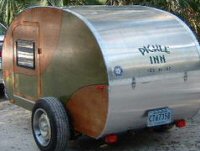
At first the wireing for the breaks etc. was to be on the outside of the shell, down low just above the rear bumper.
It has been decided that the lights would be L.E.D.'s and that as they are a long narrow section that they will be on the hatch.
This means that at this point in the build the wires will be exposed when you lift the hatch, this is OK as long as they are placed in neatly!!
Now I'm not saying that what has been done is MAGIC but it looks good and neat (at this point as I have not finished them yet).
So here are a bunch of photos


First off I run a wire from the car end to the rear of the TD as the chassis is a full length tube this is easy with a length of fence wire ran through and just tape the electric wire to it and pull back out.


I then went into the kitchen area and about 4in (100mm) in from the rear I drilled a hole through the floor and into the chassis rail.
This allowed me to run the wire up into the kitchen (no exposed wire at the rear).
NOTE.. any further in than 4in (100mm) and it is very hard to get the wire back up the chassis and into the kitchen. Also give yourself about 1ft (300mm) of a loop before you join up to the rear lights wire, this will cover IF ever you disconect the TD from the car and drive off without unplugging the electrics and you break the wire.

Next I mounted the lights.


Then ran the wire for them across the back of the hatch and down the left hand strut, allowing some slack for the hatch opening and then ran the wire under the left hand hatch gutter down to the floor, (All the electrics including the battery and the fuses are here on the left )in the long run.


solder all the wires together and cover all the joins.
The electrics in this TD are all 12v there is no mains.
A...power from the car when on the move.
B.. power from a battery when not attached to the car.
Note there will have to be a battery isolater switch so as not to have the car and the battery all going at the same time.
For the TD there are a few power requirements
Cabin lights
porch light
kitchen light
power point in cabin 12v Ciggy lighter (computer TV
power point in kitchen (fridge) 12v ciggy lighter
So a 4 point fuse box was used

Positive in the fuse box negative is the join on the left also the battery wires are connected to the power and earth wires coming from the car.
The kitchen light is again a LED and it has a switch placed next to it the wires here can be run just between the strut and the roof of the hatch.


That last photo is the wire under the hatch gutter.
By now you will be able to see what it was when I said there are 1000 and 1 little things to do.
467 to go


