DD, on the road to LCG

...ask your questions in the appropriate forums BUT document your build here...preferably in a single thread...dates for updates, are appreciated....

Postby mikeschn » Sun Feb 14, 2010 8:39 am

StPatrón wrote:
Image


Oh cool! I am thinking about something like this for the O.W.W.

Can you tell me more about the tracks, or get more pictures of the tracks...

Thanks,

Mike...
The quality is remembered long after the price is forgotten, so build your teardrop with the best materials...
User avatar
mikeschn
Site Admin
 
Posts: 19202
Images: 475
Joined: Tue Apr 13, 2004 11:01 am
Location: MI

Postby S. Heisley » Sun Feb 14, 2010 9:22 am

Thank you for posting pictures of your newly purchased trailer and your finds within. It has a delightful number of surprises! I will enjoy watching the demolition and rebuild. :applause:
User avatar
S. Heisley
Super Lifetime Member
 
Posts: 8865
Images: 495
Joined: Mon Sep 17, 2007 10:02 am
Location: No. California

Postby StPatron » Sun Feb 14, 2010 4:09 pm

I didn't intend on doing much outside today in the brutal cold, then I get a request from Mike? How cool is that? Here ya go, buddy. If this doesn't answer your questions, lemme know. Pardon my terminology when describing the parts, there's probably a more accurate way of describing this.

The galley box is 75" long, 19.5" wide and 12.5" high and constructed of 3/4" ply.

There are three dove-tailed rails for each side. They are built of hardwood, appears to be oak, 1.5" x 2.5" and are 44" long. All rails rest on a plywood base and the outermost rail is secured near each end with a bolt that extends through the flooring, making it stationary. The other two rails extend as the box is pulled out. A splined stop,,, I think that's the term,,, 4" in length is permanently attached to the rail ends. These 4" pieces are the only parts that travel in the dove-tail track.

In this first pic, I have removed the galley box and the view is looking at the aft group from the curbside. It's difficult to see, but the right rail (just like the center rail) has two dovetails.

Image

This shows the three aft rails during extension.
Image

This shows the attachment to the underneath of the galley box, but you will need to imagine the rail with 2 dovetails, the one on the right, not being there. The stop is missing on that one and it's not working correctly. I haven't been able to hold the box up and get it aligned properly without an extra set of hands. So, what is permanently attached to the box and doesn't slide is the single dove-tailed piece on the left, with one stop on the opposite end.
Image

Support leg: Once the box is extended, the flip-down leg supports the end. There are two large thumb screws that allow you to vary the leg length, the near leg is slotted. A cabinet door spring clip holds the leg in place during storage.
Image
Image
User avatar
StPatron
Donating Member
 
Posts: 748
Images: 297
Joined: Tue Dec 15, 2009 8:38 pm
Location: OK
Top

Postby StPatron » Sun Feb 14, 2010 7:43 pm

RAYVILLIAN wrote:Great find. The top is rebuildable if you'd want to restore it. I've done 2 in my day just pull the aluminum off and replace the wood like it was built. the lifts have a spring in them which are replaceable too you can get them from Macmaster carr.

Just a word of warning I tried to use the frame from a smaller version of the same brand of popup on the Winter Warrior but tried, for some stupid reason, to open up the wheel wells. If you cut that plate that is outside the wheel the whole frame collapses that is the main strength of the frame front to back. I used a custom built frame on our trailer and the rebuilt trailer from the pop up now has a 500 gal. smoker on it that my son built.

Gary


Thanks for the tips, Gary. I'm not looking at doing a restore, just don't like the idea of canvas walls. I discovered today that "Chuckwagon" is not a model name but instead was the mfr's. name. There's one now for sale on eBay, looks nearly identical to mine.
User avatar
StPatron
Donating Member
 
Posts: 748
Images: 297
Joined: Tue Dec 15, 2009 8:38 pm
Location: OK
Top

Postby StPatron » Sun Feb 14, 2010 7:48 pm

S. Heisley wrote:Thank you for posting pictures of your newly purchased trailer and your finds within. It has a delightful number of surprises! I will enjoy watching the demolition and rebuild. :applause:


You're most welcome, Sharon. You always have such nice comments.
User avatar
StPatron
Donating Member
 
Posts: 748
Images: 297
Joined: Tue Dec 15, 2009 8:38 pm
Location: OK
Top

Postby jkidd6339 » Tue Feb 16, 2010 7:25 pm

G.
Hows the weather out there. Do you have that trailer stripped to the frame yet? I thought about doing a cargo thing like that instead of the hatch. Very interesting seeing all the ideas out there. It makes it hard to decide which ones you will use for your trailer. A friend of mine had a custom made sheep herders trailer made for him and man is it nice. So now I have 2 ideas for new trailers. I guess I should finish my first one before I start on another. Throw a tarp over that trailer and go to work.

Jody

PS Have fun doing it.
Last edited by jkidd6339 on Wed Feb 17, 2010 12:27 am, edited 1 time in total.
User avatar
jkidd6339
Teardrop Master
 
Posts: 198
Images: 1
Joined: Sat Jan 24, 2009 1:16 am
Top

Postby StPatron » Tue Feb 16, 2010 9:04 pm

The weather can't make up its mind, Jody. We get a teaser and then the cold wind howls and temps drop. That's ok, though, gives me time for planning. I'm leaning hard towards keeping it partly intact, adding some height, an inside shower area, etc. Been wrestling with floor plans lately. It's all fun!

I'd like to see pics of the sheep herder's trailer if you have any.
User avatar
StPatron
Donating Member
 
Posts: 748
Images: 297
Joined: Tue Dec 15, 2009 8:38 pm
Location: OK
Top

Postby jkidd6339 » Wed Feb 17, 2010 12:09 am

I'll see if he will let me take picturs next time i'm down there.
User avatar
jkidd6339
Teardrop Master
 
Posts: 198
Images: 1
Joined: Sat Jan 24, 2009 1:16 am
Top

Postby bve » Thu Mar 04, 2010 1:02 am

Hey Gary did you come up with a plan for the trailer yet?

You should have a look at Miriam's (Auntie M) build - she used a pop-up frame and the result is quite impressive.
http://tnttt.com/viewtopic.php?t=9542

Or perhaps if a standy is something you'd like look at this one of Gerald_G's, I think it is a great basis for a roomy and highly functional TTT.
http://tnttt.com/viewtopic.php?t=9017

Both builds are great examples of using a larger frame like you have to build a TD or TTT.

Anyway whatever you decide, enjoy the build, I'll be watching.


Burke
Burke

KISS > COMPLEX
Image
Image

Build threads converted to PDFs.
As of 2008-08-08 I have added more build threads to the pdf collection
User avatar
bve
500 Club
 
Posts: 694
Images: 98
Joined: Sat Aug 25, 2007 1:44 am
Location: Edmonton, Alberta, Canada
Top

Postby StPatron » Thu Mar 04, 2010 1:42 am

Thanks for those links, Burke. I'm familiar with Miriam's build and will now check out the other one.

I originally had a traditional teardrop in mind but the axle width on this frame doesn't allow for the 5 wide I was wanting. So, I'm opting to go with a "slouchy" for now (I think that's the term for a build that doesn't allow full standing height) and see how I like it. My tow vehicle is a 4WD V-8 F-150, so towing capacity is not a factor.

So far I've worked up a SketchUp plan that utilizes some of the existing features (bed that spans the width/dinette area) and adds storage cabinets and bathroom/shower area. Then, aft of the wheel wells I will add a short hatched galley with two swing doors for the lower area. 76" wide counter space,,, ahh, the possibilities!
User avatar
StPatron
Donating Member
 
Posts: 748
Images: 297
Joined: Tue Dec 15, 2009 8:38 pm
Location: OK
Top

Postby StPatron » Sat Mar 20, 2010 2:04 am

Absolutely gorgeous day today in the 70's, with NWS predicting a blizzard tomorrow, so I decided it was time to continue the dismantling and see what I had to work with from bottom up. The "driveway workshop" has its limitations.

Image

Not too bad. Corners of the flooring have some rot, expected. I will be able to half-lap replacement plywood in at the hitch end, a tongue framing member has me in good wood with a couple of small triangles. I'm thinking about extending the aft end to the existing bumper to eliminate that knee-knocker.

Or, I might decide to cut off the bumper entirely,,,, undecided.
User avatar
StPatron
Donating Member
 
Posts: 748
Images: 297
Joined: Tue Dec 15, 2009 8:38 pm
Location: OK
Top

Postby StPatron » Sat Mar 20, 2010 2:10 am

Ok,, instead of my plans for a "slouchy". I'm going with this:

Image

Don't want to be accused of over-building, ya know. :lol:
User avatar
StPatron
Donating Member
 
Posts: 748
Images: 297
Joined: Tue Dec 15, 2009 8:38 pm
Location: OK
Top

Postby jkidd6339 » Sat Mar 20, 2010 9:44 am
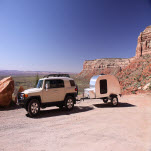
Now that's what I wanted to see, that baby stripped to the frame. Looks to be very fuctional that way. However I think just a tiny bit of luxury is called for.
User avatar
jkidd6339
Teardrop Master
 
Posts: 198
Images: 1
Joined: Sat Jan 24, 2009 1:16 am
Top

Postby High Desert » Sat Mar 20, 2010 10:15 am

StPatrón wrote:Ok,, instead of my plans for a "slouchy". I'm going with this:

Image

Don't want to be accused of over-building, ya know. :lol:

I think you're safe on that count with that 'design' :lol: :lol:

Great to see your progress :thumbsup:
Shaun

"it's not the years honey, it's the mileage"
High Desert
Platinum Donating Member
 
Posts: 8780
Images: 27
Joined: Wed Apr 08, 2009 1:46 pm
Location: SW Washington state
Top

Postby StPatron » Sat Mar 20, 2010 2:57 pm

jkidd6339 wrote:Now that's what I wanted to see, that baby stripped to the frame. Looks to be very fuctional that way. However I think just a tiny bit of luxury is called for.


Luxury? What's that? Ok, I'll add a Thermarest and sleeping bag.
User avatar
StPatron
Donating Member
 
Posts: 748
Images: 297
Joined: Tue Dec 15, 2009 8:38 pm
Location: OK
Top

PreviousNext

Return to Build Journals

Who is online

Users browsing this forum: No registered users and 6 guests