My 6x14 Toy Hauler conversion

Converting Cargo Trailers into TTTs

My 6x14 Toy Hauler conversion

Postby 8ball_99 » Sat Apr 03, 2010 12:26 am

Thought I'd share my conversion project. We have a Polaris RZR that we like to take to 4x4 parks. We camp couple days and ride the trails. We have been just tent camping.. Last summer after seeing a few guys just sleep in their cargo trailers instead of setting up a tent I had the idea to convert one into a make shift toy hauler. I decided not to thinking it really wasnt' needed. Well this year the thought was back in my head and about a month ago I picked up my 6x14 Tandem Axle. I ordered it with a flat nose 6'6" ceiling, Rv style door and I had them move the side door back as close to the fender as they could to give me space for a front bathroom. I also had them insulate it. They made a couple goofs on the trailer. One was the Etrack was only suppose to be 10' but it was the full length of the trailer.. So I removed the plywood and trim on that wall so I could cut down the Etrack and lower it. Well I found out that their insulation job wasn't very good so I ended up removing all the wall and ceiling panels and filling all the gaps the factory left. It was bad enough that I sent pictures to the factory and they refunded what I paid for the insulation! They didnt' even bother with the front..
So far I Installed windows, redid the insulation, Moved the factory roof vent to the front and added a fantastic fan in its place. I ran some wiring for lights, fan water pump, water heater, ect I built two beds one full size and one twin. They both are hinged on the wall across from each other. The twin sits up above the full like bunk beds. I can pull a few pins and remove the bed frames. Most of the time we will probably just carry the full with us. I put a 36 gallon greywater tank and a 15 gallon black water under the floor. There is a 45 gallon freshwater tank in the closet. My propane tank and battery are mounted on the front. I still have a few things to dow.. I need to install FRP on the lower parts of the wall, Install trim in the shower and cover the floor with something. I'm thinking VCT on the floor. Its a little heavy but I know its bullet proof so driving in and out of the trailer shouldnt' hurt it.. here is a few pictures of it so far. Sorry they were just taken with my phone. Tomorrow I'll take a couple pictures with a real camera.
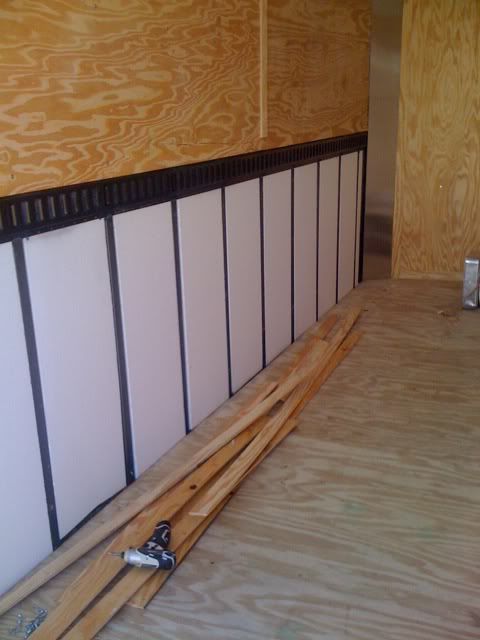
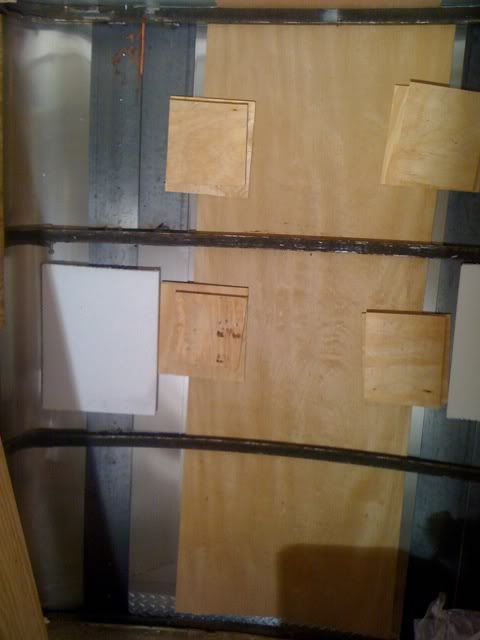
Messed up Etrack
Image
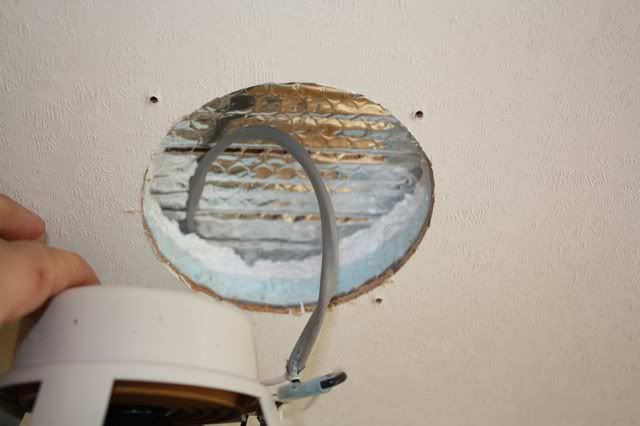
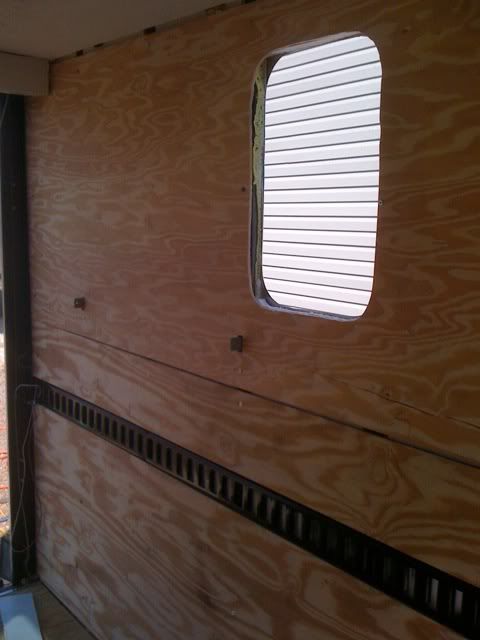
Missing insulation in the front Nose
Image
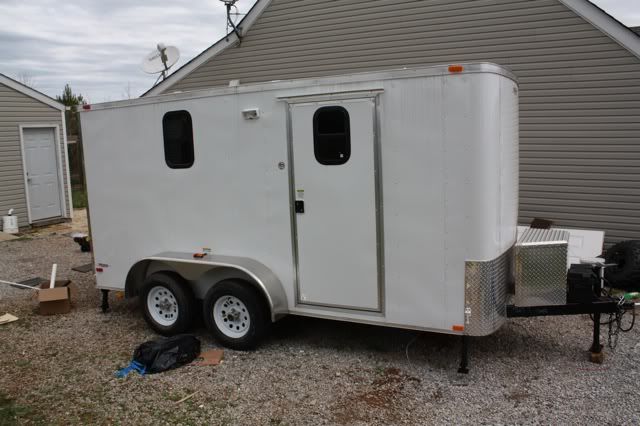
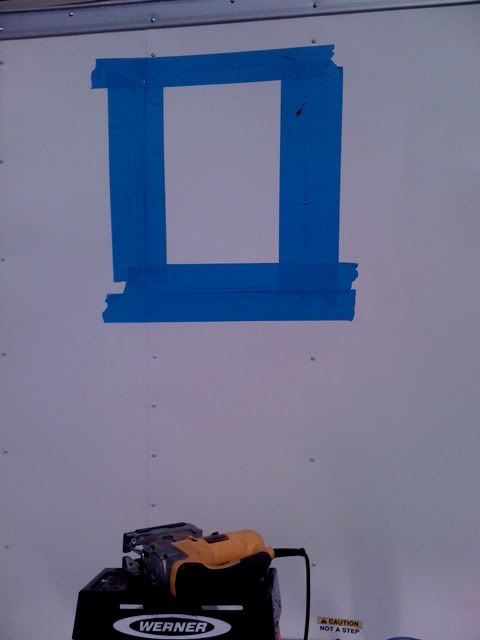
Installing the windows
Image
Image
Image
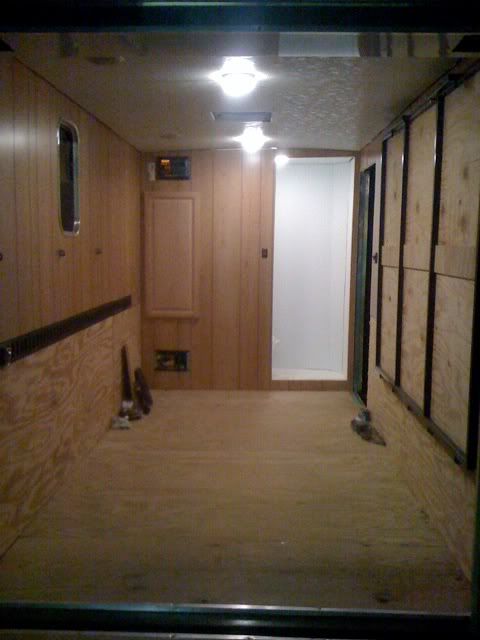
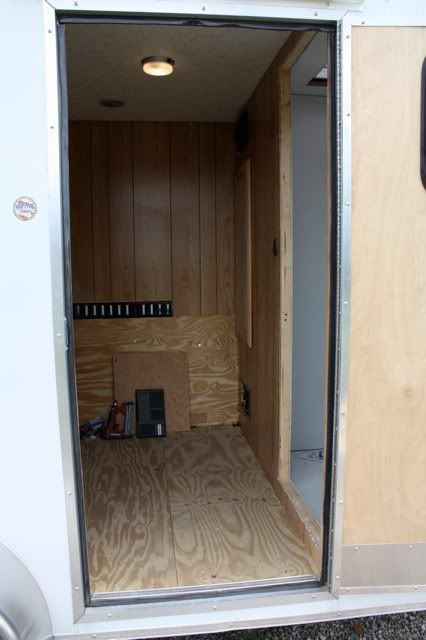
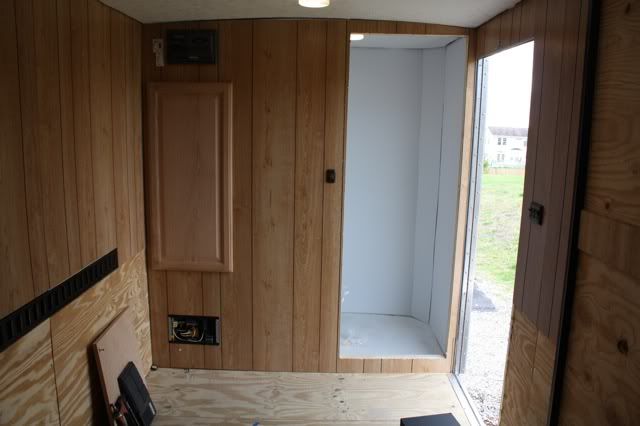
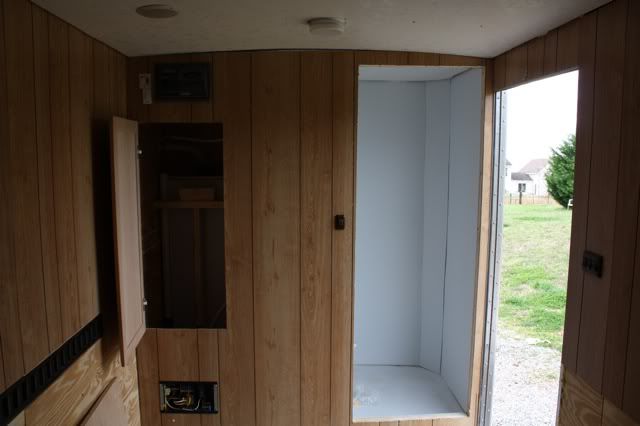
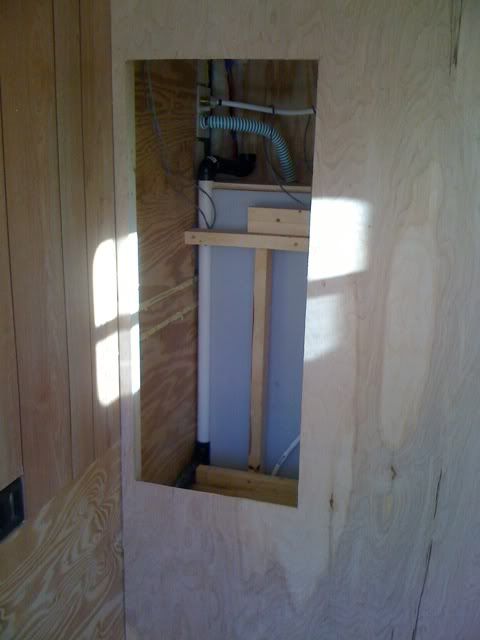
Front closet that contains all the workings. Once finished out will have rod for hanging close and a shelf for other stuff.
Image
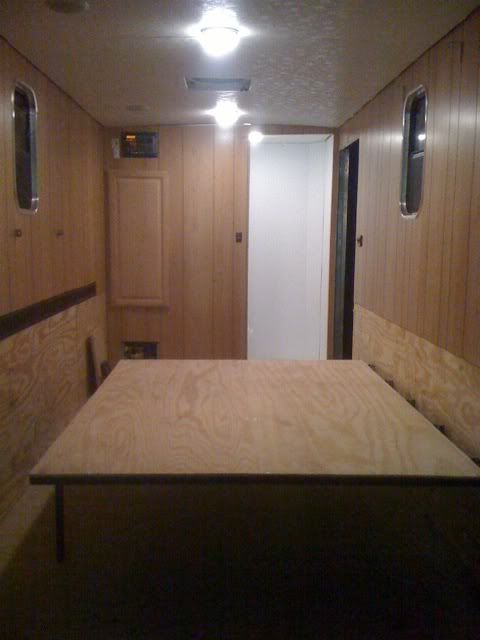
Pic of what it looks like as of tonight. One with the bed up. Other with it down.
Image
Image
8ball_99
500 Club
 
Posts: 623
Joined: Sun Mar 07, 2010 12:34 am

Postby pete42 » Sat Apr 03, 2010 12:36 am

Nice.
First time camping I'll bet you wished you had done it sooner.
good luck and keep us posted on the build. :thumbsup:
User avatar
pete42
Super Lifetime Member
 
Posts: 2203
Images: 13
Joined: Sat Nov 07, 2009 11:52 am
Location: SouthWest Ohio

Postby madrider » Sat Apr 03, 2010 7:28 am

That looks great! Keep us up with your progress, I want to do the same size trailer myself. How about some pics showing your side entry door position.
madrider
Teardrop Inspector
 
Posts: 19
Images: 6
Joined: Fri Mar 26, 2010 8:03 am
Top

Postby jwhite » Sat Apr 03, 2010 11:15 am

Your trailer looks great,I would like to see some more close up photos of the ceiling.
I am wondering how you stuck it to the ceiling what type screws and how far you spaced and covered them? and how you recessed the lights?
I had thought of doing the ceiling different than the walls with that tan marble colored board ,but I am useing that bead board paneling on the walls and it may just look better having the ceiling and walls match,I like the way Nathans looks.
I have looked on line at some high-end Motor coaches and all have a light colored ceiling with recessed lights.
jwhite
The 300 Club
 
Posts: 479
Images: 46
Joined: Wed Mar 24, 2010 10:11 am
Location: South GA
Top

Postby 8ball_99 » Sat Apr 03, 2010 1:54 pm

Here is a few pictures with a real camera. My neighbor is also going to build one for the same purpose so those other pictures are just from me taking them while working and sending them to his phone for those times his wife wont let him come out and play lol.
The lights aren't recessed into the ceiling but the speakers are. My lights are just some low profile lights I got on ebay for about 12 bucks a pair. The base is aluminum they also have a switch on them. Even though I installed wall switches and don't really need the ones on the lights. My ceiling is just some vinyl covered paneling. Lowes and homedepot both sell different' kinds. Trailer dealers also have it. The ceiling is just stapled up to some 1x3s. The 1x3s are screwed to the steel ceiling frame. This causes the ceiling to only be about 6'5" tall vs 6'6" But it gives me an extra inch of insulation. Plus Its MUCH easier to staple the paneling up then it would be to screw it to the steel supports. Once the outer trim is installed and the nail holes puttied it will look better too.
Image
Image
Here you can see the sewer dump, hotwater heater and electrical input.
Image
Image
Image
Image
Image
Picture of one of the lights
Image
Picture of one of the speakers removed. You can see the differen't layers of insulation. I have one layer of that foil bubble wrap stuff, then a 1" layer of styrofoam, then a 1/2 layer of Dow blue foam insulation. I'm not that big on chopping holes in the insulation for any reason. But the speakers pretty much had to be recessed for them to look good.
Image
8ball_99
500 Club
 
Posts: 623
Joined: Sun Mar 07, 2010 12:34 am
Top

Postby 8ball_99 » Sat Apr 03, 2010 8:40 pm

Got started on my LP bottle holder tonight. Well I say started its pretty much done. Waiting on paint to dry now. It will go in the front tool box to hold a single 20Lb bottle in place. Its very light weight just some 1/8" steel. But once all 4 legs are bolted to the floor of the box it should be more then enough to secure the bottle. Here is a few pictures of it while putting it together.
Image
Image
8ball_99
500 Club
 
Posts: 623
Joined: Sun Mar 07, 2010 12:34 am
Top

Postby madrider » Sun Apr 04, 2010 7:34 am

Thats really cool! Great job!
I like the use of the outdoor shower in your bathroom. What are you using on the walls and floor in there though? Is the floor angled into the/a drain? Inquireing minds want to know.
:roll:

I like the idea of the bathroom shower together, and have thought about that my self, I just hadnt figured out how to do it.
madrider
Teardrop Inspector
 
Posts: 19
Images: 6
Joined: Fri Mar 26, 2010 8:03 am
Top

Postby 8ball_99 » Sun Apr 04, 2010 10:00 am

Thanks! The outside shower on the inside was mainly due to getting it on ebay brand new for around 15 bucks lol. That was cheaper then I could buy a fixture with a shower head.. I was going to remove it from the box But I kinda of like that I can tuck the head and hose away in the box when not in use. The shower is made from FRP. Its glued down with a latex based FRP glue that I applied with a Vnotch trowel. So for the most part it should be very water proof once trim is put down in all the corners. As far as the draining goes.. I'll just have to see how it goes.. The front section of the floor was a little uneven.. What I did was level the trailer then applied the glue thicker in the front/side and sloped it best I could to the corner where the drain is at. It seems to drain pretty decent from what I've tested.. I can't just run the shower and give it a full check until the trim is in place. On the plus side we won't have a gas fridge so if I need to leave the rear of the trailer off level a half bubble or something for it to drain better it won't be a huge deal
I would have like to found a cheap self leveling liquid that I new wouldn't crack with the trailer on the road.. The original plan was to set the trailer up off level as in the front passenger corner lower then pour the leveling liquid out let it dry. Then level the trailer. Tada the shower would drain back to the drivers side rear corner.. But I never could find a cheap self leveling liquid that I thought would work. I thought about maybe once the shower is all done. If the drainage is much of a issue, Then maybe I could pour fiberglass resin ontop of the FRB and adjust low spots that way?
8ball_99
500 Club
 
Posts: 623
Joined: Sun Mar 07, 2010 12:34 am
Top

Postby madrider » Sun Apr 04, 2010 10:54 am

8ball_99 wrote:Thanks! The outside shower on the inside was mainly due to getting it on ebay brand new for around 15 bucks lol. That was cheaper then I could buy a fixture with a shower head.. I was going to remove it from the box But I kinda of like that I can tuck the head and hose away in the box when not in use. The shower is made from FRP. Its glued down with a latex based FRP glue that I applied with a Vnotch trowel. So for the most part it should be very water proof once trim is put down in all the corners. As far as the draining goes.. I'll just have to see how it goes.. The front section of the floor was a little uneven.. What I did was level the trailer then applied the glue thicker in the front/side and sloped it best I could to the corner where the drain is at. It seems to drain pretty decent from what I've tested.. I can't just run the shower and give it a full check until the trim is in place. On the plus side we won't have a gas fridge so if I need to leave the rear of the trailer off level a half bubble or something for it to drain better it won't be a huge deal


Okay,,,Call me dumb,,, what is FRP? I can think of a few things it might stand for,,, but Im sure thats not what it is! LOL
madrider
Teardrop Inspector
 
Posts: 19
Images: 6
Joined: Fri Mar 26, 2010 8:03 am
Top

Postby 8ball_99 » Sun Apr 04, 2010 1:10 pm

Lol FRP is fiber reinforced board. Joust a plastic walboard with fiber in it
8ball_99
500 Club
 
Posts: 623
Joined: Sun Mar 07, 2010 12:34 am
Top

Postby madrider » Wed Apr 07, 2010 2:18 pm

8ball_99 wrote:Lol FRP is fiber reinforced board. Joust a plastic walboard with fiber in it


Oh, Okay, I get it now! Thanks!
madrider
Teardrop Inspector
 
Posts: 19
Images: 6
Joined: Fri Mar 26, 2010 8:03 am
Top

Postby SirJoey » Thu Apr 08, 2010 11:00 am


Another incredible, factory-quality conversion... :applause:

Dang, U guys kill me! :o
When all is said & done...
a lot more gets SAID than DONE!
User avatar
SirJoey
Teardrop Master
 
Posts: 131
Joined: Tue Dec 08, 2009 2:10 pm
Location: Aboard a UFO, hovering over South Carolina
Top

Postby 8ball_99 » Thu Apr 08, 2010 12:26 pm

Thanks! still likes a little bit. I added my outlets and did a few odd and ends the other day.. I even stoled your sink idea.. I used a Stainless steel pan. Built a wood frame for it and covered it in FRP.. I'll take a picture today.. I had the pan and the wood and FRP were both scrap pieces.. So total cost was only 25 bucks for the faucet and sink basin. Even the smallest stainless steel handwash sink I could find was 60 Something bucks..
I can't wait to get the floor in and get the lower walls covered.. Then it should really look like something..
8ball_99
500 Club
 
Posts: 623
Joined: Sun Mar 07, 2010 12:34 am
Top

Postby tbandnick » Mon Apr 12, 2010 5:51 pm

Hey thanks for the reply. I wish i could mock what you did with shower but i only have two feet from that side door. I was thinking about a corner shower. how are you dealing with the sewage, water storage?
tbandnick
Teardrop Inspector
 
Posts: 7
Joined: Mon Apr 12, 2010 12:05 pm
Location: santa maria, ca
Top

Postby 8ball_99 » Mon Apr 12, 2010 7:54 pm

The toilet has a 15 Gallon tank under the floor for black water. The tank sits directly under it. Then there is a 36 Gallon tank beside it for the shower and sink to drain to. I setup the plumbing just like a typical RV. Both tanks connect to a single 3" outlet. The greywater tank has its own gate valve.. Open the large valve to drain the Black water tank..Close it, Then open the smaller valve to drain the greywater out of the same 3" sewer hose. This rinses the left over "stuff" out of the sewer hose left from the black water tank.
yeah that sucks about your door. I was lucky enough to pretty much plan my layout before I bought the trailer.. The factory didn't charge me a dime for moving the door back. I have about 3' in the front maybe just a hair less. My Toy which is a polaris RZR is about 9' long end to end. So once its pulled in it stops right before the door. So gives us some storage room while hauling but also makes it easy to get in and out of the trailer with everything loaded.
8ball_99
500 Club
 
Posts: 623
Joined: Sun Mar 07, 2010 12:34 am
Top

Next

Return to Cargo Trailer Conversions

Who is online

Users browsing this forum: No registered users and 3 guests