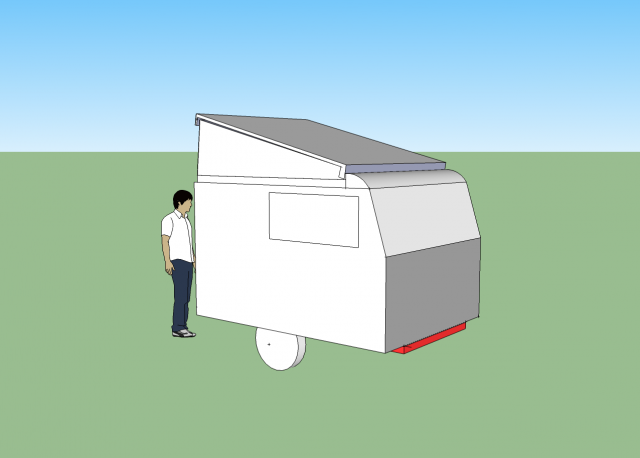
 I like them both.
The straight line design was my first thought, and it would be easier.

Please help me

![]() by steve smoot » Sun Mar 21, 2010 1:01 pm
by steve smoot » Sun Mar 21, 2010 1:01 pm
I like them both.

![]() by Classic Finn » Sun Mar 21, 2010 1:11 pm
by Classic Finn » Sun Mar 21, 2010 1:11 pm


![]() by steve smoot » Sun Apr 11, 2010 11:46 am
by steve smoot » Sun Apr 11, 2010 11:46 am
![]() by glassice » Sun Apr 11, 2010 12:38 pm
by glassice » Sun Apr 11, 2010 12:38 pm
![]() by grizz » Sun Apr 11, 2010 1:04 pm
by grizz » Sun Apr 11, 2010 1:04 pm


![]() by down under tech » Sun Apr 11, 2010 1:15 pm
by down under tech » Sun Apr 11, 2010 1:15 pm


![]() by Alfred » Sun Apr 11, 2010 5:35 pm
by Alfred » Sun Apr 11, 2010 5:35 pm

![]() by teardrop_focus » Sun Apr 11, 2010 6:00 pm
by teardrop_focus » Sun Apr 11, 2010 6:00 pm
Steve Smoot

![]() by steve smoot » Sun Apr 11, 2010 7:02 pm
by steve smoot » Sun Apr 11, 2010 7:02 pm

![]() by steve smoot » Tue May 04, 2010 6:56 pm
by steve smoot » Tue May 04, 2010 6:56 pm
![]() by S. Heisley » Tue May 04, 2010 9:20 pm
by S. Heisley » Tue May 04, 2010 9:20 pm
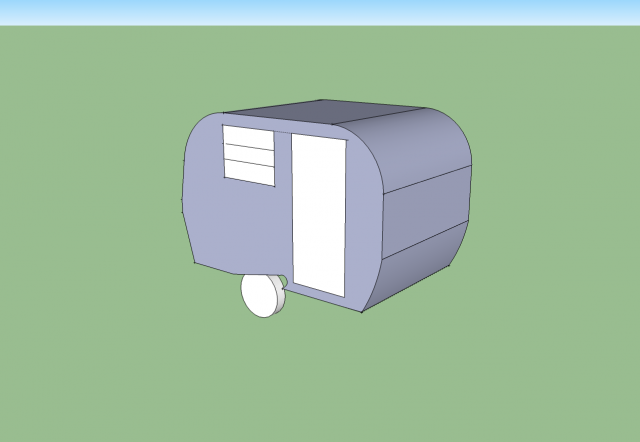
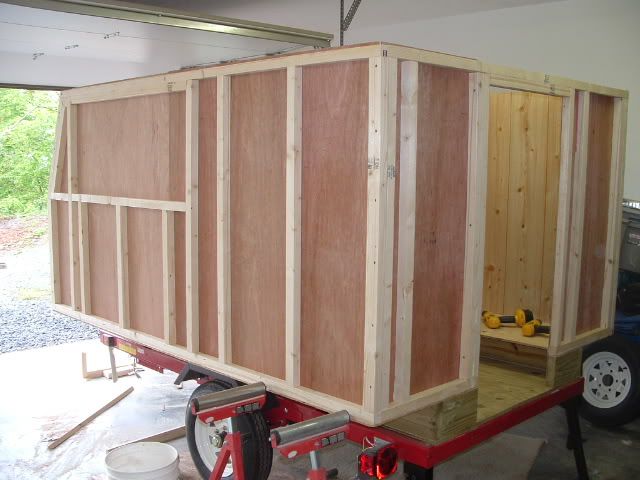
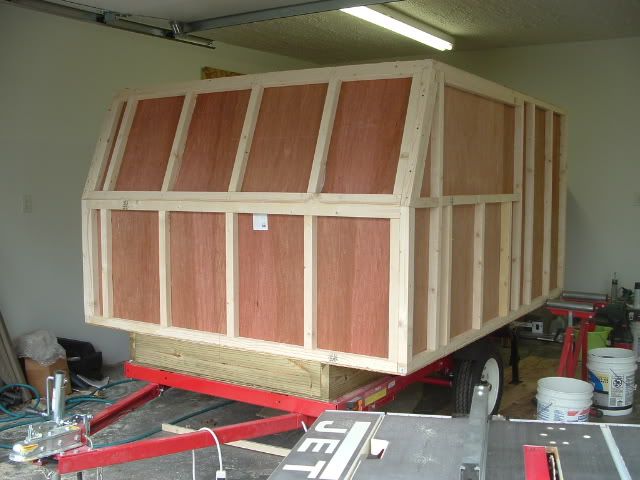
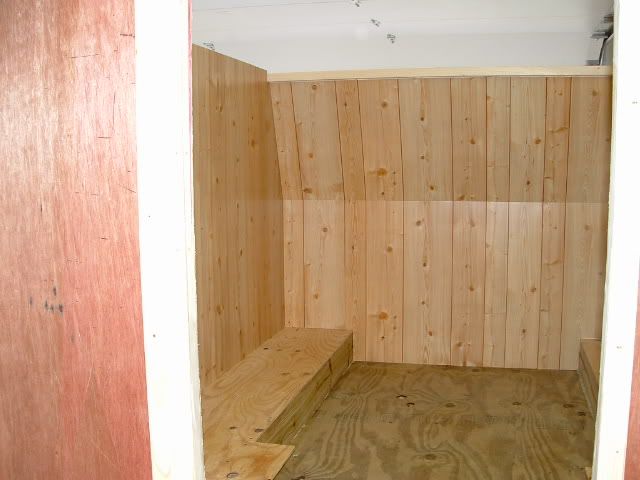
OK, I have changed my mind again...I know, I know...well, here it is..this is the one I'm going to attemp to build. It is similar to the Compak look-a-like that Andrew designed back in '07 except mine will only be 8' long by 6' wide, and the lift top will only be 4' wide like Andrew's plans.
so, what do think?


![]() by aggie79 » Tue May 04, 2010 9:45 pm
by aggie79 » Tue May 04, 2010 9:45 pm

![]() by WesGrimes » Tue May 04, 2010 10:44 pm
by WesGrimes » Tue May 04, 2010 10:44 pm

![]() by steve smoot » Wed May 12, 2010 12:37 pm
by steve smoot » Wed May 12, 2010 12:37 pm
![]() by steve smoot » Wed May 12, 2010 1:02 pm
by steve smoot » Wed May 12, 2010 1:02 pm
Users browsing this forum: No registered users and 13 guests