Grizz-Pod Teardrop Trailer - New tow truck - 66 Chevy

...ask your questions in the appropriate forums BUT document your build here...preferably in a single thread...dates for updates, are appreciated....

Postby grizz » Thu May 06, 2010 1:40 pm

Thanks guys, I guess some of you have been willing me on on this build, and helping in various ways from affar.

Today was a great day.

I went to the tip to look for a pair of old or not so old HiFi speakers to dismantle and fit into the cabin of the trailer.
I found a lot more.

Included a small 2 stroke leaf blower, less than 18 months old.... owner put it in my hands when I asked him about it, he is moving into a flat, so no need for it.
I suspect it could find its way onto a shopper bike or similar in future, or maybe I should keep it for the rather large garden at the house we are buying (when mine is sold)

There was also a lovely old meter unit, which I loved the look of, no plans yet.

And I found a very solid upholstered Oak footstool, I will be taking off the upholstery and fitting a 18mm ply footboard to it, this will then function as a small step to get into the teardrop, and a seat to sit and have adrink on.

Image
Greetings from England.

Rian.


Hoping to get it all done in time.
User avatar
grizz
1000 Club
1000 Club
 
Posts: 1210
Images: 29
Joined: Mon Sep 21, 2009 2:37 pm
Location: Rochester, Kent, UK

Postby S. Heisley » Thu May 06, 2010 2:55 pm

Your teardrop is looking better and better! :thumbsup: :applause:
User avatar
S. Heisley
Super Lifetime Member
 
Posts: 8873
Images: 495
Joined: Mon Sep 17, 2007 10:02 am
Location: No. California

Postby grizz » Thu May 06, 2010 4:33 pm

Right, did not get much done tonight, had day job stuff to deal with after work.

Fitted the wheel adaptors, they take it from the basic 4 stud caravan pattern up to a 5x205 VW studpattern so that I can use a pair of the polished Radar wheels I bought last year. I also gain about 30mm wider spacing, so that the wide mudguards can be reasonably filled.

Took pics from 3 sides, I need your help and opinions here please.

Wheel is in the air as trailer is back on axle stands. However, I tried to place the mudguard where I want to fit it to the side of the body. Mudguards will be bolted through the side of the body, to the side walls, not in supports like some.
I have no idea how much the axle will swing and move upward on the road, once the trailer is completed, or when Nicola and I are inside it along with fridge, gas bottles and other stuff.....

Any clever people have an idea how much the axle would swing, and obviously come closer to the mudguards ? I have used about 45mm spacing in the photos with a block of wood inside the arch.

Side view.

Image

Rear view.

Image

Front view.

Image


Please also comment on what you see, does it all look reasonably in proportion ?


Thanks all, for looking in and helping.

Rian.
Greetings from England.

Rian.


Hoping to get it all done in time.
User avatar
grizz
1000 Club
1000 Club
 
Posts: 1210
Images: 29
Joined: Mon Sep 21, 2009 2:37 pm
Location: Rochester, Kent, UK
Top

Postby grizz » Thu May 06, 2010 4:37 pm

S. Heisley wrote:Your teardrop is looking better and better! :thumbsup: :applause:


Thanks Sharon, it is getting to look like more than just a pile of stuff, or planks now I guess.
Greetings from England.

Rian.


Hoping to get it all done in time.
User avatar
grizz
1000 Club
1000 Club
 
Posts: 1210
Images: 29
Joined: Mon Sep 21, 2009 2:37 pm
Location: Rochester, Kent, UK
Top

Postby Classic Finn » Thu May 06, 2010 4:57 pm

Gee that looks Finntastic.. :lol: :applause: :applause: :applause: :applause: I really like the looks of your build.

You ask if its proportionial - Answer is Ohhh Yes. Lookn Real Good. :thumbsup: :thumbsup:
Royal Teardrop Society Scandinavian Bureau Chief of Staff

Image
User avatar
Classic Finn
Midnight Sun Voyager
 
Posts: 17488
Images: 146
Joined: Fri Apr 29, 2005 4:29 am
Location: Country of Finland
Top

Postby grizz » Sat May 08, 2010 3:14 am

Right all, here is a problem to be solved, or maybe I have solved it already in my head, and will end up following a path that could end up in tears.... excuse the pun :lol:

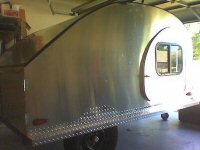
I was going to fit my fenders/mudguards to the walls and through into the inside of the trailer as explained earlier.
Now a bunch of my mates have added their views and oppinions.

I do not want to add more holes or fixings to the outside surfaces of the fenders, as with the body, I am trying to keep it smooth.

The warnings have been aimed at me possibly having a wreck or whacking the fender against something, and then having to tear down the interior to get at the bolts which would be fitted through the sides.
Of course drilling up to eight 8mm holes in the sides could lead to water getting inside the structure too.


What are your views on fixing the mudguards/fenders either to the body, or look at what I have described below to form ideas.

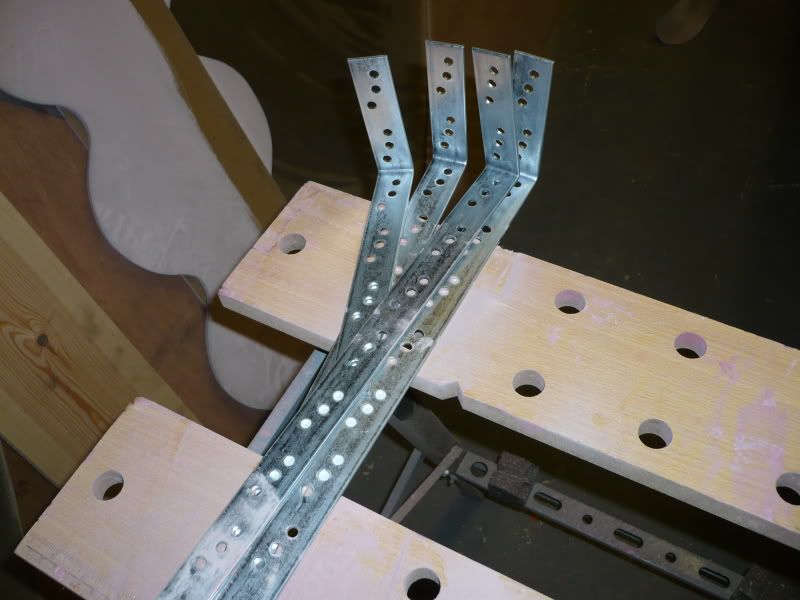
Here is a close up of what I have .

The top right little sticky outy bit is the entry for the brake line into the hub.... so not good for attaching anything.

Then you have the "Swing arm" from the central axle which runs diagonally toward the rear, fits into the hub, and possibly cast iron or some other heavy duty steel, although there is a tab welded to in on the bottom left as you look at the photo.

The tab you see to the bottom left of that swingarm has a single hole in it, and about 8mm thick and 25mm wide. it runs almost parallel to the body and then folds back under the body ending in the hole you see.

If I were to use that tab as support for the mudguard, all the energy would end up in there.
I really do not see anywhere else that I can attach and stabilise the guard propperly...... so I was thinking maybe make a bracket that fits over it, clamping behind the upper length above the hole, and still use only one bolt and nut to secure, with a "T" shaped brace at the top, ending up in a curved piece of steel to which the fenders are attached.

Hope you are as confused as I am by now.

I really see only that tab as a sensible place to mount anything.

Had planned to cut them off a while ago, just as well I did not, well at the moment at least.

Image

(I have edited your picture to reflect forum guidlines. Photobucket will do this automatically. This picture is set at 640x480. Miriam)
Greetings from England.

Rian.


Hoping to get it all done in time.
User avatar
grizz
1000 Club
1000 Club
 
Posts: 1210
Images: 29
Joined: Mon Sep 21, 2009 2:37 pm
Location: Rochester, Kent, UK
Top

Postby Rigsby » Sat May 08, 2010 8:01 am

Rian, I used the L shaped brackets that builders ude to hold on the wall plate above the bricks , when fitting a roof. Your wings are similar to the ones i used so should be ok
Image
Image
DOOIN IT THE YAARKSHA WAY--FA NOWT, THA NUS !!
User avatar
Rigsby
500 Club
 
Posts: 587
Joined: Sun Aug 31, 2008 12:21 pm
Location: Doncaster, England
Top

Postby grizz » Sat May 08, 2010 9:31 am

Thanks Steve, I think I have sorted it out now.... only time and wear and tear will tell. :?

I was trying to steer clear of any fasteners being visible from the outside.
The same with the wood sides, there will eventually be marks, holes etc in there, but for now, I am still trying to keep it smooth.

I have comitted now, and have sandwiched the steel strip into the fender/mudguard with silicone, and will add thickness to the inside of the walls with 20mm strips and then use woodscrews and large washers from the outside.
8 screws, and also Sikaflex to hold it all in place should work.
If I do have a mishap with the fenders, then the most I will need to do is fill the screw holes and start again, as the wood reinforceing and thicknessing will already be in place, also won't have holes through into the cabin space.

After dithering for about 24 hrs, and spending about 2 hrs (yes I am slow) this morning trying to figure ways to make up a successfull bracket to run from the axle, I decided to go this route.

Space is currently 50mm above the tyre tread.... I trust it will be enough once the caravan is loaded up, not to scrape the inner arch, if it is.... OOOOoooppps !!


Image

And the sandwich. This will be held to the side with 8 screws, should be enough to spread the energy.

Image
Greetings from England.

Rian.


Hoping to get it all done in time.
User avatar
grizz
1000 Club
1000 Club
 
Posts: 1210
Images: 29
Joined: Mon Sep 21, 2009 2:37 pm
Location: Rochester, Kent, UK
Top

Postby Rigsby » Sat May 08, 2010 4:20 pm

You should be ok for room, the 1 ton indespension units on my tip trailer only move about 20mm with over a ton in it. The tyres give out more
DOOIN IT THE YAARKSHA WAY--FA NOWT, THA NUS !!
User avatar
Rigsby
500 Club
 
Posts: 587
Joined: Sun Aug 31, 2008 12:21 pm
Location: Doncaster, England
Top

Postby grizz » Sun May 09, 2010 4:18 pm

Thanks to all guys and girls for compliments, comments and advice, as well as the various bits of help along the way to date.

Projects like this often get a fair share of their MOJO from the members who make comments in the treads, give advice, or like Jabbo today, popping in for a cuppa tea, a chat and to offer help with stuff like putting up the Gazzebo , which will probably only get done next weekend or so when I have help at hand.

The weekend was not a great one for the build, though I did spend about 7 hours doing "Stuff" drilling holes, masking, painting, sealing the underside some more etc....
The little jobs you do not see are the ones that often take time.

Simple example, right now my iPod is on charge, as it was flat batteries in the drawer.... so that I can test the speakers I picked up last week, to see if it will drive them, I suspect not, but hey, you never know.

Who knows about playing an iPod through external speakers ?
Do I need an amp, external power source etc ?


Back to the weekend, I guess now that the steel plate strips are set into the sides that are being attached to the sides of the Teardrop, the last thing for me was to paint the insides with underseal, both to absorb some road debris attack, and also to get it all uniformly black.

The next few days will be filled with little jobs around it, and then hopefully by next weekend some more noticeable work.

Todays result:

Image
Greetings from England.

Rian.


Hoping to get it all done in time.
User avatar
grizz
1000 Club
1000 Club
 
Posts: 1210
Images: 29
Joined: Mon Sep 21, 2009 2:37 pm
Location: Rochester, Kent, UK
Top

Postby grizz » Mon May 10, 2010 4:11 pm

Can you tell what it is yet ??


Tonight I spent about 2 hours faffing about, but got a bit done.

The front edge where the inner ply skin has to "kick back" and be locked in was made up of 2 bed frame sides, one cut at and angle and then rebated a bit to create a step for the ply to sit in. I trust this will work.

Little job, Big result.

Image
Greetings from England.

Rian.


Hoping to get it all done in time.
User avatar
grizz
1000 Club
1000 Club
 
Posts: 1210
Images: 29
Joined: Mon Sep 21, 2009 2:37 pm
Location: Rochester, Kent, UK
Top

Postby grizz » Tue May 11, 2010 4:29 pm

Once again, I spent about 2 hours on the trailer after work tonight, finished at 8.45pm.

I fixed the support for the roof vent, and figured it will be just in the right position.

Image


Then I proceeded to measure and cut the first of the inner ply sections.
Last nights support has meant I gained about 25mm, so the end of the sheet is right on a batten/rib.

Once the glue is dry, and hopefully it will not pop loose and self destruct, the roof will be held in place by the sides, and not need too much in the way of nails, screws etc....

Interior shot of first sheet bent, 4mm Birch, no steam.

Image


By 20.30pm this was the mock up of the first 2 sheets. Seems I will have 2 joins in the roof, one pretty much invisible, and the other above the head inside the cabin if you sit up, but a flush fit should make them "disappear"

Image


Thats all for tonight, but again, I am pleased with what I am getting done single handedly.
Greetings from England.

Rian.


Hoping to get it all done in time.
User avatar
grizz
1000 Club
1000 Club
 
Posts: 1210
Images: 29
Joined: Mon Sep 21, 2009 2:37 pm
Location: Rochester, Kent, UK
Top

Postby johnthom81 » Tue May 11, 2010 5:44 pm

This is really turning out to be a sweet trailer. Looks like you're almost there.
I'll be right back, you be left front.
User avatar
johnthom81
Teardrop Builder
 
Posts: 29
Images: 31
Joined: Fri Mar 12, 2010 2:25 pm
Location: Taos, NM
Top

Postby grizz » Wed May 12, 2010 1:05 am

Thanks Johnthom81, I think it is a long way to go, but I guess it is a long way from where I started with the £20.00 trailer in a hedge.
Greetings from England.

Rian.


Hoping to get it all done in time.
User avatar
grizz
1000 Club
1000 Club
 
Posts: 1210
Images: 29
Joined: Mon Sep 21, 2009 2:37 pm
Location: Rochester, Kent, UK
Top

Postby grizz » Wed May 12, 2010 1:19 am

LOOKY LOOKY HERE !!!


Thanks to Johnny "down under tech" in Reno , Nevada, We now have a number plate for the galley in the Grizz-Pod.

I mentioned a while ago that I wanted to get a plate to use as name plate for the trailer, and John jumped to the rescue, not taking no for an answer and refusing any money, he has gone and ordered a Kansas plate (There is a link to Sinclair Oil Corporation in there) and given it to Nicola and I as a Trailer warming wedding present.

Thank you Johnny, massively appreciated. You are indeed a gentleman of epic proportions.
Your generosity is evident whereever you seem to go, helping with builds, advice and being a nice guy alround.

Now we just have to get it through the postal service this century.

Image
Greetings from England.

Rian.


Hoping to get it all done in time.
User avatar
grizz
1000 Club
1000 Club
 
Posts: 1210
Images: 29
Joined: Mon Sep 21, 2009 2:37 pm
Location: Rochester, Kent, UK
Top

PreviousNext

Return to Build Journals

Who is online

Users browsing this forum: Bing [Bot] and 11 guests