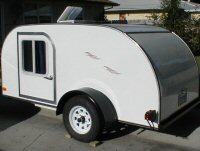
The LT... Thomas' Luxury Tent

...ask your questions in the appropriate forums BUT document your build here...preferably in a single thread...dates for updates, are appreciated....

Postby S. Heisley » Thu Apr 29, 2010 8:46 am

Hi, Thomas:

Sorry to hear about your delamination problem. Yes, that nasty storm that you went camping in probably was the culprit. But, the potential problem had to have already been there. It's a good thing that you are still working on your teardrop because that may have enabled you to find the delamination sooner, thus keeping the damage minimal.

I'm fairly certain that you know 'Fill-it' stays white when it cures; but, just in case you don't, you know now. If you can save the area with CPES followed by the same fiberglass method that you used on your visible seams, it might not show as bad...don't know.

Water can be insidious and delamination is something that all of us must fight, regardless of how experienced at building we might be. Therefore, delamination is one of the most alarming words in a td/ttt builder's vocabulary. With your attitude, you will win against it. You've done a good job on your teardrop and continue to do so. I'm cheering for you. :thumbsup:
User avatar
S. Heisley
Super Lifetime Member
 
Posts: 8873
Images: 495
Joined: Mon Sep 17, 2007 10:02 am
Location: No. California

Postby 2bits » Thu Apr 29, 2010 7:55 pm

Yeah, Tom, I remember seeing that before, I didn't think I needed it since my hatch never leaks. I see a new reason for it now!

Sharon, You can see in my pic the white stuff is the "Fill it" I was just thinking of sealing the end grain with the fill it stuff after I dump 6 million gallons of CPES on top of the end grain. That seemed to have worked for the door and door jamb. That might not get deep down enough in this instance since it has already started to separate but that may actually allow it to penetrate further since there is open space in there now.

Wes, Wow I would love to do the whole thing in Fiberglass but since the walls are standing up now, I am afraid of how it will work, I would hate to ruin the finish! I would definitely be practicing first, but that may be what it comes to!

Thanks for all the kind posts. I am gonna order the CPES tomorrow and finish my galley drawer in the meantime.
Thomas

Image
User avatar
2bits
2bit Member
 
Posts: 5132
Images: 8
Joined: Thu Dec 27, 2007 6:04 pm
Location: Lake Tawakoni, TX

Postby S. Heisley » Thu Apr 29, 2010 11:26 pm

Thomas:

CPES does drip and run a lot and might make its way down to the bottom of the damage. However, if you can get to a feed store, you might be able to get a horse's injection syringe. That way, you can possibly inject the CPES into the damaged area and be certain. The Rot Doc also sells a special injection system but it would cost a bit.
User avatar
S. Heisley
Super Lifetime Member
 
Posts: 8873
Images: 495
Joined: Mon Sep 17, 2007 10:02 am
Location: No. California
Top

Postby Laredo » Tue May 04, 2010 1:36 am

push comes to shove and you can't get to Gebo's for a cattle-sized syringe,
you can try a cake-deco place for the "writing icing" syringes ... they're about half the size of a turkey injector....
Mopar's what my busted knuckles bleed, working on my 318s...
User avatar
Laredo
Donating Member
 
Posts: 2017
Images: 0
Joined: Mon Jul 05, 2004 10:42 pm
Location: West Texas
Top

Postby planovet » Tue May 04, 2010 9:09 am

I have cattle sized syringes ;)
ImageMark (& Cindi)
Visit our website: Little Swiss Teardrop

I was wondering why the water balloon was getting bigger... and then it hit me.

ImageImageImageImage
User avatar
planovet
The Cat Man
 
Posts: 5583
Images: 3
Joined: Tue Nov 27, 2007 4:48 pm
Location: Plano, Texas
Top

Postby Prem » Sat May 08, 2010 11:30 am

Wooden boat building technique for end grain (including plywood end grain):

a) Mix epoxy, then add a little acetone to achieve the viscosity of cooking oil. Apply with foam roller or foam brush to end grain.

b) Repeat when the first batch starts to set up. (This gives a chemical bond with the previous coat of epoxy.)

c) When the second batch starts to set up, apply a third coat without the acetone and mix in micro balloons (glass beads). Apply by hand with thick rubber glove forcing the putty down into the pores of the end grain. Trowel with a putty knife to make it even.

d) When hardened, sand lightly with medium grit sand paper. The end grain is now water proof.

In the alternative, you can use Bondo (polyester resin based). But it doesn't bond to the wood nearly as well as epoxy.

For what it's worth,

Prem
My goal...

_____________________________________________
...is to live in a trailer.
User avatar
Prem
Gold Donating Member
 
Posts: 3222
Images: 144
Joined: Thu Aug 21, 2008 11:25 am
Location: State of Jefferson (Oregon side)
Top

Postby doug hodder » Sat May 08, 2010 7:31 pm

So sorry to see that damage Thomas....what a drag. If it were to have delaminated only and not the dark staining on the rest of the ply it wouldn't be so bad. A regular epoxy might seal it faster and build thicker more quickly than the CPES. I always dread major rain/wet snows, as it brings out any potential problems. Doug
doug hodder
*Snoop Dougie Doug
 
Posts: 12625
Images: 562
Joined: Tue Dec 14, 2004 11:20 pm
Top

Postby Miriam C. » Sat May 08, 2010 7:57 pm

:( :cry: Awe that is rough! I am beginning to question CPES on new wood. I used marine epoxy on mine and think I would do it again. I have an issue on the door bottom and am not real sure how it sucked it up. Water just does as it pleases. :( I do hope you get it fixed....... :thumbsup:
“Forgiveness means giving up all hope for a better past.â€
User avatar
Miriam C.
our Aunti M
 
Posts: 19675
Images: 148
Joined: Wed Feb 15, 2006 3:14 pm
Location: Southwest MO
Top

Postby 2bits » Fri May 14, 2010 7:39 pm

I remember that I had an extra 1/2" notch when I was doing my hatch, and I be I didn't didn't seal that one place. I am going to use the CPES to sink into the end grain, and then us their "filli-it" to completely seal the end grain edge. This has worked pretty well on the rest of the trailer, I had some water soak in on a previous camping trip (A real soaker) and CD and I sealed the end grain around the doors and I haven't seen any issues there since, so I feel ok that this will fix it up. at least I was already planning on extending the side trim down into the hatch area so that will cover up most of the discoloration.

Mark, I have a syringe that I got for giving my cat medicine in his mouth that I could never get hin to take, so I think I will try that one for the CPES, but are you talking about an actual syringe with a needle point that I could inject into the wood??? That is a good idea, and I might take you up on it if so!

Thanks for all the concern and ideas too.
Thomas

Image
User avatar
2bits
2bit Member
 
Posts: 5132
Images: 8
Joined: Thu Dec 27, 2007 6:04 pm
Location: Lake Tawakoni, TX
Top

Postby 2bits » Fri May 14, 2010 8:09 pm

On a lighter note, since I couldn't go camping this weekend, I was able to finish my Galley Cabinets. I really like the drawer. I didn't get the 100# drawer slides, I just thought that was over kill and the $5 ones will work fine for me, they aren't full extension, but I can get to everything just fine, and it looks pretty cool to me. The one on the far left is so skinny, I just left it a cabinet door, so I can fit my wheel chocks, propane canisters, trash bags and paper towels and whatever I can cram in there,

Image

Image

I thought about putting the hinges for the center piece on top so it would extend the countertop, but I didn't like the way it looked with the hinges on top and I also have plenty of counter top space, and I don't want to damage the face of the cabinet door with hot stuff or whatever, putting the hinges on the bottom will be perfect for setting tall stuff on it, and I don't have to sorry about messing up the finish as much, but I probably won't even use it anyway since I have so much counter top space anyway, but I figured why I didn't use it as a countertop extension would be a common question.

Now onto the slider tray for the cooler. I'll be putting the better sliders on this one...
Thomas

Image
User avatar
2bits
2bit Member
 
Posts: 5132
Images: 8
Joined: Thu Dec 27, 2007 6:04 pm
Location: Lake Tawakoni, TX
Top

Postby WesGrimes » Fri May 14, 2010 8:49 pm

Looking good Thomas :thumbsup:
That Galley is a head turner
User avatar
WesGrimes
Teardrop Master
 
Posts: 289
Images: 31
Joined: Mon Jun 22, 2009 5:41 pm
Location: Garland, TX
Top

Postby S. Heisley » Sat May 15, 2010 10:21 am

Good job, Thomas. Your galley has a nice neat and clean look about it. :thumbsup:

How deep is that top cabinet with the sliding doors on it? Does it have a shelf in it or is it a cubby hole style or?
User avatar
S. Heisley
Super Lifetime Member
 
Posts: 8873
Images: 495
Joined: Mon Sep 17, 2007 10:02 am
Location: No. California
Top

Postby 2bits » Sat May 15, 2010 5:56 pm

Thanks guys! Sharon, I haven't done much with that area but there is about 7 inches between the sliding doors and the back of the TV and the back of the skinny books cases that are on both sides of the TV. On the two sides it is a full open pass through space. I plan on putting a small 3" rail to kind of separate the sections, but I wanted it accessible from the inside as well as the outside because that it the Pantry where I will keep all the food and snacks. Here's a couple of old pics that might help since the TV and stuff isn't on there, it is all pretty open. I had also thought about putting another set of sliding doors in, but they would be screen doors so I could have an additional breeze but I still haven't decided what I am going to do with that area yet! Right now, I just shove stuff in there ;)

A shelf eh?? hmmm :thinking:

Image
Image

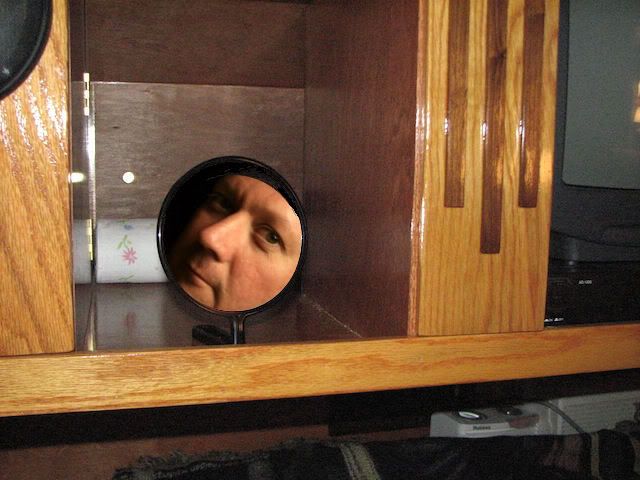
I got a real find at an estate sale today for $3! It is an old timey hand held mirror:
Image
and check out the back!
Image

And even better, it folds to where it is self standing! When it is flat I can store it between two books in my bookshelf so it is safe for travel! Awesome!
Image
Image
Thomas

Image
User avatar
2bits
2bit Member
 
Posts: 5132
Images: 8
Joined: Thu Dec 27, 2007 6:04 pm
Location: Lake Tawakoni, TX
Top

Postby aggie79 » Mon May 17, 2010 1:52 pm

Thomas,

I'm glad to see that one of us is getting something done.

Your galley cabinets, and particularly the pull-out drawer, are really cool...and functional. Nice find on that mirror!
Tom (& Linda)
For build info on our former Silver Beatle teardrop:
Build Thread

93503
User avatar
aggie79
Super Duper Lifetime Member
 
Posts: 5405
Images: 686
Joined: Tue Aug 07, 2007 5:42 pm
Location: Watauga, Texas
Top

Postby planovet » Mon May 17, 2010 4:33 pm

I don't know Thomas, something about that mirror creeps me out :lol:

Image
ImageMark (& Cindi)
Visit our website: Little Swiss Teardrop

I was wondering why the water balloon was getting bigger... and then it hit me.

ImageImageImageImage
User avatar
planovet
The Cat Man
 
Posts: 5583
Images: 3
Joined: Tue Nov 27, 2007 4:48 pm
Location: Plano, Texas
Top

PreviousNext

Return to Build Journals

Who is online

Users browsing this forum: No registered users and 10 guests