home made doors/ update from Raccoon Hollar

Anything to do with mechanical, construction etc

home made doors/ update from Raccoon Hollar

Postby steve smoot » Mon May 17, 2010 9:05 am

After I reslove the window issue, one of my up coming projects will be, making a door for my trailer.

My walls are framed with 1-1/2" sq wood framing with 1/8" paneling inside and outside. I will use FRP or plastic laminate skin on the exterior. The overall wall thickness will be about 1-13/16".

I plan to make the door the same construction. There will be 1-1/2" of foam insulation between all studs.

I have not found any door trim molding that seems to fit this thick of a door. Does anyone know where to find such a critter? Also, I will need a trim molding to fit the inside of the door opening and a hinge and some weather strip too.

Steve
Last edited by steve smoot on Sat May 22, 2010 2:40 pm, edited 1 time in total.
I am not a complete idiot, some parts are missing...
User avatar
steve smoot
Lifetime member
 
Posts: 1355
Images: 62
Joined: Thu Sep 17, 2009 5:42 pm
Location: Boone NC

Postby dwgriff1 » Mon May 17, 2010 9:31 am

Look at the weather stripping used on most home entry doors. Lowes sells it for a decent price.

What I see now has a u shaped weather strip with a plastic tang that goes into a small slot. See if you can figure a way to get a slot into the inside trim for that tang.

Just make sure that the sill allows any water to run out and not into the inside space or edge grain of the wood.

dave
User avatar
dwgriff1
500 Club
 
Posts: 947
Images: 4
Joined: Mon Jul 04, 2005 4:20 pm
Location: SW Idaho

Postby stomperxj » Mon May 17, 2010 9:42 am

Griff is right... Lowes and HD both have a huge selection of weatherstrip in many different thicknesses. As far as hinges are concerned, I bought mine a Lowes. They are black gate hinges made by Stanley. You can also find lots of cool hinges on McMaster Carr.

You can check out my pictures/build thread to see how i did my door jambs. It seems like its going to work pretty good...

Jess
User avatar
stomperxj
The 300 Club
 
Posts: 395
Images: 1
Joined: Tue Jul 29, 2008 12:25 am
Location: Kuna ID
Top

Postby planovet » Mon May 17, 2010 10:34 am

My doors aren't quite as thick as yours but similar. I did not use any trim molding around the exterior of the doors. You can see how I built mine and how I weatherstripped them on my build site. It's about halfway down the page:

http://littleswissteardrop.com/thesides.html
ImageMark (& Cindi)
Visit our website: Little Swiss Teardrop

I was wondering why the water balloon was getting bigger... and then it hit me.

ImageImageImageImage
User avatar
planovet
The Cat Man
 
Posts: 5583
Images: 3
Joined: Tue Nov 27, 2007 4:48 pm
Location: Plano, Texas
Top

Postby steve smoot » Mon May 17, 2010 11:02 am

Dave, thanks for the idea. I have some of the V shaped door molding in stock. I had not thought of using this stuff on my camper. :thinking:

Jess, I will look at Lowes again to see what they may have that is useable on my camper. You never know what you will find...

Mark, thanks for your ideas too. I just looked at your build. It seems that you chose to seal and finish the edges of your door to match the exterior color. My exterior will not be painted, but maybe there is a way to seal the edges of my door and paint them a matching color.. :thinking:


Steve
I am not a complete idiot, some parts are missing...
User avatar
steve smoot
Lifetime member
 
Posts: 1355
Images: 62
Joined: Thu Sep 17, 2009 5:42 pm
Location: Boone NC
Top

Postby aggie79 » Mon May 17, 2010 1:48 pm

Steve,

Do you know which way your are sealing your doors - inside seal like Mark (Planovet) or outside seal with t-molding?

I'm still on the fence about which way to go with mine. Like you, my doors (and sidewalls) are thicker than normal. If I end up going with t-molding, I'll use aluminum angle to cover the rest of the door edge. (I may have to trim one leg on the table saw to get it to fit.) If I do an inner seal - like a resdiential door with door stops, I'll probably use use two pieces of aluminum angle (forming a channel or "u") to cover the door edge.

I'll also will be doing something similar to the door opening.
Tom (& Linda)
For build info on our former Silver Beatle teardrop:
Build Thread

93503
User avatar
aggie79
Super Duper Lifetime Member
 
Posts: 5405
Images: 686
Joined: Tue Aug 07, 2007 5:42 pm
Location: Watauga, Texas
Top

Postby steve smoot » Mon May 17, 2010 2:28 pm

Tom, I do not have a clue yet. I want to cover the edge of the door and the door opening to prevent water from getting into the door and inside the camper.

I have looked online for hours and still do not have an answer. I have looked at stock channels and angles, but have not found the right one. :?

I found a door manufacturer that makes the door to fit your opening, but this is costly.

I will continue working on this and will post any ideas that come to mind.

Steve
I am not a complete idiot, some parts are missing...
User avatar
steve smoot
Lifetime member
 
Posts: 1355
Images: 62
Joined: Thu Sep 17, 2009 5:42 pm
Location: Boone NC
Top

Postby stomperxj » Mon May 17, 2010 2:46 pm

Steve- If you need something drawn up in CAD to see how it would look let me know and i can help you out with that-
User avatar
stomperxj
The 300 Club
 
Posts: 395
Images: 1
Joined: Tue Jul 29, 2008 12:25 am
Location: Kuna ID
Top

Postby halfdome, Danny » Mon May 17, 2010 2:48 pm

Steve, My first teardrop was about the same thickness.
I just used the "T" molding on the outside and found some aluminum angle to trim the inside.
I had to rip the leg that went inside down to 1/4" wide to negotiate the radius.
The center of the door wasn't covered with trim but I finished it before the trim went on.
You could also use the 13/16" counter top aluminum edging (it has a small lip) on the inside.
I used it on #2 & 3, great stuff. :D Danny
ImageImage
"Conditions are never just right. People who delay action until all factors are favorable do nothing". William Feather
Don't accept "It's Good Enough" build to the best of your abilities.
Image
Teardroppers Of Oregon & WashingtonImage
User avatar
halfdome, Danny
*Happy Camper
 
Posts: 5894
Images: 252
Joined: Sun Aug 14, 2005 11:02 pm
Location: Washington , Pew-al-up
Top

Postby steve smoot » Mon May 17, 2010 3:37 pm

Thanks for the info Danny. I will look into the counter top edging.

My door will have square corners, so I will not be bending the molding, but this may cause another problem, the corners could leak.. :thinking:

Sure wish the door was as easy as the framing.. :lol:


Steve
I am not a complete idiot, some parts are missing...
User avatar
steve smoot
Lifetime member
 
Posts: 1355
Images: 62
Joined: Thu Sep 17, 2009 5:42 pm
Location: Boone NC
Top

Postby steve smoot » Mon May 17, 2010 3:43 pm

Jess, thanks for the offer to help with the CAD.

I was manager of an engineering office for years and we were just getting into CAD when I left the company. I knew I would regret not learning CAD. I was old school and grew up with a pencil and drawing board.

I still have a drawing board with a parallel bar right beside of my computer.. :lol:

Steve
I am not a complete idiot, some parts are missing...
User avatar
steve smoot
Lifetime member
 
Posts: 1355
Images: 62
Joined: Thu Sep 17, 2009 5:42 pm
Location: Boone NC
Top

Postby halfdome, Danny » Mon May 17, 2010 6:38 pm

steve smoot wrote:Thanks for the info Danny. I will look into the counter top edging.

My door will have square corners, so I will not be bending the molding, but this may cause another problem, the corners could leak.. :thinking:

Sure wish the door was as easy as the framing.. :lol:


Steve

Steve, If you make nice and tight miters at the corners and roll the joints together with a rod of hard steel and goop everything well, you'll be just fine. :D Danny
ImageImage
"Conditions are never just right. People who delay action until all factors are favorable do nothing". William Feather
Don't accept "It's Good Enough" build to the best of your abilities.
Image
Teardroppers Of Oregon & WashingtonImage
User avatar
halfdome, Danny
*Happy Camper
 
Posts: 5894
Images: 252
Joined: Sun Aug 14, 2005 11:02 pm
Location: Washington , Pew-al-up
Top

Postby steve smoot » Sat May 22, 2010 12:56 pm

Hi everyone...I went to Raccoon Hollar today. Met some really nice Teardrop folks that were more than happy to share what they had done.. :applause:

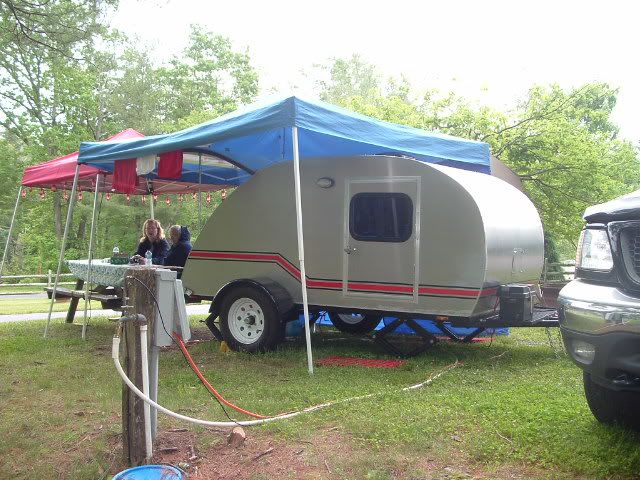
First, I have to say these were some dedicated campers, cause it was wet and foggy and dang cold. Everyone had the easy up covers. I will have to get one of those.. :thumbsup:

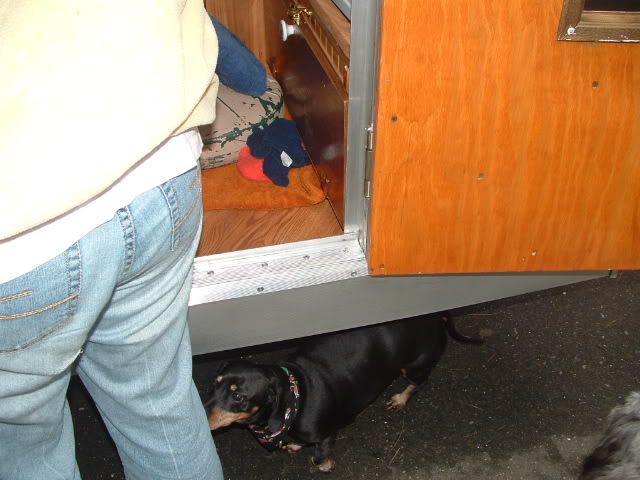
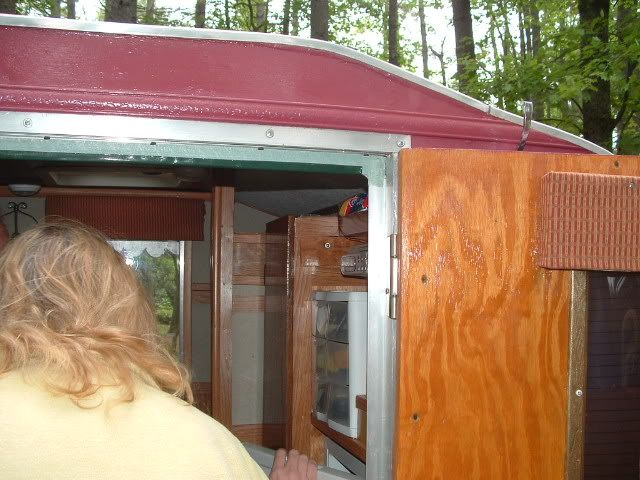
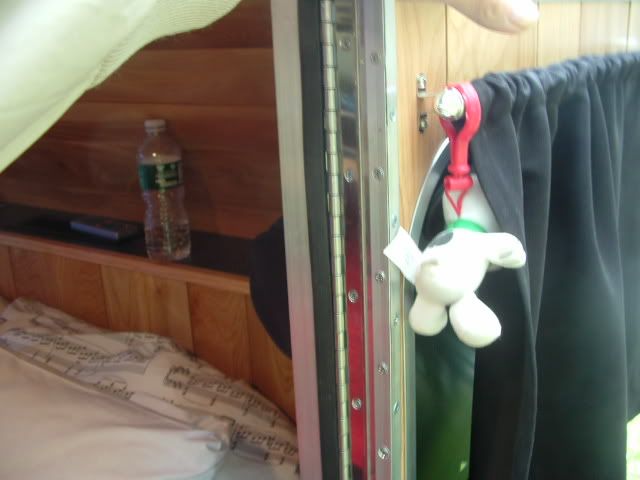
Saw several different takes on waterproofing the doors. I will attemp to post a few.


This fellow had a really cool camper. said it spent one year building it. He used aluminum angles along the back side of the door opening with waterproofing seal applied to the angle. Looks like he made the aluminum thresshold. I liked this.
Image

Here is the top view of the same door. You can see thwe aluminum angles a little better, I hope. Image

Here is one that used piano hinge and wraped the door edge and the door opening with aluminum angles. He used a pice of regular roof flashing to cover the edge of door, so no wood would be exposed if the angles did cover the edge of door. That was a neat touch.

Image

Okay, I have got to show you guys this one. The fellow and his wife showed me everything about their camper which they built. It had 12v and 110v and satalite TV and circuit breakers and fuses and on and on. He just bought a solar panel from HF...

Image

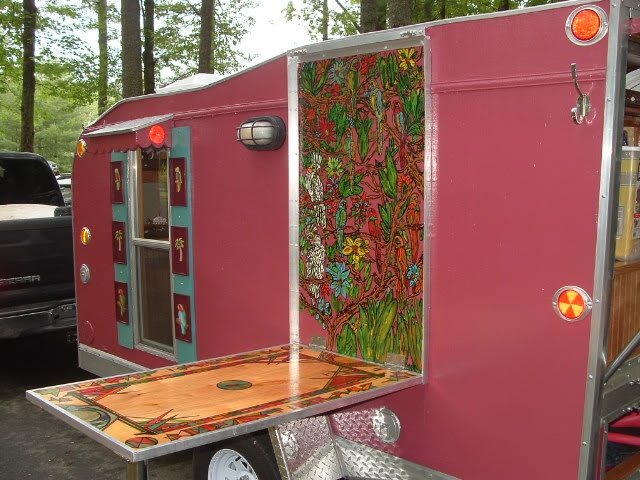
I don't know what happen to this one. thought I just posted it too? Oh well, this has nothing to do with doors, but it was a nice camper. He had drop down tables on each side. I really like this table.

Image
I am not a complete idiot, some parts are missing...
User avatar
steve smoot
Lifetime member
 
Posts: 1355
Images: 62
Joined: Thu Sep 17, 2009 5:42 pm
Location: Boone NC
Top


Return to Teardrop Construction Tips & Techniques

Who is online

Users browsing this forum: No registered users and 4 guests