MyAway build - Updates for space usage & organization

...ask your questions in the appropriate forums BUT document your build here...preferably in a single thread...dates for updates, are appreciated....

Postby S. Heisley » Tue May 04, 2010 12:15 pm

Thanks for your compliments, Brad and Tom. It's starting to look more like a trailer!
User avatar
S. Heisley
Super Lifetime Member
 
Posts: 8867
Images: 495
Joined: Mon Sep 17, 2007 10:02 am
Location: No. California

Postby perche » Tue May 04, 2010 9:57 pm

It's a lovely build, Sharon, and very well thought out. It's quite inspiring to see what you've been able to accomplish despite the gremlins.

Cheering you on... :applause:
User avatar
perche
Teardrop Builder
 
Posts: 39
Images: 3
Joined: Fri Mar 26, 2010 4:25 pm
Location: NW Minnes(n)ota, USA

Postby Steve_Cox » Wed May 05, 2010 7:17 am

Sharon,

Always enjoy each new installment of your build thread, and as always marvel at your accomplishments. But, do you ever roll the trailer out of the garage and take photos? Sure would like to see an overall perspective of how it is looking, the suspense is building. (Perhaps a writers trick to keep us coming back) :D
Steve
User avatar
Steve_Cox
4000 Club
4000 Club
 
Posts: 4903
Images: 196
Joined: Sun Apr 03, 2005 8:46 am
Location: Albuquerque New Mexico
Top

Postby S. Heisley » Wed May 05, 2010 10:51 am

Perche wrote:
It's a lovely build, Sharon, and very well thought out.


Thanks, Perche. Sometimes it seems I think too much. Then, when I put it together, I find I should have thought some more!

Steve Cox wrote:
But, do you ever roll the trailer out of the garage and take photos?


I know I’ve spent a lot of time working on the inside, fussy galley/potty cabinet stuff. It’s the hardest for me. The outside hasn’t had anything much done to it yet. So, that view just looks like a box with a couple door holes and a curved front….not very exciting. Once the electrical is finished and tested, I can put the stationary roof on. Then, the outside will start to develop and won’t look so ‘blah’ and I’ll take some pics. That will be before or by June.

June will be spent finishing and installing the lifting roof, building and installing doors, and generally, getting the outside weather and travel ready (paint, seals, windows, locks). At least, that’s the plan now. Stay tuned!
User avatar
S. Heisley
Super Lifetime Member
 
Posts: 8867
Images: 495
Joined: Mon Sep 17, 2007 10:02 am
Location: No. California
Top

Postby S. Heisley » Mon May 31, 2010 6:52 pm

Hi, trailer fans!

I’m a bit early on my monthly update but I was at a good picture-taking point. I’ve procrastinated on finishing up the electric; but, I came up with an idea for the bench beds so ended up working on them instead. It’s starting to look like a camping trailer!

Image

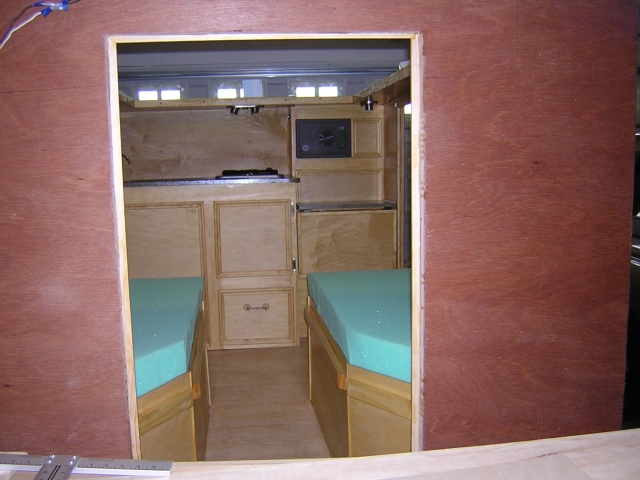
The bench/bed middle sections are made, too:

Image

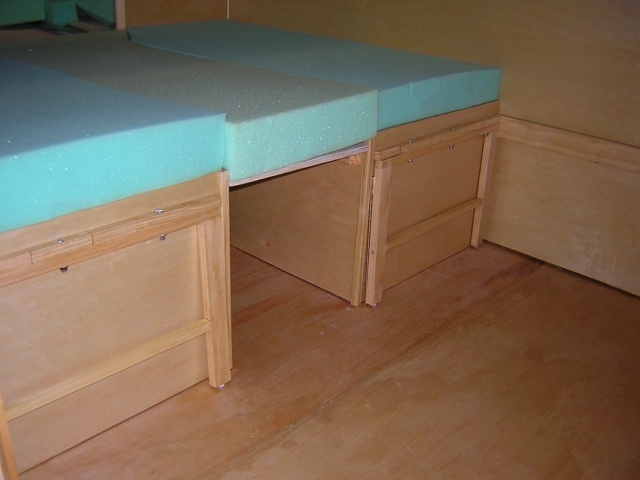
It looks like I might need to trim the foam on that middle section just a tad more….Didn’t notice it until I took this pic. But, with an electric meat carving knife, cutting foam really is like cutting a slice of turkey...not a big deal.

In the above picture, you will notice a couple things. The first is that I have made what look sort of like chair legs for half a chair. Right now, these are just leaning against the ends of the benches because I need to wait to attach them until after the floor covering is in. It will be easier to attach and adjust them to the right height then. These bed legs will be on hinges so that they pull out and support the foot board sections (the lower section of the beds where ones legs and feet will be). The upper portion of each set of bed legs is divided into 6 sections. The ones with bolts in them are made that way so they can be toggled to give middle as well as side bed foot boards support. The pieces that don’t have bolts will be fastened to the bench beds, to support the one end of the bed foot boards. (I hope that makes sense to you.) Those are also just sitting there now as their fit between each toggled piece may need to be adjusted once the hinged bed legs are in place.

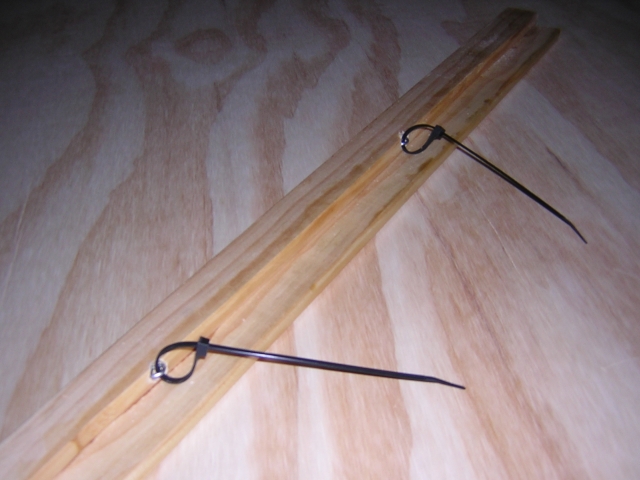
The second thing is that the bed rail that you can see in the above picture, on the one side wall, serves two purposes. Along with supporting the bed foot board, it also provides a hidden runway for the water line that runs from the water tank, inside the bench cabinet, to the sink. (It pained me to cut a hole in that cupboard!) This was pretty easy to do but I have included a picture of the rail’s back side so you can see:

Image

That’s it for now. I think I’ll go look at floor coverings as there are some on sale today. If I get the floors covered, I can finish the bed legs! (…It’ll also allow me to procrastinate a little longer on finishing the electric…I tend to procrastinate when something makes me nervous. I think I’ll be okay once I get to doing it; but, if I find I need a push, I’ll holler for help.)

I hope everyone enjoyed the Memorial Day holiday and that everyone took a moment to remember those who served our country so that we could be free and safe.
User avatar
S. Heisley
Super Lifetime Member
 
Posts: 8867
Images: 495
Joined: Mon Sep 17, 2007 10:02 am
Location: No. California
Top

Postby S. Heisley » Mon May 31, 2010 7:48 pm

This one's for you, Steve Cox:

Image

It was taken at Christmas, which is when I found out my hitch needs to be replaced...gotta get to that. As you can see, the trailer doesn't get moved much. (There are cobwebs on the wheel!) I didn't have any of the cabinets done then; so, I guess I'm making progress. The poor thing looks kind of ugly now but, by the end of June, it should be looking much better!

PS. My fiberglass tape for the exterior seams came in the mail Saturday!
User avatar
S. Heisley
Super Lifetime Member
 
Posts: 8867
Images: 495
Joined: Mon Sep 17, 2007 10:02 am
Location: No. California
Top

Postby Steve_Cox » Mon May 31, 2010 9:04 pm

Thank you Sharon :thumbsup:
Steve
User avatar
Steve_Cox
4000 Club
4000 Club
 
Posts: 4903
Images: 196
Joined: Sun Apr 03, 2005 8:46 am
Location: Albuquerque New Mexico
Top

Postby Wolfgang92025 » Mon May 31, 2010 9:53 pm

Sharon,

Looks like you are making progress. :thumbsup: :thumbsup:

From what I've seem, I think you won't have any trouble with the electric once you get started.

Looking forwards to meeting you in person and seeing your trailer at IRG II.

Wolfgang
Wolfgang

Image
User avatar
Wolfgang92025
Lifetime member
 
Posts: 1098
Images: 660
Joined: Fri Apr 18, 2008 10:16 pm
Location: Salt Lake City area, Utah
Top

Postby aggie79 » Tue Jun 01, 2010 8:41 am

Sharon,

Your AwayBuild looks like a TTT! Thank you for posting an exterior shot. Your cabinet and interior work really looks nice...and comfy too!

:applause: :thumbsup: :applause:

Please post pictures of your upcoming electrical work.

Tom
Tom (& Linda)
For build info on our former Silver Beatle teardrop:
Build Thread

93503
User avatar
aggie79
Super Duper Lifetime Member
 
Posts: 5405
Images: 686
Joined: Tue Aug 07, 2007 5:42 pm
Location: Watauga, Texas
Top

Postby S. Heisley » Tue Jun 01, 2010 6:42 pm

Thanks for the vote of confidence, Wofgang.

Aggie: Will do...sent you a PM.
User avatar
S. Heisley
Super Lifetime Member
 
Posts: 8867
Images: 495
Joined: Mon Sep 17, 2007 10:02 am
Location: No. California
Top

Postby Steve_Cox » Fri Jun 25, 2010 3:38 pm

:roll: :roll: :roll: :roll: <----- Your fan club is looking for an update :D


Sharon,

Only 3 weeks til the IRG. Working with a deadline, pretty exciting 8)

Saw the new photos, nice wiring :thumbsup:
Steve
User avatar
Steve_Cox
4000 Club
4000 Club
 
Posts: 4903
Images: 196
Joined: Sun Apr 03, 2005 8:46 am
Location: Albuquerque New Mexico
Top

Postby Shadow Catcher » Fri Jun 25, 2010 4:22 pm

So when do you get to go camping?
I am anticipating the final product, the craftwomenship is evident 8)
User avatar
Shadow Catcher
Donating Member
 
Posts: 6008
Images: 234
Joined: Sat Apr 11, 2009 8:26 pm
Location: Metamora, OH
Top

Postby S. Heisley » Fri Jun 25, 2010 4:48 pm

Hi, Shadow Catcher! Hey you, Steve!
The wiring is in and tested via the WFCO converter. I will test again, after the battery is connected. Below is a picture with the AC and DC both working. Woohoo! :woohoo:

Image

Hey, Tom (Aggie79): Take a look in my album and see if what you need is there. Check out both the picture titles and the comments. I was fairly thorough with my documentation. I will add another picture when I connect the battery.

----------

Among my many tasks, I am currently working on encasing my chassis wiring in protective plastic tubing, removing the factory-supplied metal clips and replacing them with plastic screw type; and then, spraying the underside with black undercoating as I finish upgrading the wiring in that area. That’s about half done and very messy. I end up with “black frecklesâ€
User avatar
S. Heisley
Super Lifetime Member
 
Posts: 8867
Images: 495
Joined: Mon Sep 17, 2007 10:02 am
Location: No. California
Top

Postby Cliffmeister2000 » Fri Jun 25, 2010 5:50 pm

Sharon, don't sell yourself short! You've done as fine a wiring job as I've seen, and it seems you think things through pretty completely before you get to working on it. That's a habit most of us could do well to form.

:thumbsup: :thumbsup:
God Bless

Cliff

♥God. ♥People.
1 John 4:9-11

My Teardrop build pictures
User avatar
Cliffmeister2000
Titanium Donating Member
 
Posts: 3622
Images: 157
Joined: Thu Jul 26, 2007 10:18 pm
Location: Phoenix, AZ
Top

Postby aggie79 » Fri Jun 25, 2010 6:24 pm

Sharon,

You continue to impress!

I'm looking forward to reading through your electrical installation. I think Ihave the same converter as you. If this is the case, I'll really be in luck.

Keep up the fine work!

Tom
Tom (& Linda)
For build info on our former Silver Beatle teardrop:
Build Thread

93503
User avatar
aggie79
Super Duper Lifetime Member
 
Posts: 5405
Images: 686
Joined: Tue Aug 07, 2007 5:42 pm
Location: Watauga, Texas
Top

PreviousNext

Return to Build Journals

Who is online

Users browsing this forum: No registered users and 16 guests