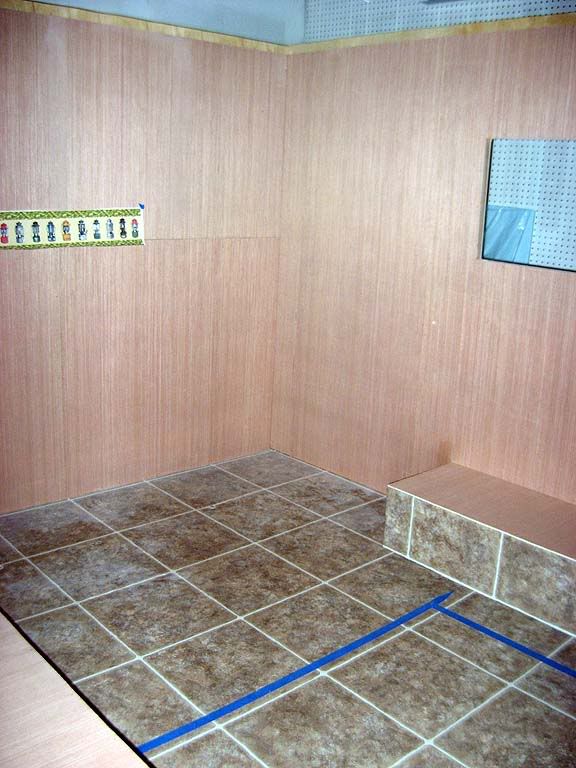
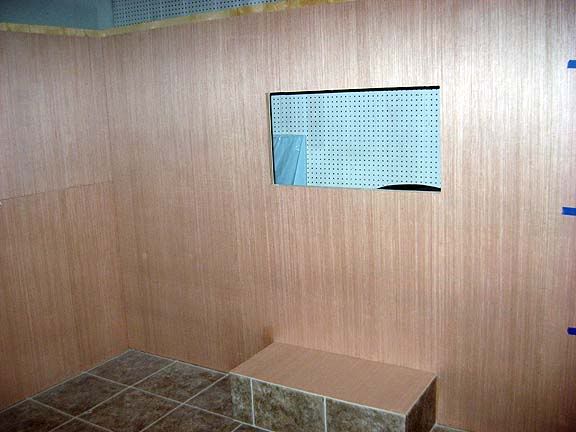
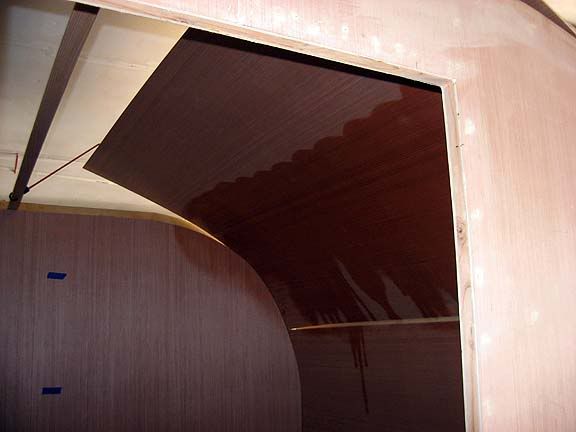
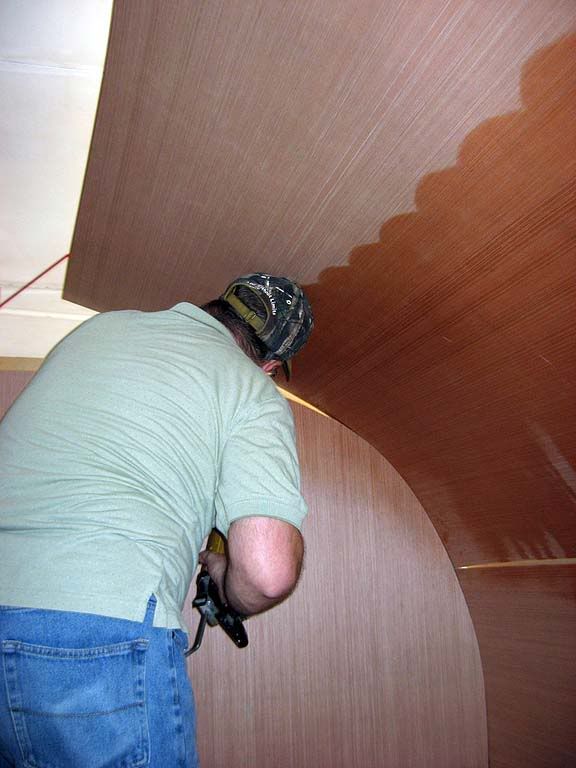
Green Lantern- now with awning!!!

...ask your questions in the appropriate forums BUT document your build here...preferably in a single thread...dates for updates, are appreciated....

Postby YuGun » Wed Dec 01, 2010 3:26 pm

:applause: Lookse very good,
Thanks for photos.
User avatar
YuGun
The 300 Club
 
Posts: 445
Joined: Sun Apr 11, 2010 1:25 pm
Location: Turkey

Postby Lookfar » Wed Dec 01, 2010 4:58 pm

It's really looking good, Scott. I wasn't around yet to watch the Ladybug, and am enjoying watching now. Looking forward to seeing the Green Lantern (and you) at BB.
Butch
Image
User avatar
Lookfar
Donating Member
 
Posts: 225
Images: 22
Joined: Sun Jan 31, 2010 9:58 am
Location: Arkansas

Postby starleen2 » Fri Dec 03, 2010 9:18 pm

This IS how I began my morning – a little bit on the chilly side – But it would soon warm up
Image
A few of the tasks ahead of me today. I really wanted to get the inside walls done
Image
second Window cut out
Image
Now to the task at hand
Image
Finished with the walls
Image
Image
Now to attend to the second bend in the front
Image
Image
Image
Almost there
Image
Done – the 2x4 is a temporary support until I get all the spars cut and installed
Image
Anyone know how to get any work outta one of these?
Image
Now to move to the front bed / storage area
Image
Image
Image
Just have to measure the top for Plywood and cut in the lower doors and the front bed is ready to go
Just a few more trim pieces, ceiling panels , and cabinets– and the interior is almost done.
User avatar
starleen2
5th Teardrop Club
 
Posts: 16272
Images: 224
Joined: Sat May 12, 2007 8:26 pm
Location: Pea Ridge ,AR
Top

Postby Darren » Fri Dec 03, 2010 9:24 pm

Very nice Scott. :thumbsup:
Image
User avatar
Darren
the camper formerly known as Victor Star
 
Posts: 1356
Images: 161
Joined: Sat Dec 03, 2005 12:09 am
Location: Shawnee, Kansas (KC)
Top

Postby 2bits » Fri Dec 03, 2010 11:15 pm

starleen2 wrote:Image


Looks like she is enjoying watching you work! :lol:

I enjoy it too from my own lawn chair!! Good work!
Thomas

Image
User avatar
2bits
2bit Member
 
Posts: 5132
Images: 8
Joined: Thu Dec 27, 2007 6:04 pm
Location: Lake Tawakoni, TX
Top

Postby toypusher » Sat Dec 04, 2010 5:42 am

Looking great there Scott! :thumbsup:
User avatar
toypusher
Site Admin
 
Posts: 43040
Images: 324
Joined: Fri Jan 28, 2005 12:21 pm
Location: York, PA Area
Top

Postby Shadow Catcher » Sat Dec 04, 2010 8:35 am

There are a number of approaches to getting work out of "one of these". I once took an elective class at the masters level on education psychology which went rather heavily into cognitive development and as we long suspected the teenage brain, is an oxymoron. Prefrontal cortex (the area of the brain responsible for decisions and understanding consequences), does not develop until their 20's. Our goal as parents is to keep them from doing really stupid things that kill them. One possible method is the what I call the cat herding approach, you walk in front of them making the sound of a can opener. Some do respond to the offer of rewards. There is also the opposite approach, no work the can opener is put away. ;)
Above all, this too shall pass they do join the human race in their later years, hopefully.
One final idea, a service learning project, help the local rescue mission or other charitable organizations that exposes them to real life in depth. :thinking:
User avatar
Shadow Catcher
Donating Member
 
Posts: 6008
Images: 234
Joined: Sat Apr 11, 2009 8:26 pm
Location: Metamora, OH
Top

Postby StPatron » Sat Dec 04, 2010 12:15 pm

Image

Wow! I never thought of mounting pegboard to the interior!!

Is that for hanging clothes? :lol:

You're movin' right along, lookin' super!
User avatar
StPatron
Donating Member
 
Posts: 748
Images: 297
Joined: Tue Dec 15, 2009 8:38 pm
Location: OK
Top

Postby YuGun » Sat Dec 04, 2010 1:09 pm

:applause: :applause: :applause:
İt is going well
User avatar
YuGun
The 300 Club
 
Posts: 445
Joined: Sun Apr 11, 2010 1:25 pm
Location: Turkey
Top

Postby Dusty82 » Sat Dec 04, 2010 1:41 pm

danlott wrote:
starleen2 wrote:
Dusty82 wrote:. . . With so many people using SketchUp to design their tears and TTTs, I wish there was a forum for sharing the SKP files for our various designs. I know I'd love to get my hands on the SKP files of a few of the designs I've seen here.

there are a few of us who are trying to get a repository going for sketch Up designs. I do plan on posting the design in the design library once it is finally done. I like to use SketchUp to model with because it gives me accurate dimensions so i can plan out everything before I start to build - the make fine adjustments as I go. If you are interested it should be available in the 3d warehouse


Here is the thread for the Teardrops & Tiny Travel Trailers collection in the Google SketchUp 3D warehouse. It would be great if more people would add their models.

http://www.tnttt.com/viewtopic.php?t=37543

Dan


Thanks very much! As it turns out, I've seen and downloaded the models you have listed in the 3D Warehouse - I just hadn't paid attention to who they'd come from. I'm also doing a bit of playing around with the floorplan in the 2 Person Standie listed there. If I ever get something that we both like, I'll post some pics.

Looking good Starleen! That's going to be one great trailer! The build quality is fantastic!
TV: 2004 Jeep Liberty Sport

Currently stuck in a tent.
User avatar
Dusty82
The 300 Club
 
Posts: 313
Joined: Thu Jan 28, 2010 8:15 pm
Location: Southern Oregon
Top

Postby starleen2 » Sun Dec 05, 2010 9:59 pm

It was a productive weekend. I managed to get the inside wall panels done and the first coat of sealer applied. Got the bed platform and microwave cabinet installed. To save weight – I’m using green vinyl on the bed platform to hide the storage underneath. There will be another shelf installed for the microwave in the cabinet and another curtain will hide the lower storage and electrical box
Image
Front framed in and tested. I do plan to come back later and cut in two doors at the front (as soon as I decide how I em’ them spaced)
Image
Image
Now for the color – It’s not called the green lantern for nuttin! – Coleman green applied to the surfaces. I did get started on applying the semi gloss sealer to the interior as well
Image
User avatar
starleen2
5th Teardrop Club
 
Posts: 16272
Images: 224
Joined: Sat May 12, 2007 8:26 pm
Location: Pea Ridge ,AR
Top

Postby YuGun » Mon Dec 06, 2010 12:47 am

:thumbsup: İt is wide as you can sleep horizontally
User avatar
YuGun
The 300 Club
 
Posts: 445
Joined: Sun Apr 11, 2010 1:25 pm
Location: Turkey
Top

Postby starleen2 » Wed Dec 08, 2010 9:06 pm

Finally got around to using that fabric I had printed. I use the curtains as a lightweight alternative to cabinet doors – it hides the storage spaces, but also saves on weight. The fabric is velco-ed in place so I can remove it to clean it if I need to
Image
Curtains for the side windows
Image
User avatar
starleen2
5th Teardrop Club
 
Posts: 16272
Images: 224
Joined: Sat May 12, 2007 8:26 pm
Location: Pea Ridge ,AR
Top

Postby aggie79 » Thu Dec 09, 2010 9:01 am

It is coming right along Scott. I do admire your fabric design.

Completion by Beaver's Bend is certainly do-able (for you - maybe not for me.)
Tom (& Linda)
For build info on our former Silver Beatle teardrop:
Build Thread

93503
User avatar
aggie79
Super Duper Lifetime Member
 
Posts: 5405
Images: 686
Joined: Tue Aug 07, 2007 5:42 pm
Location: Watauga, Texas
Top

Postby b.bodemer » Thu Dec 09, 2010 9:17 am

Great build that I enjoy following.

I really like the fabric in place of cabinet doors.

Barb
Last edited by b.bodemer on Sun Dec 19, 2010 4:39 pm, edited 1 time in total.
User avatar
b.bodemer
1000 Club
1000 Club
 
Posts: 1608
Images: 328
Joined: Mon May 08, 2006 5:43 pm
Location: Lakewood OH
Top

PreviousNext

Return to Build Journals

Who is online

Users browsing this forum: Bing [Bot] and 11 guests