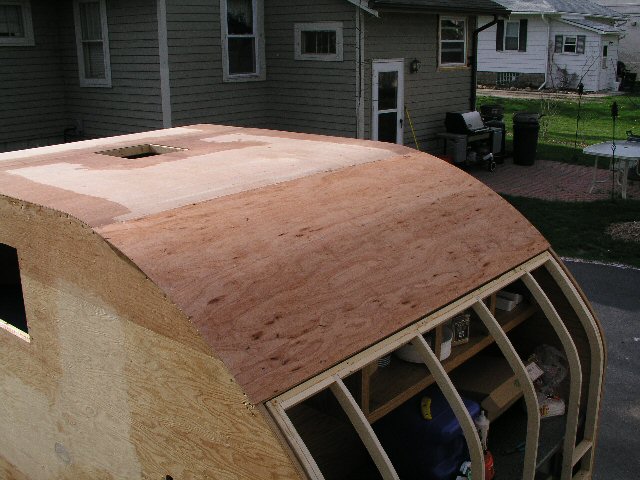
Notch Cutout

Anything to do with mechanical, construction etc

Notch Cutout

Postby John6012 » Sun Dec 04, 2005 5:00 pm

I've been researching and watching hatch building for some time and figured that as time and constructin goes on I'd figure out how to fit the hatch. I've seen what looks like a "line" or intersection om the sides of the TD extending the length of the hatch but figured o9ut it was someone's design. But today I took a good look at Mike's generic plans and found that even though I'd reviewed his generic plans before, I overlooked the "notch" Cut the notch 3/8" rom the hatch spar extending to the rear floor. But can't figure out if that includes the 1/4" luan. If it does, it's 5/8". How thick is the hatch? Spar/bow and luan on top and another 1/4" luan on the bottom. 1/4 + 1/4 = 1/2" and then some trim. Aha, the extra space is for the weather striping. Is that right? It just hit me as I was typing this....Sorry it's so long but I'm old and don't think fast.
John6012
Teardrop Master
 
Posts: 171
Joined: Fri Jul 22, 2005 9:57 pm

Postby mikeschn » Sun Dec 04, 2005 5:47 pm

Yep, that space is for the weather stripping...

here is a closeup of the notch near the bottom...

Image

Mike...
The quality is remembered long after the price is forgotten, so build your teardrop with the best materials...
User avatar
mikeschn
Site Admin
 
Posts: 19202
Images: 475
Joined: Tue Apr 13, 2004 11:01 am
Location: MI

Postby Jim Marshall » Sun Jan 22, 2006 7:13 pm

I am having a problem visualizing how my hatch will seal. One of my sides is glued up at this time and I need to figure out how the hatch will seal before I go any further. My side frame is laminated strips and they are continuous. The bend laminated frame work is 1 1/2 inches X 1 1/2 inches. Should I make a notch for my hatch weatherstripping now? If so, how much should I notch? Should I do as in the illustration above?
I started out with nothing and I still got plenty left.

VOL-N-TEAR
User avatar
Jim Marshall
The 300 Club
 
Posts: 343
Images: 63
Joined: Wed Sep 28, 2005 12:31 pm
Location: Chattanooga, Tennessee
Top

Postby mikeschn » Sun Jan 22, 2006 7:28 pm

Jim,

Let me try to explain it using this picture...

Image

In this picture the sidewalls are not notched out yet. When you attach the thin plywood skin to the hatch, it will hang over the edge of the trailer by a quarter inch or so.

If you didn't notch out the sidewalls, you would not be able to get any weatherstripping inbetween the edge of the sidewall and the overhang of the hatch.

You notch out the sidewalls depending on the thickness of the weather stripping you want to use. I show a notch of 3/8" because the weather stripping I used was 1/2" thick. That allowed for a little compression.

Does that help?

Mike...
The quality is remembered long after the price is forgotten, so build your teardrop with the best materials...
User avatar
mikeschn
Site Admin
 
Posts: 19202
Images: 475
Joined: Tue Apr 13, 2004 11:01 am
Location: MI
Top

Postby Jim Marshall » Sun Jan 22, 2006 8:52 pm

Mike, that does clear it up for me and I appreciate it a bunch. My next move will be deciding how we want our galley set up. Thanks for your help!
I started out with nothing and I still got plenty left.

VOL-N-TEAR
User avatar
Jim Marshall
The 300 Club
 
Posts: 343
Images: 63
Joined: Wed Sep 28, 2005 12:31 pm
Location: Chattanooga, Tennessee
Top

Postby schreimaster » Sun Jan 22, 2006 9:05 pm

John6012
I must be at about the same place you are on this, I figure I'll start my hatch on tuesday. I'm thinking notch 3/8 plus the thickness of my luan from the luan I already have installed for the top. That will allow for double luan, I'm doubling it on the hatch to make the edges that over hang on to the sides thicker and stronger. Some of you old pros tell me if I'm on the right track? :roll:
Lifes not a problem to be solved, but an adventure to be lived!
User avatar
schreimaster
Teardrop Advisor
 
Posts: 56
Images: 86
Joined: Mon Nov 28, 2005 3:49 pm
Location: Cumming, Ga
Top

Postby Jim Marshall » Sun Jan 22, 2006 10:11 pm

Schreimaster, I thought about the edges being thicker also but wasn't thinking about doubling the 1/4 plywood, I was just thinking about thickening the edge of the 1/4 plywood to strengthen it.
I started out with nothing and I still got plenty left.

VOL-N-TEAR
User avatar
Jim Marshall
The 300 Club
 
Posts: 343
Images: 63
Joined: Wed Sep 28, 2005 12:31 pm
Location: Chattanooga, Tennessee
Top

Postby mikeschn » Mon Jan 23, 2006 7:04 am

schreimaster wrote:John6012
I must be at about the same place you are on this, I figure I'll start my hatch on tuesday. I'm thinking notch 3/8 plus the thickness of my luan from the luan I already have installed for the top. That will allow for double luan, I'm doubling it on the hatch to make the edges that over hang on to the sides thicker and stronger. Some of you old pros tell me if I'm on the right track? :roll:


There is no need to make your notch thicker for a double layer of luan on the hatch. The luan goes on the top, not in the area of the notch. You could put 10 layers of luan on the hatch, you would still only need a notch as big as the weather stripping, minus a little for compression.

Mike...
The quality is remembered long after the price is forgotten, so build your teardrop with the best materials...
User avatar
mikeschn
Site Admin
 
Posts: 19202
Images: 475
Joined: Tue Apr 13, 2004 11:01 am
Location: MI
Top

Postby Jim Marshall » Mon Jan 23, 2006 10:26 am

Mike, what I was thinking of was adding to the bottom side of the 1/4 inch plywood that is on the lid. I was just thinking that it would make the edge that makes contact with the weather stripping stronger but maybe that is not needed. But if I were to add to the bottom of the lid in that area, I would have to make the notch deeper and would have to have something bigger to cover the raw wood also, so I think I will just stay with not adding anything to the bottom side of my 1/4 inch plywood.

While we are in this area of the weather stripping, which weather stripping do you prefer. I am leary of water getting in our hatch.

I have been reluctant to ask questions because I know the questions I need to ask have been asked before a bunch of times and folks get burned out answering the same questions over and over. I really do appreciate your patience and help.
I started out with nothing and I still got plenty left.

VOL-N-TEAR
User avatar
Jim Marshall
The 300 Club
 
Posts: 343
Images: 63
Joined: Wed Sep 28, 2005 12:31 pm
Location: Chattanooga, Tennessee
Top

Postby Kevin A » Mon Jan 23, 2006 10:35 am

mikeschn wrote:
schreimaster wrote:John6012
I must be at about the same place you are on this, I figure I'll start my hatch on tuesday. I'm thinking notch 3/8 plus the thickness of my luan from the luan I already have installed for the top. That will allow for double luan, I'm doubling it on the hatch to make the edges that over hang on to the sides thicker and stronger. Some of you old pros tell me if I'm on the right track? :roll:


There is no need to make your notch thicker for a double layer of luan on the hatch. The luan goes on the top, not in the area of the notch. You could put 10 layers of luan on the hatch, you would still only need a notch as big as the weather stripping, minus a little for compression.

Mike...


Mike,
I believe Schreimaster is planning to double up on the luan on the hatch only, if this is the case he will need to increase the notch by the thickness of the second layer to keep it flush with the surface of the roof.
"Follow me, I'm right behind you"

ImageImage
User avatar
Kevin A
The other guy
 
Posts: 3222
Images: 289
Joined: Mon Jan 17, 2005 1:16 am
Location: California, Eureka
Top

Postby schreimaster » Mon Jan 23, 2006 11:11 am

Kevin A

You are correct sir, I thought that I should double the luan on the hatch to thicken up the edges that over hang the sides. This would bring the hatch thickness to 1/4 ". I only installed 1 layer of luan on the rest of the body. So increasing the notch depth by 1 layer of luan, should give me a clean line from body to hatch. :thinking:

Let me know if I'm on the right track.

Thanks
Lifes not a problem to be solved, but an adventure to be lived!
User avatar
schreimaster
Teardrop Advisor
 
Posts: 56
Images: 86
Joined: Mon Nov 28, 2005 3:49 pm
Location: Cumming, Ga
Top

Postby toypusher » Mon Jan 23, 2006 11:20 am

Check out the Generic Build on this board. Step 5 and Step 17 should help you clear things up a bit!

Step 5

Step 17
User avatar
toypusher
Site Admin
 
Posts: 43040
Images: 324
Joined: Fri Jan 28, 2005 12:21 pm
Location: York, PA Area
Top

Postby John6012 » Mon Jan 23, 2006 4:08 pm

Well, I'm out the cost of a 1/4" offset hinge. Found out if I use that one I don't need a notch because it's already "raised" 1/4". But I cut the notch as instructed and had to purchase another hinge from Grant that fits properly due to the notch. Study, study before you cut.
John6012
Teardrop Master
 
Posts: 171
Joined: Fri Jul 22, 2005 9:57 pm
Top

Postby Kevin A » Tue Jan 24, 2006 12:39 am

John6012 wrote:Well, I'm out the cost of a 1/4" offset hinge. Found out if I use that one I don't need a notch because it's already "raised" 1/4". But I cut the notch as instructed and had to purchase another hinge from Grant that fits properly due to the notch. Study, study before you cut.
John, think of it this way, you aren't out the cost of the hinge, you have merely started collecting parts for #2 8) :lol: :thumbsup:
"Follow me, I'm right behind you"

ImageImage
User avatar
Kevin A
The other guy
 
Posts: 3222
Images: 289
Joined: Mon Jan 17, 2005 1:16 am
Location: California, Eureka
Top

Postby Denny Unfried » Tue Jan 24, 2006 8:34 am

This is the classic case of having all of your hardware on hand before making any cuts to avoid a lot of headache.

Denny

Image
aka - "Uncle Denny"
<img src="http://www.uncledennyscorner.com/teardrop/photos/Linux.gif">
User avatar
Denny Unfried
sprint car builder/racer & all that jazz
 
Posts: 411
Joined: Mon Jun 21, 2004 8:54 am
Location: So Bay, CA
Top

Next

Return to Teardrop Construction Tips & Techniques

Who is online

Users browsing this forum: No registered users and 3 guests