Green Lantern- now with awning!!!

...ask your questions in the appropriate forums BUT document your build here...preferably in a single thread...dates for updates, are appreciated....

Postby starleen2 » Thu Jan 27, 2011 11:31 am

2bits wrote:
starleen2 wrote:I just couldn’t get any sleep last night until I mounted the side wall for a profile view> Just the right height – it WILL fit going out the garage by 1 ½ inches. As more gets constructed, it will lower about another ½ inch.


Scott do you mean it will lower due to the weight of the trailer making the tires bulge slightly thus reducing the height 1/2"??? Smart thinking!!!

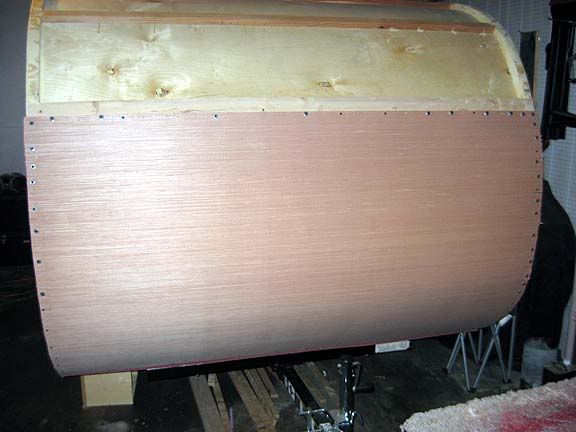
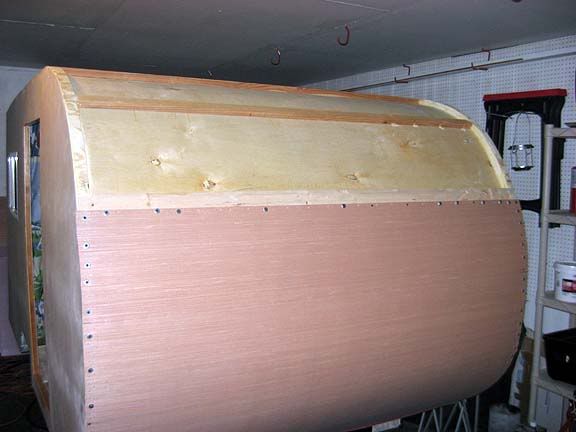
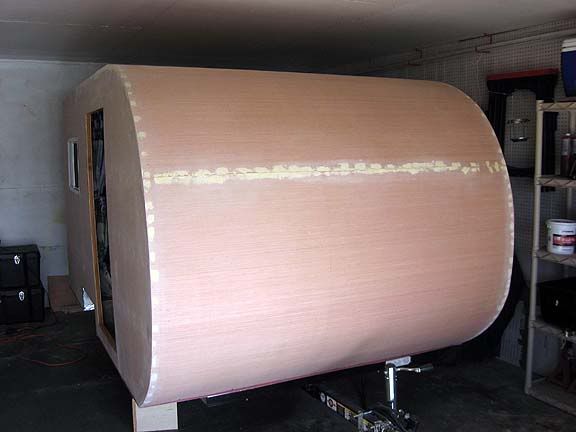
Well the time came for the test - and YES it made it out of the garage door with plenty of room to spare - Whew :eyebrows:
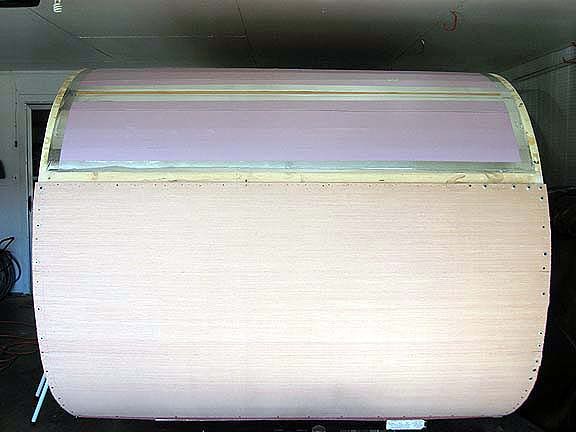
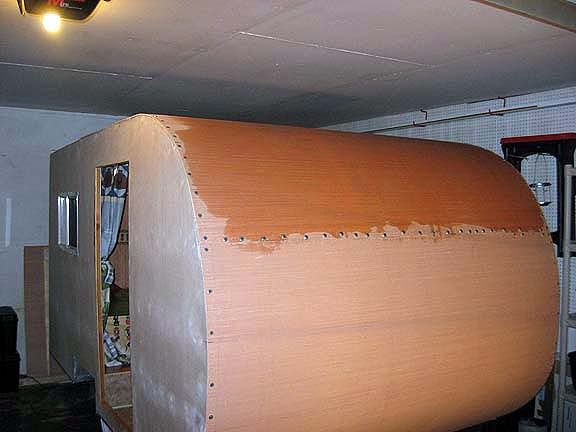
Took it outside and blew off the sanding dust - now it's ready for for the insulation. currently I'm pre-bending the front plywood to make it go on a bit easier :thinking:
User avatar
starleen2
5th Teardrop Club
 
Posts: 16272
Images: 224
Joined: Sat May 12, 2007 8:26 pm
Location: Pea Ridge ,AR

Postby 2bits » Thu Jan 27, 2011 11:10 pm

YAY! !

Where are you getting your plywood? I assume it is 1/8"? Good luck on the big bend!
Thomas

Image
User avatar
2bits
2bit Member
 
Posts: 5132
Images: 8
Joined: Thu Dec 27, 2007 6:04 pm
Location: Lake Tawakoni, TX

Postby starleen2 » Fri Jan 28, 2011 8:36 am

Thomas – the plywood is 5mm luan – a little stiff to bend, but if you prebend it – it can be coaxed into shape. The good news - no creaks, cracks , or pops - Just one smooth sheet wrapped around the lower curve. The upper portion will be easier since it's one curve. The screws are Just temporary until the adhesive is set (thanks Tom ==>aggie79 for another great tip). I added the washers to spread out the clamping force of the screws. What you do not see are the 18 gauge 1 inch long staples placed along the edges and the spars. I insulated with one inch foam insulation. Once the top portion is skinned, and screws removed, I'll do a flush cut to trim off the excess.
Image
Image
User avatar
starleen2
5th Teardrop Club
 
Posts: 16272
Images: 224
Joined: Sat May 12, 2007 8:26 pm
Location: Pea Ridge ,AR
Top

Postby Rlowell » Fri Jan 28, 2011 10:20 am

starleen2 wrote:Thomas – the plywood is 5mm luan – a little stiff to bend, but if you prebend it – it can be coaxed into shape. The good news - no creaks, cracks , or pops - Just one smooth sheet wrapped around the lower curve. The upper portion will be easier since it's one curve. The screws are Just temporary until the adhesive is set (thanks Tom ==>aggie79 for another great tip). I added the washers to spread out the clamping force of the screws. What you do not see are the 18 gauge 1 inch long staples placed along the edges and the spars. I insulated with one inch foam insulation. Once the top portion is skinned, and screws removed, I'll do a flush cut to trim off the excess.
Image
Image


Looking good!! :thumbsup: :thumbsup:
Rod
Plan your work...work your plan...at least that's the plan. Oh, just do it anyway!
gallery/image_page.php?album_id=1425&image_id=76342
User avatar
Rlowell
2000 Club
2000 Club
 
Posts: 2004
Images: 42
Joined: Wed May 23, 2007 12:39 pm
Location: Orlando, Fl.
Top

Postby starleen2 » Sat Jan 29, 2011 5:09 pm

Getting ready to do the top section. I got the insulation installed and gaps sealed and edges sealed with foil tape.
Image
A little water helps to make the bend
Image
Here's a close up of the scews and washers - it helps to spreads out the clamping force of the screw. After the bend is set - these will be removed.
Image
While the adhesive was drying, I did a little on the interior –
We got the privacy curtain installed,. As you can see it’s a standy for Mrs. Starleen!
Image
Image
Image
Image
Tied up and out of the way when not needed
Image
(if you like the design – ask Planovet where he got it – If was gifted to me on my birthday – Thanks again Mark and Cindi, told ya’ you would see it again!)
Finally flush cut the edges, all the screws removed, washers removed, counter sunk holes, screw re-installed , filled, sanded flush
Image
To round out the day – I installed the taillight bezels
User avatar
starleen2
5th Teardrop Club
 
Posts: 16272
Images: 224
Joined: Sat May 12, 2007 8:26 pm
Location: Pea Ridge ,AR
Top

Postby Rlowell » Sat Jan 29, 2011 9:16 pm

:applause: :applause:
SWEET!!!!!
Looking great.
Rod
Plan your work...work your plan...at least that's the plan. Oh, just do it anyway!
gallery/image_page.php?album_id=1425&image_id=76342
User avatar
Rlowell
2000 Club
2000 Club
 
Posts: 2004
Images: 42
Joined: Wed May 23, 2007 12:39 pm
Location: Orlando, Fl.
Top

Postby S. Heisley » Sat Jan 29, 2011 9:51 pm

Wow! ...Doing good! The privacy curtain is cute. :thumbsup: :applause:
User avatar
S. Heisley
Super Lifetime Member
 
Posts: 8866
Images: 495
Joined: Mon Sep 17, 2007 10:02 am
Location: No. California
Top

Postby Miriam C. » Sat Jan 29, 2011 9:57 pm

:thumbsup: :applause: Wow! I wish I had used washers. Seems to keep the screws from digging in! :thumbsup: Is you curtain rod spring loaded or something else? :worship:

Looking really great!
“Forgiveness means giving up all hope for a better past.â€
User avatar
Miriam C.
our Aunti M
 
Posts: 19675
Images: 148
Joined: Wed Feb 15, 2006 3:14 pm
Location: Southwest MO
Top

Postby starleen2 » Sun Jan 30, 2011 8:36 am

Miriam C., S. Heisley, Rlowell - thanks for the kind comments

Miriam C - the rod is a clothes hanger rod secured by two cups on the wall. It is made of metal and very strong. I have used the compression types before - But their limit is 6 feet - the inside dimension is 6 feet two inches ;)
User avatar
starleen2
5th Teardrop Club
 
Posts: 16272
Images: 224
Joined: Sat May 12, 2007 8:26 pm
Location: Pea Ridge ,AR
Top

Postby 2bits » Sun Jan 30, 2011 10:12 am

Yeah, you're almost there! You're on fire! (Pardon the pun haha)
Thomas

Image
User avatar
2bits
2bit Member
 
Posts: 5132
Images: 8
Joined: Thu Dec 27, 2007 6:04 pm
Location: Lake Tawakoni, TX
Top

Postby WarPony » Mon Feb 07, 2011 10:57 pm

Lookin' good, preacher man!! Will it be done for the Crossroads gathering?

Jeff
ImageImage

Still a million dollars away from being a millionaire!!
User avatar
WarPony
Donating Member
 
Posts: 2089
Images: 289
Joined: Tue Sep 14, 2004 12:10 pm
Location: Kansas, Topeka
Top

Postby starleen2 » Tue Feb 08, 2011 10:10 am

WarPony wrote:Lookin' good, preacher man!! Will it be done for the Crossroads gathering?

Jeff


Should be done by then. I'm hoping that it will be ready for Beaver's Bend gathering. I did get the door installed and finished. I lack one panel to finish off the roof. Fiberglass tape and epoxy are on the way from RAKA. Once the camper is encapsulated, then it's time for paint. I originally decided on two tone white on green - however I think I'm going all Coleman green - offset only with the graphics. I have a temporary set back - I had a knot removed from my left leg - so I can't do anything strenuous until the stitches are removed :roll:
User avatar
starleen2
5th Teardrop Club
 
Posts: 16272
Images: 224
Joined: Sat May 12, 2007 8:26 pm
Location: Pea Ridge ,AR
Top

Postby planovet » Tue Feb 08, 2011 10:17 am

starleen2 wrote:Image
Tied up and out of the way when not needed
Image

(if you like the design – ask Planovet where he got it – If was gifted to me on my birthday – Thanks again Mark and Cindi, told ya’ you would see it again!)


Looks great! :thumbsup:
ImageMark (& Cindi)
Visit our website: Little Swiss Teardrop

I was wondering why the water balloon was getting bigger... and then it hit me.

ImageImageImageImage
User avatar
planovet
The Cat Man
 
Posts: 5583
Images: 3
Joined: Tue Nov 27, 2007 4:48 pm
Location: Plano, Texas
Top

Postby Rlowell » Tue Feb 08, 2011 10:52 am

starleen2 wrote:
WarPony wrote:Lookin' good, preacher man!! Will it be done for the Crossroads gathering?

Jeff


Should be done by then. I'm hoping that it will be ready for Beaver's Bend gathering. I did get the door installed and finished. I lack one panel to finish off the roof. Fiberglass tape and epoxy are on the way from RAKA. Once the camper is encapsulated, then it's time for paint. I originally decided on two tone white on green - however I think I'm going all Coleman green - offset only with the graphics. I have a temporary set back - I had a knot removed from my left leg - so I can't do anything strenuous until the stitches are removed :roll:


Praying that you feel better soon.
Rod
Plan your work...work your plan...at least that's the plan. Oh, just do it anyway!
gallery/image_page.php?album_id=1425&image_id=76342
User avatar
Rlowell
2000 Club
2000 Club
 
Posts: 2004
Images: 42
Joined: Wed May 23, 2007 12:39 pm
Location: Orlando, Fl.
Top

Postby starleen2 » Sat Feb 12, 2011 9:00 pm

The leg is better this weekend - and it was gorgeous weekend to do some work on the camper - Couldn't bend down to to do any trailer wiring. So I spent most of the day doing filler work - Filling in screw holes, sanding down filler , getting it prepared for the epoxy - but now the weather has to warm up some more and I can open up the garage. I need plenty of ventilation lest the neighbors think I'm running a meth lab ;)
User avatar
starleen2
5th Teardrop Club
 
Posts: 16272
Images: 224
Joined: Sat May 12, 2007 8:26 pm
Location: Pea Ridge ,AR
Top

PreviousNext

Return to Build Journals

Who is online

Users browsing this forum: No registered users and 9 guests