Green Lantern- now with awning!!!

...ask your questions in the appropriate forums BUT document your build here...preferably in a single thread...dates for updates, are appreciated....

Postby Rlowell » Sat Feb 12, 2011 10:34 pm

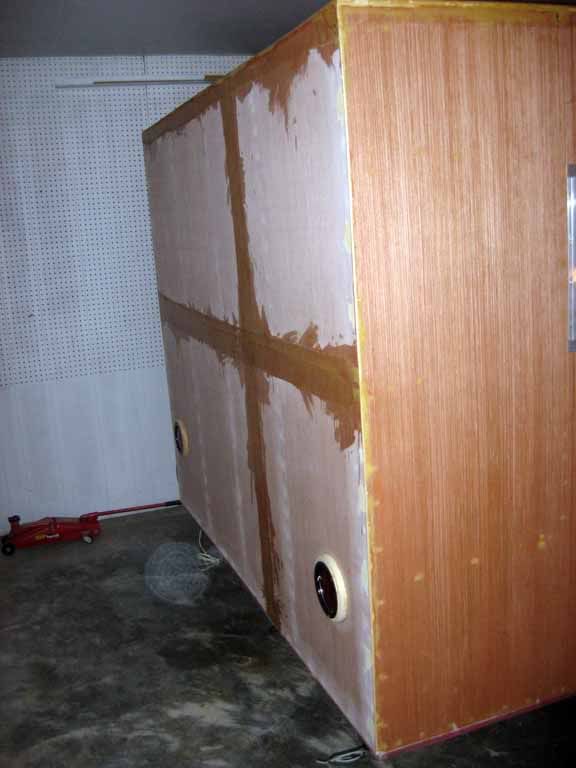
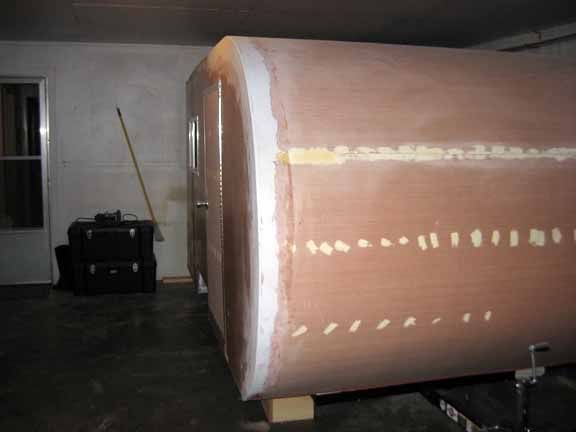
starleen2 wrote:The leg is better this weekend - and it was gorgeous weekend to do some work on the camper - Couldn't bend down to to do any trailer wiring. So I spent most of the day doing filler work - Filling in screw holes, sanding down filler , getting it prepared for the epoxy - but now the weather has to warm up some more and I can open up the garage. I need plenty of ventilation lest the neighbors think I'm running a meth lab ;)


Glad that you are feeling better.
:applause: :applause:
I am also waiting on some warmer weather so that I can start the painting process on the "KETZA" Weekender. They say we will have a few more days of very cool temp's. Oh well, what are ya gonna do...

Keep the pictures coming. You are doing a great job as always.
Rod
Plan your work...work your plan...at least that's the plan. Oh, just do it anyway!
gallery/image_page.php?album_id=1425&image_id=76342
User avatar
Rlowell
2000 Club
2000 Club
 
Posts: 2004
Images: 42
Joined: Wed May 23, 2007 12:39 pm
Location: Orlando, Fl.

Postby starleen2 » Sun Feb 13, 2011 10:43 pm

Looky what I have for the Green Lantern build – Darren B at victory graphix did these for us. Darren is a member of this forum. his work can be found at victorygraphix.com
Spectaular Job!
Image
Image
Image
Sorry for such a large picture - but the details are super. Thanks Darren :thumbsup:
User avatar
starleen2
5th Teardrop Club
 
Posts: 16272
Images: 224
Joined: Sat May 12, 2007 8:26 pm
Location: Pea Ridge ,AR

Postby droid_ca » Sun Feb 13, 2011 11:13 pm

those cups are amazing I totally love your theme you jus need to get the little lantern party lights hit,em with some paint I'm kinda curious what are your plans for an awning are going to do that logo really big... can't wait to see more
There is a world, just beyond now,
where reality runs a razor thin seam between fact and possibility;

Anywhere I roam where I lay my head is home....
Image
“Fide Canem”
Please check out my build thread
viewtopic.php?f=5&t=52816
User avatar
droid_ca
Donating Member
 
Posts: 1981
Images: 176
Joined: Thu Sep 30, 2010 5:08 am
Location: Prince George BC Canada
Top

Postby Darren » Sun Feb 13, 2011 11:50 pm

Glad you like them Scott and thanks for the complements. :thumbsup:
Image
User avatar
Darren
the camper formerly known as Victor Star
 
Posts: 1356
Images: 161
Joined: Sat Dec 03, 2005 12:09 am
Location: Shawnee, Kansas (KC)
Top

Postby High Desert » Mon Feb 14, 2011 12:28 am

Scott, those mugs are spectacular! What a great addition to the project. :thumbsup:

Darren, you do great work! :applause:
Shaun

"it's not the years honey, it's the mileage"
High Desert
Platinum Donating Member
 
Posts: 8780
Images: 27
Joined: Wed Apr 08, 2009 1:46 pm
Location: SW Washington state
Top

Postby starleen2 » Mon Feb 14, 2011 8:58 pm

Well the time has arrived – a little warmer weather! My fiberglass tape and epoxy arrived from my good friends at Raka. Got my disposable gloves, cups, spreaders, rollers, etc – all you need for applying the glass tape. I decided to use the fiberglass tape because the edges are sealed and won’t unravel. First I took a router with a round over bit to round the edges - - fiberglass doesn’t really like 90* corners. Then, using the tape, I sealed all the edges followed by a coat on the entire side. I finished by applying a skim coat of filler to hide the tape edges and to smooth everything out – one side done.
Image
Image
Image
Top, back, front, and other side to go. Once all sides are done, contoured, and sanded, It' will get a final coat to encapsulate it. Did I mention that I really do not like sanding?
User avatar
starleen2
5th Teardrop Club
 
Posts: 16272
Images: 224
Joined: Sat May 12, 2007 8:26 pm
Location: Pea Ridge ,AR
Top

Postby starleen2 » Wed Feb 16, 2011 10:36 pm

Another day and more sanding - sanding, sanding, sanding! Oh yeah - did I mention how much sanding I'm doing to this thing! But each day I'm getting closer - I need to take the door off so I can give it a good coating before paint. However this is the last major step before paint and it has to be right for that seamless look - so water just beads up and rolls off the roof, around the curves, and has a straight unobstructed path to the ground! ;)
User avatar
starleen2
5th Teardrop Club
 
Posts: 16272
Images: 224
Joined: Sat May 12, 2007 8:26 pm
Location: Pea Ridge ,AR
Top

Postby absolutsnwbrdr » Wed Feb 16, 2011 10:49 pm

Looks great Scott! It's come a long way in a relatively short amount of time!
Zach
Coming Soon...
Image Image
User avatar
absolutsnwbrdr
Donating Member
 
Posts: 2657
Images: 412
Joined: Mon Jan 25, 2010 6:10 pm
Location: Hanover, PA
Top

Postby doug hodder » Thu Feb 17, 2011 8:09 pm

Those glasses are fantastic Scott!!! Darren does great work. By the time you're done with this build, you're gonna have Popeye arms. Keep up the good work. Doug
doug hodder
*Snoop Dougie Doug
 
Posts: 12625
Images: 562
Joined: Tue Dec 14, 2004 11:20 pm
Top

Postby starleen2 » Thu Feb 17, 2011 10:33 pm

The foam for the mattress came in the other day - I cut it to size and tried it out - pretty comfy
to apply the epoxy, I found these little foam rollers
Image
They're called Whizz roller system - high density Foam. I used them first to apply the sealer on the interior panel - they worked great. So I thought I'd give em a try for the epoxy. They make several sizes. I'm using the 4" foam rollers. They are the same width of the fiberglass tape. I get about three strips down (8 oz of epoxy per strip) with a single roller before it starts to set on me. After the first strip of tape applied - I figured out the best method. First I lay down a good rolled rich strip of epoxy then apply the tape - then roll over the top until the fiberglass is wetted out. Next, I use a squeegee to smooth out the edges. Then sand the edges to get a level edge - then apply a second top coat. I repeat the same process on every seam and edge. I ordered a 50 yrd roll - I think I have about 5 yds left!
User avatar
starleen2
5th Teardrop Club
 
Posts: 16272
Images: 224
Joined: Sat May 12, 2007 8:26 pm
Location: Pea Ridge ,AR
Top

Postby StPatron » Thu Feb 17, 2011 11:44 pm

Thanks for the tips, Scott. I'm saving that info. so I can refer to it later. :thumbsup:
User avatar
StPatron
Donating Member
 
Posts: 748
Images: 297
Joined: Tue Dec 15, 2009 8:38 pm
Location: OK
Top

Postby Loader » Fri Feb 18, 2011 7:30 am

Looking good Scott. :thumbsup: :thumbsup:

Where did you order your foam from?
Earl & Kerry

"Loader"

Blue Yonder Build Thread - viewtopic.php?f=50&t=42611

ImageImage
User avatar
Loader
Platinum Donating Member
 
Posts: 1584
Images: 245
Joined: Tue Apr 26, 2005 2:33 pm
Location: Fort Worth, Texas
Top

Postby titanpat57 » Fri Feb 18, 2011 8:16 am

WOW!!


Just read through the whole build....nice work Scott!

High end details...that's what makes it!

I see you use GSU...I love that program too!....so easy to draw it now and build it.

good luck, Pat
titanpat57
Donating Member
 
Posts: 82
Images: 139
Joined: Mon Jan 10, 2011 9:48 pm
Location: Beacon NY
Top

Postby starleen2 » Fri Feb 18, 2011 5:17 pm

Loader wrote:Looking good Scott. :thumbsup: :thumbsup:

Where did you order your foam from?

I have an account with a foam supplier from the old upholstery days. I have kept the account active for over 23 yrs-so they dont mind my small orders. I have mentioned many times that I'm going to start offering mattresses to teardroppers. I have talked to a sales rep to make that a reality.
User avatar
starleen2
5th Teardrop Club
 
Posts: 16272
Images: 224
Joined: Sat May 12, 2007 8:26 pm
Location: Pea Ridge ,AR
Top

Postby Rlowell » Sat Feb 19, 2011 3:21 am

starleen2 wrote:
Loader wrote:Looking good Scott. :thumbsup: :thumbsup:

Where did you order your foam from?

I have an account with a foam supplier from the old upholstery days. I have kept the account active for over 23 yrs-so they dont mind my small orders. I have mentioned many times that I'm going to start offering mattresses to teardroppers. I have talked to a sales rep to make that a reality.


What a good idea. I am just about ready for my mattress. What do you have in mind, and what type of price range?
Rod
Plan your work...work your plan...at least that's the plan. Oh, just do it anyway!
gallery/image_page.php?album_id=1425&image_id=76342
User avatar
Rlowell
2000 Club
2000 Club
 
Posts: 2004
Images: 42
Joined: Wed May 23, 2007 12:39 pm
Location: Orlando, Fl.
Top

PreviousNext

Return to Build Journals

Who is online

Users browsing this forum: Bing [Bot] and 9 guests