
 May do that on mine !!!
![]() by eaglesdare » Sun Apr 03, 2011 3:23 pm
by eaglesdare » Sun Apr 03, 2011 3:23 pm


![]() by eaglesdare » Sun Apr 03, 2011 5:12 pm
by eaglesdare » Sun Apr 03, 2011 5:12 pm


![]() by GPW » Sun Apr 03, 2011 5:12 pm
by GPW » Sun Apr 03, 2011 5:12 pm
 ) That's why I wanted to build mine inside in the Studio , so I could take my time ... We've got a lot riding on these (time, money and expectations) ... wanted to do my Best work ...

![]() by eaglesdare » Sun Apr 03, 2011 5:21 pm
by eaglesdare » Sun Apr 03, 2011 5:21 pm

![]() by eaglesdare » Sun Apr 03, 2011 5:26 pm
by eaglesdare » Sun Apr 03, 2011 5:26 pm
![]() by GPW » Sun Apr 03, 2011 5:27 pm
by GPW » Sun Apr 03, 2011 5:27 pm

![]() by eaglesdare » Sun Apr 03, 2011 5:31 pm
by eaglesdare » Sun Apr 03, 2011 5:31 pm
![]() by GPW » Sun Apr 03, 2011 5:34 pm
by GPW » Sun Apr 03, 2011 5:34 pm

![]() by Ratkity » Sun Apr 03, 2011 5:52 pm
by Ratkity » Sun Apr 03, 2011 5:52 pm
eaglesdare wrote:yeah and that one pic where hubby and friend are smoothing the top, they are both on a ladder!
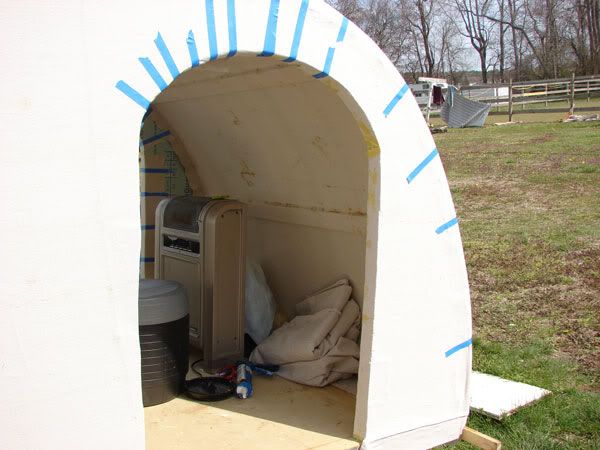
it is pretty big inside. i can stand up but i do have to stoop.
thank you gpw for the kind words.
![]() by eaglesdare » Sun Apr 03, 2011 6:29 pm
by eaglesdare » Sun Apr 03, 2011 6:29 pm
![]() by RAYVILLIAN » Sun Apr 03, 2011 7:18 pm
by RAYVILLIAN » Sun Apr 03, 2011 7:18 pm

![]() by eaglesdare » Sun Apr 03, 2011 7:51 pm
by eaglesdare » Sun Apr 03, 2011 7:51 pm
but by the time i am done, you will never see all those strange cuts i made to fit it into place.
![]() by RAYVILLIAN » Sun Apr 03, 2011 8:11 pm
by RAYVILLIAN » Sun Apr 03, 2011 8:11 pm
![]() by GPW » Sun Apr 03, 2011 8:12 pm
by GPW » Sun Apr 03, 2011 8:12 pm
 Hope the weather is Good for you !!! Can't wait to see those doors !!!!
 Users browsing this forum: No registered users and 6 guests