Frustration is setting in.....

Anything to do with mechanical, construction etc

Frustration is setting in.....

Postby WildTexan » Mon Apr 04, 2011 9:20 am

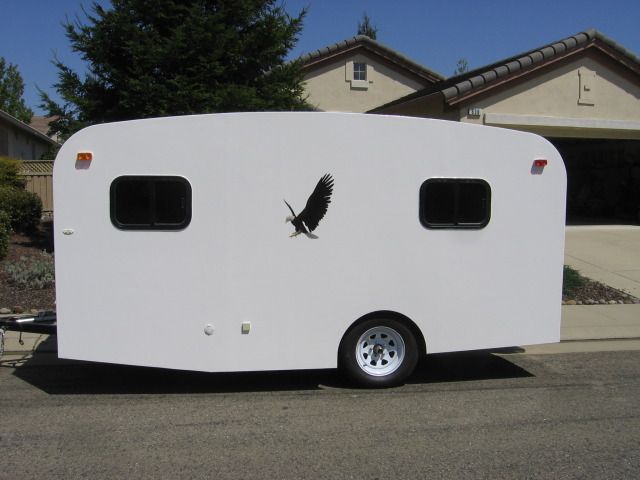
It really shouldn't take at least 2 times to get it right at every step. Framed the galley lid. Doubting it will fit properly. Lol. Not even sure I did it right. Not sure I've done any of the build right. Lol.
User avatar
WildTexan
Teardrop Advisor
 
Posts: 77
Images: 77
Joined: Thu Nov 18, 2010 3:33 pm
Location: Hickory Creek, TX

Postby WildTexan » Mon Apr 04, 2011 9:20 am

Forgot a couple pics.
User avatar
WildTexan
Teardrop Advisor
 
Posts: 77
Images: 77
Joined: Thu Nov 18, 2010 3:33 pm
Location: Hickory Creek, TX

Postby GPW » Mon Apr 04, 2011 9:29 am

Looking GOOD Tex ... :thumbsup:
There’s no place like Foam !
User avatar
GPW
Gold Donating Member
 
Posts: 14920
Images: 546
Joined: Thu Feb 09, 2006 7:58 pm
Location: New Orleans
Top

Postby rbeemer » Mon Apr 04, 2011 9:36 am

When frustration rears its ugly head, step back, have a beer and remember why you are building one.

If you look at my invisi-tear you will notice it has been 4 years in the making.
Rick

If ducks had scales, would fish quack?
rbeemer
500 Club
 
Posts: 997
Images: 13
Joined: Sun Apr 03, 2005 11:35 pm
Location: Oregon, Tigard
Top

Postby Mightydog » Mon Apr 04, 2011 12:01 pm

rbeemer is exactly right.

When you start getting tired and frustrated, stop work or you'll end up making more mistakes or, worse yet, hurt yourself.

Our first hatch is still parked out at the side of the garage. It was juuuuuuust a bit too big. We re-built based on what we had learned with the first hatch and came out with a much better product the second time. Just as Norm on New Yankee Workshop does, we had to build a prototype. That's how we refer to it, "...in the prototype we built earlier..." No one needs to know it was a mistake.
Mightydog
1000 Club
1000 Club
 
Posts: 1220
Images: 0
Joined: Tue Aug 09, 2005 7:21 pm
Top

Postby gregp136 » Mon Apr 04, 2011 12:36 pm

We did the hatch 3 times. Yes, it was frustrating, but looking back, it was worth it.
Image
User avatar
gregp136
The 300 Club
 
Posts: 329
Images: 100
Joined: Sun Jan 03, 2010 8:11 am
Location: West Allis, Wisconsin
Top

Postby caseydog » Mon Apr 04, 2011 1:01 pm

The get the size and shape of my hatch just right, I took my two side pieces, clamped them to the walls with 1/8 inch spacers, and worked them with a planer and belt sander to match the walls perfectly.

Then, i measured for each cross piece separately, cut them, and did a dry fit to make sure my fit was right.

Then, I took the hatch pieces, assembled them, and put the hatch back in place with clamps and spacers, and let the glue dry.

Image

I also skinned the hatch on the TD.

CD
Image

My build journal is HERE
User avatar
caseydog
Platinum Donating Member
 
Posts: 12420
Images: 515
Joined: Tue Jan 16, 2007 1:44 pm
Top

Postby WildTexan » Mon Apr 04, 2011 1:34 pm

Thanks for the thoughts.

@ CD- I meassured and cut my hatch the same way. I have a little bit of a tweak I can't seem to fix. I don't have a planer or a belt sander so my hatch ribs aren't "perfect" with the side of the trailer. I think my spacing around the hatch is too big. Only one way to find out. LOL! :worship:
I like your idea of leaving the galley open. I might steal that from you. LOL!
User avatar
WildTexan
Teardrop Advisor
 
Posts: 77
Images: 77
Joined: Thu Nov 18, 2010 3:33 pm
Location: Hickory Creek, TX
Top

Postby caseydog » Mon Apr 04, 2011 2:55 pm

I live just across the lake from you. So does PlanoVet. Let us know if we can help in some way. We'll try.

I have a garage full of tools. I'm sure we could work something out if you need to use something.

CD
Image

My build journal is HERE
User avatar
caseydog
Platinum Donating Member
 
Posts: 12420
Images: 515
Joined: Tue Jan 16, 2007 1:44 pm
Top

Postby WildTexan » Mon Apr 04, 2011 3:06 pm

I appreciate the offer. I have a guy in my neighborhood that built one about 8 years ago. I think I've worn out my welcome though. LOL! I go over there a lot to ask questions and just to "look" at it. Up till now I really haven't had any problems, but now I'm panicing about putting on the roof, hatch, and crossing my fingers it doesn't leak. How did you attach your roof? I was originally going to use FRP, but my buddy (who is also building a TD) convinced me to use aluminum. Haven't made a decision yet.
User avatar
WildTexan
Teardrop Advisor
 
Posts: 77
Images: 77
Joined: Thu Nov 18, 2010 3:33 pm
Location: Hickory Creek, TX
Top

Postby caseydog » Mon Apr 04, 2011 6:00 pm

The one thing I would do differently if I were to do it again, is I would skin the roof first with some thin plywood, like a thin luan sheeting, then put my FRP over that.

I also kind of messed up one small edge.

I have only leaked once, and my TD has been towed through some heavy rains. I still don't know why it leaked that one time.

I store my TD in the garage, so the FRP doesn't see a lot of sun or weather. I don't know how well it would hold up if it was stored outside.

Oh, and my pass-trough has a solid removable panel. I would use a canvas panel if I were to do it again. Much easier to remove and tuck out of the way.

CD
Image

My build journal is HERE
User avatar
caseydog
Platinum Donating Member
 
Posts: 12420
Images: 515
Joined: Tue Jan 16, 2007 1:44 pm
Top

Postby WildTexan » Mon Apr 04, 2011 6:33 pm

I plan to store my in the garage too (the only room that's still mostly mine). I like the look of the aluminum too. Guess I need to worry about this galley lid first. Lol. I really am at a loss. I'm not sure what to do next. I'm gonna try it more like yours. I've already cut the notch for the weather stripping in the side walls. Will that throw off how it lines up?
User avatar
WildTexan
Teardrop Advisor
 
Posts: 77
Images: 77
Joined: Thu Nov 18, 2010 3:33 pm
Location: Hickory Creek, TX
Top

Postby WildTexan » Mon Apr 04, 2011 9:55 pm

@Slow----I never thought about it not EVER being done. I guess I'll name it "Work In Progress". Lol. I will have to rebuild the hatch at least one more time. Currently it tweaked somehow by about 1/4 inch. I promise me throwing it across the yard had no effect on it. Lol. I suppose I can move on to wiring and come back to the hatch. Theres plenty more to do before I HAVE to have a hatch. Lol
User avatar
WildTexan
Teardrop Advisor
 
Posts: 77
Images: 77
Joined: Thu Nov 18, 2010 3:33 pm
Location: Hickory Creek, TX
Top

Postby Miriam C. » Mon Apr 04, 2011 10:36 pm

:o :lol: Depending on where you have a 1/4" off it may not matter or you have it lined up different. My whole camper is off and really the hatch did something bad. I let it hang and it recovered mostly. I trimmed it before I realized how off it was.. :oops: Then I got it in my head that this was practice and would fall apart going down the road.... I still have it, it is still tweaked a bit but oh welllllllll.....

Most people worry about their builds unless they are experenced builders. Just remember "it is a box". ;)
“Forgiveness means giving up all hope for a better past.â€
User avatar
Miriam C.
our Aunti M
 
Posts: 19675
Images: 148
Joined: Wed Feb 15, 2006 3:14 pm
Location: Southwest MO
Top

Postby WildTexan » Tue Apr 05, 2011 9:58 am

Lets see if I can insert a pic.

Image
User avatar
WildTexan
Teardrop Advisor
 
Posts: 77
Images: 77
Joined: Thu Nov 18, 2010 3:33 pm
Location: Hickory Creek, TX
Top

Next

Return to Teardrop Construction Tips & Techniques

Who is online

Users browsing this forum: No registered users and 2 guests