exterior to be painted...

Anything to do with mechanical, construction etc

exterior to be painted...

Postby oklahomajewel » Fri Feb 10, 2006 7:48 pm

Okay, I am not going to use Aluminum on the exterior of my teardrop and want to paint it some combination of Crimson and Cream, or a deep red and a light cream color.

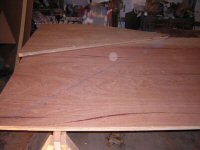
I don't have my plans handy, left them up at work, but what kind of wood or something, would I use on the roof that is bendable, durable for the weather, paintable and I'm making 5' wide so I would have to peice it somehow, right?

As always, cost is a factor....


thanks ===julie
Some things are way over my head !! ...but it keeps me looking UP!
oklahomajewel
3000 Club
3000 Club
 
Posts: 3693
Images: 82
Joined: Fri Jul 22, 2005 11:12 am
Location: McLoud, OK

Postby Hardin Valley Magic » Fri Feb 10, 2006 8:00 pm

Julie, For the top of mine I used a simple sheet of Luan and glued and screwed it down. Where the joints are I used bondo automotive putty. That was also used on the screw heads. Sanded down smooth and used zinsser primer. It is oil based and is a sealer primer. After 2 coats (less than a gallon) I sanded smooth and painted the roof with barn and fence paint found at Lowe's. It is oil based and when put on with a foam roller it came out shiney and streakless.
As for worries about water. I caulked the side edges with clear paintable silicon.
Worked for me. check out my gallery or www for pics of the finished product..
Hope this helps. :thumbsup:
Last edited by Hardin Valley Magic on Sat Feb 11, 2006 8:41 pm, edited 2 times in total.
aka Steven D.
User avatar
Hardin Valley Magic
Donating Member
 
Posts: 548
Images: 45
Joined: Wed Sep 14, 2005 9:45 pm
Location: Knoxville Tenn.

Postby Boodro » Fri Feb 10, 2006 8:38 pm

Julie ,did you read my post to your question on FRP in the thread about FRP? Have you changed your mind already???? :shock: Oh silly me, of course you did, that goes on all the time when dealing with teardrop builders , does'nt it??? :? :? :? :? :? :? :? :? :? :? :? :? :? :? :? :? :? :? :? :? :? :? :? :? :? Oh well keep on builin!!! :applause: :applause:

Julie I will say that FRP is a JOY to work with , It cuts very easy, it bends even easier , drills & glues & screws very easy too! :thumbsup:
Easy to wash when dirty too.
We are all travelers in this world , from the sweet grass to the packin house , birth till death , we travel between the eternities . ( Robert Duvall as Prentiss Ritter)
User avatar
Boodro
1000 Club
1000 Club
 
Posts: 1052
Images: 101
Joined: Sun Oct 10, 2004 9:35 pm
Location: Sylvania, Ohio
Top

Exterior to be painted

Postby gerry boucher » Fri Feb 10, 2006 9:49 pm

Hi Julie,
I used 2 layers of 1/8" luan screwed to the frame. The curve, is a garage door track frame, and the luan bent to it faily well. I bolted it in the back with 3/8 and some metal stapping then painted everything bright red. Used Ace Hardware Hi Gloss Red. On the lengthwise seam I used the plastic weather stripping from the door also painted red, blends in well.
Gerry
User avatar
gerry boucher
Teardrop Master
 
Posts: 105
Images: 55
Joined: Tue Jan 11, 2005 9:28 pm
Top

Postby oklahomajewel » Fri Feb 10, 2006 11:17 pm

Hardin Valley Magic wrote: For the top of mine I used a simple sheet of Luan and glued and screwed it down. Where the joints are I used bondo automotive putty. That was also used on the screw heads. Sanded down smooth and used zinsser primer. It is oil based and is a sealer primer. :thumbsup:


That sounds good to me... so is your's 5' wide also? Did you have a seam running long ways across the top and then about a 1' wide piece to finish it, and the use bondo on those seams?

That's what I'm picturing.

Thanks!!! :)
Some things are way over my head !! ...but it keeps me looking UP!
oklahomajewel
3000 Club
3000 Club
 
Posts: 3693
Images: 82
Joined: Fri Jul 22, 2005 11:12 am
Location: McLoud, OK
Top

Postby Hardin Valley Magic » Fri Feb 10, 2006 11:25 pm

Mine is actually 49 3/16" wide. So there for i had to run the luan across it. I ended up with 2 1/2 pieces for the top. The seams run across it.
The putty that I used was sold at a local automotive parts store (Advance Auto). It was in a red and white tube can't think of the name right now. Just used a spreader to skim it across the seams and where the screws pulled down a dip in the luan. Feathered it back about 1 1/2" - 2 1/2". away from each.
Hope that helps. :)
aka Steven D.
User avatar
Hardin Valley Magic
Donating Member
 
Posts: 548
Images: 45
Joined: Wed Sep 14, 2005 9:45 pm
Location: Knoxville Tenn.
Top

Postby doug hodder » Sat Feb 11, 2006 12:08 am

Julie...you can always use baltic birch ply...comes in 5x5 sheets in 1/8" thick ...just make a good butt joint on the material and if you want...put some glass cloth tape and epoxy on it...epoxy on the rest of the exterior can be sanded down to a car like finish and top coated...not necessary, but you probably could get by with a good quality urethane to seal it up...Doug
doug hodder
*Snoop Dougie Doug
 
Posts: 12625
Images: 562
Joined: Tue Dec 14, 2004 11:20 pm
Top

Postby EZ » Sat Feb 11, 2006 1:38 pm

Julie,

Check out the thread below regarding using latex paint for boats:

http://tnttt.com/viewto ... highlight=

I brushed on a very thinned coat of epoxy on my 6mm Luan plywood homebuilt sailboat then painted it with 100% latex exterior primer and color. The finish is nice, it is waterproof and the thinned epoxy gets into the Luan fibers and helps bind them making it a little stronger. I am going to do the same with 6mm Luan for the roof of my camper but I purposely don't have any tight bends in my design.

Ed
User avatar
EZ
Donating Member
 
Posts: 427
Images: 72
Joined: Sun Jan 15, 2006 12:32 am
Location: Circle Pines, Minnesota
Top

Postby surveytech » Sat Feb 11, 2006 4:23 pm

I too am painting my tear.
If you take your time you can make the seam not visible.
It's just lots of sanding!
Here is the first shot after a little bit of bondo to fill the holes.....
Image

After the side trim is installed and a little more smoothing of the bondo...

Image

And after two coats of oil based primer.........

Image

I used oil primer on everything and will be using oil finish paint as well.
It takes a bit for it to dry even here in Florida where the weather has been in the 60's to 70's. If temps are lower expect longer drying times.
Latex paint would probably dry quicker.
The two seams that I have are not visible now. Time will tell how the hold up to the weather and travel.
Hope this helps.

Walter
surveytech
Donating Member
 
Posts: 776
Images: 6
Joined: Fri Apr 29, 2005 7:13 pm
Location: kissimmee, florida
Top

Postby Hardin Valley Magic » Sat Feb 11, 2006 6:00 pm

Walter, Very nice!! :thumbsup: :thumbsup:
aka Steven D.
User avatar
Hardin Valley Magic
Donating Member
 
Posts: 548
Images: 45
Joined: Wed Sep 14, 2005 9:45 pm
Location: Knoxville Tenn.
Top

Postby brickz » Sat Feb 11, 2006 7:38 pm

Julie, you could also add some strength with a strip of fiberglass tape and epoxy resin. a little messier and leaves a slightly raised seam that you can then smooth over to a less noticeable bulge with the Bondo. I did this and if you look close you can see the seams but I decided it was worth the extra strength. After two coats primer and three finish coats of oil base it's a little less noticable but still won't be as good as Walter's.
"A single accurate measurement is worth a thousand expert opinions" - Admiral Grace Hopper
User avatar
brickz
Donating Member
 
Posts: 100
Images: 24
Joined: Mon Dec 20, 2004 4:39 pm
Location: Gilbertsville NY
Top

Postby Hardin Valley Magic » Sat Feb 11, 2006 8:56 pm

Julie here is the final product. sorry no pics of it before primer and paint. Sorry.
Image
aka Steven D.
User avatar
Hardin Valley Magic
Donating Member
 
Posts: 548
Images: 45
Joined: Wed Sep 14, 2005 9:45 pm
Location: Knoxville Tenn.
Top

Postby cracker39 » Mon Feb 13, 2006 9:05 am

From those articles on latex paint, it sounds like my decision to use eurothane for sealing the plywood, a good latex primer over that, and latex acrylic house paint for the finish will work. That's a lot of painting, but I'll be spraying and it will go quickly...I'd say 2-3 days work.
Dale

Sometimes I pretend to be normal. But, that gets boring...so I go back to being me.

Squidget Pop Top Build Pages http://www.thesquidget.com/ptbuild/ptbuild.html

Squidget and Pop Top Plans Info and Photos: http://www.TheSquidget.com
User avatar
cracker39
3000 Club
3000 Club
 
Posts: 3069
Images: 233
Joined: Thu Jun 30, 2005 2:18 pm
Location: Lake Alfred, Florida, USA
Top

Postby Jimbo » Mon Feb 13, 2006 6:42 pm

Hardin Valley Magic wrote:Julie here is the final product. sorry no pics of it before primer and paint. Sorry.
Image


Did I read right that your roof is painted? It looks like a sheet of aluminum. Dang good job!!!
Started many, finished none... Bought a TTT <Sigh> ;)
User avatar
Jimbo
2nd Teardrop Club
 
Posts: 290
Images: 1
Joined: Sun Apr 18, 2004 5:56 pm
Location: Kentucky
Top

Postby Hardin Valley Magic » Mon Feb 13, 2006 7:26 pm

Yup, it sure is barn and fence paint from Lowe's alum in color. 8) 8)
aka Steven D.
User avatar
Hardin Valley Magic
Donating Member
 
Posts: 548
Images: 45
Joined: Wed Sep 14, 2005 9:45 pm
Location: Knoxville Tenn.
Top

Next

Return to Teardrop Construction Tips & Techniques

Who is online

Users browsing this forum: Bing [Bot] and 0 guests