1982 1500 Play-Mor questions

General Discussion about almost anything Teardrop or camping related

Postby 2bits » Fri May 20, 2011 11:39 pm

Congrats! I think we are all looking forward to the pics! :twisted:
Thomas

Image
User avatar
2bits
2bit Member
 
Posts: 5132
Images: 8
Joined: Thu Dec 27, 2007 6:04 pm
Location: Lake Tawakoni, TX

The Paphut is Home!! and Tons of Questions

Postby papmom35 » Sun May 22, 2011 9:10 pm

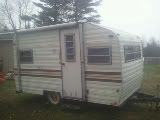
As I mentioned before, my Play-Mor 1500, AKA the Paphut was delivered on Friday nite. I was finally able to get out there this evening and take some pics. Here is the link to my photobucket album:

http://s899.photobucket.com/albums/ac19 ... -Mor_1500/

I would put all of them in my personal album on this site but I didn't realize you have to do it one by one AND you MUST put a title on them. I just finished putting titles on 49 pics for photobucket!! That's a project for another day!!

I've had a chance to really start getting to know her. I know that the fridge has got to go but my friend and I tried to slide it out of it's cubby hole but we couldn't do it. It appears there's some sort of plate on the bottom of the fridge that is getting caught on the "lip" of the cubby. I'm going to have to remove the trim around the cubby, the vent trim and then hopefully can tip it forward enough to get the plate over the lip. Once I do get it out, I plan to replace it with a much smaller fridge and was thinking of installing a shelf over it to maybe put a small AC unit on? Could I put a drip pan under the AC unit to catch the water or does there have to be a hose routed to the outside? Also, do I have to vent these room AC units?

The brown paint on the cabinets has to go as well but that can wait for a while.

The outlet over the sink area and the light on the side of overhead cabinet and facing the bench don't work. Please let it be a fuse problem!!

I probably won't be using the holding tank and wonder if it can be removed? The tubing is not hooked up to the sink anyway-at some point it was cut.

My brother says I can get a harness kit for the tow lights and just replace what is there and has been cut under the trailer rather than trying to splice it back together.

The bench bed is a LOT smaller than I thought-more like an oversized twin but not even a full size. Whoo boy-that's going to be a tough fit with 3 dogs and no they don't sleep in crates :roll:

It needs a very good cleaning on the outside. Not sure what I should use for that job-just soap and water or a special cleaner?

I'm pretty sure it needs a total redo on the sealing of all seams on the outside. That will be fun!! :thumbdown:

Wheel hubs (?) or whatever that part of the wheel is called needs a thorough cleaning, rust removal and repainting as do the tongue and the part of the chassis that forms a lip that the trailer sits in.

There are a lot of trim parts missing. Worth replacing with aluminum trim?

I need to find a new door window unit. The glass is cracked in multiple places and the hinge mechanism that allows the jolousie type windows to open and close is totally broken and I don't think its fixable? where would i find such a replacement unit?

There are 2 major holes/slits in the aluminum siding. Not sure how to repair this.

Looking at the vent from the roof it looks like it has pulled away from the roof on one side. Not sure I can reach it from a ladder-maybe but will the roof hold my weight?

Will I be able to install a shelf at the foot of the bench to hold a DVD player? Are there studs somewhere on these things?

That's it for now! Can't wait to get started cleaning her up next weekend!!

Oh, almost forgot a funny story that happened today:

Why Stablizing Jacks are Needed on a One Axle Trailer or a Lesson in Physics

So my sister came over this morning to check out her "investment". Loved it!! I pulled out the bench to show her how it makes a bed and we were wondering how uncomfortable the cushions might be to sleep on so of course we had to sit down to try them out-both of us at the same time!! Well, you all know what happened next! As it tipped backwards we jumped up and moved forward-the rig started correcting itself and then BAM! It went down hard on the front wheel/hitch thingy. We ran outside and I saw the wheel on it's side on the driveway. The post that it goes in was imbedded a bit into the block of wood it had all been resting on. I checked to see if there was any obvious damage and of course tried lifting it myself :lol: . No damage that i could see. Later on, my neighbor came over to check out the camper and when I told him what happened he reached down and lifted the whole tongue right up!! I quickly got the wheel put back in place. Whew!! I now have 2 jacks in the rear of the trailer and it's much better but not perfect. Live and learn!!
Pappin' in Pink (well, we will be sometime in the future when I can paint my new Paphut!!)
Image
User avatar
papmom35
Teardrop Master
 
Posts: 120
Joined: Sat Mar 05, 2011 1:17 pm
Location: MA

Postby mary and bob » Sun May 22, 2011 9:51 pm

Can you seal up those cuts in the siding with silicone? Some sanding or wire brush on the rust and paint with Rustoleum or similar paint. My glass guy told me that trailers are supposed to use "tempered" glass in the windows which is expensive, so when I needed a piece replaced he said don't say it goes in a camper. Done that forgot the rear jacks thing so don't feel bad! Keep a couple mousetraps set in it, they can get in anywhere. I've seen replacement crank mechanisms in our local Ace hardware store for the windows. Need one for our camper so have to see if they have one I can use. I know there's places selling used parts & windows but can't remember their names. Maybe a google search will help, but someone here will probably come on with the info. Sounds like a lot of minor things to do. Bob
mary and bob
500 Club
 
Posts: 822
Images: 3
Joined: Sun Nov 18, 2007 8:03 pm
Location: chatham n.y.
Top

Re: The Paphut is Home!! and Tons of Questions

Postby frank_a » Mon May 23, 2011 7:34 am

papmom35 wrote:I've had a chance to really start getting to know her. I know that the fridge has got to go but my friend and I tried to slide it out of it's cubby hole but we couldn't do it. It appears there's some sort of plate on the bottom of the fridge that is getting caught on the "lip" of the cubby. I'm going to have to remove the trim around the cubby, the vent trim and then hopefully can tip it forward enough to get the plate over the lip. Once I do get it out, I plan to replace it with a much smaller fridge and was thinking of installing a shelf over it to maybe put a small AC unit on? Could I put a drip pan under the AC unit to catch the water or does there have to be a hose routed to the outside? Also, do I have to vent these room AC units?

The outlet over the sink area and the light on the side of overhead cabinet and facing the bench don't work. Please let it be a fuse problem!!

I probably won't be using the holding tank and wonder if it can be removed? The tubing is not hooked up to the sink anyway-at some point it was cut.

My brother says I can get a harness kit for the tow lights and just replace what is there and has been cut under the trailer rather than trying to splice it back together.

It needs a very good cleaning on the outside. Not sure what I should use for that job-just soap and water or a special cleaner?

I'm pretty sure it needs a total redo on the sealing of all seams on the outside. That will be fun!!

Wheel hubs (?) or whatever that part of the wheel is called needs a thorough cleaning, rust removal and repainting as do the tongue and the part of the chassis that forms a lip that the trailer sits in.

There are a lot of trim parts missing. Worth replacing with aluminum trim?

I need to find a new door window unit. The glass is cracked in multiple places and the hinge mechanism that allows the jolousie type windows to open and close is totally broken and I don't think its fixable? where would i find such a replacement unit?

There are 2 major holes/slits in the aluminum siding. Not sure how to repair this.

Looking at the vent from the roof it looks like it has pulled away from the roof on one side. Not sure I can reach it from a ladder-maybe but will the roof hold my weight?

Will I be able to install a shelf at the foot of the bench to hold a DVD player? Are there studs somewhere on these things?

That's it for now! Can't wait to get started cleaning her up next weekend!!


Isn't it great to have it home to play with and think about what to do with it Pam? Good for you. I didn't have time to look at all your pics, but let me offer my 2 cents on your comments here.

Let me know what you find for a small AC unit that would fit above a fridge. I have 2 thoughts about catching water - #1, how often will it be used? If not often, drip pan. #2, save the hassle of remembering to empty a drain pan and just install a hose to the outside. #2 is what I would do.

Where is your electrical "stuff?" I take it you have 12V and 110V. How about some pics of junction boxes, terminal boards, etc.? You're going to have one for 12V and one for 110V. They should be separate.

The holding tank in Spot was removed. Easy to do. If you don't need it take it out! (You might want to do it in a way it could be easily re-installed - ya never know...)

Of course you can get a harness for the trailer lights, just not one that is specific to your trailer. Does it have electric brakes? Will you need anything more that stop/turn/tail? If just stop/turn/tail, that's pretty easy stuff. Usually you'll find 4 wire harness available any number of places, some of it 16 gauge, some of it 14 gauge. I generally go for the heavier gauge myself. White is ground, brown is stop & tail, green is right, yellow is left turn. 12V wiring is easy to do if you just take your time. I am completely re-wiring Spot, for instance, all the 12V wiring is coming out and being replaced with new stuff, and I am adding 110V to it.

I'm a firm believer in environmentally friendly heavy duty cleaners for initially real dirty stuff. I use Purple Power personally, but that's what I would do. Get it wet, spray some cleaner on it and scrub till you're happy!

I think you can search this site for seam sealing. I haven't yet, but noticed some minor water stains inside Spot, so will be researching that too.

I think Bob gave you great advice on your window and siding problems.

I would NOT trust the roof to hold your weight or anyone's. No need for surprises!

I'm sure you can install shelving. Certainly lots of folks do. Ask someone at a hardware store what they suggest for something like that. Is there a Play-Mor web site? If there is, register and ask those folks!

Best of luck with it Pam.

Frank
Tiny travel trailer - 1979 Sunline Sunspot. Tow vehicles: 2008 Subaru AWD Outback, 2009 GMC 4WD Canyon. For fun: 1923 T bucket hot rod, 1962 Power Cat tunnel hull speed boat. 1974 Dodge Dart waiting for renovation.
User avatar
frank_a
Teardrop Master
 
Posts: 250
Images: 34
Joined: Thu Aug 26, 2010 11:34 am
Location: Coeymans Hollow, NY
Top

Postby Cliffmeister2000 » Mon May 23, 2011 8:44 am

Hey, Pam, I have a Papillon too! Jaimee.

Good day

Image


Bad day
Image


What's with the camera?

Image


Hiking the wilds of Chiricahua National Monument in Southeastern Arizona with one of our other dogs, Joey

Image


Exploring secret caves

Image


The whole family!

From the left: Joey, Moby, Jaimee, My beloved, Gina, and our newest, Rommel.

Image
God Bless

Cliff

♥God. ♥People.
1 John 4:9-11

My Teardrop build pictures
User avatar
Cliffmeister2000
Titanium Donating Member
 
Posts: 3622
Images: 157
Joined: Thu Jul 26, 2007 10:18 pm
Location: Phoenix, AZ
Top

Postby papmom35 » Mon May 23, 2011 9:01 am

Hey Cliff!! That is soooo cool! Jaimee is adorable-but then ALL paps are IMHO!! You should have seen the one I fostered a few years ago-25 lbs, no fringe except a little on her tail, a belly as big as bouda! Her name was baby and I thought she was the sweetest cutest pap I ever set eyes on! Her name is Clovis now, she lives in Brooklyn, NY and is racing towards her UDC title. She got her CDC title in her first 3 tries about 6 months after adoption.
Now that I have a trailer, I'm hoping I can tour the country in a few years chasing agility trials. Maybe we'll meet up!!

Frank-great tips! I'll check out Purple Power for sure. I will take more pics of the inner workings. For some reason I don't think I have 12V in there.
Barry from TJ suggested a roll on roof rubber paint from lowes. Can't hurt.
I'm also going to hit the local junk yard to find some sissor jacks and find someone who can weld them to the bottom rear of the frame (also Barry's idea). There are no brakes yet on the trailer so all I have to do right now is replace the 4 flat harness with a new one and I'll look for the heavier guage. What about the lites in the back way up top? When I take the tail lights off will I see their wiring coming down and connecting to the tail lights?
Pappin' in Pink (well, we will be sometime in the future when I can paint my new Paphut!!)
Image
User avatar
papmom35
Teardrop Master
 
Posts: 120
Joined: Sat Mar 05, 2011 1:17 pm
Location: MA
Top

Postby frank_a » Mon May 23, 2011 9:23 am

Pam, I buy Purple Power in the gallon size, and then use old spray bottles (like Windex) for use. Generally, just because it's so strong, I keep one spray bottle full strength, then another one 50% water.

I never even thought about jacks. Hmm, more expense...

I plan on re-wiring my trailer sometime over the next week. There has to be wire going to those marker lights up top. My marker lights on top don't work now but will soon. Sometimes on old trailers it's just the bulb. One of the things I do on all my 12V wiring (just like 110V) is run a ground to EVERY light. I find that solves a lot of future problems before they even occur!

When I rewire, I will do it to a fused terminal block.

Power from the harness will go to one row of screws, then leads for lights will go off the other corresponding end. This makes it very easy to track problems, and provides a fuse for each function. Also, you want a separate grounding strip, from which ground wires can run to each light. I'll be installing a seven wire harness, so 6 will go to power and fuses and ground will go to the ground strip. I plan on having brakes at some point, and want to run an auxiliary line for back up lights, something I think may come in very handy...

Best of luck!

Frank
Tiny travel trailer - 1979 Sunline Sunspot. Tow vehicles: 2008 Subaru AWD Outback, 2009 GMC 4WD Canyon. For fun: 1923 T bucket hot rod, 1962 Power Cat tunnel hull speed boat. 1974 Dodge Dart waiting for renovation.
User avatar
frank_a
Teardrop Master
 
Posts: 250
Images: 34
Joined: Thu Aug 26, 2010 11:34 am
Location: Coeymans Hollow, NY
Top

Random Observations

Postby Engineer Guy » Mon May 23, 2011 11:34 am

Here's my $0.02 worth based on experience with all of 2 Trailers.

Running Lights

On my Play-Mor, and on many TTs, Running Lights are wired in parallel. The +12 VDC [only] goes into one Light, and out of that Light to the next one. You'll see a pair of little 'v'-shaped teeth. One bites through the Wire Insulation to feed the Light, and the adjacent little 'v' also cuts into the Insulation to go on to the next Light. Meanwhile, the screw[s] holding the Light goes to TT Chassis Ground to complete the circuit. The good news is that things haven't changed much. I bought some new, clear Lens Covers that snap-fit my ~22 year-old Running Lights.

I use 'Scotchbrite' [non-metallic] Scrub Pad to shine up all connection points, including the Screw Heads and Light 'pads'. That typically makes Lights come back to life if replacing the Bulb with a known good Bulb doesn't do so. As with all Troubleshooting inside-and-outside, an inexpensive Voltmeter will be a good investment. Knowledge is power [of whether voltage is at a connection].

My Play-Mor has a few Fuses under the Couch. One is to protect the Running Lights circuit. Check that Fuse, if you have them, for integrity.

+12 Volts [with Ground to TT Chassis] can be applied to Wires to check their function. This will help in determining which Wires feed which Lights. My own need is to first understand 'what is' before replacing/splicing Wiring w/o understanding.

I glanced quickly at your Pic Album. Looking at the Bulbs and/or Wiring will confirm that internal Lights run from +12 VDC. The question then is trace out whether that Circuit and/or wiring is working.

Fridge Venting

Fridges typically need a sealed space around them to positively convect Fridge-generated heat up to the Roof Vent. One of the necessary seals could be what's catching and tripping you up. The keen Eye will note that the TT Manufacturer has taken some care to install seals around the Fridge. Were it possible, they would have skipped this step for Production Labor savings.

A/Cs most often need outside Air to vent to. Others on this Forum have posted the need for this, and the details they addressed to ensure this happens. The dripping Water runoff need is separate.

Wall Studs & Construction

TT Construction hasn't changed much. Wall Studs and Window Framing are typically 2" x 2"s that actually measure 1.5" x 1.5". Little Brads and fasteners holding the Paneling on will indicate where the Studs are. For TT Production speed, Studs are often held together with large, square, U-shaped Brads that can be installed quickly.

See Stud Finders linked here that sense material density. They're available at Big Box Stores if you can't determine for free by Eye where Studs are.

Stud Finders

Assume the Roof won't support weight, and don't even try... My pal and I will safely rig up 2 Ladders and run a stout Scaffold-type Board between them to support weight, if that step is even necessary.

Roof Coatings

This is a lively topic. I picked up some of this Coating @ ~$25-/quart, and will be doing only the seams on my Roof, and those of a TT-owning pal. The advice to take this approach is based on our Metal Roofs being in good shape. My 'Advisors' on this approach were 2 Gents with about 70 years experience between them who own a local RV Shop.

Heng's Alkyd Roof Coating

Laws Of Physics & Relatives

You've learned what I've known all along: Relatives are dangerous to invite into tight quarters!
8)
Several nice, light Jacks came w/my Play-Mor, and I use them religiously. Always chock both Wheels, too. All this keeps Mister Murphy and his Law at bay.

I fold our TT Table up and out of the way so our 85 lb. Goldie has a bit of room, too.

I'll have my Play-Mor w/repaired Roof Seams out Boondocking in a few weeks for the inaugural shakedown trip w/Pooch. I'll post Pix and 'insights' then.

Image
Last edited by Engineer Guy on Mon May 23, 2011 7:56 pm, edited 3 times in total.
~Reality proceeds with or without your consensus~
User avatar
Engineer Guy
The 300 Club
 
Posts: 480
Images: 118
Joined: Wed Mar 17, 2010 5:19 pm
Location: W. CO
Top

Postby frank_a » Mon May 23, 2011 5:39 pm

Boy, what a great thread! I just ordered 4 scissor jacks, never had even thought about it.

Frank
Tiny travel trailer - 1979 Sunline Sunspot. Tow vehicles: 2008 Subaru AWD Outback, 2009 GMC 4WD Canyon. For fun: 1923 T bucket hot rod, 1962 Power Cat tunnel hull speed boat. 1974 Dodge Dart waiting for renovation.
User avatar
frank_a
Teardrop Master
 
Posts: 250
Images: 34
Joined: Thu Aug 26, 2010 11:34 am
Location: Coeymans Hollow, NY
Top

Postby papmom35 » Mon May 30, 2011 9:40 pm

Hi EG and Frank-I'm so sorry I'm just responding now. For some reason Gmail didn't let me know you had posted! Great post EG-i'm going to print it out and show it to my dad and bro. Here is what we did today:

My dad and I were able to solve the first problem in the Play-mor: the non-functioning outlet and light over the sink. I noticed one of the black wires wasn't connected to the terminal so I connected it and voila!! Light and power!! I know this is such a minor, "even a monkey could figure this out" thing but I feel very proud and accomplished. We also tried to find the battery but there just isn't one. There is a board with terminals and fuses and wires in a plastic covering that go through the wall on the front driver's side but where they go after that is beyond me. I found the ground wire attached to a screw under the chassis but couldn't see anything else. I tried to see if these could in anyway be connected to the tow light harness but I don't think so. But, in reading your post EG, this might be the power to the running lights up top? If there is no battery and they aren't connected to the tow light harness, how do they work? All the fuses seem to be fine-not broken anyway.

The scissor jacks are setup-dad brought me some wood blocks to place them on-good thing too because the driveway has a lot of divets. Now it feels so much more stable when we walk inside. Amazing!! But, I forgot about chock blocks so I'll add that to my shopping list.

Also have pretty much decided that the new TV will be an early Ford Escape if our car guy can find one at auction that is in good shape, fairly low miles and will be an even trade. I'll talk to him tomorrow to see what he thinks of that plan.

Dad is adamant that I put brakes on this rig no matter what my tow vehicle is. He's talking surge brakes as being cheaper and just as effective. Anyone have any thoughts on this? I thought electric brakes gave you more control.
Pappin' in Pink (well, we will be sometime in the future when I can paint my new Paphut!!)
Image
User avatar
papmom35
Teardrop Master
 
Posts: 120
Joined: Sat Mar 05, 2011 1:17 pm
Location: MA
Top

Postby papmom35 » Mon May 30, 2011 9:45 pm

EG-you have a metal roof on your Play-mor? I'm pretty sure mine is rubber? I'll find out when I go to clean it next weekend and I promise I won't try to stand or kneel on it!! I got a longhandled carwash brush so I'm hoping that will do the trick. I only have one ladder so can't do the scaffolding thing. I'll be as careful as possible. Oh, and love your GR!! he's gorgeous! I hope he likes the inaugral outing of the Play-Mor!! Can't wait to see the pics and hear all about it!

Frank-going to read the latest on the Sunline restoration right now!!
Pappin' in Pink (well, we will be sometime in the future when I can paint my new Paphut!!)
Image
User avatar
papmom35
Teardrop Master
 
Posts: 120
Joined: Sat Mar 05, 2011 1:17 pm
Location: MA
Top

Postby 2bits » Mon May 30, 2011 10:15 pm

Check your SPAM folder in Gmail, if you see an email notification from this board, open it, and click on Not Spam and it should remember your preference :)
Thomas

Image
User avatar
2bits
2bit Member
 
Posts: 5132
Images: 8
Joined: Thu Dec 27, 2007 6:04 pm
Location: Lake Tawakoni, TX
Top

Work More On The Play-Mor

Postby Engineer Guy » Mon May 30, 2011 10:39 pm

Just rolled in from another day of TT prep. The 'Heng's Roof Coating' we 'invested' in looks like great stuff. Mighty thick 'Toothpaste'/'Ben Gay' consistency w/Fibers embedded. I used a dull Chisel to scrape off some old edge Seam flotsam and jetsam. Cleaned up surfaces w/Lacquer Thinner, per my pal and former Air Force Jet Mechanic's suggestion. We spread Heng's around with a Putty Knife and/or Finger to 'work it in'. As it set up, it sure appears initially that it will seal very well. No 'Scaffolding' was req'd; only a good Aluminum Ladder up the TT side.

I suspected a rear left corner leak that got down into the small Shower corner, and time will tell if my hunch was verified today. From the Factory, the horizontal edge Seam/Trim Metal overlapped the Trim piece that continues to go down the rear edge of the TT. There was a small, lateral gap between these overlapping, different-sized Trim pieces, and the side Trim did not meet/cover the Roof well. My Roof is in great shape for an '89, and - yes - is some sort of Rubberized material/membrane.

In other news, I've been checking 'all Systems' and details pre-trip 'just because'. Of all the many Keys given me, there was not one for the 'Master Lock' on the Spare Tire Lug Bolt, under the Tire Cover. Better to find that now than in Nowhere UT next week. We removed the Bumper Carrier and stumbled upon an excellent, open Locksmith. This super-nice fellow picked the Lock open. His price went from '$15- or $20-' for >1.5 hours work to $12- - if I didn't use a VISA Card - to $10- Cash [for lack of change]! Unreal. At a List of $7.95, I don't plan to replace that Lock. I'll figure out something else moderately secure.

TT SECURITY BUMMER ALERT

We discussed TT 'security' in general, per a Thread herein. This seasoned Locksmith had a Client suffer one serious break-in on his very upscale TT. The Thieves used A SAWZALL to cut right through a TT Sidewall, and cleaned out the 'loaded' TT. Another Client had a Shoebox-sized piece of the Door around the Locks 'sawed' away using a portable Grinder w/hardened Cutting Wheel. So much for the grand ideas here for Coupler or Wheel Locks, or Security Alarms!

The last 2 days have included Lube'ing all Window and other Mechanisms; snugging down Window frames; un-bypassing the Winterized Water System [which works perfectly]; checking the Fridge cooling; and doing some modest 'Guy Cleaning', as my Avatar terms how Males clean. Installed a WH Drain Valve. Bought some Plastic Storage Boxes. Cut some 45 degree edges on some 'inherited' Wood 'Levelers'. Tacked up some Girlie Posters. JUST kidding...

I'm a little stumped on your Play-Mor wiring description. There 'shouldn't' be a Battery on board IF you can't see an obvious place for it on the front Frame. There's virtually always a Battery on Commercial TTs. We need some clear, Camera [not Cellphone] pix. Or, I do anyway. Use something like a yellow Pencil in the pix to point to details you're questioning. You've found one Wire disconnect, and there may be others. The Running Lights certainly [or should] connect to the Harness. That connection has nothing to do with overall TT Ground. A Voltmeter, or continuity checker, is looking more necessary than ever to know 'what is' vs. 'what can be guessed'. Sounds like you've got a nearly-identical Fuse 'box' to protect TT +12 VDC Wiring. I bought spare Fuses and Bulbs today: 2 - 6 Amp and 1 - 10 Amp 3AG type [round Glass Fuses]. The Ground connection sounds normal, and like what I have. It, too, goes into the TT Wiring Harness to connect to the TV. Without exception, all my TT Wiring is Factory Stock; unmodified. A very pleasant starting situation...

Most all of us 'Sparkies' here have overlooked/not found incredibly simple and obvious things over time. Plenty of 'Monkeys' - to use your term - present and accounted for here.
~Reality proceeds with or without your consensus~
User avatar
Engineer Guy
The 300 Club
 
Posts: 480
Images: 118
Joined: Wed Mar 17, 2010 5:19 pm
Location: W. CO
Top

Postby papmom35 » Tue May 31, 2011 5:40 am

:lol: EG!! Your avatar is a very lucky avatar indeed. Wish I could rent you and Frank out for an hour or two of in person tutorials!! Camera pics will be forthcoming on the mystery wiring. Tomorrow nite probably as I have quilting class tonite (hmmm, wonder how i can fit a sewing machine and quilting frame into the Play-Mor LOL!!).
sounds like you are pretty close to your inaugral voyage-very exciting!
My spare tire is crap and I need to replace it totally-the rim is mangled and the tire itself has severe weather cracking. It was never covered I imagine.
There is no place on the tongue that I can see for a battery box. Just a propane tank.
Pappin' in Pink (well, we will be sometime in the future when I can paint my new Paphut!!)
Image
User avatar
papmom35
Teardrop Master
 
Posts: 120
Joined: Sat Mar 05, 2011 1:17 pm
Location: MA
Top

Postby frank_a » Tue May 31, 2011 5:59 am

You could rent me cheap Pam if we could ever get together. We're just south of Albany NY, not too far away. My problem is I am incredibly busy right through the next couple weeks, including the Adirondack Tearup at fish Creek weekend after next. This weekend I'm heading to a classic boat show in western NY, be gone Friday a.m. through Sunday p.m., then it's double time getting Spot ready to haul to Fish Creek. Once Fish Creek is over, my time lightens up a little, but I have a big classic boat show in the Finger Lakes mid July that we will also be dragging Spot to, and staying a couple weeks. I have major projects with Nine Lives (our boat) to accomplish before then. Then things lighten up a bit!

I'd like to see more pics too!

Frank
Tiny travel trailer - 1979 Sunline Sunspot. Tow vehicles: 2008 Subaru AWD Outback, 2009 GMC 4WD Canyon. For fun: 1923 T bucket hot rod, 1962 Power Cat tunnel hull speed boat. 1974 Dodge Dart waiting for renovation.
User avatar
frank_a
Teardrop Master
 
Posts: 250
Images: 34
Joined: Thu Aug 26, 2010 11:34 am
Location: Coeymans Hollow, NY
Top

PreviousNext

Return to General Discussion

Who is online

Users browsing this forum: No registered users and 6 guests