Thrifty Alternatives ..Building Foam Campers

Canvas covered foamies (Thrifty Alternatives...)

Moderator: eaglesdare

Postby Conedodger » Thu Jun 02, 2011 7:24 am

Been thinking about the 1.5" foam and the joint to the floor.

The image below uses a piece of wood 1.5" x 1.5" glued to the foam and screwed from below. Then with the 1/8" ply fixed to both the batton and the foam. It then has the normal TB2 / Cloth skin

I think this would be stronger than "normal" the TB2/cloth both sides join

Image
Conedodger
Teardrop Master
 
Posts: 129
Joined: Thu May 12, 2011 2:24 pm
Location: United Kingdom

Postby GPW » Thu Jun 02, 2011 8:04 am

Cone what about running a strip of ply along the outer edge too , forming a sort of "taco" the foam would slip down into.. That would pretty much move all the stresses to the wood areas...mechanical fasteners in abundance.. no longer relying on the glue for attachment of wall to floor ... :thinking: Image
There’s no place like Foam !
User avatar
GPW
Gold Donating Member
 
Posts: 14920
Images: 546
Joined: Thu Feb 09, 2006 7:58 pm
Location: New Orleans

Postby Ratkity » Thu Jun 02, 2011 9:20 am

While the taco sandwiching is interesting, I don't think it's necessary.

The canvas is pulled tightly against the foam and wrapped under the ply floor (held with staples as needed) and then becomes rigid after the glue dries. The inside ply makes more sense because the pressure from the canvas is towards the inside. I think the outside ply just makes an unsightly bump to canvas over. Even on something as big as a standie, I think the outer ply is unnecessary and might even cause a place of weakness due to foam flex under bumpy driving conditions.

Just thinking and rambling.

Hugs,
Ratkity
Ratkity
Gold Donating Member
 
Posts: 1065
Images: 0
Joined: Wed May 26, 2010 1:01 pm
Top

Postby Conedodger » Thu Jun 02, 2011 10:09 am

GPW wrote:Cone what about running a strip of ply along the outer edge too , forming a sort of "taco" the foam would slip down into.. That would pretty much move all the stresses to the wood areas...mechanical fasteners in abundance.. no longer relying on the glue for attachment of wall to floor ... :thinking: Image


Its another great idea, but now who is over engineering :lol:
Conedodger
Teardrop Master
 
Posts: 129
Joined: Thu May 12, 2011 2:24 pm
Location: United Kingdom
Top

Postby GPW » Thu Jun 02, 2011 3:32 pm

Just trying to follow Dad's advice eh .... Those old guys know their stuff... ;)

Rat , just another idea to add to the fray ... The outer strip could be used as a decorative element , perhaps shaped like waves , or some other pleasing pattern ... :thinking: Optional , of course...
There’s no place like Foam !
User avatar
GPW
Gold Donating Member
 
Posts: 14920
Images: 546
Joined: Thu Feb 09, 2006 7:58 pm
Location: New Orleans
Top

Postby GPW » Thu Jun 02, 2011 7:13 pm

Now with the free plexiglass and pre-rabbeted framing , the windows are a certainty ... Just thinking of a fixed one (non opening) behind the door on the side , and a hinged opening one on the driver side , with a Velcro screen ... there may even be enough material left for a small window on the door ... :thinking: That or my pal Vinney showed me a plastic porthole for about $30.00 That would be cool in the door too... That or a Mouse window .... :o :D 8)
There’s no place like Foam !
User avatar
GPW
Gold Donating Member
 
Posts: 14920
Images: 546
Joined: Thu Feb 09, 2006 7:58 pm
Location: New Orleans
Top

Postby eaglesdare » Thu Jun 02, 2011 7:29 pm

caution on using velcro. my neighbor used some on her pop up and the heat was horrible to the glue. the velcro has come off but the glue remains has not. it is an ugly mess. i was going to use velcro on mine but after seeing the mess she has i won't be using velcro. unless i use some other form of adhesive. a dab or so of gg might work? or even tb2? or if its where wood is, could always staple it in.
Louella
May the foam be with you.
User avatar
eaglesdare
Donating Member
 
Posts: 3168
Images: 13
Joined: Tue Aug 26, 2008 7:06 pm
Top

Postby GPW » Fri Jun 03, 2011 6:06 am

Eagle , that screen fabrication is yet another project ... coming soon ... :o
The plan is to use the un-glued Velcro and sew it into the screen , and just use one of our regular glues to stick it around the door frame ...

Spent all evening thinking about the windows ... Made a few drawings to see where they would be best placed.. Turns out I really don't have room in the passenger side rear for a window... My door is rather large and takes up a good bit of area on that side ... So now , it's looking like one window and a window in the door will be all that's needed ... I think ? :thinking:

Made a drawing for AC placement ... looks like the best place is on the floor in the front ... where the weight will help the balance ... and placing it on the floor won't require any special bracing ... Still undecided about a slide out AC mount or just a fixed installation and cover for traveling ??? Been thinking a lot about the AC , what with record high temps here already ... it becomes a necessity ... Hot now , can't wait till August ... :o
There’s no place like Foam !
User avatar
GPW
Gold Donating Member
 
Posts: 14920
Images: 546
Joined: Thu Feb 09, 2006 7:58 pm
Location: New Orleans
Top

Postby eaglesdare » Fri Jun 03, 2011 6:42 am

i would love to have a perment place for the a/c. but i just don't want to cut into my canvas. i love the "sock" and i just don't feel comfortable putting a hole in the sock. so on the first foamie i am going with the door. no holes to cut.

on the second build i am thinking of the perminent placement.

also thinking of a slide out bed. a slide out from the rear. that would give more sleeping room in case more kids come along. that is the only way i can come up with more than 3 in there. it would be nice to get a bit more of a challenge for me in the build.

our temps have dropped here. i think we went back down to the 50's. its up now into the 60's and should max out in the 70's. would be a great day to do some work on the tear. but i have been glued to the tv watching the casey anthony trial.
Louella
May the foam be with you.
User avatar
eaglesdare
Donating Member
 
Posts: 3168
Images: 13
Joined: Tue Aug 26, 2008 7:06 pm
Top

Postby GPW » Fri Jun 03, 2011 9:26 am

Eagle , yours is different from mine ... with that flat front wall , it's easy to cut the hole , line it with some wood (or not) , and just add more canvas over the exposed foam , wrapping over the inside and out ... just another reinforcing strip , keeping the continuity of the "sock" ...Do we need a picture ???

Got my window and inner frame (mock up) done , working on the outer frame now... Image
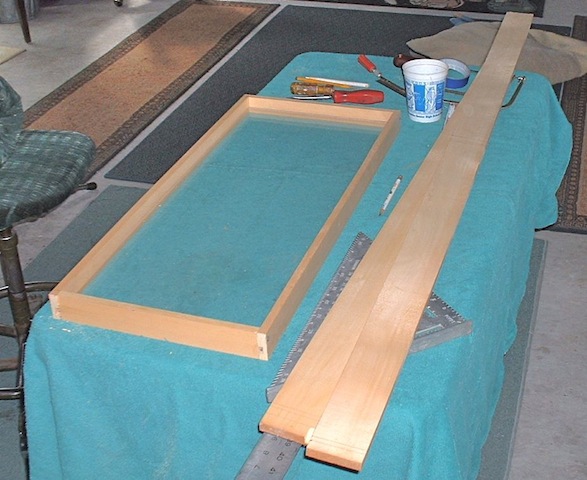
Once everything fits , will take it all apart and coat it with the "secret Jedi waterproofing formula "... :o (min and poly ... you know ) except where the glue joints are (taped off) ... A little silicon in the rabbet and we should be able to screw it all back together and install .. Hopefully ...
Supposed to be triple digits today ... Gonna' be a Hot one !!! :twisted: Must be Global Schwarming" :roll: They announced today the longest drought in state history ... Glad I had my rain barrels or my cooking garden would be dust ...

That Door AC idea is pretty Cool (excuse the pun) ...just a tight foam insert ... that should be easy ... why you could even put a little window above the AC to let the light in (mouse window ) ... You should cover it and paint it to match ... just to be uniform ... (and very Cool ) 8)
There’s no place like Foam !
User avatar
GPW
Gold Donating Member
 
Posts: 14920
Images: 546
Joined: Thu Feb 09, 2006 7:58 pm
Location: New Orleans
Top

Postby GPW » Fri Jun 03, 2011 10:25 am

Got the outer frame done ... Fits , plenty of room for rubber seal ... You notice I angled the bottom of the window outer frame out so the water drains out ... much like a standard house window ... Image
There’s no place like Foam !
User avatar
GPW
Gold Donating Member
 
Posts: 14920
Images: 546
Joined: Thu Feb 09, 2006 7:58 pm
Location: New Orleans
Top

Postby eaglesdare » Fri Jun 03, 2011 11:05 am

:applause:
Louella
May the foam be with you.
User avatar
eaglesdare
Donating Member
 
Posts: 3168
Images: 13
Joined: Tue Aug 26, 2008 7:06 pm
Top

Postby GPW » Fri Jun 03, 2011 12:22 pm

Thanks Eagle !!! Here's the window and frame with the stops installed ... there's just enough space between the stops and the window itself for a 1/4" rubber gasket all around inside ... that should keep the water out ... If it ever rains here again ... :roll: Image

Ps. the bowed looking frame on the bottom is an optical illusion ... camera lens distortion ... It's really dead straight ...
There’s no place like Foam !
User avatar
GPW
Gold Donating Member
 
Posts: 14920
Images: 546
Joined: Thu Feb 09, 2006 7:58 pm
Location: New Orleans
Top

Postby GPW » Fri Jun 03, 2011 7:56 pm

Been thinking about a Foamie Cargo trailer :thinking: Just a Big foam Box... 12-14' long ... about 5.5' tall inside ... Not a traditional Cargo Trailer ... but a Foamie Camper that has all the space of one and Much less weight ... (and expense)... V nose ,no problem ... This one is just too SMALL... :oops:
There’s no place like Foam !
User avatar
GPW
Gold Donating Member
 
Posts: 14920
Images: 546
Joined: Thu Feb 09, 2006 7:58 pm
Location: New Orleans
Top

Postby tonyj » Fri Jun 03, 2011 11:23 pm

Been thinking along those lines myself. Foamie cargo box and foamie tear body that could be removed and used on the same trailer frame. Hmmm . . . :thinking:
Still graced with two eyes and ten fingers (due in no small part to luck!).

Just when you think a problem is solved, an uglier result replaces it.

tony
User avatar
tonyj
Super Lifetime Member
 
Posts: 2468
Images: 160
Joined: Mon Sep 26, 2005 10:18 pm
Location: Texas, Corpus Christi
Top

PreviousNext

Return to Foamies

Who is online

Users browsing this forum: jgmahoney and 8 guests