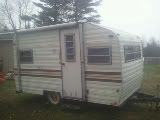
1982 1500 Play-Mor questions

General Discussion about almost anything Teardrop or camping related

Postby papmom35 » Tue May 31, 2011 7:01 am

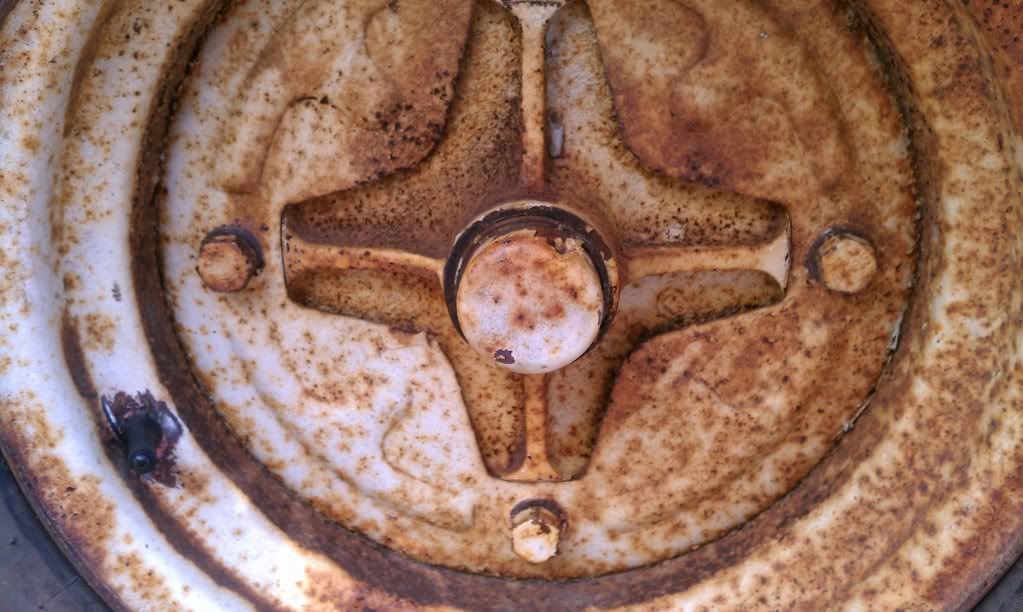
Awww Frank, that is so sweet! I wish we were closer too-you have so much knowledge and generosity! I'm going to jack her up as much as I safely can and try to get under the chassis with my flip camcorder. there might be an answer under there I'm just not seeing. I'll also be sure to take pics of whats under both dinette benches. The innards so to speak. Once we get the tow light situation fixed she's definitely campable I think iwth a good cleaning and a new spare tire. Hope that doesn't cost too much. the tire that's on the rim now is an auto tire, not an RV tire so that needs to be changed out. Can't wait for vacation next week!!
Pappin' in Pink (well, we will be sometime in the future when I can paint my new Paphut!!)
Image
User avatar
papmom35
Teardrop Master
 
Posts: 120
Joined: Sat Mar 05, 2011 1:17 pm
Location: MA

Postby frank_a » Tue May 31, 2011 7:30 am

I needed to read back a couple of threads to see what's going on!

The only complicated thing about electric brakes is wiring the controller into your vehicle. Surge brakes require an expensive coupler ($100+), and it's not always easy to find one if you have a triangulated tongue. Generally, surge brakes are put on trailers with straight tongues, like boat trailers. Everything else is about the same cost, i.e. drums, shoes, backing plates, except you need a controller, which I think you can find for less than 100 bucks but again, it needs to be wired in. surge brakes can be a problem when you're backing up. Not so with electric. I'm putting electric brakes back on Spot one of these days! My conundrum there is getting Gail's Subaru wired for it. My truck came with 7 plug RV wiring, Gail's Outback didn't (none of them do), and it isn't easy hooking hers up for a brake controller.

Now, as to wiring. There's two kinds. There's 4 pole flat (and 5 pole flat with electric brakes), and the colors are brown (stop/tail), white (ground), yellow (left turn) and green (right turn). Brakes are usually a blue wire. Sometimes 12V power will be added like for your lights just using white and black wires coming from a battery.

The other alternative is the trailer was set up for a 7 wire RV plug. Then the colors change (handy huh?) to green (stop/tail), white (ground), red (left turn), brown (right turn), blue (brakes), yellow (backup lights), black (auxiliary power).

Maybe knowing wire colors will assist in diagnosis. good luck!

Frank
Tiny travel trailer - 1979 Sunline Sunspot. Tow vehicles: 2008 Subaru AWD Outback, 2009 GMC 4WD Canyon. For fun: 1923 T bucket hot rod, 1962 Power Cat tunnel hull speed boat. 1974 Dodge Dart waiting for renovation.
User avatar
frank_a
Teardrop Master
 
Posts: 250
Images: 34
Joined: Thu Aug 26, 2010 11:34 am
Location: Coeymans Hollow, NY

New pics

Postby papmom35 » Sat Jun 04, 2011 10:22 pm

As promised, here is the link to the new pics on Photobucket showing the wiring inside the dinette bays, the frige cubby (I managed to cut the lip holding the fridge in and I didn't lose any fingers or other body parts nor did I drop the thing on the floor of the Paphut!!), the storage cubby below and below that the wheel well?
Really looking forward to what you all have to say about what looks like battery wiring but there is no battery.

http://s899.photobucket.com/albums/ac19 ... -Mor_1500/
Last edited by papmom35 on Sat Jun 04, 2011 10:31 pm, edited 1 time in total.
Pappin' in Pink (well, we will be sometime in the future when I can paint my new Paphut!!)
Image
User avatar
papmom35
Teardrop Master
 
Posts: 120
Joined: Sat Mar 05, 2011 1:17 pm
Location: MA
Top

Re: New pics

Postby Gage » Sat Jun 04, 2011 10:26 pm

papmom35 wrote:As promised, here is the link to the new pics on Photobucket...................
:thinking: Can't find the link. Did you hide it somewhere in plain sight? ;)
Image Image Image
Remember 'Teardrop Time'.......Take your time, you don't have to have it finished NOW.
User avatar
Gage
8000 Club
8000 Club
 
Posts: 8321
Images: 28
Joined: Sat Apr 17, 2004 9:14 pm
Location: Palmdale, CA
Top

Postby papmom35 » Sat Jun 04, 2011 10:32 pm

Yep, in plain site in cyber space :lol: I just added it above.
Thanks Gage for the catch!
Pappin' in Pink (well, we will be sometime in the future when I can paint my new Paphut!!)
Image
User avatar
papmom35
Teardrop Master
 
Posts: 120
Joined: Sat Mar 05, 2011 1:17 pm
Location: MA
Top

Postby papmom35 » Sun Jun 05, 2011 12:25 pm

This morning I washed the Paphut. She looks a little brighter, perhaps not as dingy but not perfect. If I ever win the lottery I think I will invest in a paintjob for her. Oh wait, if win the lottery she goes and I get a HUGE RV and tour the country :lol:
My ladder wasn't really tall enough for me to do a great job on the ALUMINUM not rubber, roof. That was a surprise! Good thing all I bought was the rubber roof RV cleaner and not the paint on rubber roof stuff suggested to me!
I was also going to prime and paint the wheel hubs today but I realized that those wheels look like they have 2 different sections to them and if I painted them no one would be able to take the sectons apart with out scraping out the paint. So, maybe when I get brakes installed I'll ask the RV place to also prime and paint the wheels while they are off the RV and taken apart? Sound like a good plan?
The rain will be moving in soon so I don't think I'll get the stripe painted today like I had planned. Will go shopping for cushion fabric instead (most likely pink chintz or something pink and flowery-sorry guys!!).

Loving having this week off and being able to do little things with the Paphut to make it my own.
Pappin' in Pink (well, we will be sometime in the future when I can paint my new Paphut!!)
Image
User avatar
papmom35
Teardrop Master
 
Posts: 120
Joined: Sat Mar 05, 2011 1:17 pm
Location: MA
Top

Postby frank_a » Mon Jun 06, 2011 10:47 am

I would never have an RV place paint my wheels. I would do it after the RV place did the brakes and were done and wouldn't screw it up getting brake3s on. Then I would do it myself. The reason is prep. RV guys won't do much prep on something like that, especially something old like that. When they were done, I'd jack it up, clean the wheels real well, sand and/or wire brush them, clean them again (warm soapy water would do it), then prime first and then paint. I like Rustoleum, but understand Tractor Supply sells some great stuff too, maybe Valspar?.

Let me know if I can help in anyways.

Frank
Tiny travel trailer - 1979 Sunline Sunspot. Tow vehicles: 2008 Subaru AWD Outback, 2009 GMC 4WD Canyon. For fun: 1923 T bucket hot rod, 1962 Power Cat tunnel hull speed boat. 1974 Dodge Dart waiting for renovation.
User avatar
frank_a
Teardrop Master
 
Posts: 250
Images: 34
Joined: Thu Aug 26, 2010 11:34 am
Location: Coeymans Hollow, NY
Top

Postby papmom35 » Mon Jun 06, 2011 11:09 am

But Frank, if my wheels are in 2 parts, don't I need to remove them and take them apart in order to paint? Otherwise, wouldn't I be painting the 2 parts together, making it very difficult to remove them if I have to again (like for repacking the bearings?). I don't think the scissor jacks I have will be able to jack up the rig high enough to remove the wheels or if they are sturdy enough to hold it up? where did you get yours again?
I did buy some spray paint rustoleum primer but the more I think about it the more I think I should get the primer in the can and brush it on if I end up doing it myself.
Pappin' in Pink (well, we will be sometime in the future when I can paint my new Paphut!!)
Image
User avatar
papmom35
Teardrop Master
 
Posts: 120
Joined: Sat Mar 05, 2011 1:17 pm
Location: MA
Top

Postby frank_a » Mon Jun 06, 2011 11:29 am

Do you have a better shot of your wheels Pam? I'm not used to two part wheels I guess, and don't understand how they would work. And yes, it they are two part, I would take them apart to paint them. Also, spray-on rustoleum dries lots quicker than brush-on. If time is of no consequence, I brush-on. Otherwise it's rattle can time!

With correct prep, you could have paint stay looking good on your wheels for years. Have the RV place do it and maybe the paint would last the year, that is, unless you can afford to pay for the prep. I just don't trust places like that to do a good job on stuff they probably joke about as being "junk." Plus, there's the satisfaction you get from doing a job well.

I got the cheapest scissor jacks I could find and each will support 5,000#s! These are the ones I got: http://www.etrailer.com/Trailer-Jack/St ... SC-24.html I couldn't imagine scissor jacks not supporting a small travel trailer like yours.

Frank
Tiny travel trailer - 1979 Sunline Sunspot. Tow vehicles: 2008 Subaru AWD Outback, 2009 GMC 4WD Canyon. For fun: 1923 T bucket hot rod, 1962 Power Cat tunnel hull speed boat. 1974 Dodge Dart waiting for renovation.
User avatar
frank_a
Teardrop Master
 
Posts: 250
Images: 34
Joined: Thu Aug 26, 2010 11:34 am
Location: Coeymans Hollow, NY
Top

Postby papmom35 » Mon Jun 06, 2011 11:41 am

I'll take a close up with my phone and try to post it through photobucket. If I take the wheels off and apart, will I screw up anything on the axel or is it like changing a car tire? Do i have to let the air out of the tire first to take the wheel apart? You might be able to answer better when you see the pic.
Pappin' in Pink (well, we will be sometime in the future when I can paint my new Paphut!!)
Image
User avatar
papmom35
Teardrop Master
 
Posts: 120
Joined: Sat Mar 05, 2011 1:17 pm
Location: MA
Top

Postby frank_a » Mon Jun 06, 2011 11:50 am

The only two part wheels I've ever seen are for agricultural and construction equipment where something (like foam) was being used inside the wheels. If it's just air Pam, you bet you need to deflate the tires 1st! You're not confusing the wheels with the hubs are you? Generally the wheels bolt to a hub, and the hub is held on by a single axle nut. Pictures would help. Maybe it's time to buy a cheap digital camera!

Frank
Tiny travel trailer - 1979 Sunline Sunspot. Tow vehicles: 2008 Subaru AWD Outback, 2009 GMC 4WD Canyon. For fun: 1923 T bucket hot rod, 1962 Power Cat tunnel hull speed boat. 1974 Dodge Dart waiting for renovation.
User avatar
frank_a
Teardrop Master
 
Posts: 250
Images: 34
Joined: Thu Aug 26, 2010 11:34 am
Location: Coeymans Hollow, NY
Top

Postby papmom35 » Mon Jun 06, 2011 3:49 pm

Image

See how the star shape comes forward through the round part?

And I do have a nice digital camera! This was taken with my evo. Not bad eh ?
Last edited by papmom35 on Mon Jun 06, 2011 4:23 pm, edited 1 time in total.
Pappin' in Pink (well, we will be sometime in the future when I can paint my new Paphut!!)
Image
User avatar
papmom35
Teardrop Master
 
Posts: 120
Joined: Sat Mar 05, 2011 1:17 pm
Location: MA
Top

Postby eamarquardt » Mon Jun 06, 2011 4:11 pm

Thoughts on some of your issues.

In your picture you show the hub and the rim. Yes they are two separate pieces but your rims are one piece.

I have little experience with trailer wheels but your 4 bolt rims and the ribs on your hubs look pretty old. You can probably get brake drums that match when you add the brakes. However, if you don't have a spare, the time to get one is when you add the brakes. If you can't find a spare with the same bolt pattern as your current wheels it would be an opportune time to change your rims when you upgrade to brakes. I wouldn't hit the road w/o a spare that fits your trailer. For some reason I've had several flats on my utility trailer but none on my tow vehicle so a spare for a trailer is a good thing to have (and carry).

You're unsure if you're current jack is suitable for changing a tire. I'd recommend that you get the right lug nut wrench and a suitable jack (and blocks of wood to place on the ground under the jack when using it) now and learn how to change the tire. Make sure that you can undo the bolts on both wheels. Better under controlled circumstances than while on the side of the road in less than ideal circumstances.

Hope this helps.

Cheers,

Gus
The opinions in this post are my own. My comments are directed to those that might like an alternative approach to those already espoused.There is the right way,the wrong way,the USMC way, your way, my way, and the highway.
"I'm impatient with stupidity. My people have learned to live without it." Klaatu-"The Day the Earth Stood Still"
"You can't handle the truth!"-Jack Nicholson "A Few Good Men"
"Some people spend an entire lifetime wondering if they made a difference in the world. The Marines don't have that problem"-Ronald Reagan
User avatar
eamarquardt
Silver Donating Member
 
Posts: 3179
Images: 150
Joined: Sat Nov 11, 2006 11:00 pm
Location: Simi Valley, State of Euphoria (Ca)
Top

Postby papmom35 » Mon Jun 06, 2011 4:20 pm

thanks Gus! I do plan on getting a new spare wheel and tire at some point. Not going anywhere for a while as I don't have a suitable TV. Anyway, I didn't even think of matching it to what I have. As far brakes go, there is one set (brake and drum) up in Maine that the RV guy who inspected this rig for me will sell to me for $50. I just have to get it somehow (I have a friend who lives right across the street from him so it won't be too hard) and he knows it fits my wheels and hub? The other set will come from Dexter-A month ago they had 2 left that would fit so I'm hoping that is still the case. It will get way more expensive than what I have $$ for to change the wheels out.

Now, here's my blonde question: Is the star shaped piece with the huge nut coming through the star shaped hole the hub? And is the part the hole is on the rim?
Pappin' in Pink (well, we will be sometime in the future when I can paint my new Paphut!!)
Image
User avatar
papmom35
Teardrop Master
 
Posts: 120
Joined: Sat Mar 05, 2011 1:17 pm
Location: MA
Top

Postby frank_a » Mon Jun 06, 2011 4:29 pm

Aha! Now I get it. You have very strange wheels Pam, and an even stranger hub. First, loosen the 4 nuts (or bolts) that hold the wheel on. They're much easier to start when the wheel is still on the ground. Once you have them just loose enough, jack the trailer up and remove the wheel. Take another picture just like the last one here above Gus' post but with the wheel off. I would like to see this hub with the wheel off and any backing plate that's behind it. then I would like you to take that hub off, pull the cotter pin, remove the outer bearing, and tell me what the part number is. I would bet it's a 1" bearing surface and if it is, my friendly suggestion would be to get normal hubs and normal wheels and tires. They're readily available and not that expensive.

Good luck!

Frank
Tiny travel trailer - 1979 Sunline Sunspot. Tow vehicles: 2008 Subaru AWD Outback, 2009 GMC 4WD Canyon. For fun: 1923 T bucket hot rod, 1962 Power Cat tunnel hull speed boat. 1974 Dodge Dart waiting for renovation.
User avatar
frank_a
Teardrop Master
 
Posts: 250
Images: 34
Joined: Thu Aug 26, 2010 11:34 am
Location: Coeymans Hollow, NY
Top

PreviousNext

Return to General Discussion

Who is online

Users browsing this forum: Bing [Bot] and 12 guests