New build, "the 78 teardrop"

...ask your questions in the appropriate forums BUT document your build here...preferably in a single thread...dates for updates, are appreciated....

New build, "the 78 teardrop"

Postby Danny » Sat Aug 06, 2011 9:29 am

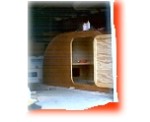
Nearly 78 inches long x 41 inches wide interior..Roughly based on the kit profile, maybe a little bit cooler,cuter looking(JMO).. Daughters think it is super cute..lol....Anyway,building very light, no big hunks of 3/4" on this baby..I hope to come in under 300# total weight.. No pix yet, perhaps I should pause and take some? 1/2 inch floor with 1 x4 pine under edges and down the middle(under) galley will be pine framing with 1/4 ply surface.. surprisingly, there is a lot of room inside,will be very functional..Will write more later..Danny..
User avatar
Danny
The 300 Club
 
Posts: 333
Images: 108
Joined: Sat Oct 07, 2006 11:22 pm
Location: Nebraska

"PIX"

Postby Danny » Sat Aug 06, 2011 5:24 pm

:o OK, I have 12 new build pix, :shock: :? 6 are posted for now
Last edited by Danny on Sun Aug 07, 2011 2:21 pm, edited 1 time in total.
User avatar
Danny
The 300 Club
 
Posts: 333
Images: 108
Joined: Sat Oct 07, 2006 11:22 pm
Location: Nebraska

Postby myoung » Sat Aug 06, 2011 5:40 pm

Simple. Have your daughter resize the photos in Preview on her Mac and then upload to your photo gallery on this site. Keep the width under 750 pixels.

Search the forum for further instruction and advice.
Mike Young
build thread: viewtopic.php?t=40459
User avatar
myoung
500 Club
 
Posts: 644
Images: 250
Joined: Sat Aug 07, 2010 11:21 am
Location: Nipomo, CA
Top

Postby Danny » Sat Aug 06, 2011 6:41 pm

well,that failed... :thumbdown: :? danny is a musician and woodworker not a geek patrol member..lol..used resizer,and pix now posted..On with the build!!!
Last edited by Danny on Sun Aug 07, 2011 2:22 pm, edited 2 times in total.
User avatar
Danny
The 300 Club
 
Posts: 333
Images: 108
Joined: Sat Oct 07, 2006 11:22 pm
Location: Nebraska
Top

Postby bonnie » Sat Aug 06, 2011 6:45 pm

Fspot or Gimp will work under linux.
Remember, the turtle won. :)
User avatar
bonnie
Donating Member
 
Posts: 1390
Images: 107
Joined: Sun Jul 24, 2011 4:14 pm
Location: Roxana, IL
Top

Postby Danny » Sat Aug 06, 2011 7:18 pm

Well,there are new build pix in my album..so, until I can get them uploaded to the thread,you can view there..Thanks! :thumbsup: 8)
User avatar
Danny
The 300 Club
 
Posts: 333
Images: 108
Joined: Sat Oct 07, 2006 11:22 pm
Location: Nebraska
Top

78 tear build pix

Postby Danny » Sat Aug 06, 2011 8:00 pm

Image Image
Last edited by Danny on Sat Aug 06, 2011 8:06 pm, edited 1 time in total.
User avatar
Danny
The 300 Club
 
Posts: 333
Images: 108
Joined: Sat Oct 07, 2006 11:22 pm
Location: Nebraska
Top

78 tear build pix2

Postby Danny » Sat Aug 06, 2011 8:02 pm

Image Image Image
User avatar
Danny
The 300 Club
 
Posts: 333
Images: 108
Joined: Sat Oct 07, 2006 11:22 pm
Location: Nebraska
Top

Postby GuyllFyre » Sun Aug 07, 2011 9:10 am

You can download and install GIMP on any Windows or Linux computer and it will allow you to crop and resize pictures.

It's a "poor man's Photoshop."
Things I have for sale on craigslist:
http://albany.craigslist.org/search/?ar ... catAbb=sss

Things I have for sale on eBay:
http://www.ebay.com/sch/merchant/seansmith
User avatar
GuyllFyre
Donating Member
 
Posts: 209
Joined: Fri May 21, 2010 9:35 pm
Location: Scotia, NY
Top

Postby copout » Sun Aug 07, 2011 9:34 am

Picasa is also a good option for managing your photos
Veni Vidi Vici
User avatar
copout
Teardrop Inspector
 
Posts: 19
Images: 15
Joined: Mon Aug 01, 2011 10:27 am
Location: Western Australia
Top

Postby Danny » Sun Aug 07, 2011 9:37 am

copout wrote:Picasa is also a good option for managing your photos
..They are already posted.right above your post... :D
User avatar
Danny
The 300 Club
 
Posts: 333
Images: 108
Joined: Sat Oct 07, 2006 11:22 pm
Location: Nebraska
Top

Postby Danny » Sun Aug 07, 2011 10:29 am

:) OK. the very first thing I did was make a template of the profile. worked pretty good, allowed me to cut both sides at once with the router.Also, allows placement of screwholes and door(s) placement..This tear is small and could be pulled by a motorcycle with ease at least that is the plan..my trailer frame is on backorder,so, using a couple of 2x6 laid flat on the garage floor to simulate trailer rails..works good(be sure and find a good level area of floor)..next item will be the door jamb rain stop lip. since we don't have spars in yet, this allows for a rectangle of 1/4 ply exactly the height and width of 3/4 pine jamb. set inside and temporary screwed to jamb. then with compass, draw am outline, 3/8 to 1/2 inch smaller than the door opening.this will be your lip to keep out rain..Remove plywood and cut ,re install with screws and glue.. be sure and butter the glue with a thin piece of scrap coating every inch of surface area.. Really works good if you have measured and glued and screwed everything tight and square..when you apply spar varnish(several coats) your seal will be weather proof when the doors are shut tight and locked.... My last build used this and it withstood 3 inch rains even horizontal rain driven by 60 mile per hour wind..no leaks at all..
User avatar
Danny
The 300 Club
 
Posts: 333
Images: 108
Joined: Sat Oct 07, 2006 11:22 pm
Location: Nebraska
Top

Postby Danny » Sun Aug 07, 2011 7:46 pm

I talked about a template in the last post. The old pros on here already know about such things, but, we have a lot of new learners, itching to make sawdust so, I wanted to make this post of transforming the idea to actual full size. So, you are doodling around with your T-square and compass and suddenly there it is, exactly what you want to build. Hopefully you drew to scale. For instance, My eyes are bad so I like 2 inches= a foot. With this scale you can transpose your idea from paper to a 4x8 foot sheet of ply..which would be 8 inches x 16 inches on paper using the above scale. If you want to swing a 2 foot radius, set your compass to 4 inches,so on and so forth.. A large compass for laying out full size profile, can be constructed from a straight 1x2 piece of wood. using a nail or sharp drywall screw in one end for a pivot point and drilling a hole at the desired length, the size of a pencil diameter. A nice snug fit is needed so you don't get wobble when swinging the radius..Hope this helps..Danny
User avatar
Danny
The 300 Club
 
Posts: 333
Images: 108
Joined: Sat Oct 07, 2006 11:22 pm
Location: Nebraska
Top

Postby Danny » Tue Aug 09, 2011 3:56 pm

:twisted: OK, today the spars(ribs) went in and the ceiling liner.. always amazed at how much this stiffens the entire structure..It is looking like a teardrop now..The weather seal/doorstop went in yesterday..Thats all for now, since everything is glued/screwed and clamped. :D
User avatar
Danny
The 300 Club
 
Posts: 333
Images: 108
Joined: Sat Oct 07, 2006 11:22 pm
Location: Nebraska
Top

Postby S. Heisley » Tue Aug 09, 2011 5:56 pm

Am I reading correctly? Usually, the chassis can weigh around 300# and you are saying that you hope your build comes in around 300#? There are no moving metal parts that I can see under that teardrop. Are you having a chassis built or do you have something special planned?
User avatar
S. Heisley
Super Lifetime Member
 
Posts: 8869
Images: 495
Joined: Mon Sep 17, 2007 10:02 am
Location: No. California
Top

Next

Return to Build Journals

Who is online

Users browsing this forum: jdeleon and 1 guest