Pyrofish's 8.5' x 20' Toy Hauler

Converting Cargo Trailers into TTTs

Pyrofish's 8.5' x 20' Toy Hauler

Postby Pyrofish » Sun Jul 17, 2011 7:24 pm

Finally able to get to work on my 8'6" x 20' Toy Hauler :D I have a trip coming up in August, which in Florida is ONE HOT month. 8) So I'm trying to get this thing from a landscaper's trailer to an AC'd toy hauler by the 20th. We pulled all of the wood from the inside over the past week. Still a little in the front, but I have to pull down the shelving to do the rest.

Using a heat gun and scrapers, my girl and I were able to remove all three sides of decals from old lawn business that used to own this thing. Thats alot of lettering! :thumbdown: While I was pulling on some vinyl decal, it tore, and the paint scraper was in that hand... so i punched myself in the face with a metal scraper yesterday :applause: cut my nose, but otherwise ok. Don't run with scissors and all...

The old cam hasps on the back had been run into and bent, so I replaced them today too. Had to grind the bolts off...

All of that done, the day seemed early, so I decided to tackle the Rv style door latch. As soon as I opened the door, I saw a chunk of steel in the way where the old exterior handle was attached. So I broke out the grinder and went to work.
Image

Jumping from that pic to this one, in no way conveys the trial and error of using a sawzall, a grinder, a dremel, and a jigsaw to make these happen.
Image

Image

On to the Door frame. Broke out the square drill bits... DOH! No square drill bits around, sooo, I drilled this one out with smaller bits, then used a screw driver to beat it sort of straight.
Image

Not perfect, or ideal, but a file will straighten it up.
Here's the exterior pic of it installed. I forgot to put the cam hasp back on. Do that tomorrow :thumbsup:
Image

Inside the door once the screws are in
Image

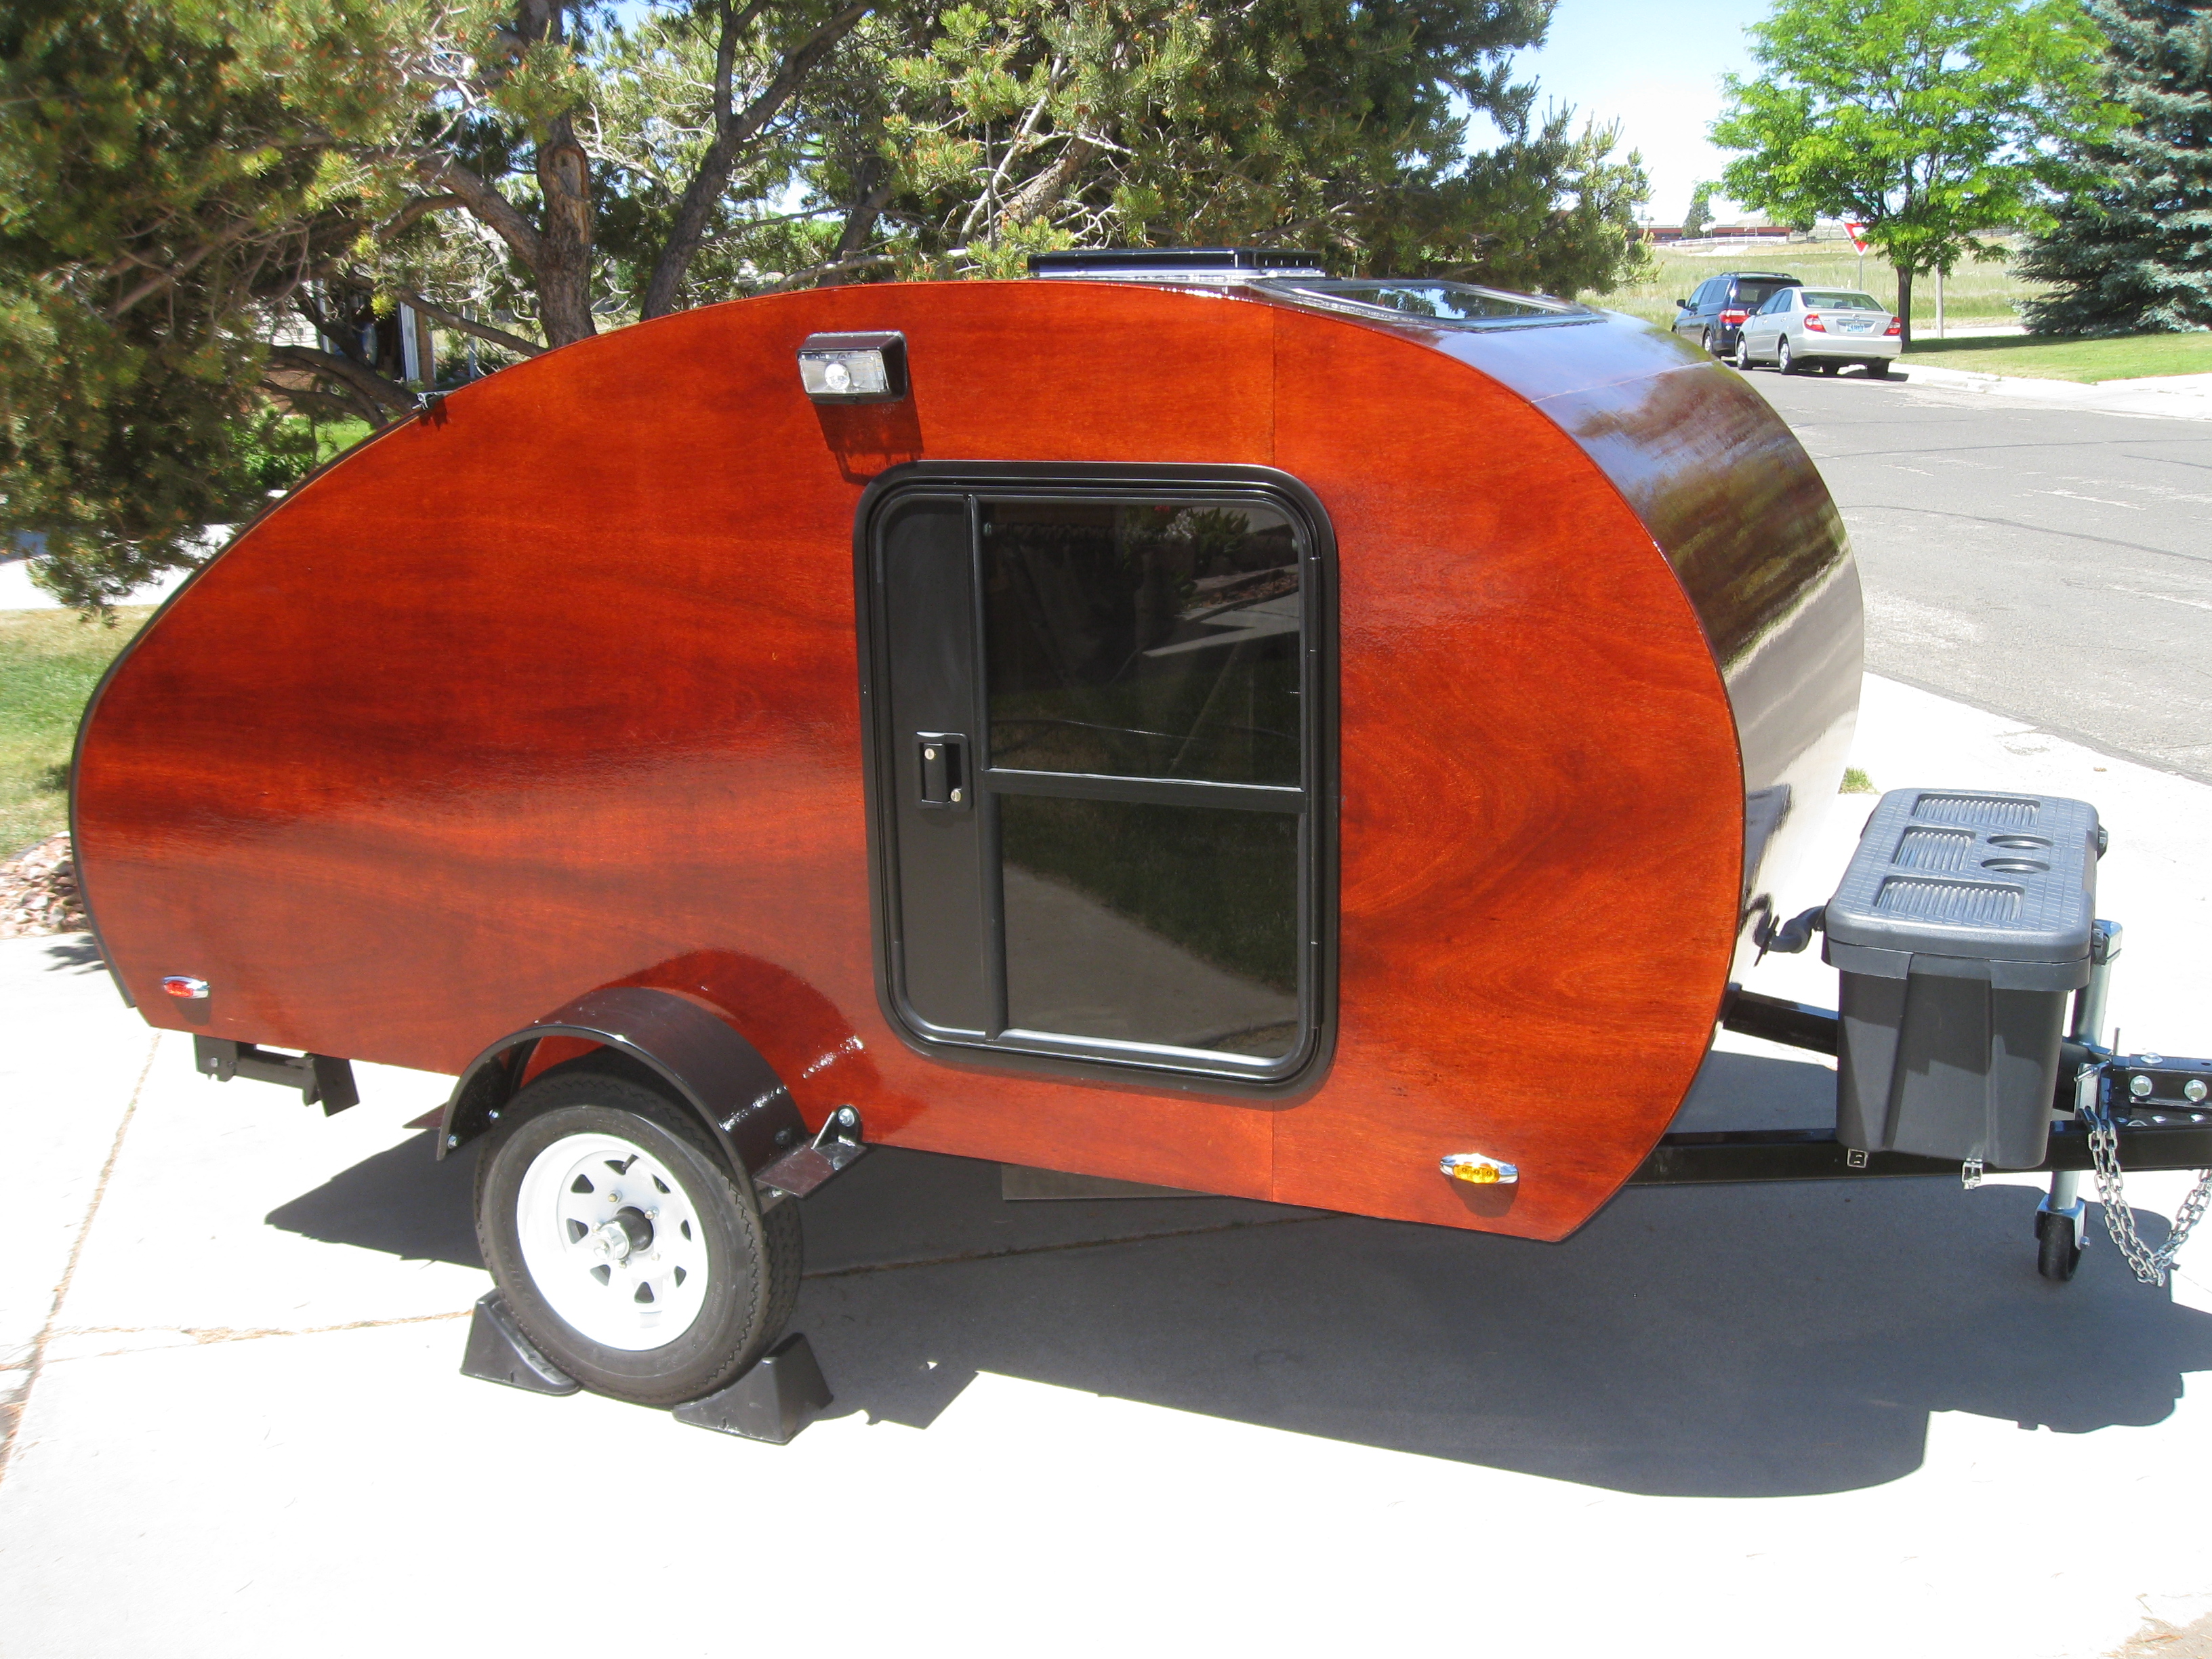
And the overall Port side of the beast. It is 8' tall BTW.
Image

More to come as work continues :?
User avatar
Pyrofish
Teardrop Master
 
Posts: 182
Images: 14
Joined: Thu Jun 02, 2011 8:53 am
Location: Mims, Fl

Postby pilgrim » Sun Jul 17, 2011 10:53 pm

Looks like you're solving the problems that crop up! In every thing I've ever done like this it seems that a fair amount of redneck engineering comes into play. I'm having a ball with mine but then I'm not on a strict time line - just kinda cruising through the whole process and enjoying the ride. With the kind of start you've got I bet you'll get this thing knocked out in time. :thumbsup:
The road less traveled usually has fewer potholes.
User avatar
pilgrim
Teardrop Builder
 
Posts: 41
Images: 31
Joined: Fri Jun 10, 2011 9:51 pm
Location: Northwest Montana

Postby pete42 » Mon Jul 18, 2011 7:08 am

I know I'm a little late with this tip I learned years ago when I was prepping aluminum airplanes for painting;

when removing the paint or decals we always used wooden scrapers
If I used metal ones there was a chance of putting a scratch in the aluminum skin. :cry:

nice trailer, big, but nice. :thumbsup:

Pete
User avatar
pete42
Super Lifetime Member
 
Posts: 2203
Images: 13
Joined: Sat Nov 07, 2009 11:52 am
Location: SouthWest Ohio
Top

Postby Pyrofish » Mon Jul 18, 2011 8:38 am

Scratches galore! :applause: lol

It doesn't matter though. I'm going to have to paint it. Maybe I'll go redneck it and give it a palm frond camo look. My girl won't like it, but it's easier than a clean paint job :roll:

Honestly, I wasn't looking for one this big, but when it popped up for $2900... well, I just had to pull the trigger. Onward and upward.
User avatar
Pyrofish
Teardrop Master
 
Posts: 182
Images: 14
Joined: Thu Jun 02, 2011 8:53 am
Location: Mims, Fl
Top

Postby pete42 » Mon Jul 18, 2011 10:02 am

Just got back from grocery store bought to much and weather is going to be in mid 90's today and the rest of the week.

Paint jobs are expensive anymore lots of sanding and prep. but makes them look good I don't blame you good price for trailer and you can always use the space.
pete
User avatar
pete42
Super Lifetime Member
 
Posts: 2203
Images: 13
Joined: Sat Nov 07, 2009 11:52 am
Location: SouthWest Ohio
Top

Postby lonerider » Mon Jul 18, 2011 11:48 am

pete42 wrote:Just got back from grocery store bought to much and weather is going to be in mid 90's today and the rest of the week.

Paint jobs are expensive anymore lots of sanding and prep. but makes them look good I don't blame you good price for trailer and you can always use the space.
pete


Oooo mid 90's :o
It's been over 100 here for 18 days, last 4 days over 103 :x Heat Index around 115!!
Can't even go into my trailer, you will become a "Baked Potato" fast :?
lonerider
Teardrop Advisor
 
Posts: 94
Joined: Sun Feb 21, 2010 6:29 am
Location: Texas
Top

Postby Pyrofish » Mon Jul 18, 2011 12:58 pm

Our dew point doesn't let us get over 100 much, but it does reach 100 almost daily in August. Heat index... well, what's 100F plus 100% humidity? :lol: :thumbdown:

One of the other uses for this bog toy hauler when I'm not camping, will be my back yard beer fermenter. I should be able to get some good homebrew going in there. Just not enough room in my current place. :thumbsup:
User avatar
Pyrofish
Teardrop Master
 
Posts: 182
Images: 14
Joined: Thu Jun 02, 2011 8:53 am
Location: Mims, Fl
Top

Postby Pyrofish » Sat Aug 06, 2011 9:28 pm

So, got some work done today. Combination of heat and rain have been a major hold-up lately. I had one of our office warehouse bays emptied so I could work on it indoors today and for the next week.
Image

I removed the existing vent and curb to reveal some rust. Not the best news obviously.

The front vent opening is much better
Image

I'll be attaching everything tomorrow. Removing those was one heck of a chore. They were REALLY attached. On a bright note, the frame held me, and at 335 lbs, I'd say that's a good frame :thumbsup:

Plan for tomorrow is mount the fan, mount the AC, install the aluminum standoffs in the walls to get the proper thickness for my insulation, and if I can get all of that done... probably drink some beer :twisted:

I wasn't excited to find out that the used AC I bought on eBay has no control unit or louvers... so I have to find that next...
User avatar
Pyrofish
Teardrop Master
 
Posts: 182
Images: 14
Joined: Thu Jun 02, 2011 8:53 am
Location: Mims, Fl
Top

Postby Pyrofish » Sun Aug 14, 2011 8:24 pm

Got some more work done on the beast. Camping in it this coming weekend, so I hope things go smoother than they have been.

The AC was a new experience for me. I didn't know you could buy one that was only the top half, then the inside stuff was a separate thing altogether.

After some research, I finally just called an RV place, and they told me what I needed. :thumbsup: 3 days later, the controller, the interior ducted portion, and the thermostat showed up.
Image
I don't think they sent me the right controller though... This one needed 12v to make it work. I have a converter, so it wasn't a big deal, I just hadn't planned to install it this soon.

If you're going to put the converter in, might as well start running interior 120 outlets right?
Image
All GFI outlets for this thing.

Alot of wiring. The blue is a 10/3 extension cord for the main power coming in. The yellow is 12/3 romex for the 120 outlets. Should be 12 in all with 3 exterior.
Image

The Mess...
Image

In this pic, you can see the aluminum stand-offs on the wall and the ceiling. The ceiling ends up 2-1/2" thick, and the wall ends up 4" thick. The nice thing about the wall being 4", and why I planned it so thick, is the inside floor width will be exactly 8' wide between the aluminum. Nice for putting in the extra floor plywood :thumbsup:

If you look close, you might see some wires hanging from the ceiling, some of that is the wiring for the lights, and one pair is the Fantastic Fan I have yet to wire in. It really hurts that the WFCO isn't in it's final position...

More to come as the build progresses.
User avatar
Pyrofish
Teardrop Master
 
Posts: 182
Images: 14
Joined: Thu Jun 02, 2011 8:53 am
Location: Mims, Fl
Top

Postby Wolfscout » Mon Aug 15, 2011 3:51 am

I like that you are giving yourself 4" walls. more insulation inside will help on extreme hot or cold days. plus you can hide the 110 boxes better,.
great Start.
Larry Fulmer, Jr.

2016 8X20 Homestead Patriot CTC
CTC 2

'90 6x12 Wells Cargo Trailer Conversion
my 1st build= CTC 1 FB album history.
User avatar
Wolfscout
500 Club
 
Posts: 511
Images: 32
Joined: Tue Jun 14, 2011 5:01 pm
Location: Newberry, S.C.
Top

Postby 8ball_99 » Mon Aug 15, 2011 11:05 am

Its looking good. Should be very nice when its done! 12 110v outlets seems like a lot, But I guess with the extra thickness of the walls its not to big of a deal to add extra. I used the metal jacketed wire vs romex. Thats what the cargo trailer places install in theirs if you add 110v. Might be something to consider. I was worried about the romex vibrating against the metal studs and maybe wearing a hole. The jacketed wire has a plastic wrap between the wire and the jacket to protect the wire. With all your wiring though that stuff might be expensive!
8ball_99
500 Club
 
Posts: 623
Joined: Sun Mar 07, 2010 12:34 am
Top

Postby Pyrofish » Mon Aug 15, 2011 12:07 pm

That might be expensive! :o

:D

12 seems like alot, the original plan was 8. 3 on each wall, and 2 in the kitchen. Then I changed the layout a little, and added a bathroom-closet-kind-of-thing. Now there's one more in the "bathroom", and 3 on the outside. I hadn't planned on exterior outlets, but a friend with an RV talked me into it. I know I've used his exterior outlets on many occasions, so it seems like a good thing to do.

As far as the wire, all of the wire is secured using vinyl coated steel clamps at every place I can. Anywhere it crosses a stud, I plan to wrap it in the bubble foil style of insulation. All of the sharp edges that I've installed will be covered by the 2" insulation.

I haven't used any yet, but the wires that will be concealed by insulation, I plan to use butt connectors that incorporate solder and heat shrink inside. You use a heat gun to install them. Pretty cool product.
User avatar
Pyrofish
Teardrop Master
 
Posts: 182
Images: 14
Joined: Thu Jun 02, 2011 8:53 am
Location: Mims, Fl
Top

Postby 8ball_99 » Tue Aug 16, 2011 9:22 am

glad your friend talked you into an outside outlet.. You will be glad you added one.. I have one on mine also although I just flipped through my pictures and I guess I didnt' take one of it.. Its on the side under the awning beside the entry door. Most of the time if your at a campground with power they have standard 15amp outlets along with the larger 30 amp RV plug. So its not a big deal just to plug in to there for outside use.. I put mine by the door for our boot dryer and if we wanted to run awning lights. Or really anything else we might want to plug in under the awning.. I've got 6 total 110 outlets in my 7x24. 5 of the outlets are all on one circuit and the way I wired them they pretty much daisy chain which cut down on the wiring a lot. Most of the wiring is run under the trailer since my walls are only 1" thick
8ball_99
500 Club
 
Posts: 623
Joined: Sun Mar 07, 2010 12:34 am
Top

Postby Wolfscout » Tue Aug 16, 2011 10:03 am

One of the things I've brought from my tent camping and moving up to the CTC has been the use of electical outlets on six ways for lights and the unknowns at camp grounds where it was available.
when I started getting ideas on my camper.. I didn't want to have to go back later and add stuff. so I stubbed out for each and every thing I could imagine.
you never know when you might want to use a drill, or power a coffeepot outside. or a audio system.
Larry Fulmer, Jr.

2016 8X20 Homestead Patriot CTC
CTC 2

'90 6x12 Wells Cargo Trailer Conversion
my 1st build= CTC 1 FB album history.
User avatar
Wolfscout
500 Club
 
Posts: 511
Images: 32
Joined: Tue Jun 14, 2011 5:01 pm
Location: Newberry, S.C.
Top

Postby Pyrofish » Tue Aug 16, 2011 11:42 am

I've got a few more going in on mine for various reasons. I don't plan on alot of 110 stuff, but I do plan on have them on 3 different circuits.

Some of this stuff goes back to my between-camping plan... which is using the interior to condition homebrew beer. So I need room for 2 smallish chest freezers (one for ales, and one for Lagers) in there, and a table to work on for bottling.

I had originally planned to complete the walls before the first trip, and was really pushing to make that happen. Now I just want insulation in the ceiling, and the wood on the floor. Everything else will come after this camping trip. Get a better idea of how much room I actually have. I don't want to mount a bed to the wall on the side where I have to exit my Rhino :thinking: Things like that.
User avatar
Pyrofish
Teardrop Master
 
Posts: 182
Images: 14
Joined: Thu Jun 02, 2011 8:53 am
Location: Mims, Fl
Top

Next

Return to Cargo Trailer Conversions

Who is online

Users browsing this forum: No registered users and 0 guests