Attached exterior accessories

General Discussion about almost anything Teardrop or camping related

Attached exterior accessories

Postby nrody » Thu Aug 18, 2011 11:09 am

Ok, progress has slowed to a snails pace on the Bean.
At this point I have installed some insulation but before I get too far I would like to ask everyone out there what attached exterior accessories are your favorites and must haves. Perhaps things like bottle openers, boat cleats or anything else that make your tear's that much better (or worse).

:scratchthinking:
nrody
Nancy
User avatar
nrody
Donating Member
 
Posts: 459
Images: 12
Joined: Fri Oct 15, 2010 8:38 pm
Location: Whittier, CA

Postby aggie79 » Thu Aug 18, 2011 11:17 am

I haven't made it to that point yet but I plan to add a cleat for a side table. I also plan to have a 120v electrical connection too that is acessible with the hatch closed.
Tom (& Linda)
For build info on our former Silver Beatle teardrop:
Build Thread

93503
User avatar
aggie79
Super Duper Lifetime Member
 
Posts: 5405
Images: 686
Joined: Tue Aug 07, 2007 5:42 pm
Location: Watauga, Texas

Postby bobhenry » Thu Aug 18, 2011 11:55 am

I gotta second the exterior 120 v outlet. Here is a link on a rather inexpensive table attachment method for removable side tables....

http://www.tnttt.com/viewtopic.php?t=43504&highlight=side+tables+again

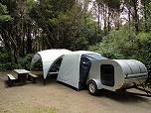
We tested out the bat wing tables on the chuckwagon at the Crossroads of america gathering, and they worked great. Not a thing I would do differently. Having an outlet directly above the table worked out great for lights as well as small appliances you may want to use.

(The blender for the margaritas) :thinking:

I am going to install identical rails on the 4x7 sleeper trailer and I will be able to "borrow" the chuck wagon tables to use with the other trailer as needed.

I have just had an original thought while thinking about the boat cleat. By mounting a heavy duty pull handle on or just under each side it would make a great anchor point to hook a ratchet strap for the ez up to keep it on the ground in windy situations.

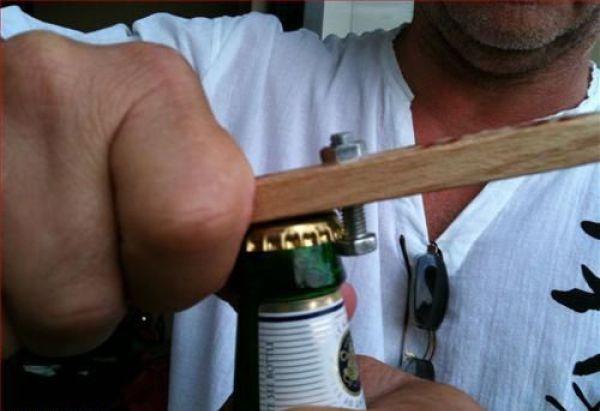
I have already added a redneck bottle opener to the chuckwagon.

A short elevator bolt pulled thru the side and a 1/4 " carriage bolt just above it. I spaced the carriage bolt out the thickness of the square shoulder bolt by using an undersized washer so the carriage bolt extends out about 3/16 - 1/4 ". Just slide the bottle cap under the carriage bolt lip and pry down on the flat head of the elevator bolt and pssssst its open.
I like it because it drives folks crazy trying to figure out what the hell it is !

I know, I know , I gotta get a picture :oops:

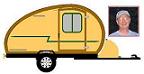
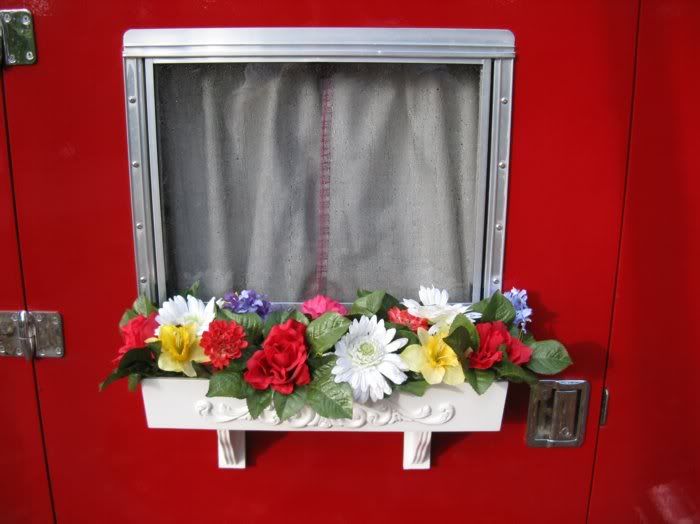
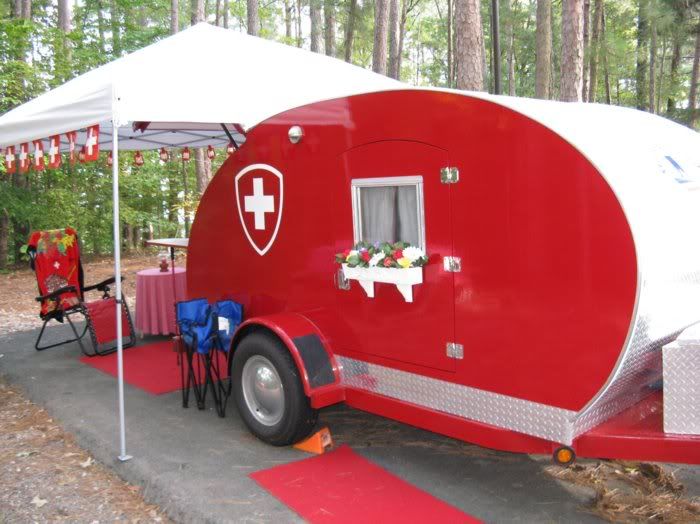
Here was my inspiration........Image
Last edited by bobhenry on Fri Aug 19, 2011 7:25 am, edited 1 time in total.
Growing older but not up !
User avatar
bobhenry
Ten Grand Club
Ten Grand Club
 
Posts: 10368
Images: 2623
Joined: Fri Feb 09, 2007 7:49 am
Location: INDIANA, LINDEN
Top

Postby green_eyed_diablito » Thu Aug 18, 2011 12:37 pm

It's never too early to plan!

I installed a table to the exterior of the Menehune Hut. It clips into a rail that is permanently affixed to the wall and the leg rests on the wheel. I was trying to figure out how to make a telescoping leg so the table would be level no matter what the terrain was like, but then it hit me. Why not rest the leg on the wheel so that as long as the trailer is level, the table will be level.

The table itself is 1/2 of a 50's dinette table.

Image
Image
Since this life here and now is all we can know, our most reasonable option is to live it fully.
ImageImage
User avatar
green_eyed_diablito
Teardrop Master
 
Posts: 226
Joined: Tue May 12, 2009 1:17 pm
Location: Los Angeles, CA
Top

Postby bobhenry » Thu Aug 18, 2011 12:40 pm

Guess I had better get you to level my crooked stove .....

Image


What can I say I was up against a deadline !

Here is a shot of the tables !
Growing older but not up !
User avatar
bobhenry
Ten Grand Club
Ten Grand Club
 
Posts: 10368
Images: 2623
Joined: Fri Feb 09, 2007 7:49 am
Location: INDIANA, LINDEN
Top

attached exterior ideas

Postby nrody » Thu Aug 18, 2011 4:03 pm

All wonderful Ideas folks. Keep em comming. Now I need to look for the thread for the table rail. I saw it recently but now I need to find it.
:applause:
nrody
Nancy
User avatar
nrody
Donating Member
 
Posts: 459
Images: 12
Joined: Fri Oct 15, 2010 8:38 pm
Location: Whittier, CA
Top

Re: attached exterior ideas

Postby jerry101jlh » Thu Aug 18, 2011 4:56 pm

nrody wrote:All wonderful Ideas folks. Keep em comming. Now I need to look for the thread for the table rail. I saw it recently but now I need to find it.
:applause:


This link might be of help

https://www.berrylandcampers.com/rv-parts/product.php?productid=2998&cat=9&page=30&js=n.
jerry101jlh
Teardrop Master
 
Posts: 167
Joined: Fri May 27, 2011 2:15 pm
Top

Postby planovet » Thu Aug 18, 2011 5:01 pm

I kinda like the window boxes I made, it's very Swiss. ;)

They are attached with the same type of rail that the above tables are attached. That way I can easily take them off for travel.

Image

Image
ImageMark (& Cindi)
Visit our website: Little Swiss Teardrop

I was wondering why the water balloon was getting bigger... and then it hit me.

ImageImageImageImage
User avatar
planovet
The Cat Man
 
Posts: 5583
Images: 3
Joined: Tue Nov 27, 2007 4:48 pm
Location: Plano, Texas
Top

Postby Shadow Catcher » Thu Aug 18, 2011 6:29 pm

We have two 120 AC outlets one for the AC and one for what ever. Door holder opens. Kedar/awning rail three sides.
User avatar
Shadow Catcher
Donating Member
 
Posts: 6008
Images: 234
Joined: Sat Apr 11, 2009 8:26 pm
Location: Metamora, OH
Top

Postby S. Heisley » Thu Aug 18, 2011 8:08 pm

No matter how careful and thoughtful you are now, there will be something that will come up later that you wish you could do. The following may help you do that:

While your teardrop is stripped down to the studs, something that is inexpensive and easy to do is to tape some Kraft paper onto the stripped side of the wall and trace where everything is. Trace the wood joints; mark where screws are, and maybe even the wiring. Then, roll it up and mark what each Kraft sheet is for (i.e. drvr wall or psngr wall or front or...?) and store it for future use. The sheet won't cover the entire wall, top to bottom; but, if there is something that is important that isn't covered, you can write it on the sheet, explaining exactly where it is. That way, if you want to do something after the bean is closed up, you'll know where everything is down to a fraction of an inch and know what you can do and be able to figure out how you can do it. Pictures are also helpful but the traced Kraft paper seems to help me the most.
User avatar
S. Heisley
Super Lifetime Member
 
Posts: 8873
Images: 495
Joined: Mon Sep 17, 2007 10:02 am
Location: No. California
Top

Postby Big Dan » Thu Aug 18, 2011 8:39 pm

This is whats so cool about these trailers. Theres no (cookie cutter) about them. Each trailer reflects the owners personality. And there is no limit to what you can do. :thumbsup:
"Happiness is only real when shared" Alexander Supertramp
User avatar
Big Dan
The 300 Club
 
Posts: 414
Images: 45
Joined: Fri Dec 10, 2010 7:46 pm
Location: WA
Top

Postby Sam I am » Thu Aug 18, 2011 9:26 pm

I have a side table and a gravity feed water tank that hang on interlocking aluminum extrusion cleats. Also, a trash bag holder on the other side. Those extrusions are great! They lift off or go on in seconds.

Image
User avatar
Sam I am
500 Club
 
Posts: 770
Images: 106
Joined: Sun Jul 02, 2006 9:19 pm
Location: Central PA
Top

Postby bobhenry » Fri Aug 19, 2011 7:18 am

S. Heisley wrote:No matter how careful and thoughtful you are now, there will be something that will come up later that you wish you could do. The following may help you do that:

While your teardrop is stripped down to the studs, something that is inexpensive and easy to do is to tape some Kraft paper onto the stripped side of the wall and trace where everything is. Trace the wood joints; mark where screws are, and maybe even the wiring. Then, roll it up and mark what each Kraft sheet is for (i.e. drvr wall or psngr wall or front or...?) and store it for future use. The sheet won't cover the entire wall, top to bottom; but, if there is something that is important that isn't covered, you can write it on the sheet, explaining exactly where it is. That way, if you want to do something after the bean is closed up, you'll know where everything is down to a fraction of an inch and know what you can do and be able to figure out how you can do it. Pictures are also helpful but the traced Kraft paper seems to help me the most.


This is the single most intelligent piece of advice I have seen on this forum in the 4 1/2 years I have been around !

Damn it Sharon why didn't you tell me sooner ! :lol: :lol: :lol:

Poking nail hole after nail hole thru your finished wall to find a framing member and later realizing you also found (and shorted out) an electrical circuit with an errant nail or screw isn't funny :x

I have relied on my build pictures many times to guesstimate just these facts when adding new features to the trailer and some guesses were wrong. Perhaps with help getting a tape measure strung thru a picture would be of benefit also .
Growing older but not up !
User avatar
bobhenry
Ten Grand Club
Ten Grand Club
 
Posts: 10368
Images: 2623
Joined: Fri Feb 09, 2007 7:49 am
Location: INDIANA, LINDEN
Top

Postby S. Heisley » Fri Aug 19, 2011 9:04 am

:oops: Gosh, Thanks, BobHenry. I did tell people; but, it was a while ago:

http://tnttt.com/viewto ... c&start=45
User avatar
S. Heisley
Super Lifetime Member
 
Posts: 8873
Images: 495
Joined: Mon Sep 17, 2007 10:02 am
Location: No. California
Top


Return to General Discussion

Who is online

Users browsing this forum: No registered users and 3 guests