Re-engineering my doors, lots of pics

Anything to do with mechanical, construction etc

Re-engineering my doors, lots of pics

Postby MyChell » Tue Aug 23, 2011 3:37 pm

I have quite a few things on my Chell that I would like to add/modify, as is the teardrop way, so it seems. :) The primary thing that I want to fix is the doors. I know - yet another door post - and I have read many. If I were starting from scratch, I would simply duplicate something that already works for another. However, since I am modifying what exists, I am having trouble envisioning exactly what to do to seal my doors. :thinking:

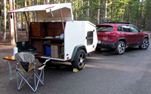
I show the curbside door, which is the one I use all of the time. The driver's side door has the same sealing issues. The doors lock from the outside with cabinet locks, and slide locks to close/lock from the inside. There's no way to hold the door closed without locking a lock. Previously, the doors were offset so much that the doors stood nearly an inch out from the trailer. There were plastic spacers (removed these) under the hinges like the one I repurposed for the inside latch (see pic below). Some offset is needed though, since the inside of the door near the hinge is rubbing the door jamb. There was also foam weatherstripping on the door, too thick at the hinge and you could see not just daylight, but trees and grass through the gap latchside. I used olive oil and a lot of elbow grease to get the adhesive from the weatherstripping off of the door. Also, the inner door jamb is curved in a manner hard to describe in words - detailed pics of this are below. The bottom of the door seen here was cracked and ultimately broke, from my short legs reaching for the ground and putting pressure on it - put a sturdier board here. Again, difficult to describe in words. Lots of pics follow...

What I would like to accomplish follows the pics - Thanks for looking!

My doors as they are now - locks from the outside with a cabinet lock
Image

Hinges - I am thinking perhaps I should replace these with the offset piano hinges
Image

Inside Latch - There used to be plastic blocks under the hinges (too much offset) like the spacer seen on the slide latch in this picture.
Image

Close up of repurposed spacer block
Image

The gap latchside as it is now
Image

Curved jamb - My doors close against an inner jam of very thin plywood. The exterior plywood is routed in a curve to the inner door jamb, resulting in a curved inner surface to attempt to seal. The thin weatherstripping here doesn't do much, but is the effort of a helper with good intentions, an excellent carpenter I might add, but with no rv experience. You can also see in a couple of these, that the inside of the door near the hinges is rubbing against the jamb.
Image
Image
Image
Image
Image
Image


Bottom of the jamb, board in place
Image
Close up of the jamb, easy to see the curve in the jamb here
Image

What I would like to have - Doors that seal properly - I have read many posts and am unsure how to go about this with the curved jamb. Would aluminum t-channel work without interfering with the curved jamb? Are the corner radii too tight on the door to bend aluminum channel? I am thinking I should I replace the existing hinges with an offset piano hinge from Grant. The curved jamb is giving me fits on envisioning a solution to this. Of course, the curve may not be a problem at all - it may be my head overthinking things, which I tend to do<grins>. An actual door handle that locks - not sure what sort of door handle will work with my doors and walls. It would be nice if it would simply close, rather than fussing with the slide latches inside every darn time. Not to mention, those cabinet locks don't seem like they would slow anyone down. It would be nice to be able to close the door without having to lock it every time.

:thumbsup: Any and all suggestions and assistance are greatly appreciated, teardrop gurus! :thumbsup:

PS No internet at my current parking space, my Momma's, but I will be checking in here every day or two. Thanks again!!!
User avatar
MyChell
Teardrop Builder
 
Posts: 28
Images: 52
Joined: Sat Aug 20, 2011 12:25 pm
Location: NW Georgia

Postby aggie79 » Wed Aug 24, 2011 9:47 am

Hello MyChell.

I really like the interior of your teardrop. Of course I'm old enough to have owned bell-bottomed jeans, knee-high leather moccasins, and blue-tinted eyeglasses.

Before I throw out a couple of ideas, I need to issue the disclaimer that I am not one of the multi-build, talented craftsman that are on this forum.

As you know there are two basic ways to weatherseal teardrop door. One is an exterior seal, using t-molding around the perimeter of the door. The weatherseal is placed on the leg of the t-molding that overlaps the sidewall. The other way is an interior seal where there is an inner door jamb that frames the perimeter of the door opening. Weatherseal is placed on this inner door jamb. This appears to be the way that your teardrop door is arranged.

For either way, you need to leave a gap or space for the weatherseal. A weatherseal will compress, so the gap needs to be less than the thickness of the weatherseal. It varies depending upon the type of weatherseal, but usually the seals need to compress about 1/3 third of their thickness. So, for example, if you plan to use a 3/8" thick seal, then the gap would need to be about 2/3 of that or 1/4" in this case.

If you go the exterior seal route, using t-molding, the door is not flush with the sidewalls. It will need to "sit out" the distance of the gap needed for the weatherseal. To do this, you'll need to use either an offset piano hinge (like Grant sells) or spacers on the sidewall side of your hinge.

For the interior seal route, there is a "plan a" and "plan b" method to create the gap for the weatherseal between the door and the jamb. The "plan a" method is like the exterior seal route. The door is offset from the plane of the sidewalls using an offset piano hinge or spacers and the interior jamb is flush with the inside edge of the sidewalls. (This appears to be the method that your builder tried to implement.) The "plan b" method is to have your door flush with the sidewalls. There is no offset, so hinges with no spaces or standard piano hinge could be used. To get the offset for the weatherseal, a spacer is used on the inside sidewall surface to space the door jamb the amount of distance you need.

On my build, because I didn't trust my skills, I used both an exterior seal and a "plan a" interior seal. Here is a sketch of what I did.

Image

As far as what to do on your teardrop, here's what I think may be causing the "issues". First, as you mentioned, the interior jamb material is not substantial enough. Second, I have a feeling that your door may be slightly warped. Third, there may not be sufficient enough gap for your weatherseal.

I would retrofit the doors using the "plan b" interior seal method. The jamb that you have now appears to be about 1/4" thick. I would leave that in place as the spacer, but cut it so that it is matches the door opening. The easiest way would be with a router, but you could carefully use a jigsaw and sand the cut to match the opening. Next you would need to make the inner jamb. I would recommend that the material is at least 1/2"; 3/4" would be better. I would allow the jamb to extend about 1" into the opening.

After the new jamb is cut, it needs to be fastened. I used adhesive sealant (don't use silicone) and screws.

Image

Image

Apply the sealant and clamp in place. Then come back and install the screws. The adhesive alone is probably good enough to hold the jambs in place. If you use screws, be sure that they do not go through the sidewalls.

After the new jamb is in place, I would re-seal around the door opening, old jamb used as a spacer, and new jamb. Then install the seals, and re-install the doors.

If your doors are not straight (flat), a continuous piano hinge will help to straighten them. Also, you could add "stiff-backs" to the interior side of the door. By stiff-backs, I mean two pieces of wood installed vertically, one on either side of the door. But, if you do, you'll need to think about your lock/latch set-up. (I would use the door latches that Grant sells.)

Hope this wasn't too long-winded.

Good luck and take care,
Tom
Tom (& Linda)
For build info on our former Silver Beatle teardrop:
Build Thread

93503
User avatar
aggie79
Super Duper Lifetime Member
 
Posts: 5405
Images: 686
Joined: Tue Aug 07, 2007 5:42 pm
Location: Watauga, Texas

Postby MyChell » Thu Aug 25, 2011 2:41 pm

I totally appreciate your input and don't consider your post long winded at all. I consider myself longwinded. BTW, I have looked at your build thread for ideas on my Climate Right (petcool) install. Beautiful and inspiring work!

First, as you mentioned, the interior jamb material is not substantial enough. Second, I have a feeling that your door may be slightly warped. Third, there may not be sufficient enough gap for your weatherseal.


First, agreed that the jamb is too thin, Second, I would be surprised if the door was not warped, Third, I am sure I don't have enough gap. I had to read and reread your post a couple of times to envision your idea - not your words, but getting them to sink into my head. I like your idea about replacing the jambs and can visualise how using the existing jamb (it is 1/4") as the spacer between the door and a new jamb would work. The only place that idea concerns me is along the top of the doors. I don't have much room to work at the top. I just realised that I don't have a good picture that shows all of the area above this door inside. I'll correct that but there are a couple below. There isn't much vertical space at all between the door opening and the spars or the roof for that matter, especially toward the front of the cabin.
You can see it a bit closer here
Image
and here
Image
It's kinda of dark in this one
Image
You can see it in this one of the other door.
Image

The 1/4" has been cut to fit around the spars - I must admit to being more than a bit intimidated by managing to puzzle fit a piece of thicker material around the spars. If I cut off the excess 1/4" and the routed curve (made the wall edge flat), I am not sure how much of the exterior wall's plywood I would have to mount an inner jamb to if I cut down the existing opening. If I only cut off the 1/4" bits and left all of the routed curve of the exterior wood (which in rereading again is what I think you mean), I still need to offset to the outside a bit (I think?), because the inside edge of the door nearest the hinge is rubbing against this curved exterior wall edge. I guess this could be due to having a warped door as well. If I decided to offset the door to include an exterior seal as well as made a new inner jamb, I could still seal the wider inner gap with a bit thicker weatherseal, I think. All this has me thinking about an outer jamb of sorts, maybe 1/2" thick to accomodate an exterior seal. I am wondering if this would add too much weight to the doors and make more problems. More thoughts on this to come I am sure as I am off to read and over think doors, weatherstripping, and hinges again...

Thanks again for your thoughts on this!
User avatar
MyChell
Teardrop Builder
 
Posts: 28
Images: 52
Joined: Sat Aug 20, 2011 12:25 pm
Location: NW Georgia
Top

Postby jss06 » Thu Aug 25, 2011 3:53 pm

Here is a diagram of how I am setting up my door seals.

Image

In my case the door is 1 1/2 inches thick and the lip is 3/4 inches thick.

The exterior wall door opening is curved as is the door, but the interior sealing lip is square cut. The 1/4" spacer plywood is router trimmed to the door opening with the lip glued to that. I will get a picture of that so you can understand a bit better.
User avatar
jss06
Palladium Donating Member
 
Posts: 663
Joined: Mon May 12, 2008 7:48 pm
Location: Carrollton, TX
Top

Postby MyChell » Thu Aug 25, 2011 3:55 pm

This may seem a simple question, thinking so much about everything, but.... If I remounted with a piano hinge, I would need a flat door opening to work with correct? Again, I think too much. Get off the computer, off the forum, let what you have learned soak in without overdoing it, Michelle!!
User avatar
MyChell
Teardrop Builder
 
Posts: 28
Images: 52
Joined: Sat Aug 20, 2011 12:25 pm
Location: NW Georgia
Top

Postby MyChell » Thu Aug 25, 2011 4:08 pm

Thanks John, I would love to see a pic, sounds like we are working on somewhat similar doors. And thanks again for your input, Tom. Much to think about while I am looking at my Chell armed with more new knowledge.
User avatar
MyChell
Teardrop Builder
 
Posts: 28
Images: 52
Joined: Sat Aug 20, 2011 12:25 pm
Location: NW Georgia
Top

Postby jss06 » Thu Aug 25, 2011 4:11 pm

I really do love working from home: In my case the doors are built so they are flush with the outside wall.

Door opening bottom:

Image

Door opening Top:

Image


Interior shot of door lip:

Image
User avatar
jss06
Palladium Donating Member
 
Posts: 663
Joined: Mon May 12, 2008 7:48 pm
Location: Carrollton, TX
Top

Top edge of doors

Postby MyChell » Fri Aug 26, 2011 3:22 pm

Took some more pics this morning to show how close to the spars the door openings are cut.

Curb side Door
Image
Top Corner - The spar in this corner is very close to the edge of the wall's plywood
Image
As you can see from the outside in this pic.
Image

The door on the other side is much the same.
User avatar
MyChell
Teardrop Builder
 
Posts: 28
Images: 52
Joined: Sat Aug 20, 2011 12:25 pm
Location: NW Georgia
Top

Close up of curved opening profile

Postby MyChell » Fri Aug 26, 2011 3:24 pm

Another shot to show how the door opening is curved a bit better. The opening itself has a curve, not just the curved corners.
Image
User avatar
MyChell
Teardrop Builder
 
Posts: 28
Images: 52
Joined: Sat Aug 20, 2011 12:25 pm
Location: NW Georgia
Top

Postby aggie79 » Mon Aug 29, 2011 8:44 am

MyChell,

I think I see what you are talking about. The edges of the door opening are not square cut. It looks like the builder may have used a roundover bit in a router. Because of this, t-molding may not be long enough to span the gap of the door opening and the rounded edges of the door opening.

So...you still probably have two options. I think there is enough room to do an interior jamb. But what may work better is to construct a "trim ring" to be applied to the outside of you door around its perimeter. I envision a trim ring about 3" in width. About 1" of the trim ring would span over the door gap and rounded door opening. This would give you surface to apply weatherseals and would work similar to t-molding. I would use a high quality 1/4" plywood. (Personally, I would go with 6mm Baltic Birch.)

With this way, you still need to leave space for the weatherseal and would have to change your hinges to a longer strap hinge so that the hinge centerline is beyound the outer edge of the hinge side trim ring.

Take care,
Tom
Tom (& Linda)
For build info on our former Silver Beatle teardrop:
Build Thread

93503
User avatar
aggie79
Super Duper Lifetime Member
 
Posts: 5405
Images: 686
Joined: Tue Aug 07, 2007 5:42 pm
Location: Watauga, Texas
Top

Postby bobhenry » Mon Aug 29, 2011 9:48 am

This is my fifth tiny trailer build and I learned from #2 to avoid curves if you are planning on trim.

Here is a close up of my latest el cheapo door effort

Image

Image

Perhaps you could wood trim as I have but with a short 45 degree section to mimic the curve making a non standard hexagon and eliminating the round corner. The door blank could remain as it is and just redesign the inside stop and the outside trim.

Looking at the close up picture of the trim and stop, I intend to remove trim and stop one more time and wrap the wall with a self stick low nap weather seal I also intend to adhere some to the stop. Now when the stop is reinstlled the weather strip will be trapped between the stop and the wall. When I reinstall the outside trim it will trap the edge wrapped around the outside of the wall. The halo around the opening greatly stiffens the wall and the door trim helps to control the warping.
Growing older but not up !
User avatar
bobhenry
Ten Grand Club
Ten Grand Club
 
Posts: 10368
Images: 2623
Joined: Fri Feb 09, 2007 7:49 am
Location: INDIANA, LINDEN
Top

Postby MyChell » Wed Aug 31, 2011 1:42 pm

I have been busy and haven't had much teardrop time in the last few days. I believe I am going to go with the flush mounted doors, beef up the interior jambs, and interior seal as Tom suggested. It will probably be next week before I can work on this. I plan on doing lots of teardrop work in the next week, so I will keep you posted on how things go. Thanks for the input guys!
User avatar
MyChell
Teardrop Builder
 
Posts: 28
Images: 52
Joined: Sat Aug 20, 2011 12:25 pm
Location: NW Georgia
Top


Return to Teardrop Construction Tips & Techniques

Who is online

Users browsing this forum: No registered users and 3 guests