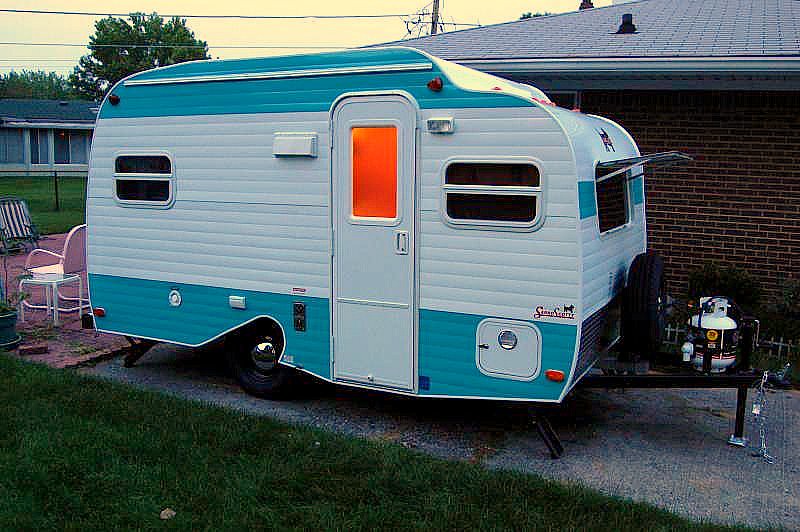
4//11/13 - Eleven months later - back to work. Page 9

Canvas covered foamies (Thrifty Alternatives...)

Moderator: eaglesdare

Postby GPW » Tue Jan 24, 2012 8:34 am

Eagle ... but we know yours works ... you’ve camped in it !!! a Lot !!! :thumbsup:
There’s no place like Foam !
User avatar
GPW
Gold Donating Member
 
Posts: 14920
Images: 546
Joined: Thu Feb 09, 2006 7:58 pm
Location: New Orleans

Postby linuxmanxxx » Tue Jan 24, 2012 11:24 am

You want some serious pizazz and pop go to etrailer and get the clear LED lights that are red when they light. I put those on my prototype and the upper bar on the production and they are bright and look amazing and so modern deco looking.
User avatar
linuxmanxxx
500 Club
 
Posts: 802
Images: 10
Joined: Fri Sep 10, 2010 1:50 am
Location: Abilene TX

Postby millstone » Thu Jan 26, 2012 9:17 pm

Mike:

Sorry. I only have 1.5 inches of foam on roof. The first half inch is cut flush with the hatch frame. The other inch is cut to fit the trailer walls. So the half inch space will be filled up with an (oak) strip on the bottom of the hatch lip plus weatherstripping.

The lights I got at the harbor freight store for like eight bucks each or something. LEDs. Round amber led lights for the front side marker lights. Still want to pit some bright white lights in for better backing vision. Not sure of I will though.

Getting antsy. Plus I think im about to lose my build area. So i gotta get cracking.

M.
User avatar
millstone
Silver Donating Member
 
Posts: 74
Images: 0
Joined: Tue Jul 05, 2011 3:53 pm
Location: Georgia
Top

Postby millstone » Thu Jan 26, 2012 9:28 pm

Louella. Hatch frame on page 4. M.
User avatar
millstone
Silver Donating Member
 
Posts: 74
Images: 0
Joined: Tue Jul 05, 2011 3:53 pm
Location: Georgia
Top

Postby eaglesdare » Fri Jan 27, 2012 5:54 am

millstone wrote:Louella. Hatch frame on page 4. M.


i must have forgot.
Louella
May the foam be with you.
User avatar
eaglesdare
Donating Member
 
Posts: 3168
Images: 13
Joined: Tue Aug 26, 2008 7:06 pm
Top

An unhealthy hatch obsession

Postby millstone » Wed Feb 01, 2012 8:51 pm

I think I have a completed hatch.

I got a 16-6 cable to wire the hatch/trailer lights. Four wires for the trailer lights, and two for the lights on the inside of the hatch.

Image

On the foam I wrote a couple of wiring diagrams, or "cheat sheets."

I had two of those reading lights like the ones in the cabin, so I put 'em inside the hatch.

Image

And here's the finished hatch

Image

Now, to fish that cable thru two small holes in the galley partition, over the ceiling and down to the battery area, where the trailer light wires will go to a connector, and the other galley light wires will go to the fuse box.

I guess now I can obsess on something else. :rofl2:

Mark
User avatar
millstone
Silver Donating Member
 
Posts: 74
Images: 0
Joined: Tue Jul 05, 2011 3:53 pm
Location: Georgia
Top

Postby CliffinGA » Wed Feb 01, 2012 11:48 pm

Looks great Mark now you can come finish mine :lol:

Cliff :thumbsup:
In God we trust, shoot the rest and he will sort out!

My Build:

viewtopic.php?f=50&t=42628
User avatar
CliffinGA
1000 Club
1000 Club
 
Posts: 1499
Images: 207
Joined: Sat Nov 14, 2009 1:29 pm
Location: Jefferson, GA
Top

Postby GPW » Thu Feb 02, 2012 7:31 am

Mark , did you “waterproof “ all that wood before you put it on ? :roll:
Really Nice looking hatch !!! 8)
There’s no place like Foam !
User avatar
GPW
Gold Donating Member
 
Posts: 14920
Images: 546
Joined: Thu Feb 09, 2006 7:58 pm
Location: New Orleans
Top

Postby millstone » Fri Feb 03, 2012 3:56 pm

Im on my way to J-town right now. Basketball games.

CliffinGA wrote:Looks great Mark now you can come finish mine :lol:

Cliff :thumbsup:
User avatar
millstone
Silver Donating Member
 
Posts: 74
Images: 0
Joined: Tue Jul 05, 2011 3:53 pm
Location: Georgia
Top

Postby millstone » Fri Feb 03, 2012 3:59 pm

GPW wrote:Mark , did you “waterproof “ all that wood before you put it on ? :roll:
Really Nice looking hatch !!! 8)


I didn't but I can. Should. Was going to spar poly the face side. Probably should hiit the underside with some 50 50 huh?
User avatar
millstone
Silver Donating Member
 
Posts: 74
Images: 0
Joined: Tue Jul 05, 2011 3:53 pm
Location: Georgia
Top

Postby GPW » Fri Feb 03, 2012 5:00 pm

Can’t hurt !!!
There’s no place like Foam !
User avatar
GPW
Gold Donating Member
 
Posts: 14920
Images: 546
Joined: Thu Feb 09, 2006 7:58 pm
Location: New Orleans
Top

Postby CliffinGA » Fri Feb 03, 2012 11:32 pm

Dang Mark sorry I wasn't on here earlier was to busy gettng stuff ready to head to Griffin tonorrow. Hopefully ya'll had a good game ... and lost :lol:. May not be from here but still pull for the JHS and Jackson County HS.

Cliff :thumbsup:
In God we trust, shoot the rest and he will sort out!

My Build:

viewtopic.php?f=50&t=42628
User avatar
CliffinGA
1000 Club
1000 Club
 
Posts: 1499
Images: 207
Joined: Sat Nov 14, 2009 1:29 pm
Location: Jefferson, GA
Top

Postby millstone » Sat Feb 04, 2012 5:23 pm

CliffinGA wrote:Dang Mark sorry I wasn't on here earlier was to busy gettng stuff ready to head to Griffin tonorrow. Hopefully ya'll had a good game ... and lost :lol:. May not be from here but still pull for the JHS and Jackson County HS.

Cliff :thumbsup:


Cliff

Girls lost big time. Boys won. I actually ducked out early. Maggie (jv cheerleader) wanted to go home. Brook stayed the whole way with betsy (varsity cheerleader)

Like the folks at JC. Betsy has several friends there. I do find the Jefferson crowd a bit intense. Not nearly as bad as Hart though.
User avatar
millstone
Silver Donating Member
 
Posts: 74
Images: 0
Joined: Tue Jul 05, 2011 3:53 pm
Location: Georgia
Top

Re: 4/9 Beginning the skinning

Postby millstone » Mon Apr 09, 2012 7:44 pm

Catching some building hours when I can.

Because I am glueing up the roof out of 1/2" sheets, I became concerned about the foam where it contacts the camper floor when the hatch is down. I put in a wooden contact piece:

Image

Went ahead and skinned the foam with canvas. Using latex concrete block filler ($89/five gallon pail at Ace Hardware) It's very thick; you could almost trowel it on, like with a foam grout float. I opted to roll. One coat to stick the canvas, then two coats over top. I recommend a foam roller. I used a semi-smooth nap roller, ant it rolled on way too stipply for me. I sanded down the stipple and went back with a foam roller. Still stipply, but with some 100 grit sandpaper, it now feels like a textured FRP Panel. I can live with that.

Image

Another pic to show some progress:

Image

And one, just because. Looking like a camper now

Image

Still working out some kinks. The hatch doesn't fit as nicely with the wooden strip, but I'm hoping the hatch closing mechanism, whatever that may be, will cinch it down. Putting the foam on the roof now. A mishap with some great stuff foam is giving me fits, but nothing that a 3 x 24 belt sander can't fix.

Rocking and rolling in the 706. Peace

Mark
User avatar
millstone
Silver Donating Member
 
Posts: 74
Images: 0
Joined: Tue Jul 05, 2011 3:53 pm
Location: Georgia
Top

Re: 4/9 Beginning the skinning

Postby GPW » Mon Apr 09, 2012 7:54 pm

WOW!!! NICE !!! :thumbsup: 8) 8) 8)
There’s no place like Foam !
User avatar
GPW
Gold Donating Member
 
Posts: 14920
Images: 546
Joined: Thu Feb 09, 2006 7:58 pm
Location: New Orleans
Top

PreviousNext

Return to Foamies

Who is online

Users browsing this forum: DrAlvarez and 12 guests