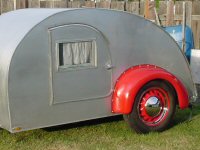
OK, I've been promising pics and here are a few. I'll upload more in a day or two, when we make some more substantial progress.
Remember that cabin cabinet case? Here it is with some pieces of cherry laid out for face frames:

Making an apron for the cabinet bottom:

Laminating the side posts:

Cutting the apron tenons:

More-or-less completed face frames:

Just about the same time:

I was really jazzed to see the assembled face frames in place for the first time, although this is just dry fit-- nothing is glued up yet:

Another view. It's really hard to photograph inside the trailer with our camera:

Yes, we have a cat problem, but in fairness these are all gathered on top of the table because of the dog problem!

And they're only PART of the cat problem, at that....

Here are the solid wood, flush maple doors rough cut and dry fitted, no hinges or pulls yet, and of course no finish on anything yet. I still have several tasks to do on these doors, including evening out the spacing around the face frames. I'm thinking about covering the end grain along each side as well. Just because. Eww, it's end grain. Haven't decided about beading yet. The top door will likely be divided into halves that open sideways.

The next step is making the base frame for the front cabin closet, which will also function as a headboard (with doors). This is the base frame that clears the mattress, again in cherry and maple:


Like I've said, this bit seems interminable. I've never built cabinets this nice before, so I'm going slow and carefully! But Kathy and I were talking about this, and we decided that we're not building the teardrop for production, and we're gonna be looking at those cabinets for years, so why not make them the way we like them? Besides, everyone needs a hobby!

--Mike C.
If it isn't broke, perhaps a more expensive tool is required to break it....


 Still, it's not as fun as camping.


 . Reading this thread is addictive. Looking forward to future installments


 Gonna be a tight fit.


