West Coast 6x10 V-Nose Conversion

Converting Cargo Trailers into TTTs

Re: West Coast 6x10 V-Nose Conversion

Postby roadinspector » Mon Apr 02, 2012 9:55 pm

8ball_99 wrote:It probably wouldn't hurt, But I've got 6 of those exact lights on my trailer and its been through some pretty major rains.. Including my trailer sitting with in a few miles of 5 different tornados since last year :? I have not noticed any water getting into the lights and I did check for leaks pretty well after the first couple of major rains. You see all that water sheeting over the windows and you just know something is going to leak somewhere lol. So far so good..


Cool! That is some real bragging rights. You know you built it right when you can say that. :applause:
Dadgum it! I cut that board 5 times and it's still too short!
2001 quad-cab Dodge Cummins 3/4 ton camper special, 16x7x7 CT work in progress toyhauler, 01 HD Ultra Classic, 98 HD Heritage Softail, 88 HD 1200 Sportster. viewtopic.php?f=42&t=51510
User avatar
roadinspector
500 Club
 
Posts: 599
Images: 127
Joined: Wed Mar 24, 2010 10:33 pm
Location: Texas

Re: West Coast 6x10 V-Nose Conversion

Postby BC_Explorer » Sat Apr 07, 2012 12:48 am

I was able to get some more work done on the trailer.

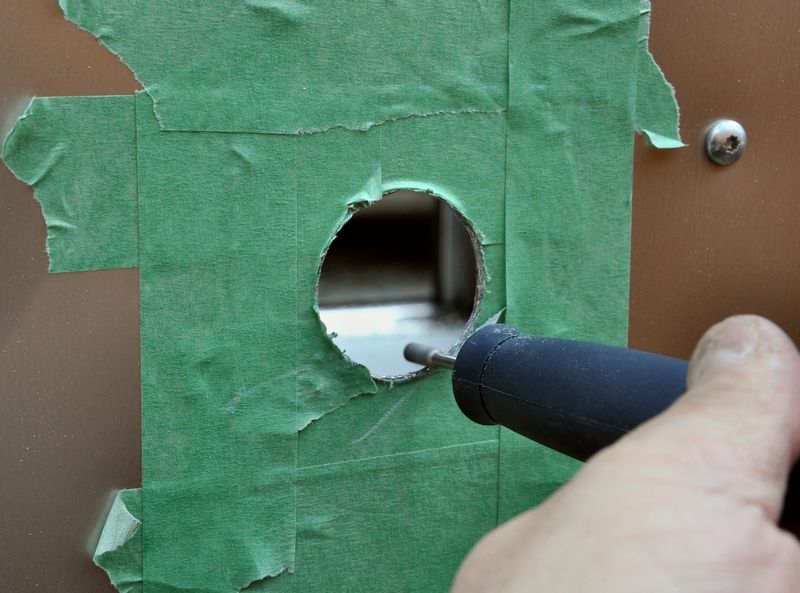
I cut the hole for the AC power. I didn't have the right size hole saw and did not want to purchase a new one which would of entailed also purchasing a new mandrel as the one I have is not compatible. At $27.00 for a new hole saw and mandrel that I may never use again, I made do with the one I have which is slightly undersize. A few minutes work with the rotary tool was suffucient to enlarge the hole.

Image


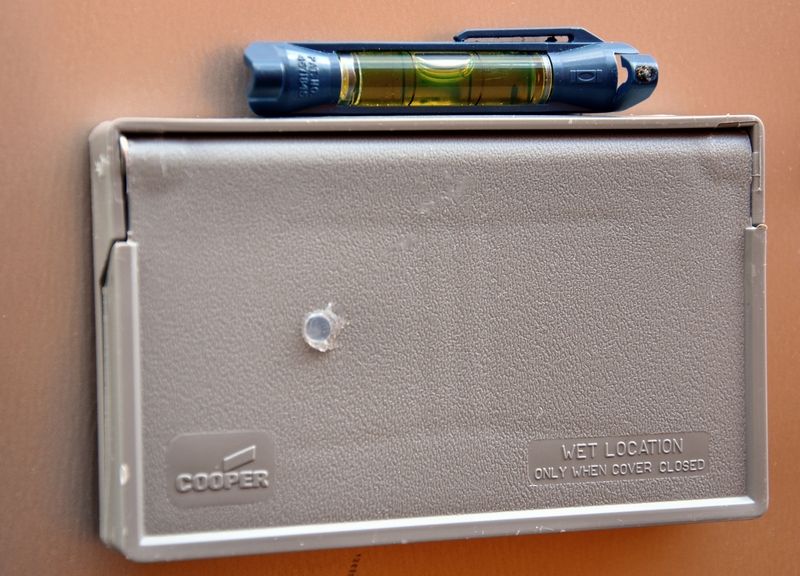
Box is mounted and level with the trailer which I had also leveled beforehand. The box had a small hole which I previously filled with silicone. Although the box came with a gasket to seal it against the trailer skin, after this picture was taken, I also ran a bead of silicone all the way around the edge of the box at the trailer skin as extra insurance against any water penetration.
Image


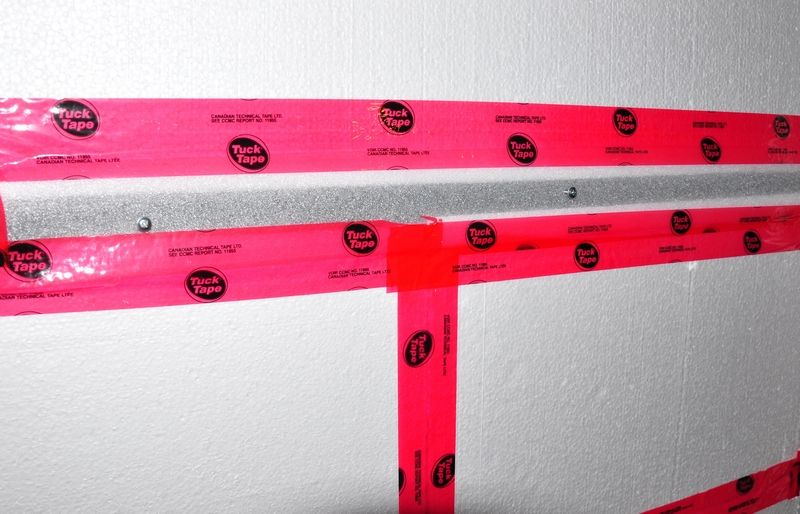
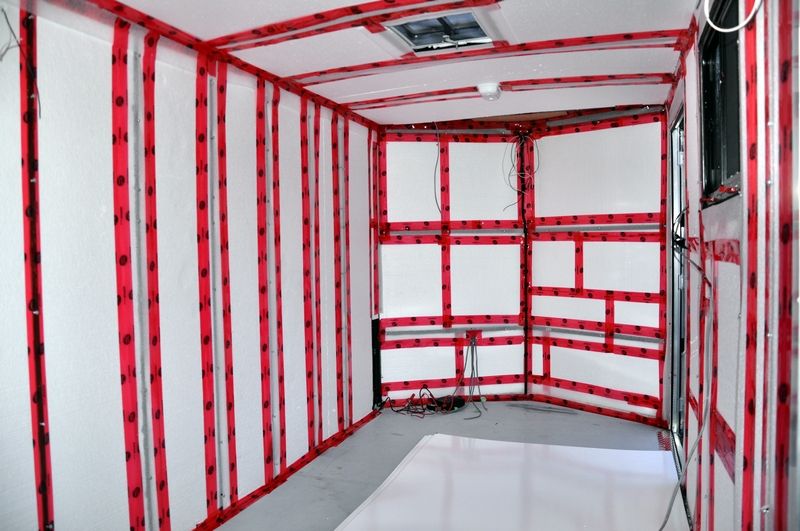
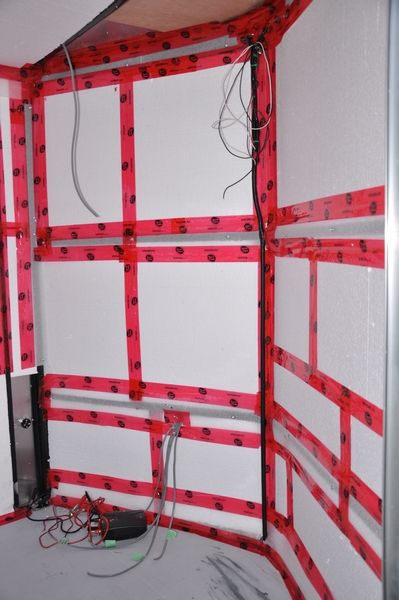
I re-did the insulation this week as I noticed some days ago that the steel studs transfered a lot of cold into the trailer. I know that the wallboard would stop most of the cold but I want this trailer to restain heat as much as possible for all season use. I purchased ($10.89 for 82' roll) sill plate gasket (polyethylene foam.) This gasket is normally used in residential and commercial construction to act as a barrier between concrete and wood. A good example is in the typical residental basement; the gasket is rolled out onto the bare concrete floor then the 2x4 or 2x6 wood bottom wall plate is then layed on top of the gasket to protect the wood from any moisture transfer.
Image


I covered the studs with gasket then re-taped with tuck tape except the very far left stud as seen 2 pics below as I ran out of gasket and don't want to buy another 82' roll just to get 6' of it... There is now a very noticeable difference with far less cold transferred through the studs. It took quite a bit of work to apply the gasket and re-tape all the walls and roof supports but will be worth the effort in the colder fall and winter months.
Image


The trailer is 98% insulated with the exception of the very front roof top in the V-Nose which is waiting for some lights to arrive then measured/mounted. Also the small area near the 110 Volt plug still needs to wired then insulated.

For those who may be researching and planning to insulate their trailer. With planning and judious use of end cuts, this 6x10 V-Nose took 5-1/2 sheets of insulation. Without the extra tape to double side seal the sill plate gasket, one roll of tuck tape would probably suffice.
Image

Image


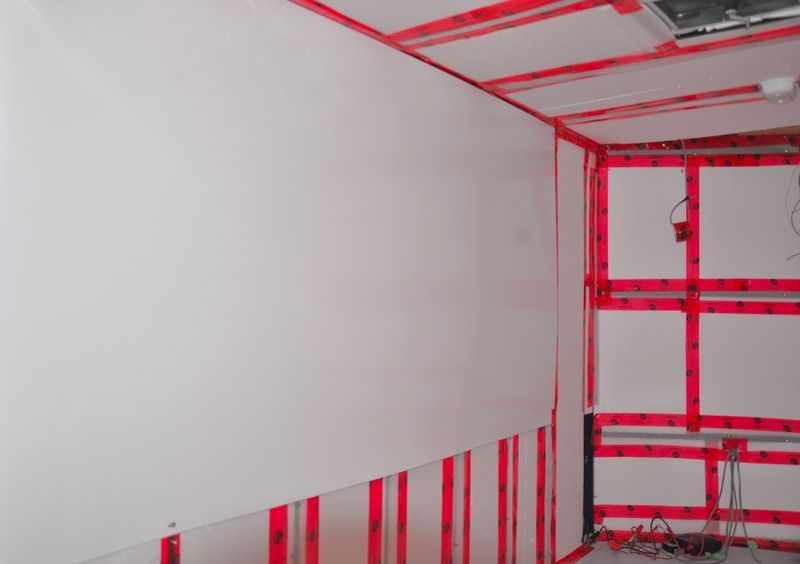
First sheet of wallboard going up. I went with a 1/4" pearl board which is better quality then the regular white wallboard. Although it costs $32.00 /sheet as compared to the regular wallboard at $19.00 / sheet, it is money well spent as it does not sratch as easily and the tougher sheened finish will make for a much easier to maintain, interior. I will also be using this wallboard on the ceiling and should have it and the walls completed tomorrow.
Image
BC_Explorer
Teardrop Master
 
Posts: 162
Images: 19
Joined: Tue Aug 16, 2011 10:11 pm

Re: West Coast 6x10 V-Nose Conversion

Postby JJ92 » Sat Apr 07, 2012 6:48 am

Nice use of the seal plate gasket. To bad you didn't do this last weekend. I would have shamelessly stolen that idea to do in mine.

Jeff
JJ92
Teardrop Inspector
 
Posts: 13
Images: 5
Joined: Thu Feb 16, 2012 8:43 pm
Location: Virginia
Top

Re: West Coast 6x10 V-Nose Conversion

Postby pete42 » Sat Apr 07, 2012 7:54 am

thanks, now I have another good idea to use
I can imagine it took time to do the refit but one that will pay off in having a better insulated trailer
I also like seeing that you took the time to have a level inlet, little things make all the difference
good job
pete
User avatar
pete42
Super Lifetime Member
 
Posts: 2203
Images: 13
Joined: Sat Nov 07, 2009 11:52 am
Location: SouthWest Ohio
Top

Re: West Coast 6x10 V-Nose Conversion

Postby BC_Explorer » Sat Apr 07, 2012 2:36 pm

Early this am, it was just above freezing (36 F.) I plugged in a small portable AC heater and at 7 minutes, the trailer interior was comfortably warm. At 13 minutes, it was uncomfortably warm and I had to unplug the heater. The trailer retained the heat well enough that I was able to work inside with just a light wind breaker on and did not have to turn the heater on again.

Today I am working on putting up the walls and will post again later tonight.
BC_Explorer
Teardrop Master
 
Posts: 162
Images: 19
Joined: Tue Aug 16, 2011 10:11 pm
Top

Re: West Coast 6x10 V-Nose Conversion

Postby BC_Explorer » Sun Apr 29, 2012 12:07 pm

It's been awhile since I posted an update. I have finally got the interior walls up and still have the roof to finish. but I am holding off as I need to add another light or two but the placement depends on final layout of the cabinets, bed etc which is now my focus as I am planning on a camping trip in 3 weeks so I have a lot more work to do..

I had more photos but lost them when a memory card decided to go south...but the below gives a good idea of the work that has progressed since I last posted.

For the interior walls, I went with a paneling which has gloss melamine type finish coat on it, much like a whiteboard. Although the cost of paneling is more expensive then just a matte finish type of material, the end result is a much better product and is easily cleaned with just a damp cloth and Windex. I puchased the paneling from the local Home Depot and initially took their advice of using a fine tooth jig saw blade. The problem I encountered was that no matter how careful I was, the blade chewed up the white finish on the board. I resorted to using a razor knife and althought it is much slower, it is also much cleaner. And like cutting gyproc, once you are about half way through the material, it can be folded back and cut the rest of the way through very easily.
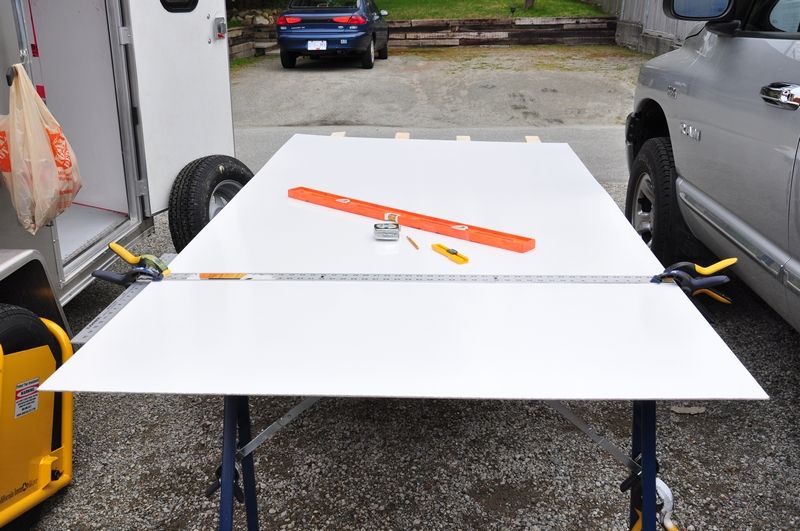
Image


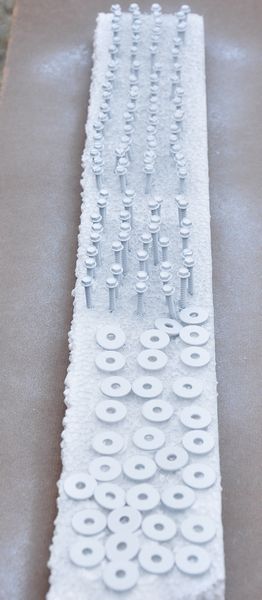
One of the drawbacks of using this type of paneling is that the white finish is thin and when drilled through and screwed into, can leave some spidering that can spread over time when the the CT is subject to movement. In order to prevent this spidering, I used flat fender washers to spread the load weight and slight pinch of the screws. After I had completed one wall, the rows of bare silver screws and washers was distracing so I spray painted all of them with white laquer paint so that is blends in more. If I was to do this again, I would of used an enamel based paint as it is more durable when subject to the drill socket. In any case, I have since touched up most of the screws and washers where the paint was chipped off.
Image


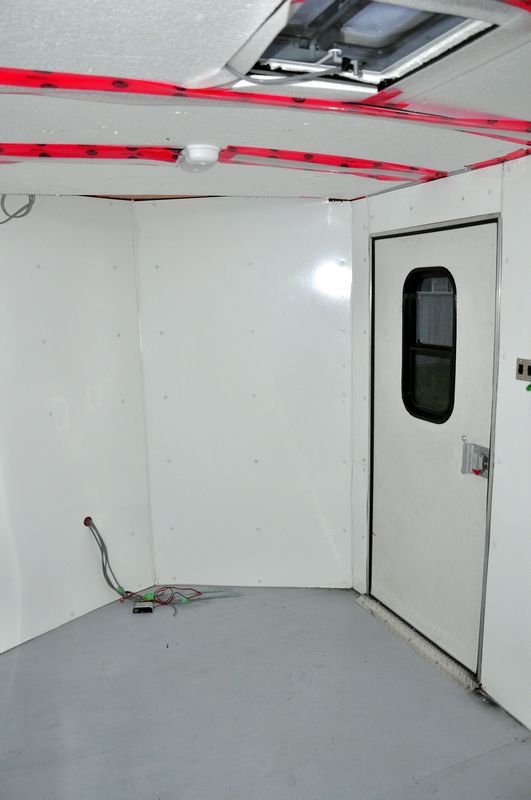
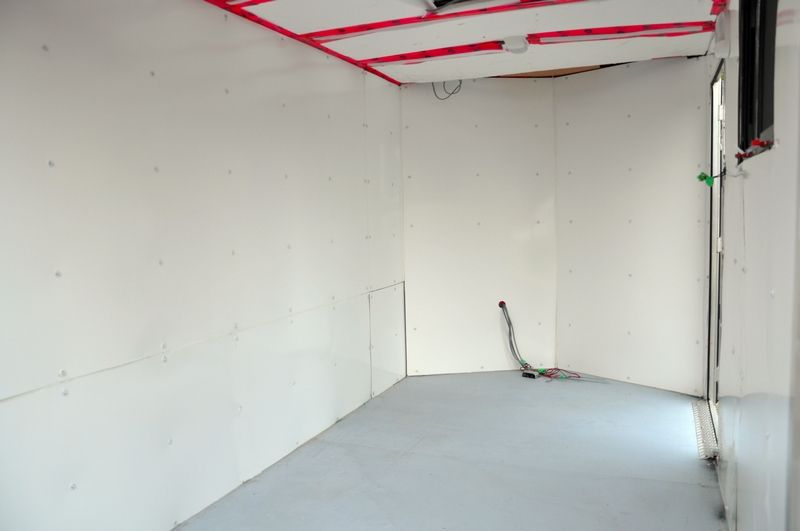
Some interior photos. Although I like the look of the panels, it is subject to some slight rippling between the studs. If I were to do it all over again, I would go with 3/8" plywood then the paneling. That left front bottom corner panel is where the 110V comes into the trailer and which I wanted to leave somewhat accessible if there was ever a need to get to the wiring at the plug. Also that section will be covered so I am not too worried about the small gaps between the panel edges.
I have tried several methods to hide the seams of the panel edges where they meet. Although most will be hidden by cabinets, the bed etc, I still don't like the looks of them. I checked and visted several hardwarde and building supply stores but could not find anything I really liked then so resorted to trying seam tape and another type of white tape meant for sealing gaps however the very smoooth surface of the paneling does not provide much of a grip for the tape. I found that in each case even after applying the tape when both the tape and the interior walls were very warm (80F) that the tape would start to unstick after a few days of warm/cold cycles. The only solution that seems (no pun intended) to work is white caulking of which I don't really like but is acceptable.
Image


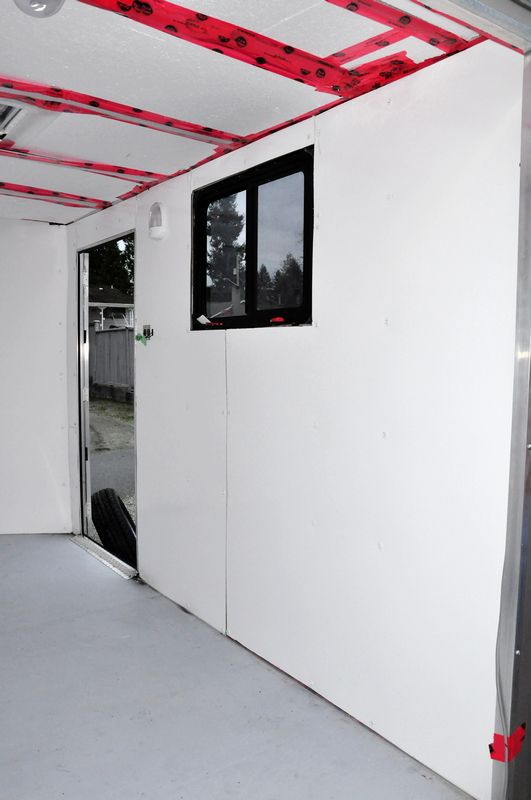
I still need to install the trim ring for the window which is going to a challenge as the window is made for a 3/8" wall but walls are nowhere near that depth. The trim ring when mounted and screwed in, also provides to hold the window in place and needs to be secured somehow. The original method from the factory was a crude cut out that went around the window frame then the trim ring went over top of this.
Image


Couple of more interior photos.
Image


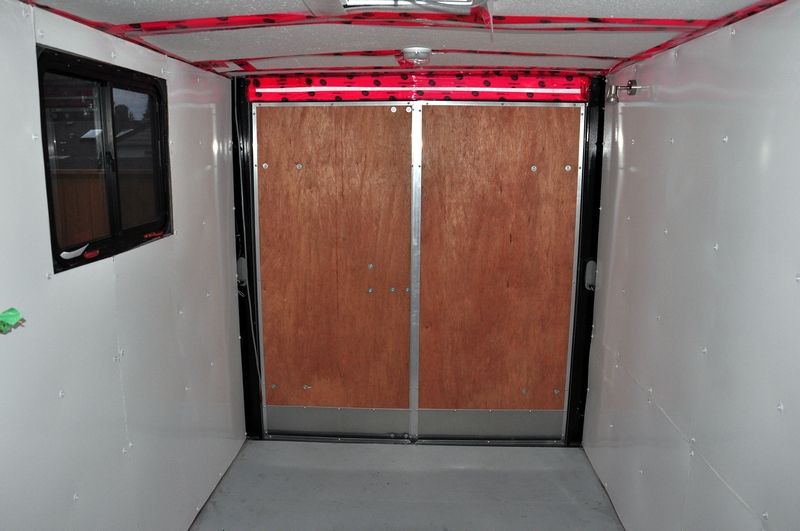
Not sure what to with the doors. I may just prime then paint them white with a melamine based paint. I also need to close off that top channel above the door which is not going to easy as that steel channel is thick and not easy to drill...and yes I tried already.
Image


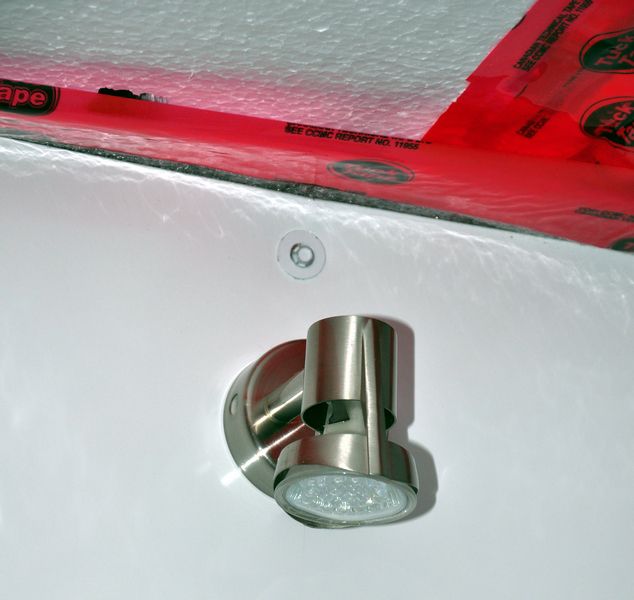
One of the 12V LED lights I mounted. This one is in the back of the trailer and right above where the bed will be. Although the light is not that bright as compared to incasadent bulbs, the white interior offsets this. On a related note, the white gloss interior does not take much light to brighten it up. Last night I tested the lights and found that the 2 overhead lights which are wired for the power through the CT>truck electrical plug, provides almost too much light even in when dark out.
Image
BC_Explorer
Teardrop Master
 
Posts: 162
Images: 19
Joined: Tue Aug 16, 2011 10:11 pm
Top

Re: West Coast 6x10 V-Nose Conversion

Postby 8ball_99 » Sun Apr 29, 2012 12:33 pm

Yikes I hope you have better luck with that stuff then I did. Did you install it straight to the studs or on top of plywood? I did my ceiling with that stuff to start with. I ended up pulling it all down and redoing it with some luan. The white finish chips easily. But my major issue with it was after a wet camping trip the stuff wrinkled up and got very wavy. It just looked really bad. It's pretty much cardboard with a coating on one side. Maybe you will have better luck with it. I bet I threw 10 sheets in the dumpster. I wasn't a happy camper. Frp is much better stuff. Cost twice as much but is bullet proof and is solid plastic.
8ball_99
500 Club
 
Posts: 623
Joined: Sun Mar 07, 2010 12:34 am
Top

Re: West Coast 6x10 V-Nose Conversion

Postby BC_Explorer » Sun Apr 29, 2012 1:10 pm

I mounted the paneling to the studs which are also covered with sil plate gasket then sealed with tuck tape which will stop any moisture transfer. A couple of panels have been up for almost two weeks and with a lot of rain, warm sunny, days with cold night cycles, there has been no problems so far. As you can see in my previous posts, I have taken a lot of steps to prevent moisture transfer as I do live in the PNW which is well known for it's annual rainfall amount.

Also there are few different types of the paneling similar to the type I used. The cheaper paneling is thinner overall and the white finish is micro thin and very vulnerable to scratching which is why I did not use it despite it's much cheaper cost.

As for the FRP, here it is almost $60.00 per sheet as compared to the type I am using which at $32.00 is half the cost and adds up over 5 sheets so far with at least 2 more to purchase for the roof. Time will tell if this was the right decision...
BC_Explorer
Teardrop Master
 
Posts: 162
Images: 19
Joined: Tue Aug 16, 2011 10:11 pm
Top

Re: West Coast 6x10 V-Nose Conversion

Postby 8ball_99 » Sun Apr 29, 2012 9:59 pm

Got you. Frp here is 32-39 and the stuff you used is around 15 bucks. The thin white board is like 9 bucks. I have 4 layers of insulation in my ceiling and 1/2 plywood slats screwed to the metal studs. I used foil tape to seal up the seams between the wood slats and the last layer of insulation between them. I didn't have an issue untill I loaded my UTV in the rain and made a 5 hour trip home with it parked inside. So maybe under normal use it will be fine. Didn't mean to sound like I was knocking your trailer just when I seen all that shower board it brought back bad memories. It was a lot of work to install it just to remove it a month later. :( not to mention even at only 15 bucks a sheet it wasn't a cheap goof

8ball_99
500 Club
 
Posts: 623
Joined: Sun Mar 07, 2010 12:34 am
Top

Re: West Coast 6x10 V-Nose Conversion

Postby BC_Explorer » Wed May 02, 2012 6:11 am

@Bkcreation34:

For my trailer, the wiring is fairly simple (and not complete yet.) I went with 5 circuits of 12 volt wiring which will connect to a fuse block and common ground bar. There will also be a 750 watt inverter along with 2x 30 watt solar panels. For 120V, I will be using a simple system much like detailed here. As for outlet boxes, there will none on the walls as my 120V needs will be almost nonexistent which I have described in a previous post in my build thread.

It seems like you have a lot of good ideas for your trailer but one thing to keep in mind that as you start planning and measuring, the confines of a small 6x10 trailer will become real apparent. If I were to do it all over again (and now that I have a much more capable tow vehicle) I would of purchased a 7x12 V-Nose. 3500 LB rated single axle trailer. The extra 2 feet of length and 1 foot of extra width would make a significant difference in interior room and allow for more comprehensive design.

As for my camping destination, I will be headed to the interior of BC, Canada.
Image
BC_Explorer
Teardrop Master
 
Posts: 162
Images: 19
Joined: Tue Aug 16, 2011 10:11 pm
Top

Re: West Coast 6x10 V-Nose Conversion

Postby bc toys » Thu May 03, 2012 7:30 am

They are nice trailers but with a big price tag for I believe I can make mine with most of the same stuff for a hole lot less $$. Like looking at ever ones build post give me all kinds of ideals Thanks for posting pics guys.
bc toys
2000 Club
2000 Club
 
Posts: 2217
Images: 42
Joined: Sun Jun 28, 2009 2:45 pm
Location: LAS VEGAS NV
Top

Re: West Coast 6x10 V-Nose Conversion

Postby 8ball_99 » Thu May 03, 2012 8:35 am

I've seen that video for elkmountain trailers before. Never knoticed the prices on the layout page though. They do seem pretty Dern high. It is a lot of time and labor to finish out a cargo. Also most people on here don't add everything an rv has. That also drives the cost up. I know I have a little over 12k in my trailer not counting my labor.
8ball_99
500 Club
 
Posts: 623
Joined: Sun Mar 07, 2010 12:34 am
Top

Re: West Coast 6x10 V-Nose Conversion

Postby 8ball_99 » Thu May 03, 2012 9:43 am

Converting a cargo is still cheaper then buying a new camper. Now if you compare converting a cargo vs a used travel trailer then it can be a toss up. There are some pretty good deals on used campers. A lot of people just want to get out from under them so they are willing to take a big hit.. Same time though your getting a Used travel trailer. So everything from tires to a new rubber roof could be it that trailers not so distant future. I spent a little bit of money, But I have a nice, New trailer with all the conveniences of a factory travel trailer. But with the structure of a cargo trailer. I also used better materials to finish out the trailer then the junk factories use on trailers. Even with all that I still saved 7+ grand over a new trailer similar to mine.
8ball_99
500 Club
 
Posts: 623
Joined: Sun Mar 07, 2010 12:34 am
Top

Re: West Coast 6x10 V-Nose Conversion

Postby crumvoc » Thu May 03, 2012 5:50 pm

I bought my windows, crank-out awning type windows, from Grant at lil Bear Tagalongs. He also carries sliders and other hardware.
http://www.lilbear.teardrops.net/parts4.html

Good prices, and Grant has been awesome to work with.

and now you have my $.02, FWIW
Living in the high-desert.
User avatar
crumvoc
Teardrop Master
 
Posts: 144
Images: 139
Joined: Sun Feb 26, 2012 11:06 am
Top

Re: West Coast 6x10 V-Nose Conversion

Postby BC_Explorer » Thu May 03, 2012 5:55 pm

With my CT, I had the factory do the install of the 30"x22" egress window. The cost on this was $250.00. Also the window in side door was factory installed (can't recall the cost right now but it is documented in a previous thread here.) Having the factory install the windows was a much easier solution for me in terms of time and also I do not have all the right tools for the job. If I were to order another CT, I would not hesitate to have the factory do the window installs again.
BC_Explorer
Teardrop Master
 
Posts: 162
Images: 19
Joined: Tue Aug 16, 2011 10:11 pm
Top

PreviousNext

Return to Cargo Trailer Conversions

Who is online

Users browsing this forum: Bing [Bot] and 3 guests