Early this am, it was just above freezing (36 F.) I plugged in a small portable AC heater and at 7 minutes, the trailer interior was comfortably warm. At 13 minutes, it was uncomfortably warm and I had to unplug the heater. The trailer retained the heat well enough that I was able to work inside with just a light wind breaker on and did not have to turn the heater on again.
Today I am working on putting up the walls and will post again later tonight.
Teardrops n Tiny Travel Trailersor t n ttt for short (tnttt.com) |
West Coast 6x10 V-Nose Conversion
Re: West Coast 6x10 V-Nose Conversion
![]() by BC_Explorer » Sat Apr 07, 2012 2:36 pm
by BC_Explorer » Sat Apr 07, 2012 2:36 pm
- BC_Explorer
- Teardrop Master
- Posts: 162
- Images: 19
- Joined: Tue Aug 16, 2011 10:11 pm
Re: West Coast 6x10 V-Nose Conversion
![]() by BC_Explorer » Sun Apr 29, 2012 12:07 pm
by BC_Explorer » Sun Apr 29, 2012 12:07 pm
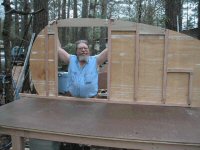
It's been awhile since I posted an update. I have finally got the interior walls up and still have the roof to finish. but I am holding off as I need to add another light or two but the placement depends on final layout of the cabinets, bed etc which is now my focus as I am planning on a camping trip in 3 weeks so I have a lot more work to do..
I had more photos but lost them when a memory card decided to go south...but the below gives a good idea of the work that has progressed since I last posted.
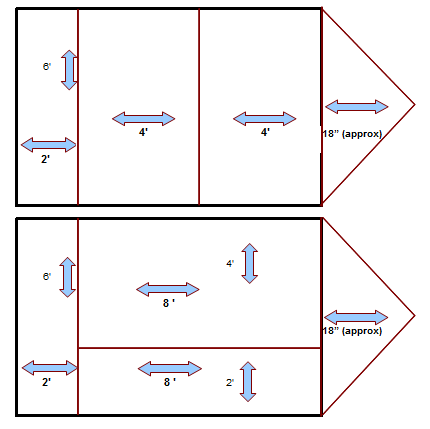
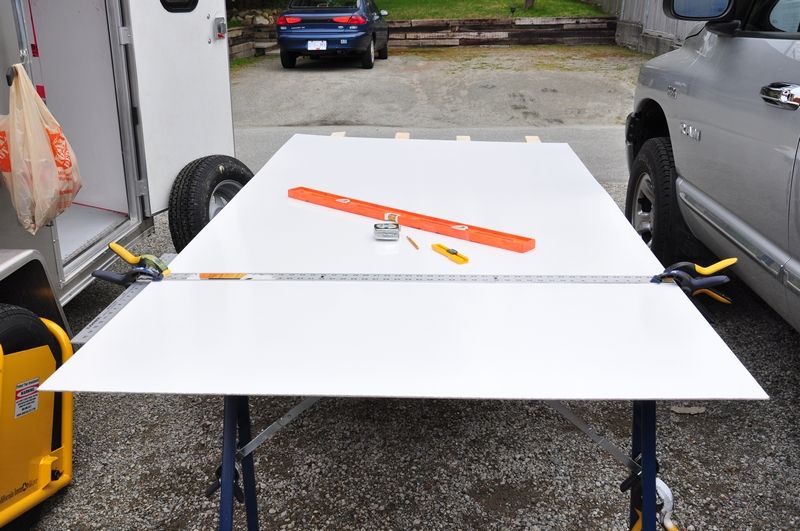
For the interior walls, I went with a paneling which has gloss melamine type finish coat on it, much like a whiteboard. Although the cost of paneling is more expensive then just a matte finish type of material, the end result is a much better product and is easily cleaned with just a damp cloth and Windex. I puchased the paneling from the local Home Depot and initially took their advice of using a fine tooth jig saw blade. The problem I encountered was that no matter how careful I was, the blade chewed up the white finish on the board. I resorted to using a razor knife and althought it is much slower, it is also much cleaner. And like cutting gyproc, once you are about half way through the material, it can be folded back and cut the rest of the way through very easily.
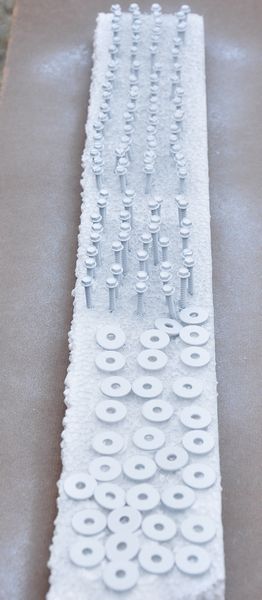
One of the drawbacks of using this type of paneling is that the white finish is thin and when drilled through and screwed into, can leave some spidering that can spread over time when the the CT is subject to movement. In order to prevent this spidering, I used flat fender washers to spread the load weight and slight pinch of the screws. After I had completed one wall, the rows of bare silver screws and washers was distracing so I spray painted all of them with white laquer paint so that is blends in more. If I was to do this again, I would of used an enamel based paint as it is more durable when subject to the drill socket. In any case, I have since touched up most of the screws and washers where the paint was chipped off.
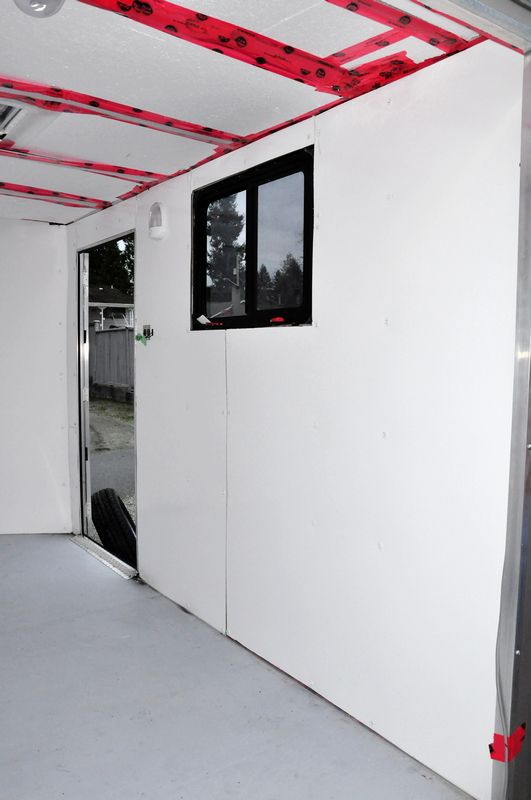
Some interior photos. Although I like the look of the panels, it is subject to some slight rippling between the studs. If I were to do it all over again, I would go with 3/8" plywood then the paneling. That left front bottom corner panel is where the 110V comes into the trailer and which I wanted to leave somewhat accessible if there was ever a need to get to the wiring at the plug. Also that section will be covered so I am not too worried about the small gaps between the panel edges.
I have tried several methods to hide the seams of the panel edges where they meet. Although most will be hidden by cabinets, the bed etc, I still don't like the looks of them. I checked and visted several hardwarde and building supply stores but could not find anything I really liked then so resorted to trying seam tape and another type of white tape meant for sealing gaps however the very smoooth surface of the paneling does not provide much of a grip for the tape. I found that in each case even after applying the tape when both the tape and the interior walls were very warm (80F) that the tape would start to unstick after a few days of warm/cold cycles. The only solution that seems (no pun intended) to work is white caulking of which I don't really like but is acceptable.

I still need to install the trim ring for the window which is going to a challenge as the window is made for a 3/8" wall but walls are nowhere near that depth. The trim ring when mounted and screwed in, also provides to hold the window in place and needs to be secured somehow. The original method from the factory was a crude cut out that went around the window frame then the trim ring went over top of this.
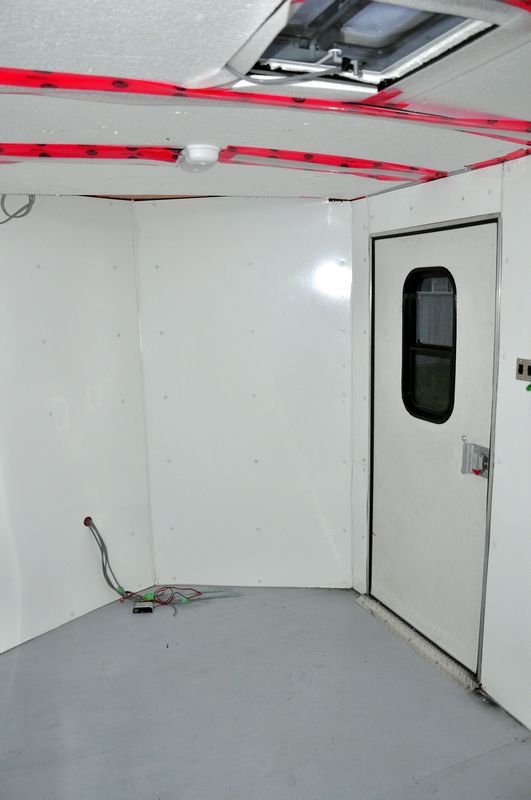
Couple of more interior photos.
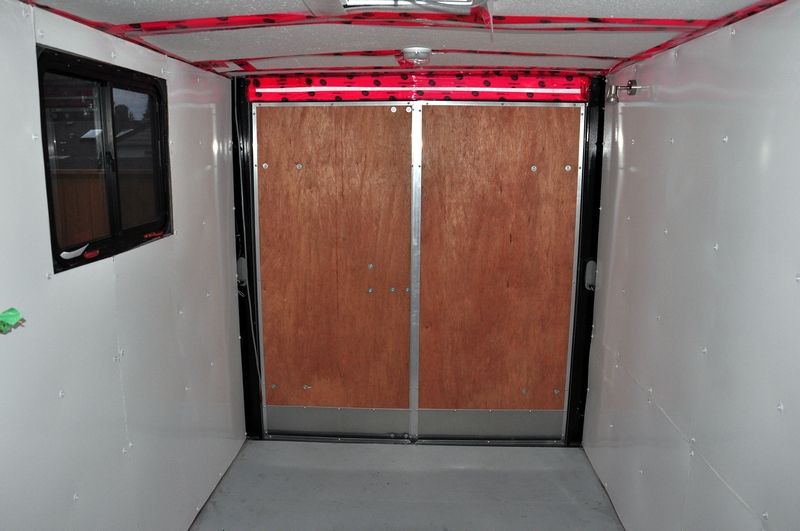
Not sure what to with the doors. I may just prime then paint them white with a melamine based paint. I also need to close off that top channel above the door which is not going to easy as that steel channel is thick and not easy to drill...and yes I tried already.
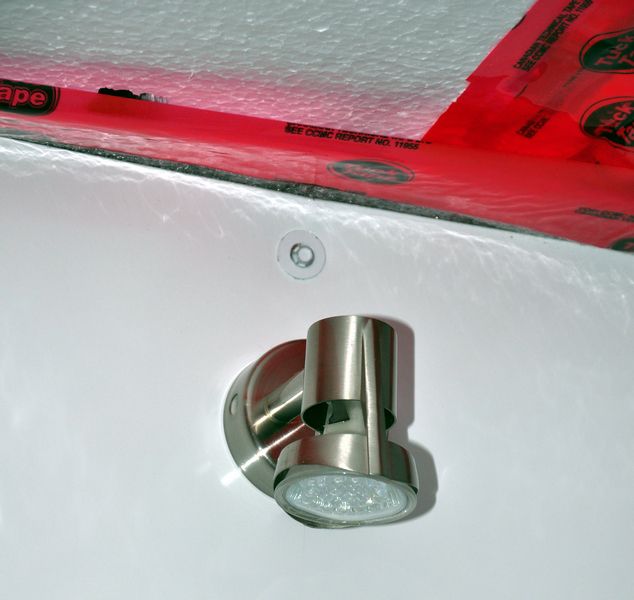
One of the 12V LED lights I mounted. This one is in the back of the trailer and right above where the bed will be. Although the light is not that bright as compared to incasadent bulbs, the white interior offsets this. On a related note, the white gloss interior does not take much light to brighten it up. Last night I tested the lights and found that the 2 overhead lights which are wired for the power through the CT>truck electrical plug, provides almost too much light even in when dark out.
I had more photos but lost them when a memory card decided to go south...but the below gives a good idea of the work that has progressed since I last posted.
For the interior walls, I went with a paneling which has gloss melamine type finish coat on it, much like a whiteboard. Although the cost of paneling is more expensive then just a matte finish type of material, the end result is a much better product and is easily cleaned with just a damp cloth and Windex. I puchased the paneling from the local Home Depot and initially took their advice of using a fine tooth jig saw blade. The problem I encountered was that no matter how careful I was, the blade chewed up the white finish on the board. I resorted to using a razor knife and althought it is much slower, it is also much cleaner. And like cutting gyproc, once you are about half way through the material, it can be folded back and cut the rest of the way through very easily.
One of the drawbacks of using this type of paneling is that the white finish is thin and when drilled through and screwed into, can leave some spidering that can spread over time when the the CT is subject to movement. In order to prevent this spidering, I used flat fender washers to spread the load weight and slight pinch of the screws. After I had completed one wall, the rows of bare silver screws and washers was distracing so I spray painted all of them with white laquer paint so that is blends in more. If I was to do this again, I would of used an enamel based paint as it is more durable when subject to the drill socket. In any case, I have since touched up most of the screws and washers where the paint was chipped off.
Some interior photos. Although I like the look of the panels, it is subject to some slight rippling between the studs. If I were to do it all over again, I would go with 3/8" plywood then the paneling. That left front bottom corner panel is where the 110V comes into the trailer and which I wanted to leave somewhat accessible if there was ever a need to get to the wiring at the plug. Also that section will be covered so I am not too worried about the small gaps between the panel edges.
I have tried several methods to hide the seams of the panel edges where they meet. Although most will be hidden by cabinets, the bed etc, I still don't like the looks of them. I checked and visted several hardwarde and building supply stores but could not find anything I really liked then so resorted to trying seam tape and another type of white tape meant for sealing gaps however the very smoooth surface of the paneling does not provide much of a grip for the tape. I found that in each case even after applying the tape when both the tape and the interior walls were very warm (80F) that the tape would start to unstick after a few days of warm/cold cycles. The only solution that seems (no pun intended) to work is white caulking of which I don't really like but is acceptable.
I still need to install the trim ring for the window which is going to a challenge as the window is made for a 3/8" wall but walls are nowhere near that depth. The trim ring when mounted and screwed in, also provides to hold the window in place and needs to be secured somehow. The original method from the factory was a crude cut out that went around the window frame then the trim ring went over top of this.
Couple of more interior photos.
Not sure what to with the doors. I may just prime then paint them white with a melamine based paint. I also need to close off that top channel above the door which is not going to easy as that steel channel is thick and not easy to drill...and yes I tried already.
One of the 12V LED lights I mounted. This one is in the back of the trailer and right above where the bed will be. Although the light is not that bright as compared to incasadent bulbs, the white interior offsets this. On a related note, the white gloss interior does not take much light to brighten it up. Last night I tested the lights and found that the 2 overhead lights which are wired for the power through the CT>truck electrical plug, provides almost too much light even in when dark out.
- BC_Explorer
- Teardrop Master
- Posts: 162
- Images: 19
- Joined: Tue Aug 16, 2011 10:11 pm
 not to mention even at only 15 bucks a sheet it wasn't a cheap goof