Standy widget (unnamed for now)

...ask your questions in the appropriate forums BUT document your build here...preferably in a single thread...dates for updates, are appreciated....

Standy widget (unnamed for now)

Postby O'Shell » Tue Apr 24, 2012 4:34 pm

Well here we go... 8)

Hello all, welcome to my build journal. I am at the very early stages but am also at the point where I should start a journal. I had an introduction thread in the "newbies" section found here I settled on the Shasta frame out of the two trailer frame choices I had. Also bobhenry convinced me to go duallys. Here is my first sketchup of my profile, it was done before I went dually so I have to change that when I get a chance also it has a very rough floor plan.
Image

So I started the tear down of the Shasta camper, I wasn't planing on posting as many pics of the tear down process but then I thought maybe some people might want to see it so here's waaaay too many pics of that... :? :pictures:
Image
Image
Image
Image

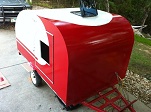
My sweet Modela a week before she was set free from this world.
Image
Image
Image
Image
Image
Image
Image
Image
Image
Image
Image
Image

This pic shows the worst of the rotted wood. Over at the vintage Shastas forum I read a restore thread where the lady said she was amazed the thing held together at all... I concur. She also mentioned how hers must of been built late Friday afternoon judging by all the mistakes she found tearing it down. I guess they all were just kinda slapped together back then...
Image
Image

Won't have to buy a whole lot of wiring...
Image
Image
Image

The 2x2 sub-floor frame was bolted to the frame on top of insulation and sheet metal. The carriage bolts were rusted as frigg and the first one took way too much elbow greese, so I got the compressor out and got the cut off wheel made short work of the 24 of so rusted little buggers.
Image
Image

Reduced that camper to this pile of 1xs and 2xs..
Image

This pile of laminated lauan..
Image

This pile of plywood..
Image

Bunch of sheet metals, various colors, white, gray and unpainted..
Image

Various hardware..
Image

Down to this.. The red lines here are the cross members and the yellow lines are the footprint of my plans.
Image

Maybe I should move my footprint back some to put more weight on the axles since its duallies?
Image

I think I am going to cut most of the antlers off and build within 6' wide. With the antlers its 7' 6" wide :shock: The box is 5' 2" wide.
Image

Going to use that A frame its welded pretty good but the tongue hitch has go to go..
Image

The crossmembers are another story on the welds.. This is my favorite.. :NC
Image

Hooked up the brakes to power and they work very well but wanted to inspect the hubs. The grease is old but all the bearings and washers look good.
Image
Image

I am going to redo the breaks at some point including new wears and machined drums but since they work and the pads are mostly still there I'm going to run them for now.
Image
Image
Image

The wiring I do want to replace as these red wires are dried out and cracking. It seems they are part of the rubber seal/plug that the green wires inside plug in to, I looked at a few sites and around here but couldn't find info on where I might find replacements. So if anyone could help me on that I'd be grateful.
Image
Image
Image

I have ordered about half of the list of things I want to build in to this camper and collected a grip. I wanted to collect as much as possible before I start so I can measure, visualize, plan and not be slowed down by waiting or money. I have not decided on build materials or a strategy on that yet. I have, thanks to this site and all that reside here, a bunch of ideas floating around in my head.

I am looking for a good welder right now. First things first... :)
"Flying is just falling with style"

My build thread
User avatar
O'Shell
Teardrop Inspector
 
Posts: 20
Joined: Sat Apr 07, 2012 8:44 pm
Location: Santa Fe, NM

Re: Standy widget (unnamed for now)

Postby 2bits » Tue Apr 24, 2012 5:16 pm

I really enjoyed seeng the teardown, I going to be doing the same very soon, so this was really helpful! Nice start and that was good to inspect those welds! Wow!
Thomas

Image
User avatar
2bits
2bit Member
 
Posts: 5132
Images: 8
Joined: Thu Dec 27, 2007 6:04 pm
Location: Lake Tawakoni, TX

Re: Standy widget (unnamed for now)

Postby KCStudly » Tue Apr 24, 2012 5:20 pm

Just some thoughts on finding a good welder:
1. Ask to see a sample of his or her work. No worm like beads sitting on top, and no undercutting/sink holes. Heavy MIG welding splatter shows a lack of attention to detail.
2. Ask how long most jobs stay in his or her shop. If it's a friend that is just doing you a favor, make sure they have the time and dedication to see it through w/o delay. If they are "giving you a deal" working on it when they can, your project might not make it to the front of the list (one man shops can sometimes lack professionalism in this regard). These things always seem to take longer than you think!
3. Be specific about what you want; a detailed drawing or hand sketch is always a good idea.

Those brakes and bearings look perfectly serviceable to me. Scrub the drums some more with a brown scuff pad or some 80 grit emery to give them a little tooth and break any glaze, hose 'em off with brake cleaner, fresh bearing grease and seals, new wire bulkhead connectors and you should be good to go.

You may also want to check your leaf spring bushings and the condition of the suspension hardware/fasteners (rust), but I'd say you have an excellent start.

Are you going off road with that Land Cruiser?

Location looks nice. Is that SoCal?
KC
My Build: The Poet Creek Express Hybrid Foamie

Poet Creek Or Bust
Engineering the TLAR way - "That Looks About Right"
TnTTT ORIGINAL 200A LANTERN CLUB = "The 200A Gang"
Green Lantern Corpsmen
User avatar
KCStudly
Donating Member
 
Posts: 9640
Images: 8169
Joined: Mon Feb 06, 2012 10:18 pm
Location: Southeastern CT, USA
Top

Re: Standy widget (unnamed for now)

Postby O'Shell » Tue Apr 24, 2012 7:30 pm

Thomas, thanks for stopping by. After tearing apart this camper I learned a few things. First thing I wouldn't use staples in the rebuild at all. The staples were about 60% loose. I think the play in each joint was the main reason the roof had 3 types of sealant on it (rubber, black and silver crud) Even with all this it looked like it still leaked.
Next the thing was built from in to out on most of it. The walls required taking the skins off both sides to get at the staples. If the wood is beat up as bad as mine was I wouldn't try to use it again. Rather if I was doing what you plan I'd measure all the pieces take a ton of pictures and buy new wood, use a jig and glue. I also would not have been able to slavage the lauan as digging the little nails was a pain and lots of it was glued. Not that I wanted it but if yours looks good remember the nail and glue...

KC, thank you for the pointers on the welder and brakes. You think if I pull the parts and take them down to carquest they'd be able to set me up with new ones? Or where should I look for parts? I think its a 69. I
I take my fj40 off road all the time. I like driving in deep snow the best tho. I am is Santa Fe New Mexico.

Cheers guys!


Sent to space then back to you using a phone!
"Flying is just falling with style"

My build thread
User avatar
O'Shell
Teardrop Inspector
 
Posts: 20
Joined: Sat Apr 07, 2012 8:44 pm
Location: Santa Fe, NM
Top

Re: Standy widget (unnamed for now)

Postby KCStudly » Tue Apr 24, 2012 8:49 pm

The Timken style bearing "cones" (with rollers) and "cups" (outer race) should each have stamped or etched markings that should still be visible. You most likely have different inner and outer sizes for that size trailer. If you have no markings, have a vernier or dial caliper, and know how to use it, then you can take accurate measurements of the spindle diameters where the bearings and seals ride, the width of each bearing and seal, and the inside diameter of the hub at these three locations (or drive the inner bearing and seal out and measure their OD's), and that should be enough for a good parts man to figure it out. Some of the better parts stores (like Napa) should be willing and able to figure it out for you with these parts in hand. They may even offer press services for a reasonable fee to remove and replace your cups and seals with newly greased bearings.

If all you need is to regrease your old bearings and replace the seals, the markings on the old seal can be harder to make out; some times the area where the markings were have rusted. Same method applies. You need accurate (.000 three decimal places) measurements of the spindle, hub and thickness. Sometimes these are fractional equivalents, but don't assume that they are.

You were ambitious enough to disassemble the hubs so I am going to assume that you know how to get the job done, but if you've never done this level of maintenance before there are plenty of examples and tutorials here (and at other on-line sources). The three most important things are; Cleanliness - a single piece of grit will ruin all of your hard work in a short period of time; proper application of fresh clean grease - palming a dollop of grease (I use vinyl exam gloves) and firmly slapping the rim of the cone into your palm will force the grease up thru the rollers and cage (do this all the way around, don't just slather the grease on); and proper tensioning of the nut - snug it up finger tight and while spinning the hub by hand just bump it a tad with a wrench until you feel the hub start to drag NOT bind, then back off just enough to get the cotter pin in.

Don't hammer directly on the bearing races or seal, use a suitably sized mandrel or you can grind the old races down a little so they are a loose fit and use those as drive mandrels, better yet use a press.

Babble, babble, babble... hope this is useful info for you. Difficult to judge a persons knowledge and history from a few short words. Sounds like you are on the right track to me.
KC
My Build: The Poet Creek Express Hybrid Foamie

Poet Creek Or Bust
Engineering the TLAR way - "That Looks About Right"
TnTTT ORIGINAL 200A LANTERN CLUB = "The 200A Gang"
Green Lantern Corpsmen
User avatar
KCStudly
Donating Member
 
Posts: 9640
Images: 8169
Joined: Mon Feb 06, 2012 10:18 pm
Location: Southeastern CT, USA
Top

Re: Standy widget (unnamed for now)

Postby pappaw » Wed Apr 25, 2012 8:53 am

wow, lotta work there, nice job on that :thumbsup:

like you tow too. ;)

Jeff :beer:
Image Cheers from Granny, Pappaw, and Cocoa (the Dachshund) Image
pappaw
Teardrop Master
 
Posts: 240
Images: 14
Joined: Mon Nov 22, 2010 12:15 pm
Location: S.W.Ohio
Top

Not sawdust but burned metal is fun too..

Postby O'Shell » Thu May 10, 2012 11:07 pm

So life can really get in the way of a project but I'm back on track. Had my grandfather here for a week and then my breaks on my Landcruiser exploded so that took several days to work out. And welders seem to think think I'm made of money or their hands make gold, one or the other. So I took the hour drive to Albuquerque to the harbor freight store and got my self a 170amp mig welder and supplies. On sale for $200 originally $300. I couldn't find a welder to do the job for less. And next time I need to weld something I have it. That took another few days to work out the 220V for the thing..
Image

I took a welding class when I was 22 so I think with some practice I can do a fine enough job. Here is from left to right my first welds with this awesome machine. I know they need some work and I need to steady my hand but still not as bad as some of the Shasta welds.
Image

The middle weld holds the two pieces together. I put all my body weight and bounced on it up and down, it refuses to break and I didn't finish because I had the vice grips on that spot.
Image

I also scored big by answering an ad titled rv parts. Got 4 Trojans 105 and a 45amp Progressive Dynamics power center. He said the batteries are new, showed me a ball float test on each one. He briefly connected one wrong and melted one of the posts but its still good. The PD power center is used and after cracking the mounting plate on one corner figiting with it trying to test it when it took a dive off the table, I have found its in perfect working order. Not bad for another 200 bucks.. ;)
Image
Image
Image
He said he had them hooked up to keep them conditioned, Do I need to leave these plugged in when I'm not using them? He had some wires setup but didn't give me the wires to create a series. I used a big Al wire to connect them but only had that one piece. When I turned the breaker on, the batteries sounded like they were fizzing or bubbling like a light boil is this normal?
Image

Anyway next on my list is to cut down the trailer and the pieces I cut off I plan to burn some wire and get my welds looking better. Maybe go without coffee before hand? :frightened:
And still need to do the trailers breaks too.. Plugging on...

Oh and thanks Jeff my Fj40 is my most prized possession. :D
"Flying is just falling with style"

My build thread
User avatar
O'Shell
Teardrop Inspector
 
Posts: 20
Joined: Sat Apr 07, 2012 8:44 pm
Location: Santa Fe, NM
Top

Re: Standy widget (unnamed for now)

Postby txcamper » Fri May 11, 2012 9:18 am

Great looking 40 and project. Plan to get back into a 60 someday to tow mine.

Those welds are impressive, my trailer is my first ever welding project and I haven't had the training class. It shows! But I've done the same 'jump up and down' test with a successful outcome.
User avatar
txcamper
Teardrop Master
 
Posts: 120
Images: 129
Joined: Wed Mar 21, 2012 12:25 am
Top

Re: Standy widget (unnamed for now)

Postby KCStudly » Fri May 11, 2012 2:38 pm

Pretty good start for not having welded in such a long time (I assume a long time :roll: ).

I like the third from the left. The others look a little cold to me (sitting on top, not fused in to the base metal well). You probably went slower and/or had the heat up a little more on that one. Also, when you start, and when you get just short of the egde, stop advancing and just hover for a moment; it will fill that shallow part in without burning out the far edge.

A little more practice; you are doing fine. :thumbsup:
KC
My Build: The Poet Creek Express Hybrid Foamie

Poet Creek Or Bust
Engineering the TLAR way - "That Looks About Right"
TnTTT ORIGINAL 200A LANTERN CLUB = "The 200A Gang"
Green Lantern Corpsmen
User avatar
KCStudly
Donating Member
 
Posts: 9640
Images: 8169
Joined: Mon Feb 06, 2012 10:18 pm
Location: Southeastern CT, USA
Top

Re: Standy widget (unnamed for now)

Postby O'Shell » Fri May 11, 2012 5:11 pm

Thanks txcamper old cruisers are like tanks they will go anywhere, are bulletproof and like gas like I like air. I looked at your build thread and your welds aren't so bad..

KC thank you. I am 35 now so yeah a long time :) Thanks for the tip on the edges I was wondering about that. I had it set for 1/8" but on that 3rd one realized that the two pieces stacked is more like 1/4". These were with the flux core wire it came with. I had never used flux core and until reading up some more didn't know that it was part of my problem. I wasn't able to see the pool of metal very well. I now know it was because the flux. I have an extra co2 tank from when I bought a kegerator off the internet and it came broken, they refunded my money and told me to keep the broken one.. (amazing how things worked before the crash of 08) So I called Airgas to see if they'd fill or swap the bottle for weld gas and he said sure. I went down there and the gentleman asked a lot of questions and when he fully understood what I was looking for he then said the regulator I was going to use was not going to work with the tank. So he advised me to not spend any money at his shop and try co2 first as a shield gas. Another thing I did not know could be done. I would be out there right now but a little rain and a lot of wind make welding unsafe. I really want to get good at this because I have some other projects I've been dreaming about that need welding, including a spare tire/ jerry can/ cooler/ high lift jack/ holder for the rear of my rig. Weather permitting tomorrow I plan to cut some chunks from the trailer to practice on.
"Flying is just falling with style"

My build thread
User avatar
O'Shell
Teardrop Inspector
 
Posts: 20
Joined: Sat Apr 07, 2012 8:44 pm
Location: Santa Fe, NM
Top

Re: Standy widget (unnamed for now)

Postby KCStudly » Fri May 11, 2012 11:19 pm

Practice, practice, and practice some more. Using the actual metal and joint configuration you plan on welding, like you said, using scrap from cut offs of the trailer, is ideal for practicing.

For steady welds, make sure your work is far enough away from you on the bench, or if in situ on the frame, so that you have something to prop your elbows on. Use blocks of scrap metal to prop your elbows and/or palms up to match the level of your work. As shown in my build thread, I have used a stool as a prop and maneuvered the frame into a number of positions to suit the weld orientation.

Before striking the arc, make a practice pass to be sure that you can see under the cup and have good support for your elbows, wrists and/or palms over the whole pass. If not reposition until you can or make shorter passes and reposition. Don't blow a good weld because you are in a rush to get to the end of the joint; if you can't see the bead, or become unstable in your arm support, stop and reposition.

Rather than make one long pass, from one edge to the other, weld the last edge first before the heat build up so much, then go back to the other edge and start; less chance of melting out the edge at the end this way. Better yet, start in the middle and place tacks moving outward in an alternate patter, then weld the what would be the end "first" (less adverse affect from heat expansion). Another technique that works for some is to back stitch; weld the last inch first, skip back an inch and weld up to where you started the first inch, skip back another inch, and repeat; keeps heat more even (I don't use this one much).

For vertical welds, always weld up. If the puddle gets too hot it will melt out and flow down, no harm, but if you weld down, you will get a deceivingly good looking weld that has significantly less penetration and a lot less strength (especially with MIG).

For that horrible gap the factory sold, grind or die grind the grapes off and back it up with a closely fitted closure plate that overlaps the web of the cross member, then weld up the gap joining all three pieces (xmbr, main rail and backing plate) all in one go. if you don't want the backing plate to remain afterward, say for aesthetic reasons, the fit and clamp a piece of heavy aluminum to the back of the joint before filling. The steel melts before the aluminum and won't stick to it.

If you get fizzing or boiling in the weld, stop; your shield gas is compromised and you have porosity; get the grinder and remove it all... now remove some more, then try repositioning or holding the cup closer. The shield gas is heavier than air and will fall down, not up, so weld down when ever possible. If welding outside, and there is much of any breeze, you can position pieces of plywood or sheet metal around the weld to help prevent shield gas from being blown away. The flux core can actually work better, sometimes, under these conditions.

Sorry for prattling along. I like to share and want to help you to have a successful outcome.
KC
My Build: The Poet Creek Express Hybrid Foamie

Poet Creek Or Bust
Engineering the TLAR way - "That Looks About Right"
TnTTT ORIGINAL 200A LANTERN CLUB = "The 200A Gang"
Green Lantern Corpsmen
User avatar
KCStudly
Donating Member
 
Posts: 9640
Images: 8169
Joined: Mon Feb 06, 2012 10:18 pm
Location: Southeastern CT, USA
Top

Re: Standy widget (unnamed for now)

Postby O'Shell » Sun May 13, 2012 9:56 pm

KC your advice is golden and I have been practicing weather permitting as much as I can. I am also in the middle of reading your thread, no spoilers! I burnt a bunch of wire testing different settings. My next problem was my regulator is psi not cfh so I tested a series of settings till I got the best results. Took some time and produced some very ugly welds. Once I had the best setting I could find (15psi) I went to town on a chunk of bent up bumper. Here are some shots of my progress. In this shot they are again from left to right but I had it flipped so my movements are from the other side. As you can see I was still having some straight line issues that mellowed out toward the end of these.
Image

Here are some closer pictures.
Image
Image

After I took a 3m rust/paint wheel to it.
Image
Image
Image

Then I cut it in half to see the inside.
Image
Image

And a pic of the underside.
Image

As you can see I was still struggling to keep a nice steady movement but I am getting better at it. Some really nice spots in there :FNP
I knew something wasn't right still and decided to read up a little on weld gases. Here is what I discovered. I am going to get the 80/20 mix and a proper regulator. But unfortunately that will be my last purchase into this camper project for about a month as a major financial set back has occurred. I hope to get the frame ready in that time and not feel like I'm stuck but I fear it might happen. I want to sand it down and paint it as well but paint might be out of my price range too :x Well plug on is all we can do. At least I have some work to do still.. I also need advice on the best method of cutting the frame. I have a heavy duty angle grinder but it is tricky to get a straight cut. I have an Oxy/ acetylene w/ cutting tip but again is impossible to cut straight. I have a jig saw and did cut a straight piece off the trailer with it but in that one cut I broke one blade, almost broke a second and it took a long time. I guess just chop it, grind and sand till I get a flat edge? Have to think on that while I burn more wire with proper gas..

Til next time :beer: Cheers!
"Flying is just falling with style"

My build thread
User avatar
O'Shell
Teardrop Inspector
 
Posts: 20
Joined: Sat Apr 07, 2012 8:44 pm
Location: Santa Fe, NM
Top

Re: Standy widget (unnamed for now)

Postby KCStudly » Mon May 14, 2012 12:23 am

First mark the cut accurately using a quick square and soap stone or sharpie marker.

If using a torch, prick punch a bunch of marks all along the line so that you can see it when the flame burns off the markings. You can clamp a straight edge of scrap along the mark half the tip diameter away and use that to guid the torch (leave a little extra to allow grinding smooth).

The best method would probably be to get a thin cut off wheel for your grinder. Always cut in the direction of travel of the wheel and wear a face mask. Rather than trying to cut through from start to finish, run the wheel over your line a few times to make a little trough, then use the trough to guide the wheel as you cut through. Don't force it, let the wheel cut and clear itself. Don't grind with a cut off wheel, only plunge. They are too thin and flexible for grinding on the side and will shatter.
KC
My Build: The Poet Creek Express Hybrid Foamie

Poet Creek Or Bust
Engineering the TLAR way - "That Looks About Right"
TnTTT ORIGINAL 200A LANTERN CLUB = "The 200A Gang"
Green Lantern Corpsmen
User avatar
KCStudly
Donating Member
 
Posts: 9640
Images: 8169
Joined: Mon Feb 06, 2012 10:18 pm
Location: Southeastern CT, USA
Top

Re: Standy widget (unnamed for now)

Postby O'Shell » Mon May 21, 2012 4:05 pm

Because I have this down time before my build I have been doing a lot of thinking, more research and lots of practice welding.

I have been thinking heavily about the placement of these dual axles vs. the door vs. the main weight. In my design I have my appliances, 4 T-105s and 2 propane tanks all on the tongue side. That leaves the holding tanks (21 gal fresh and an undetermined size gray tank) and a gaucho over the axles. The room left when placing the axles as far back on my footprint as I could and the fridge as far forward as I could is a narrow 21" for the door. I'd love to find a smaller fridge and trade for the one I have as it's too big. But I do like that it works very well and is 3 way without a circuit board. (older model) How vented do T-105's need to be? Could I put them under the gaucho in an compartment that has an external vent on one side? Maybe even a fan?
Image

Anyway I feel confident in my welds now so as soon as I concrete a plan I will cut up and weld this trailer. Here is some of my latest welds.
Before clean up.
Image

After clean up. (pay no attention to the one on the right, gas was off...)
Image

Underside.
Image

I also welded these two pieces back together. Some of it had up an 1/8" gap..
Image

Then I did the back side, this was very steady but too cold, Should of turned it up as the metal was much ticker with all the welds on the other side.
Image

Hey KC what causes these greenish brown glazed spots? Are they good or bad?
Image

Shiny after chipped out.
Image

As long I can do better than Shasta my welds will last 40+ years too :thinking:
Image
"Flying is just falling with style"

My build thread
User avatar
O'Shell
Teardrop Inspector
 
Posts: 20
Joined: Sat Apr 07, 2012 8:44 pm
Location: Santa Fe, NM
Top

Re: Standy widget (unnamed for now)

Postby KCStudly » Mon May 21, 2012 10:19 pm

If it looks like a little spot of brown glass or similar to the slag that is left behind by stick welding, then it is just a small concentration of silica and is of no worry. Chip or wire brush it off and you are good to go. Usually a sign of less than perfect cleanliness in weld prep or a bit of crud (such as rust) on the weld wire.

The shiny spot after you chip it just means that the silica shielded the weld even better than the shield gas and there is nice pure alloy underneath (I think :roll: ). The gray color is generally a sign of marginally high heat. Shinny means the heat is better, not too hot. I tend to weld hot because I like to see good penetration and make sure that I have a good puddle.

The little dark pit is a bigger concern as that could be a sign of porosity. If it is just a single divot from incomplete filling then it is probable okay, but if it was all fizzy like sparkling soda when you were welding it, and looks like metal with a bunch of speckles or swiss cheese holes when you grind it a little, then it is porosity and it has to go. All of it. What I see there in the photo looks like no concern to me. Sometimes you will get a little volcano action if you roll over a spot and don't let the puddle form. That can trap a pocket of air in the root under the puddle and let it bubble up after you roll over it. Same thing can happen if you roll up to another tack or section that you have already welded and the bridge fills the gap before the puddle melts in all of the way. if it is just an isolated spot you can cheat a little and just hover over it until the bubble bursts and it settles in, but if it gets fizzy you should really grind it out. These little blips in an otherwise great weld are usually not much of a concern if they do not occur at a critical location, like on an edge, corner, or transition where a stress riser woud be likely to form, such as the corner of the tip of a leg of a gusset and such.

Your welds are showing marked improvement and I would say you are on the verge of being quite a competent welder. It's time to start joining scrap pieces together in different joint configurations. When you do fillets you will need more heat and it is even more important to work the heat so that you do not get washout on the high side with corresponding build up on the low side. If you are welding a heavier piece to a lighter piece, or a broadside piece to an edge, instead of weaving evenly from side to side you can lead into the heavier side, hold, then drag back to the light side, lead into the heavy, hold, drag back to the light. This gets more preheat into the bigger side, and just ties the smaller side in as required.

Master fillets, then move to vertical. If you can do a perfect vertical weld every time, then you are a better welder than I.

You are doing great! :thumbsup: :applause: :thumbsup: :applause:
KC
My Build: The Poet Creek Express Hybrid Foamie

Poet Creek Or Bust
Engineering the TLAR way - "That Looks About Right"
TnTTT ORIGINAL 200A LANTERN CLUB = "The 200A Gang"
Green Lantern Corpsmen
User avatar
KCStudly
Donating Member
 
Posts: 9640
Images: 8169
Joined: Mon Feb 06, 2012 10:18 pm
Location: Southeastern CT, USA
Top


Return to Build Journals

Who is online

Users browsing this forum: No registered users and 9 guests