The Poet Creek Express - Foamie Hybrid

Canvas covered foamies (Thrifty Alternatives...)

Moderator: eaglesdare

Re: The Poet Creek Express - Sawdust !!! (?)

Postby pmowers » Fri May 11, 2012 10:48 am

KCStudly wrote:... I found an old ventilator cone in the scrap bin that was about 29 inches across (14-1/2 R) so I used that to wrap the test slats around to see if they could take the bend, The 0.20 thk was a little stiff and I could hear it starting to crack before getting there. The 0.13 thk was just about right. It made the bend easily without cracking. The little thin sliver could form a much smaller radius quite easily, but would require a whole lot more cutting and gluing, so I will stick to the 1/8 inch range. ...


KC,
You probably know this, but when I was making shaker boxes, after hot-soaking or steaming the bands for the box sides, I would gently bend the strips in one direction, then the other, looking for the fibers to start to lift from the wood. I would mark that side and use it for the inside of the box. If I bent the wood with the marked side on the outside of the curve, I would get cracks or breaks almost every time. The same trick is used to make bent-wood frames for fishing nets and tennis rackets. I used to get 2 mm cherry to bend into a 2x3.5 inch oval no problem. -Just an idea to think about.

Pat
Growing old is mandatory, growing up is optional.

Build log:http://www.tnttt.com/viewtopic.php?f=42&t=51193
User avatar
pmowers
Donating Member
 
Posts: 287
Images: 43
Joined: Wed Sep 14, 2011 2:44 pm

Re: The Poet Creek Express - Sawdust !!! (?)

Postby KCStudly » Fri May 11, 2012 12:43 pm

Thanks Pat. That's great information that I had not considered. I am aware of steam bending and presoaking, but I really need to find ways to speed the process along (without compromising quality), and eliminating as many steps as I can seems worthwhile. It doesn't take much longer to rip a few more slats at 1/8 thk than it does to rip 'em at 1/4, and a few more plys doesn't take much longer during a layup, so if I can do that and not splinter any slats while bending, then I think it will be less effort than building a steam box or trough, and adding a soaking or steaming operation into the mix.

I've never done this sort of thing in wood before, very little "fine" wood working experience at all, really, so feel free to say, "I told you so" later if I end up with a bunch of splinters crying in my soup. ;) :R :roll: :cry: :?

Again, thank you so much for the suggestion, I will keep it in mind and will plan to wet things down as a Plan 'B'. :thumbsup:
KC
My Build: The Poet Creek Express Hybrid Foamie

Poet Creek Or Bust
Engineering the TLAR way - "That Looks About Right"
TnTTT ORIGINAL 200A LANTERN CLUB = "The 200A Gang"
Green Lantern Corpsmen
User avatar
KCStudly
Donating Member
 
Posts: 9613
Images: 8169
Joined: Mon Feb 06, 2012 10:18 pm
Location: Southeastern CT, USA

Re: The Poet Creek Express - Sawdust !!! (?)

Postby Wolffarmer » Fri May 11, 2012 3:56 pm

KC

I am not really sure just what you are doing. ( actually I am not sure what I am doing ) But on my trailer I made some runners, moldings, thingamajigs by laminating 1/8" maple strips that has a 26 inch radius. No problems. Not that mine look all that great but it works for me.

Randy
"these guys must be afraid of the dark"
User avatar
Wolffarmer
Donating Member
 
Posts: 4612
Images: 309
Joined: Wed May 02, 2007 1:32 pm
Location: Idaho Rupert
Top

Re: The Poet Creek Express - Sawdust !!! (?)

Postby Wolffarmer » Fri May 11, 2012 4:19 pm

Here is a pic of the lamentations. :lol: from 2007

The light colored strips up the front and over the top. The side pieces are just 1/2 inch stock screwed to the sides. I also think epoxied.

Image

Also showing my single beam tongue, made just long enough so I can jack knife with my intended tow vehicles when i get in those tight areas. Have used it a few times now.

Now for some total embarrassment. Picture of my frame. High art does not pass my door threshold.

Image

Image

Orangie iron is from old farm equipment, axle and springs from a VW Rabit pickup. Does make for a nice ride. Would be wonderful ride if I had put shocks on it. When I started the project I did not know if I could build a camper, or if I would like it. So I figured if the teardrop failed I could just throw it off and use the trailer for a utility trailer about the homestead so I didn't put much into making it pretty, Just make it work. The day I started cutting iron I found this forum. So as the build progressed into the cabin part and finishing it out you people infected me and I started paying more attention to details and such.

Randy
"these guys must be afraid of the dark"
User avatar
Wolffarmer
Donating Member
 
Posts: 4612
Images: 309
Joined: Wed May 02, 2007 1:32 pm
Location: Idaho Rupert
Top

Re: The Poet Creek Express - Sawdust !!! (?)

Postby GPW » Fri May 11, 2012 5:02 pm

Wolf, nothing embarrassing about a good working trailer , especially one from Salvage ... :thumbsup:
There’s no place like Foam !
User avatar
GPW
Gold Donating Member
 
Posts: 14912
Images: 546
Joined: Thu Feb 09, 2006 7:58 pm
Location: New Orleans
Top

Re: The Poet Creek Express - Sawdust !!! (?)

Postby pmowers » Fri May 11, 2012 8:25 pm

KC- I quite understand about avoiding the "wet work" ;)
I meant thàt you might want to look at the way the wood flexes when you bend it, to avoid the cracking.
Growing old is mandatory, growing up is optional.

Build log:http://www.tnttt.com/viewtopic.php?f=42&t=51193
User avatar
pmowers
Donating Member
 
Posts: 287
Images: 43
Joined: Wed Sep 14, 2011 2:44 pm
Top

Re: The Poet Creek Express - Sawdust !!! (?)

Postby KCStudly » Fri May 11, 2012 10:23 pm

Randy, you have nothing to be ashamed of, I like and can appreciate the thought and hard work you have put into your camper. More importantly, you use it on a reasonable schedule (at least once a year or more counts for me).

I like that you put gussets on the spring hangers. Ask anyone, I do believe in triangulation. Also know what you mean about the infectious nature of this web site. I got it bad, too! :?

Thank you for confirming that the lamination is about as simple as I suspect. That is encouraging.

Re: What I am doing. I'll try to explain it better. If you look at this computer model image
of the design you should be able to see the wood edging capping the top and rear of the foam walls in the galley area.
Image
I included this because I felt that this standing edge of the wall would be susceptible to damage (unlike GPW's camo bug out rig that has no galley hatch).

You can also see how I plan to do the hatch with the ribs exposed on the under side, then the ply skin, then the foam and canvas (canvas not shown) on top, wrapping the edge of the ply up to the first hatch rib. (There's also an extra spar like piece of wood that reinforces the bottom edge of the hatch protecting that edge of the foam from impacts). I figure with the stressed panel construction on top of the ribs there is no reason for spars or blocking (plus I think it will look better), which leads me to how to make the arcs, and how to screw, nail or staple through the hatch ply into the ribs without upsetting the edge grain of traditional hatch ribs. Hence my exploring ideas for how to make the ribs so that they will take a screw better.

Enough of that, tell me more about the two tone "V" shape on the front of your tear. Is that a splice used to lengthen the ply, or just artistic staining? If the later then pooh on your statement about art. Hell, Pooh on either count. Looks like art to me.

Boy I sure would like to meet you, Randy. I like your style, and please don't be offended when I say that you make me think of my dad. Practical, world wise in a down to earth way, and not afraid to see the way things are in the world with the ability to find humor in it.

I did consider the single tongue member/Jack knife thing, but at my planned weight and 5+ wide size I thought that I would be better off with the strength of the A-frame tongue.

Pmowers, Thank you, too. You have convinced me to look closer and at least 'side' the slats to optimize strength and avoid splits. A question for you; how much thickness do you think I will get from each glue layer? In other words, if I laminate 12 slats that are 0.120 thk (1.440 total) how thick will it be with the glue? (I'm hoping for 1.5 total thickness on the wall caps, and if I can predict the end thickness I might go back to forming over the jig instead of into the jig.
KC
My Build: The Poet Creek Express Hybrid Foamie

Poet Creek Or Bust
Engineering the TLAR way - "That Looks About Right"
TnTTT ORIGINAL 200A LANTERN CLUB = "The 200A Gang"
Green Lantern Corpsmen
User avatar
KCStudly
Donating Member
 
Posts: 9613
Images: 8169
Joined: Mon Feb 06, 2012 10:18 pm
Location: Southeastern CT, USA
Top

Re: The Poet Creek Express - Sawdust !!! (?)

Postby Wolffarmer » Fri May 11, 2012 10:49 pm

KC

The "V" is just staining. I don't know about how artful it is. The rear hatch has one also. I just came up with something for your ribs. Go ahead and cut them from plywood, Then glue an 1/8 maple facing on both sides of it, well top and bottom. Should be rather fast building, give something for the screws from the top to go into and dress up the bottom. I would not use what is called hard maple get what is called the soft maple, Of course for the visible part could go whole hog and get birds eye maple, or quilted maple. Hickory would be good also but a bear to work. cherry is sweet to work but spendy. Hmmm that might be nice on the visible part. What ever I would also cut a strip thicker than 1/8 and see how easy it is to bend to what is needed. But 1/8 maple will do a pretty tight bend without steaming. I kind of like this idea for somethings will have to try and not forget it.

I just hooked up my trailer tonight, might head out tomorrow for a bit of a camp.

Randy
"these guys must be afraid of the dark"
User avatar
Wolffarmer
Donating Member
 
Posts: 4612
Images: 309
Joined: Wed May 02, 2007 1:32 pm
Location: Idaho Rupert
Top

Re: The Poet Creek Express - Sawdust !!! (?)

Postby Wolffarmer » Fri May 11, 2012 10:54 pm

Here is the back of mine all closed up. Next one I will have to make it a Burning Man symbol.
:)

Image

Randy
"these guys must be afraid of the dark"
User avatar
Wolffarmer
Donating Member
 
Posts: 4612
Images: 309
Joined: Wed May 02, 2007 1:32 pm
Location: Idaho Rupert
Top

Re: The Poet Creek Express - Sawdust !!! (?)

Postby KCStudly » Sat May 12, 2012 12:03 am

Randy, make sure to let us know when you start your next build thread. I am eager to follow along. :thumbsup: :thumbsup: :thumbsup:

Forgot to mention the progress on wood. I had gotten a phone call from Rover Mike (message went to voice mail due to ringer being off... I help a friend who owns a dance studio putting on an annual show, and had turned my ringer off during rehersals... Doh). Anyway, the message said that he wanted to talk to me about my plywood. When we talked before he was a little concerned about finding 5 mm, and suggested 1/4 inch. I was worried about bending 1/4, so I pro-actively sent him an e-mail last night with a link to http: //www.noahsmarine.com/United_States/Plywoods-us/plywoods-us.html "Noah's marine plywood" (Edit Note: I have deactivated this link due to what may have been a "bait and switch" scheme; after placing my order the invoice came to a higher amount and I was referred to their "new" site; still very good price compared to other sources; will put correct link in an update post dtd. 5/26/12). When I spoke with him today he asked if 6 or 4 mm would be okay, expressing concern about availability and cost. So I referred him to my e-mail and pulled up the linked website again to talk to him about the pricing. He was on his cell on the road, so after we hung up I called Noah's to check on availability and shipping cost; 86 sheets in stock, $160 shipping on 16 sheets boxed on all 6 sides (so $54 a sheet for 5 mm Okoume WBP no voids spec grade marine ply). Hoping to get all of the ply cut to blanks, the lumber stringers, xmbr's, and spars ripped, the foam stock (uncut), and the individual inner wall skin templates CNC routed for around $1k. Yet to be seen, but I do have about 20 hrs labor into the Rover project, so...

Tomorrow I plan to go to the Borg and get a couple of 2x10's x 10, some TB2, air gun brads, and a ton of clamps. Bring that, some wax paper and the plans to work to do some ripping and glue up. It will be a short day because I need to get some sleep, and the dance show is in the evening so I will need to get cleaned up early for that.
Last edited by KCStudly on Fri Nov 16, 2012 11:18 pm, edited 3 times in total.
KC
My Build: The Poet Creek Express Hybrid Foamie

Poet Creek Or Bust
Engineering the TLAR way - "That Looks About Right"
TnTTT ORIGINAL 200A LANTERN CLUB = "The 200A Gang"
Green Lantern Corpsmen
User avatar
KCStudly
Donating Member
 
Posts: 9613
Images: 8169
Joined: Mon Feb 06, 2012 10:18 pm
Location: Southeastern CT, USA
Top

Re: The Poet Creek Express - Sawdust !!! (?)

Postby GPW » Sat May 12, 2012 6:52 am

KC, if I may offer my humble considerations on cabins... Our first TD had a nice Big hatch/Galley , room for all kinds of stuff , no matter what we tried (and we tried a LOT) water would always find it’s way in .. ALWAYS ... :o grrrr!!! Best prepare for that as Much as Possible .... it’s gonna happen :oops:
Rounding off the rear does surprisingly little for aerodynamics, the square ender more favorable and allows the use of simple doors , which tend to leak LESS... and as a bonus provides even more Galley space if desired... Just crumbs for thought... :thinking:
After all the DELUXE trailer building you’ve accomplished , I’d think only the Very BEST/Finest materials should even be considered in this project ... :thumbsup: Take this ALL the way ... 8) 8) 8)

As the indians, bowyers , and sleigh makers figured out , Hickory is best worked GREEN !!! It is the best for bending and is one extremely TOUGH wood ... :thumbsup: Many Hickory deflex/reflex and recurves we‘ve bent proved this .... (bowyer, yet another “addiction” :R “ )
There’s no place like Foam !
User avatar
GPW
Gold Donating Member
 
Posts: 14912
Images: 546
Joined: Thu Feb 09, 2006 7:58 pm
Location: New Orleans
Top

Re: The Poet Creek Express - Sawdust !!! (?)

Postby KCStudly » Sat May 12, 2012 10:57 am

Thanks for the suggestions and vote of support, GPW.

I think you have a point about the hickory for bows and sleigh runners, where a spring like quality is necessary, but for the wall cap and hatch ribs don't you think I would want those to be a bit more rigid? Point being that I think Douglas fir will be fine for the caps. I will consider another species for the exposed ribs, though.

On the curved versus square thing, don't tell me you have forgotten the almighty arch! :lol: I do see your point and that is certainly a good thing for other builders to be aware of, but truth be told the bustle in the back has a certain eye appeal ;) that I am committed to. It is part of the vision that I have for TPCE. Sorry, you won't be talking me out of this one! :twisted:

Yup, I'm way too far into this to risk using the crappy luan underlay found at the big box. I had originally thought that was the way I would go, but I have way too much time and money invested to risk an implosion like Mike saw with his delamination. :no:

Time. Time is the problem now. Must be campable by mid August.

This just in... the trailer frame has been painted with one coat of epoxy primer and two coats of epoxy finish paint!!! Paint is spec'd for 30 years in direct contact with water, was used on a handrail project for a dam. Finish is sort of a flat tone with texture like toned down FRP; kind of a light crepe feel. Pics later, I gotta run to the hardware to get building supplies. (That will most certainly not be the last time you hear that from me. :D )
KC
My Build: The Poet Creek Express Hybrid Foamie

Poet Creek Or Bust
Engineering the TLAR way - "That Looks About Right"
TnTTT ORIGINAL 200A LANTERN CLUB = "The 200A Gang"
Green Lantern Corpsmen
User avatar
KCStudly
Donating Member
 
Posts: 9613
Images: 8169
Joined: Mon Feb 06, 2012 10:18 pm
Location: Southeastern CT, USA
Top

Re: The Poet Creek Express - Yup Sawdust !!!

Postby KCStudly » Sun May 13, 2012 11:46 pm

No building this past Wednesday due to working on set-up for the dance show. Friday night was dress rehearsal. Saturday I slept in as promised. When I did get up I made it a light duty day so I could be ready for the real deal show in the evening.

I did go to Ho-De-Po for pneumatic staples, brads, a gallon of TB2 and a pint as well for the applicator bottle, which I will use the gallon to refill. Realized I had forgotten to detail the arc lengths on the drawing of the galley wall cap rails, so was reluctant to buy lumber until I could confirm the required length. The nailer is a Husky that I paid $18 for at the pawn shop.

I had borrowed some walkie talkies from work to use for the show and had to go back in because one of them would not accept AAA batteries in place of the battery pack. While there I checked on the arc lengths, added them to the drawing (under 8 ft over all, about 6-1/2 ft). Realized I had forgotten to get spring type clamps, so back to Ho-De-Po for those; thankfully it was on the way to Mecca. Going the wrong direction now, so the boards will wait.

Here's the haul.
Image

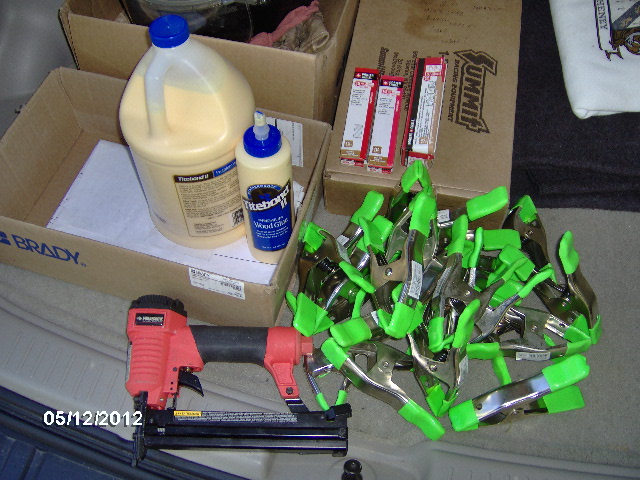
The clamps were a buck apiece. They had nicer ones (Husky) for just under $3 ea, and the rubber grip pads did seem better on those, like they would stay on better, but for what I need and the fact that I am not likely to need them much after the camper build, the cheap ones seemed like the better deal.

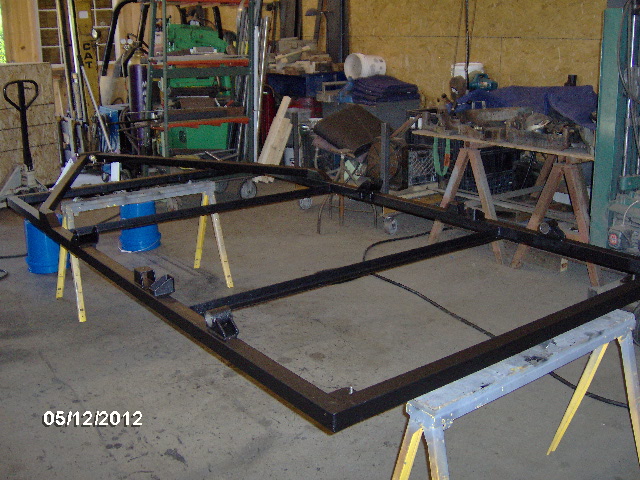
Had hoped to rip the slats for the cap rails, but was anxious to see the trailer in paint and didn't want to get too dirty/sweaty before the show, so on to Fab Mecca.

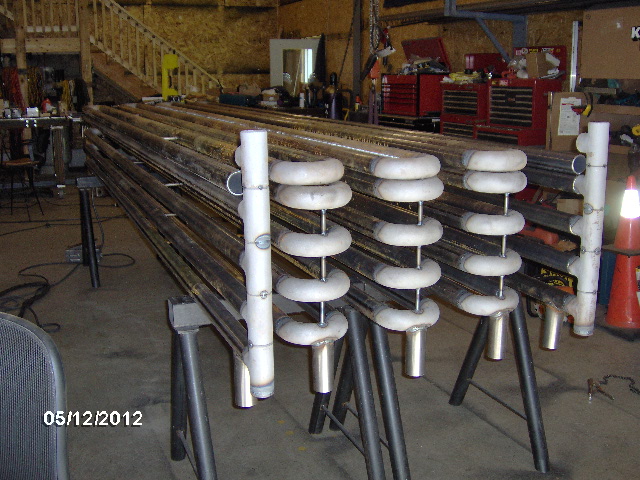
The Zamboni thawer-outer tube bundle is coming along nicely.
Image

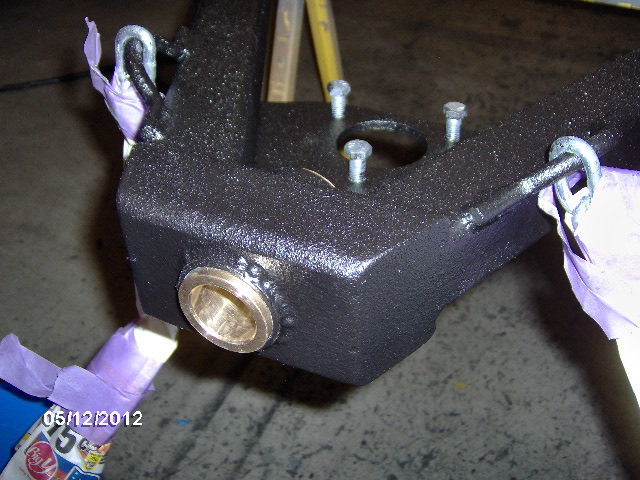
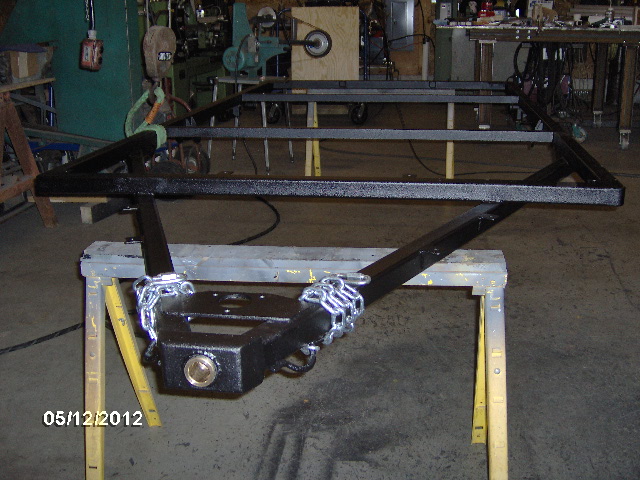
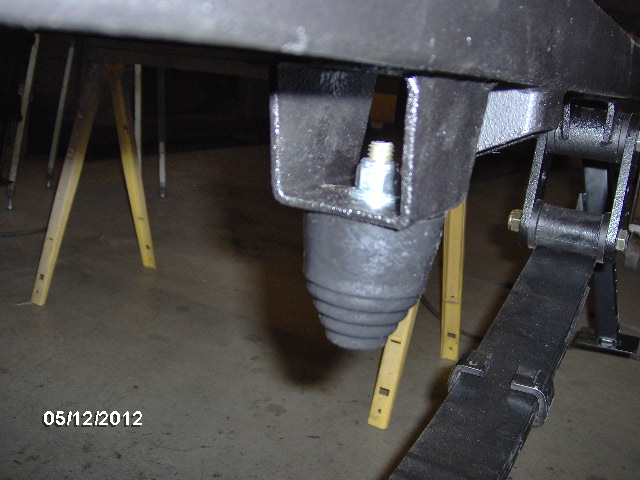
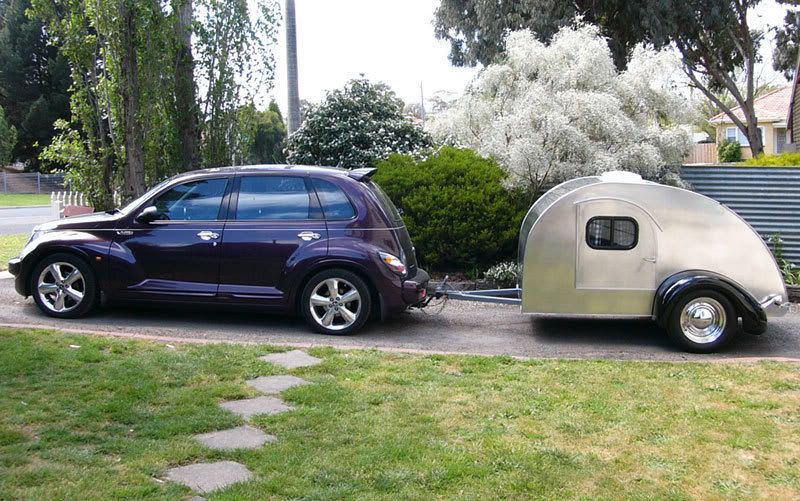
Drum roll please, rim shot, and tadah, here it is...
Image

A close up of the coupler area (the camera flash makes the texture look more sparklly than it is in person).
Image

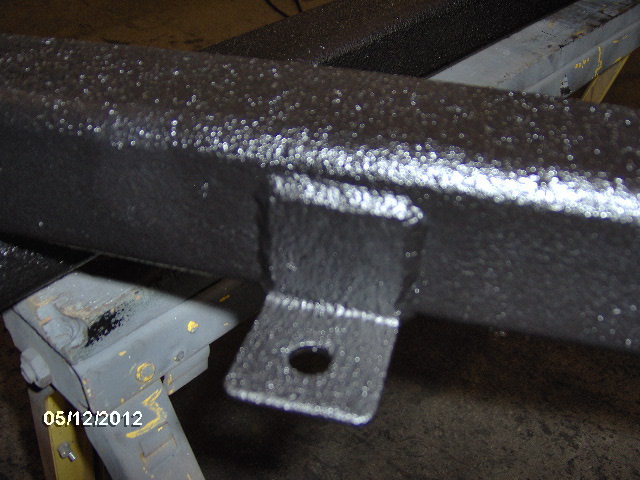
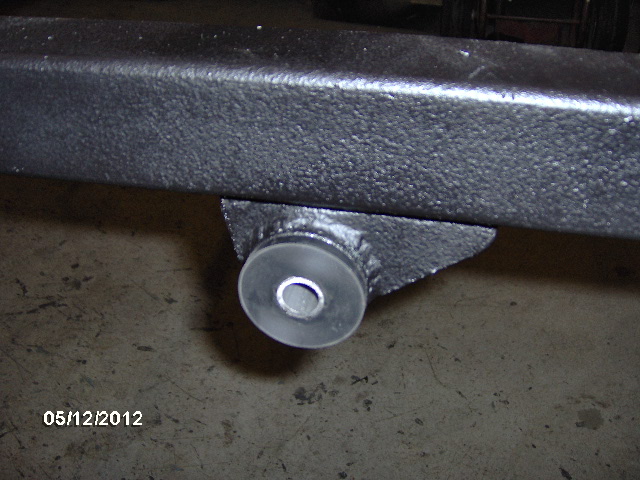
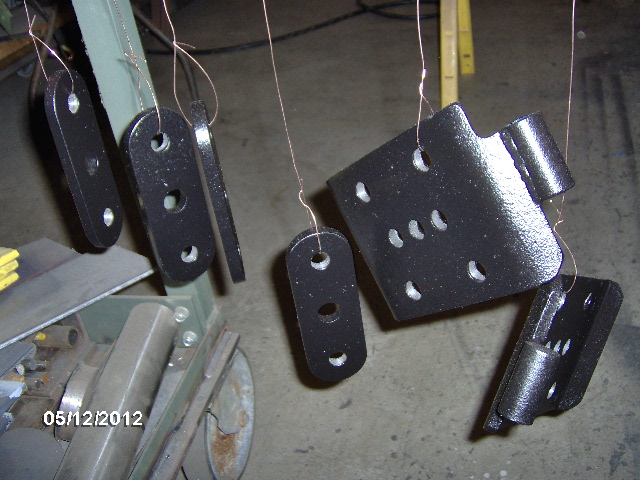
One of the tongue box mounting clips.
Image

Painted underside, note the rear shackle bushing bores were masked off and left unpainted to preserve fit.
Image

And another shot with it right side up and the masking removed from the safety chains.
Image

Tapped the shackle bushings in with a soft mallet and put a little wax lube on the bushing tubes before tapping them in.
Image
Image

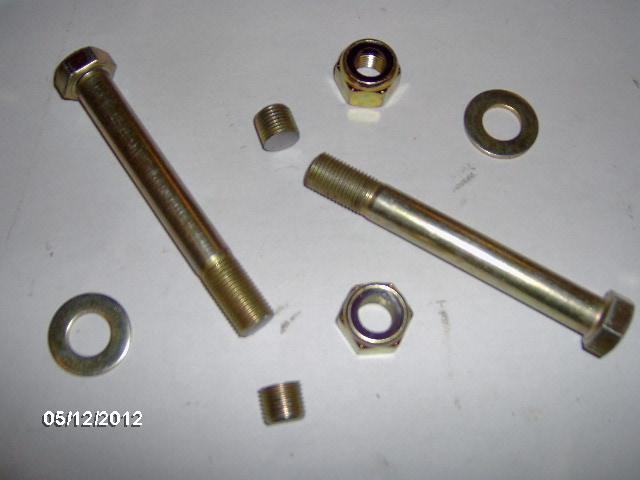
Here are the shackles and U-Bolt plates.
Image

Trimmed the excess off of the front spring mount bolts and chamfered them on the Bader sander. I will touch up the ends of the bolts with a little cold spray galvanizing.
Image

Stainless steel nylon insert nuts for the stabilizer jacks.
Image

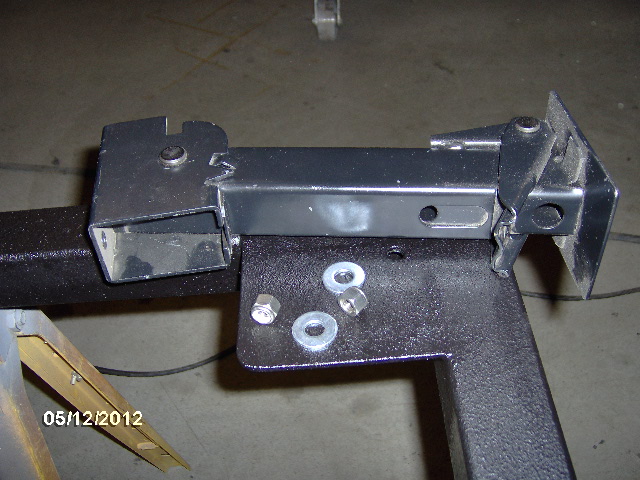
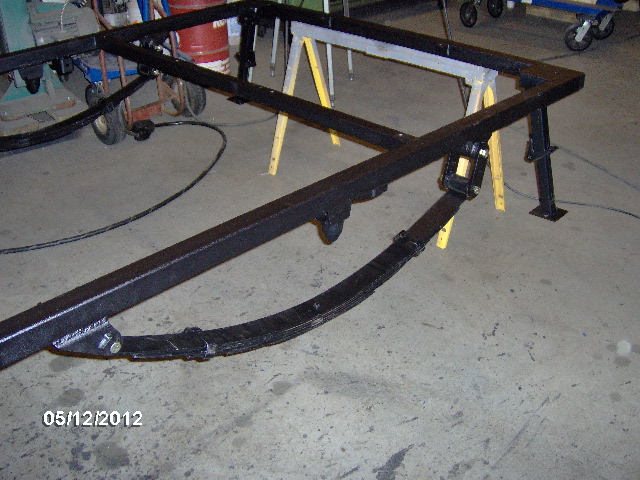
Suspension going together.
Image

Bump stops came with nylon insert nuts. I added flat washers.
Image

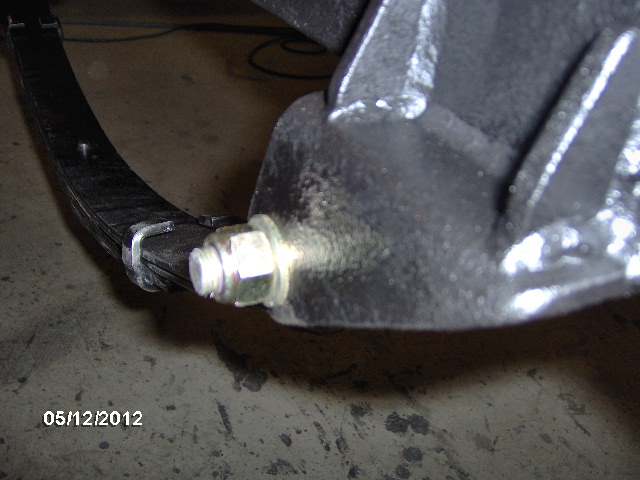
Close up of trimmed spring hanger bolt after installation.
Image

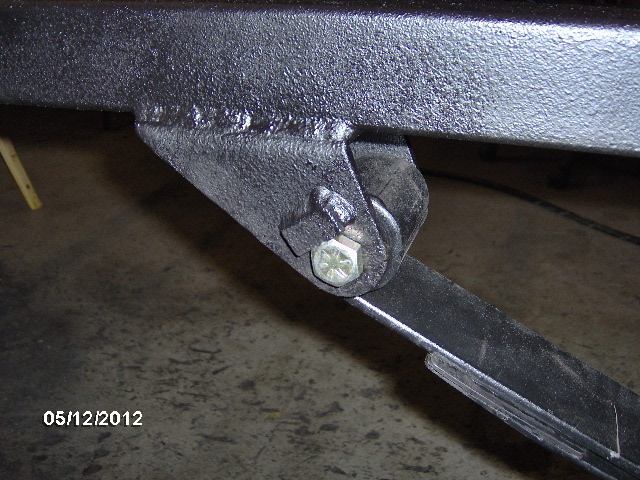
Anti-rotation lug in use.
Image

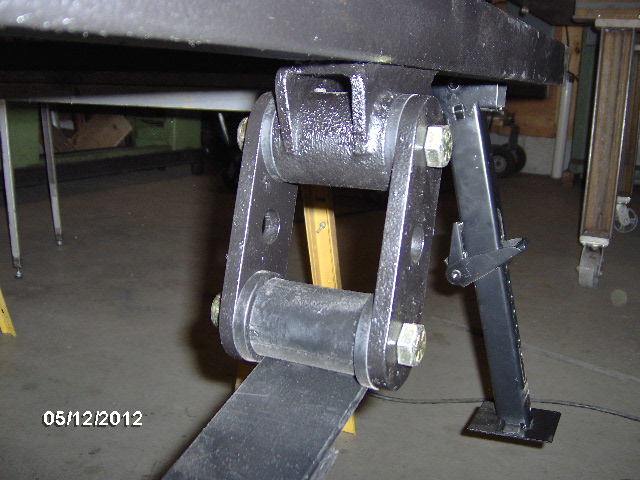
And the shackles are installed. I am considering safety wiring the nuts on these.
Image

And now for your exclusive back stage pass, we go off topic to "The Dance Show".
Brian on the sound board.
Image
This was my seat for many years (20+ ?) but I am now more of a stage manager.

Here's Brenden on the lighting panel.
Image

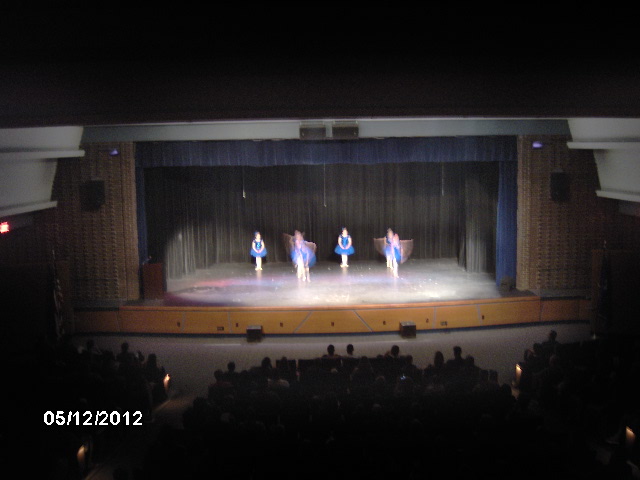
One of the ballet numbers (sorry for the blurr, no flash allowed).
Image

Back stage during one of the modern pop pieces.
Image

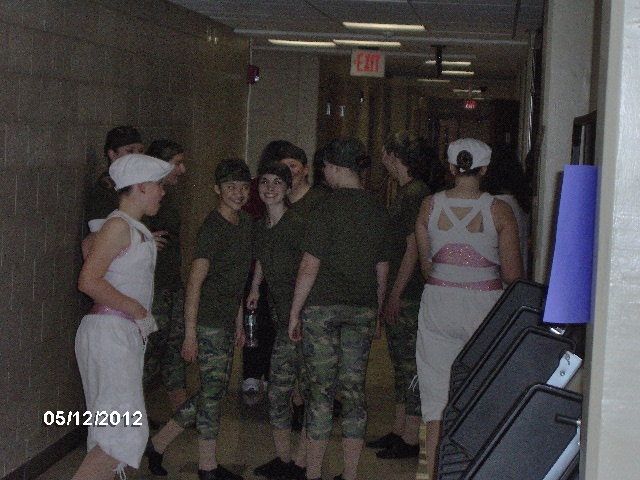
Dancers in costume in the wings.
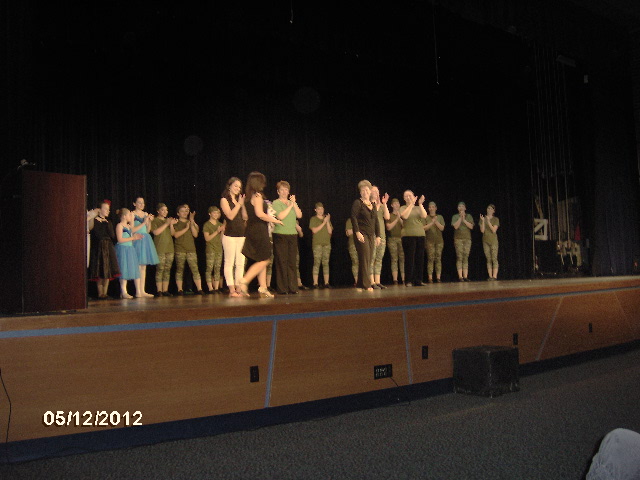
Image

And the final bow.
Image

And now back to our regularly scheduled program.

I got up this morning and ran around to several of the real lumber yards in the region finding three of them to be closed before I remembered that it was Sunday. DOH. Back to Ho-De-Po.

Do you think that you can find a couple of 2x sticks of lumber with no knots, checks, cracks or twists in them?

Miriam (Our Aunti M) had suggested in another thread that longer wider boards tended to have less knots and twists, and would warp less after cutting, but no matter what width or length boards I looked at they all had lots of knots. I decided that if I was going to have to work around knots and have that much waste I would just stick to the fir 2x4's. This worked out better because after picking a few boards out of the pile at the home center and hauling them to the table saw at work, I was able to further improve my selection by swapping some of my boards with better ones from the stock pile of some twenty boards on hand there.

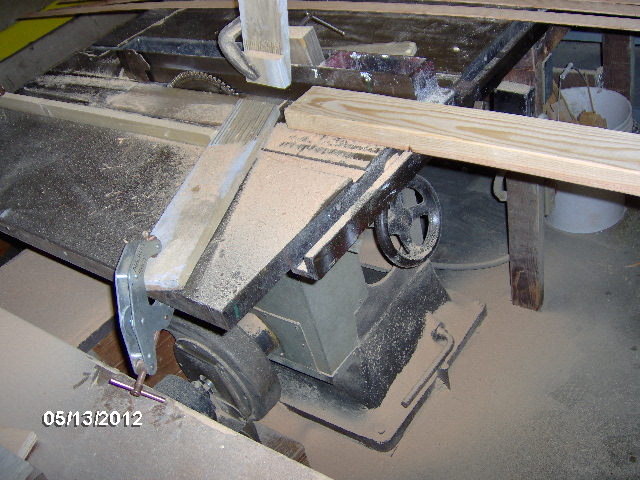
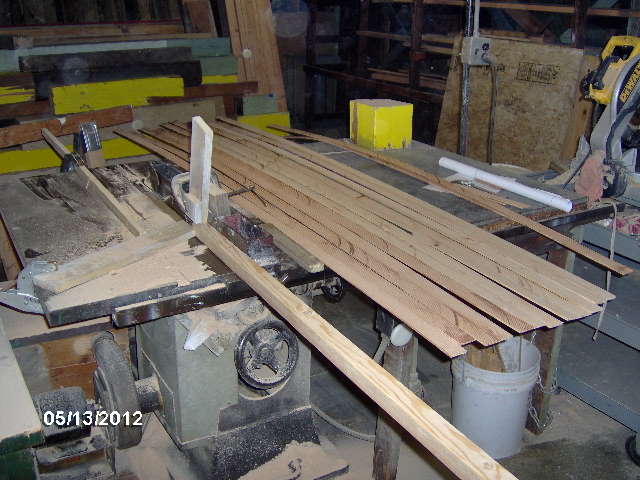
Made another feather board from some scrap and here is a shot of the set up.
Image

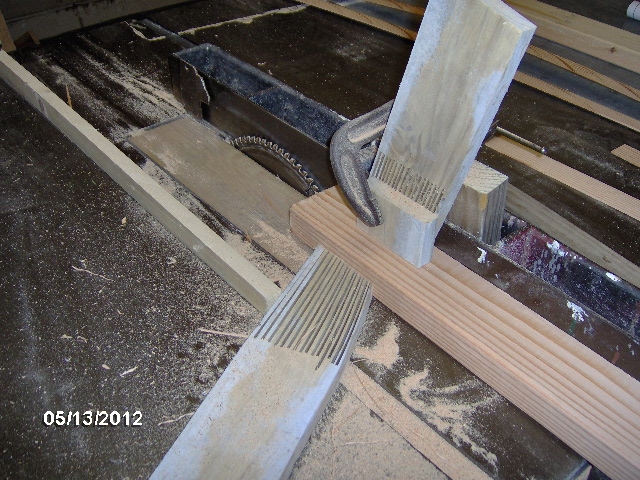
The guard had to come off in order to get the fence to within 1/8 inch from the blade, but with the fence this close and the feather boards out front, there was no fear of accidentally getting into the blade, plus I used a push stick to get the board that last way thru the blade.

Here you can see the first couple of slats. One to get rid of the radius edges, and the next was very uneven in thickness because the board was not straight. The two shorter pieces are the ends that broke off at the small knots. I call these shims.
Image

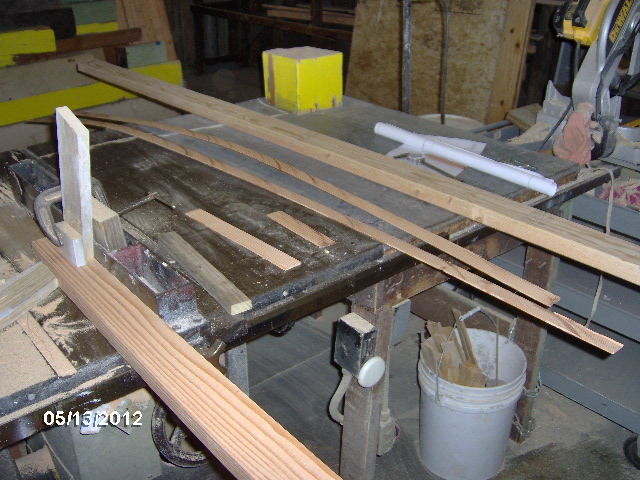
I got 5 slats out of the first board, moving the side feather board for each cut, before reaching a big knot. On to the next board that looked a little more promising.
Image

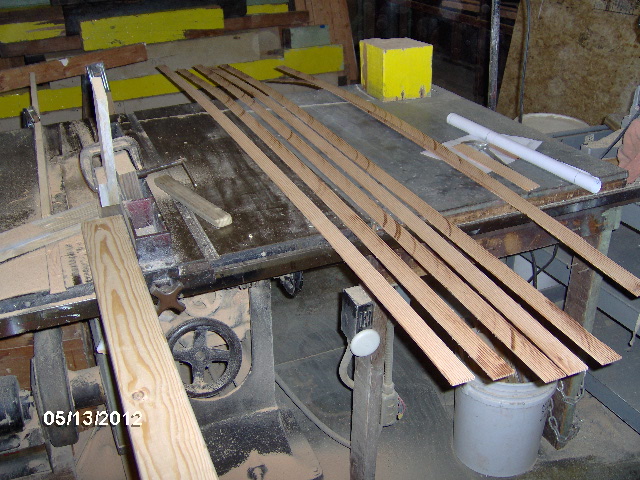
Now we're starting to get into some real sawdust! I tell you the feather boards help, but you sure have to push to get by them and the splitter.
Image

Slat count is rising. Could only use about 2/3 of the board. Even if they had not been full of knots, there comes a point where the drop starts to get less stable/too weak for pushing. Don't want a forearm full of shattered wood, so set that piece aside.
Image

Let me just say, if you have never worked with wood, it is a living thing. It has a mind of it's own. Some of the slats are thicker or thinner. Some are a little tapered across the face from the board having had twist. Some are a little thicker at the ends from the board having a bow and not riding the fence true, and the remainders came out with noticeable differences in width from end to end. I don't think the fence was holding solid, because after a few slats they would get thicker. I had originally figured on 12 slats per cap, but it only took about 9 slats to get to the target 1-1/2 inch thickness. That means that some of the slats are closer to 0.200 thk, so I may have to soak them down after all (ain't going back to do anymore of this than necessary).

The forecast is calling for more sawdust.
Image

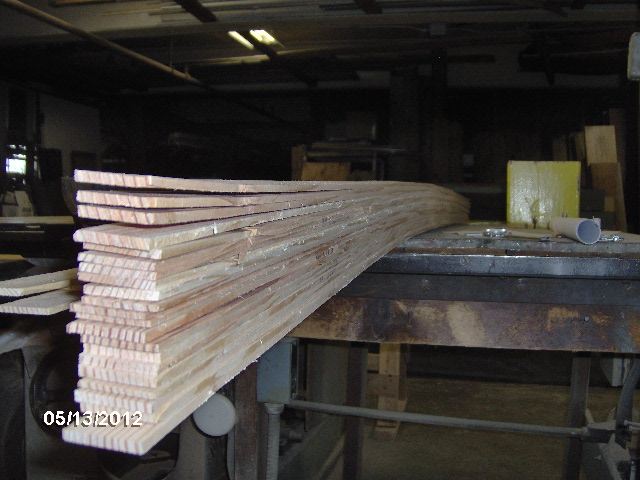
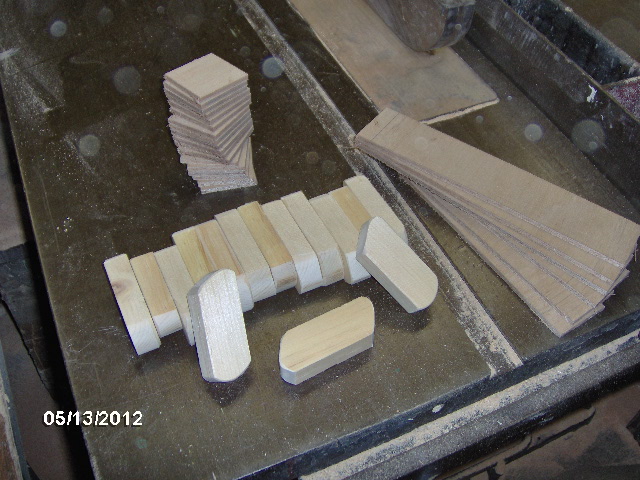
End result, a stack of slats.
Image

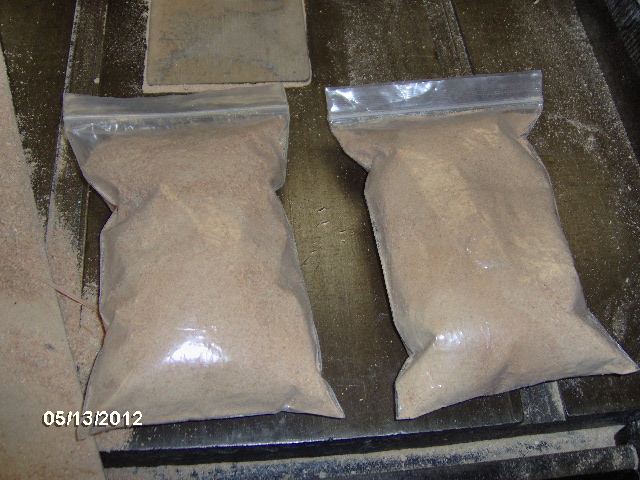
During the "clean up after yourself" phase I collected up a couple of zip lock bags full of sawdust to be used as filler later, if needed.
Image

Then I found a small scrap of 5 mm underlayment and made some shims for the jig. Also cut a small piece of pine into clamp blocks. I cut these on an angle and rounded the front end to a small radius, and the rear end to a larger radius. Kind of an experiment with the thought being that the small end will locate the work without influencing the line of the arc, while the big end will be more forgiving of clamp placement perpendicular to the arc of the slats even if the blocks are not screwed down perfectly square. We'll see if it works. I'll probably have to remake these out of thicker material for more even clamping.
Image

And that was it for today. Went and got cleaned up and took a nice dinner up to my Mom's place for a visit on mother's day (dropped the slats and jig parts off at Mecca on the way).
KC
My Build: The Poet Creek Express Hybrid Foamie

Poet Creek Or Bust
Engineering the TLAR way - "That Looks About Right"
TnTTT ORIGINAL 200A LANTERN CLUB = "The 200A Gang"
Green Lantern Corpsmen
User avatar
KCStudly
Donating Member
 
Posts: 9613
Images: 8169
Joined: Mon Feb 06, 2012 10:18 pm
Location: Southeastern CT, USA
Top

Re: The Poet Creek Express - Yup Sawdust !!!

Postby GPW » Mon May 14, 2012 7:19 am

GREAT PAINT JOB !!! Slats, tools , and dancing girls .... You’re too much Dude !!!! :lol: :lol: :lol: 8)
There’s no place like Foam !
User avatar
GPW
Gold Donating Member
 
Posts: 14912
Images: 546
Joined: Thu Feb 09, 2006 7:58 pm
Location: New Orleans
Top

Re: The Poet Creek Express - Yup Sawdust !!!

Postby Oldragbaggers » Mon May 14, 2012 10:27 am

Wow, that's some very intricate work you are doing. So happy to see the sawdust flying.
Life is sooooo good.........
Sail...camp....bike...repeat
Becky

Build Journal http://www.tnttt.com/viewtopic.php?f=50&t=45917
Visit our blog at http://www.oldragbaggers.com
Image Image
User avatar
Oldragbaggers
Gold Donating Member
 
Posts: 1842
Images: 331
Joined: Mon Aug 01, 2011 9:22 pm
Location: Essex, MD
Top

PreviousNext

Return to Foamies

Who is online

Users browsing this forum: No registered users and 11 guests