A disastrous epoxy day

General Discussion about almost anything Teardrop or camping related

A disastrous epoxy day

Postby Oldragbaggers » Sat May 26, 2012 11:52 pm

It happens. It shouldn't happen. We pray it won't happen, especially on the most visible part of a large project. But sometimes epoxy work just goes all wrong.

It was 90 degrees in the shade here today and I wanted to lay the cloth on my roof. I should have waited for a cooler day. But not me. I put an umbrella up over the teardrop, thinking that would actually help, and forged forward.

Even though I was using slow hardener, and small batches, it just kept kicking too fast. Several batches ended up in the trash with the paint pan and roller smoking. One roller handle in the trash as well because the roller was bonded it to it permanently. And then there is the spot on the front of the roof where the cloth is not saturated and there's a big ugly blob on top of it because the the epoxy had really kicked fast and I didn't realize it before I rolled on the mess.

I am now faced with a LOT of sanding before I can even begin to fix this mess.

Ugh. I need a break from teardrop building. Maybe tomorrow needs to be a boating day.

Hope you all are doing better than I am.

Happy Memorial Day.
Life is sooooo good.........
Sail...camp....bike...repeat
Becky

Build Journal http://www.tnttt.com/viewtopic.php?f=50&t=45917
Visit our blog at http://www.oldragbaggers.com
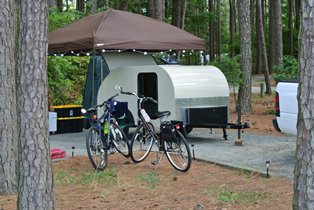
Image Image
User avatar
Oldragbaggers
Gold Donating Member
 
Posts: 1842
Images: 331
Joined: Mon Aug 01, 2011 9:22 pm
Location: Essex, MD

Re: A disastrous epoxy day

Postby ParTaxer » Sun May 27, 2012 7:40 am

Sorry to hear of the set back. I've been following your build all along and am very impressed with your work and can't wait to see the final results.

Mike
I have wisdom beyond my years. In fact, I'm nearly senile.
User avatar
ParTaxer
The 300 Club
 
Posts: 391
Images: 32
Joined: Sat Mar 10, 2007 5:37 pm
Location: Louisville, KY

Re: A disastrous epoxy day

Postby Oldragbaggers » Sun May 27, 2012 7:57 am

Thanks Mike. I'll get it fixed. It'll just take a lot of work and it'll set me back a bit time wise. But the upside of fiberglass is that with enough sanding, it can always be fixed.
Life is sooooo good.........
Sail...camp....bike...repeat
Becky

Build Journal http://www.tnttt.com/viewtopic.php?f=50&t=45917
Visit our blog at http://www.oldragbaggers.com

Image Image
User avatar
Oldragbaggers
Gold Donating Member
 
Posts: 1842
Images: 331
Joined: Mon Aug 01, 2011 9:22 pm
Location: Essex, MD
Top

Re: A disastrous epoxy day

Postby LDK » Sun May 27, 2012 8:55 am

Hi Becky

I didn't use epoxy and fiberglass on my build but I can imagine it can be a pain in the butt.
The only kind of epoxy I used was cpes. Don't put your build off for too long or it might be hard to get back in the groove.
good luck. :)
LDK
Gold Donating Member
 
Posts: 1419
Images: 1
Joined: Fri Jan 22, 2010 8:29 pm
Top

Re: A disastrous epoxy day

Postby Wobbly Wheels » Sun May 27, 2012 11:25 am

It happens, Becky. I've had some days where I feel like I'm fighting it every step. I get everything ready to go, glove up, and, right when I start mixing, I realize I forgot something. Aaaarrgh !!!

One thing that helps on warm days is to keep the resin and hardener in the fridge. I use a small cooler with a couple ice packs in the bottom and keep the mixed pot in there. We don't often see the 90s here, but it can still get plenty warm.
User avatar
Wobbly Wheels
Donating Member
 
Posts: 1080
Joined: Tue Mar 15, 2011 9:51 am
Top

Re: A disastrous epoxy day

Postby mikeschn » Sun May 27, 2012 5:14 pm

Sorry to hear about that Becky... I hope your fiberglass recovery goes well.

And thanks for the warning. Since I am learning glassing on my current build, I'll try to do it on a cooler day! :sweaty:

Mike...
The quality is remembered long after the price is forgotten, so build your teardrop with the best materials...
User avatar
mikeschn
Site Admin
 
Posts: 19202
Images: 475
Joined: Tue Apr 13, 2004 11:01 am
Location: MI
Top

Re: A disastrous epoxy day

Postby rmclarke » Sun May 27, 2012 5:42 pm

:( :( Sorry about your little setback....I say little because, like you said, it's fixable :thumbsup: :thumbsup:
I agree with Wobbly Wheels, keeping it cool on those warmish days is the way to go.
Keep up the good work!! You've got a fine build going on there! :thumbsup:
"When a hammer is the only tool you own, every problem begins to look like a nail..."

ImageFrom this: Image to this: Image Finally!!
User avatar
rmclarke
The 300 Club
 
Posts: 384
Images: 231
Joined: Mon Apr 09, 2007 3:22 am
Location: North Jefferson State
Top

Re: A disastrous epoxy day

Postby Oldragbaggers » Sun May 27, 2012 7:59 pm

I probably have the most well skinned teardrop roof ever. After I cut away all the patches of cloth that hadn't adhered to the wood, I feathered all the edges out nice and smooth. Since there were basically spots all over the place and I didn't want to make a bad situation worse by just laying patches all over the place, I just laid another layer of cloth on the entire roof, so the majority of it has 2 layers of 12 oz. (yes, that's overkill....) cloth.

Here's the secret I figured out today to laying heavy cloth. (And I was kicking myself the whole afternoon for not thinking of it yesterday.) I had been trying to roll on the resin, like I always do with the lighter weight cloth. But it takes so long rolling to get the heavier cloth saturated that things start to cook before you can get anywhere. So today my method was to mix it in cups, no more than 6-8 oz at a time, then pour it on and spread it with the squeegee. I got much better saturation of the cloth and I could move fast before anything start to kick off. I used a lot of cups because I didn't want to mix new resin in a cup that had residue of stuff that had started to kick in it so I didn't do more than 2 batches in the same cup.

Today's layup went well and my roof should be bullet proof. I'm not happy though with the way the heavy cloth went over the edges. Even with taping it down tight over a 1/2" radius, it still raised up and has bubbles in a few spots. If I can't get it all tight and smoothed out to my satisfaction I will end up putting edge molding on after all, but the jury is still out on that until I finish with all my sanding, filling and fairing.

I really caused myself a lot of extra work, and not a small amount of expense with the additional cloth and resin, but thank goodness I am on the right track to making it right again and when it's all said and done my roof should be even stronger than my original plan, not that I'm planning on a meteor falling on it or anything. I'm also thankful that there are options out there, like nice edge moldings, and if worse had absolutely come to worse, the option to skin it with aluminum and just hide the whole mess. What a learning experience. My husband keeps saying to me..."that'll be nice to know when you build your next one...." I don't think so. :NC

I supposed I should probably move the contents of this thread over to my build thread. I should have posted it there in the first place.

Thanks everyone for your words of support and encouragement.
Life is sooooo good.........
Sail...camp....bike...repeat
Becky

Build Journal http://www.tnttt.com/viewtopic.php?f=50&t=45917
Visit our blog at http://www.oldragbaggers.com
Image Image
User avatar
Oldragbaggers
Gold Donating Member
 
Posts: 1842
Images: 331
Joined: Mon Aug 01, 2011 9:22 pm
Location: Essex, MD
Top

Re: A disastrous epoxy day

Postby Oldragbaggers » Sun May 27, 2012 9:58 pm

To a certain extent it depends on whether you are using fast or slow hardener, but in general it should be over 60 degrees for the entire length of the cure, at least 24 hours. I personally like working around 75 degrees. You can work epoxy at higher temps, but use slow or extra slow hardener, use small batches and work fast.
Life is sooooo good.........
Sail...camp....bike...repeat
Becky

Build Journal http://www.tnttt.com/viewtopic.php?f=50&t=45917
Visit our blog at http://www.oldragbaggers.com
Image Image
User avatar
Oldragbaggers
Gold Donating Member
 
Posts: 1842
Images: 331
Joined: Mon Aug 01, 2011 9:22 pm
Location: Essex, MD
Top

Re: A disastrous epoxy day

Postby angib » Mon May 28, 2012 11:23 am

Hey, having half a dozen batches of epoxy kick off while you're still working it is one of the important steps to becoming an epoxy expert. Welcome to the fraternity.
User avatar
angib
5000 Club
5000 Club
 
Posts: 5783
Images: 231
Joined: Fri Apr 30, 2004 2:04 pm
Location: (Olde) England
Top

Re: A disastrous epoxy day

Postby Corwin C » Mon May 28, 2012 12:05 pm

Sorry to hear about your troubles ... may the correction be painless. As you have noticed, temperature makes a huge difference in how epoxy goes down. Getting it out of the mixing container and in a thin puddle on your project slows the cure down as well. I usually do my layup early in the morning when it's cool and let it cure in the warm afternoon sunshine (before the bugs come out.)

Oldragbaggers wrote:... Here's the secret I figured out today to laying heavy cloth. (And I was kicking myself the whole afternoon for not thinking of it yesterday.) I had been trying to roll on the resin, like I always do with the lighter weight cloth. But it takes so long rolling to get the heavier cloth saturated that things start to cook before you can get anywhere. So today my method was to mix it in cups, no more than 6-8 oz at a time, then pour it on and spread it with the squeegee. I got much better saturation of the cloth and I could move fast before anything start to kick off. I used a lot of cups because I didn't want to mix new resin in a cup that had residue of stuff that had started to kick in it so I didn't do more than 2 batches in the same cup...


It's interesting how these things have to be experienced in order to learn them ... I do pretty much the same. I have a trusted helper measure and mix the epoxy while I wet out the fabric and get it squeegeed into place. This way I have a continuous flow of fresh epoxy to work with. I have enough cups that I can let the remaining epoxy in the cup go off and then pop (or peel) out what's left in the cup before re-using it. I also, use a small squeegee and push around a puddle of epoxy to speed up the wetting process without getting bubbles. It is so much more relaxed to do twenty small batches than two big ones. When doing this, treat it a little like painting and keep a "wet" edge. And remember to periodically go back and check what you've done earlier checking that the fabric is still in place and it's curing properly.

When doing canoes, I would start on one end and by the time I got to the other end, where I started is almost ready for "fill" coats. I'm a fan of a chemical bond rather than sanding and re-coating. This is done by coating over previous epoxy layers with a "soft" or incomplete cure. Check with your epoxy manufacturer for instructions.
Corwin
Image Image Image
If I am unwilling to stand up straight before the world and admit what I have accomplished during the day, without excuses, in complete and honest detail, then I can do better ...
and no one should be expected to accept anything less.
-- myself
User avatar
Corwin C
500 Club
 
Posts: 916
Images: 78
Joined: Mon Oct 19, 2009 10:27 am
Location: Junction, Piute County, UT
Top

Re: A disastrous epoxy day

Postby Wolffarmer » Mon May 28, 2012 2:10 pm

At least it doesn't sound like you glued yourself to something heavy.

Good lessons can come hard. so to speak.

Randy
"these guys must be afraid of the dark"
User avatar
Wolffarmer
Donating Member
 
Posts: 4612
Images: 309
Joined: Wed May 02, 2007 1:32 pm
Location: Idaho Rupert
Top

Re: A disastrous epoxy day

Postby Wobbly Wheels » Mon May 28, 2012 2:24 pm

I've nothing to add to what's already been posted except for a FYI...a bit of trivia....
When manufacturers list pot life and cure times, they are assuming a standard shop temperature of 72 degF and (I think) 55% humidity. Above that means a slow hardener, below means a fast one.

Adjust to taste, of course.
User avatar
Wobbly Wheels
Donating Member
 
Posts: 1080
Joined: Tue Mar 15, 2011 9:51 am
Top

Re: A disastrous epoxy day

Postby angib » Mon May 28, 2012 4:25 pm

Wobbly Wheels wrote:When manufacturers list pot life and cure times, they are assuming a standard shop temperature of 72 degF and (I think) 55% humidity.

And, to be fair, they were having a chuckle, and maybe a wry grin too, as they wrote it down.....
User avatar
angib
5000 Club
5000 Club
 
Posts: 5783
Images: 231
Joined: Fri Apr 30, 2004 2:04 pm
Location: (Olde) England
Top

A disastrous epoxy day

Postby nevadatear » Mon May 28, 2012 6:18 pm

Been there as well however on the opposite end of the spectrum. Trying to epoxy in January. ! Learned a lot a boy did I get good at sanding. If there is one think worse than going off too fast,it is never going off and having to scrape off the gloppy epoxy and washing with vinegar. But I did learn ! When is cold, warm the room and warm the epoxy. And you are absolutely right about squeezing it to the fabric. I found the straight end of kitchen bowl scraper was ideal. Lost it to epoxy process for ever. Sounds like you will have a great trailer when you are done

Debbie
Last edited by nevadatear on Mon May 28, 2012 9:54 pm, edited 1 time in total.
Debbie (with Randy looking over my shoulder)
Our build thread: http://www.tnttt.com/viewtopic.php?t=41295&highlight=monstero
2009 Homebuilt woody, Kenskill inspired 5 wide
ImageImage
User avatar
nevadatear
Silver Donating Member
 
Posts: 2381
Images: 171
Joined: Mon Nov 10, 2008 2:37 pm
Location: No. Nevada
Top

Next

Return to General Discussion

Who is online

Users browsing this forum: No registered users and 7 guests