Hi Becky,
Very nice paint job there, you'll be camping in no time now!!! Isn't it wonderful working on finish stuff? Thank you for keeping us updated on your progress; I too really enjoy your style.
Cheers,
Dave
Teardrops n Tiny Travel Trailersor t n ttt for short (tnttt.com) |
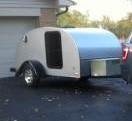
Lance and Becky's Sagwagon
Re: Lance and Becky's Sagwagon - Spray Painting 8/23
![]() by DMcCam » Mon Aug 27, 2012 10:02 am
by DMcCam » Mon Aug 27, 2012 10:02 am

-

DMcCam - Gold Donating Member
- Posts: 883
- Joined: Wed Jan 06, 2010 8:30 pm
- Location: Reno, Nevada
Re: Lance and Becky's Sagwagon - Mini Galley Update
![]() by Oldragbaggers » Mon Sep 17, 2012 5:45 pm
by Oldragbaggers » Mon Sep 17, 2012 5:45 pm
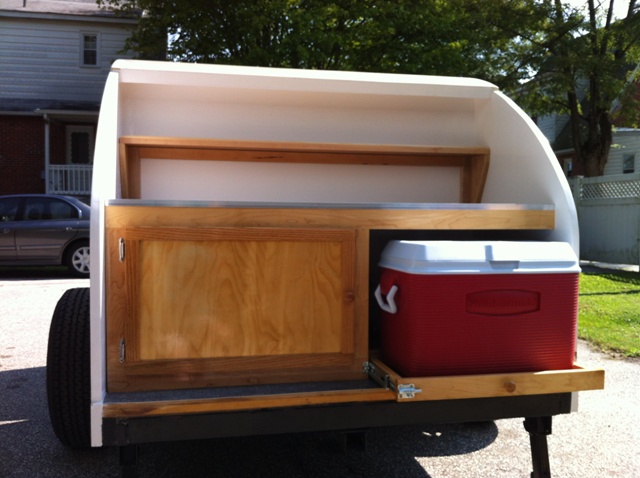
My very basic galley. The upper shelf is just sitting in place for now. I still need to put a couple more of coats of varnish on it before I permanently mount it. I used a Formica type laminate from Home Depot for the counter top. I bought 2 sheets of 2'x4' and pieced it. The seam is barely visible. The trim is 1" aluminum angle.
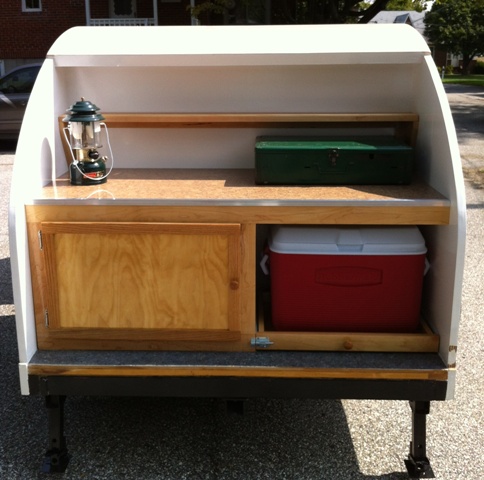
My Coleman storage rack located behind the sliding cooler drawer.
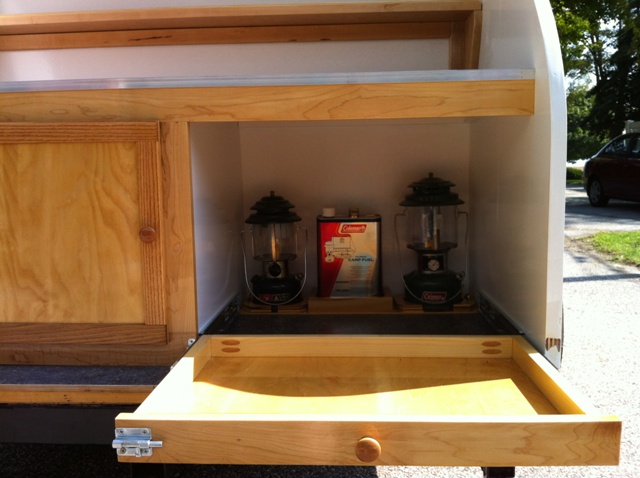
The rack has bases cut specifically for the 2 lamps and the can of fuel and the fit is fairly snug. (Our 502 Sportster stove also fits perfectly in the compartment for the CL2 lantern), In addition I put a hook on one side of the rack and a small cleat on the other side so that I can run a piece of small line over the ball nuts on the lanterns and secure them down. An option to that might be cushioned hoods that will slide over the lanterns to protect them and the wall from scratches under travel. That will be an easy winter project.
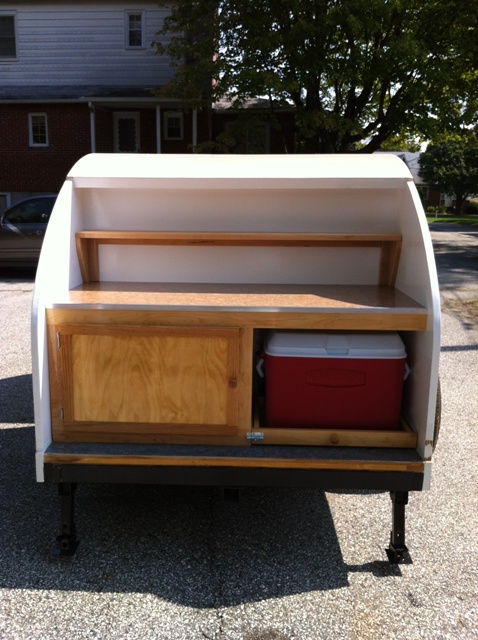
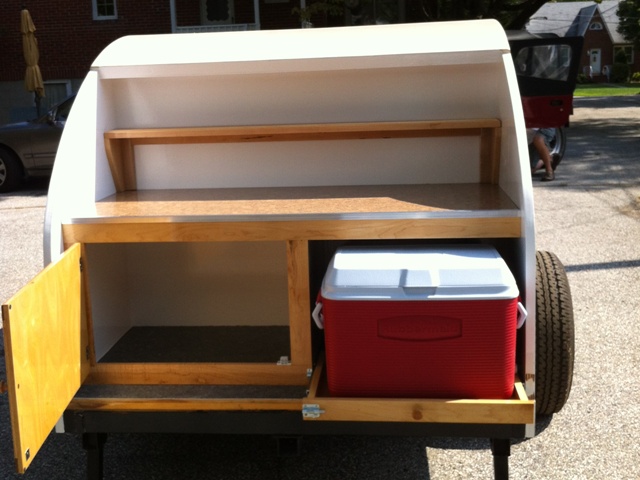
The cabinet will be left as is and we will just stack our stuff inside in plastic storage bins. I will put in a couple of hooks in strategic places so I can secure the bins with bungee cords.
The sliding drawer installation gave me a fit, but it's working well now.
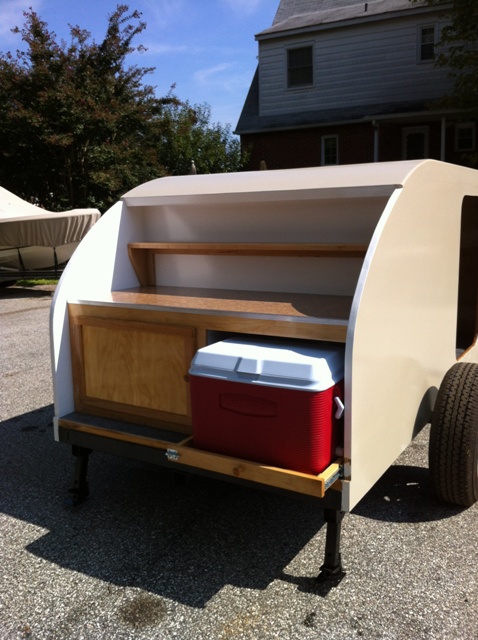
Starting to look like a real galley
I still have to mount lights, hooks, hold down eyes and other small finishing touches, but it isn't going to get any more complicated than this. And then I just need to GET THE LID ON IT!!!
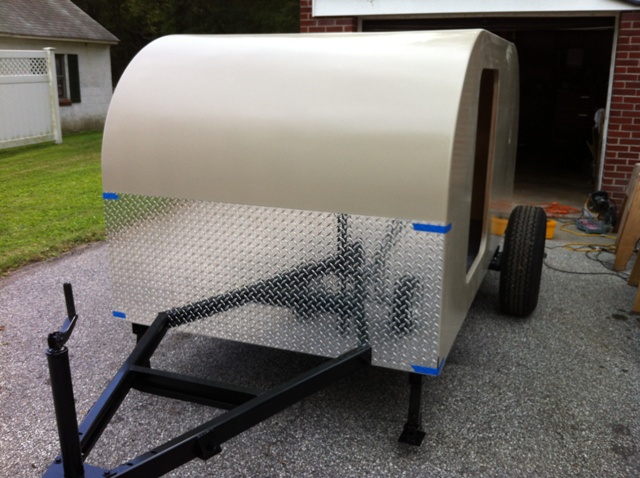
I also got my diamond plate rock guard cut. Started to mount it today but I ran out of day before I got everything done that I wanted to do. (I'm also still working on the hatch but I'll save that for another update.)
That's all for now.
My Coleman storage rack located behind the sliding cooler drawer.
The rack has bases cut specifically for the 2 lamps and the can of fuel and the fit is fairly snug. (Our 502 Sportster stove also fits perfectly in the compartment for the CL2 lantern), In addition I put a hook on one side of the rack and a small cleat on the other side so that I can run a piece of small line over the ball nuts on the lanterns and secure them down. An option to that might be cushioned hoods that will slide over the lanterns to protect them and the wall from scratches under travel. That will be an easy winter project.
The cabinet will be left as is and we will just stack our stuff inside in plastic storage bins. I will put in a couple of hooks in strategic places so I can secure the bins with bungee cords.
The sliding drawer installation gave me a fit, but it's working well now.
Starting to look like a real galley
I still have to mount lights, hooks, hold down eyes and other small finishing touches, but it isn't going to get any more complicated than this. And then I just need to GET THE LID ON IT!!!
I also got my diamond plate rock guard cut. Started to mount it today but I ran out of day before I got everything done that I wanted to do. (I'm also still working on the hatch but I'll save that for another update.)
That's all for now.
Life is sooooo good.........
Sail...camp....bike...repeat
Becky
Build Journal http://www.tnttt.com/viewtopic.php?f=50&t=45917
Visit our blog at http://www.oldragbaggers.com
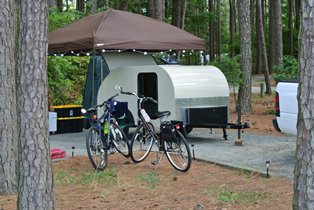
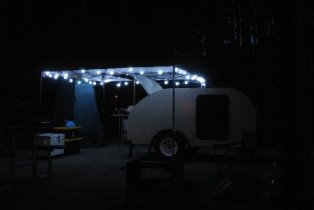
Sail...camp....bike...repeat
Becky
Build Journal http://www.tnttt.com/viewtopic.php?f=50&t=45917
Visit our blog at http://www.oldragbaggers.com
-

Oldragbaggers - Gold Donating Member
- Posts: 1842
- Images: 331
- Joined: Mon Aug 01, 2011 9:22 pm
- Location: Essex, MD