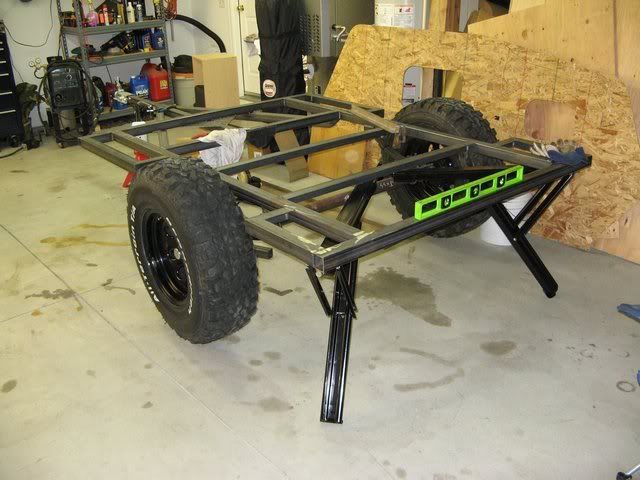
Silvrzuki77- I also like the second photo stabilizer set-up from
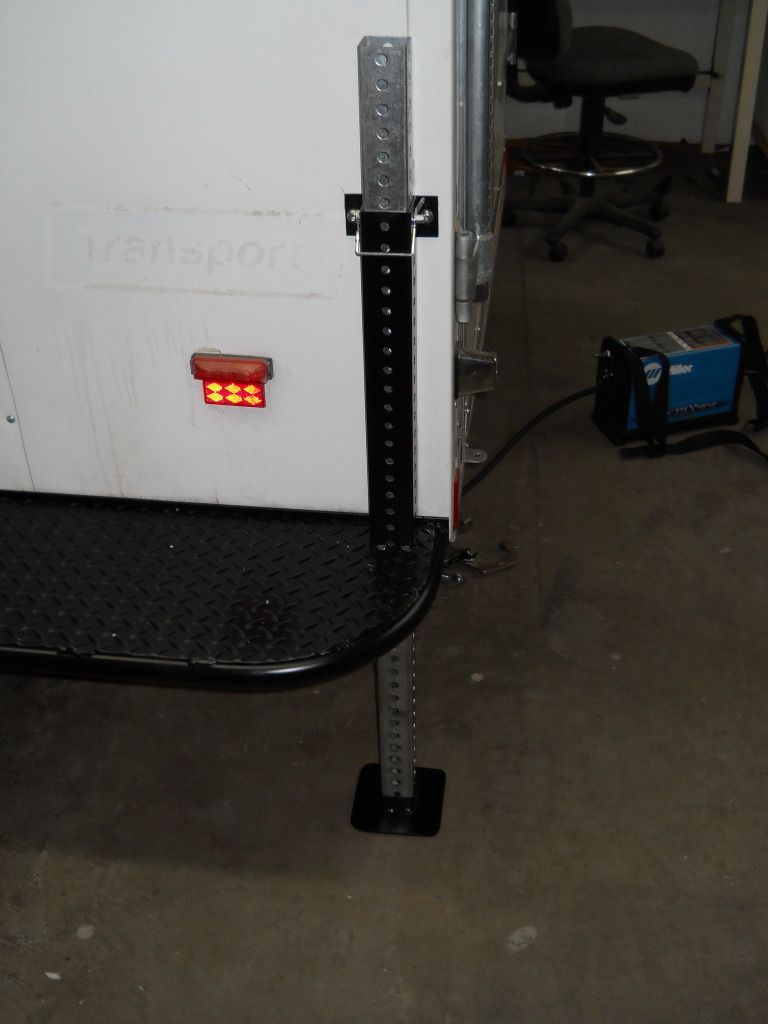
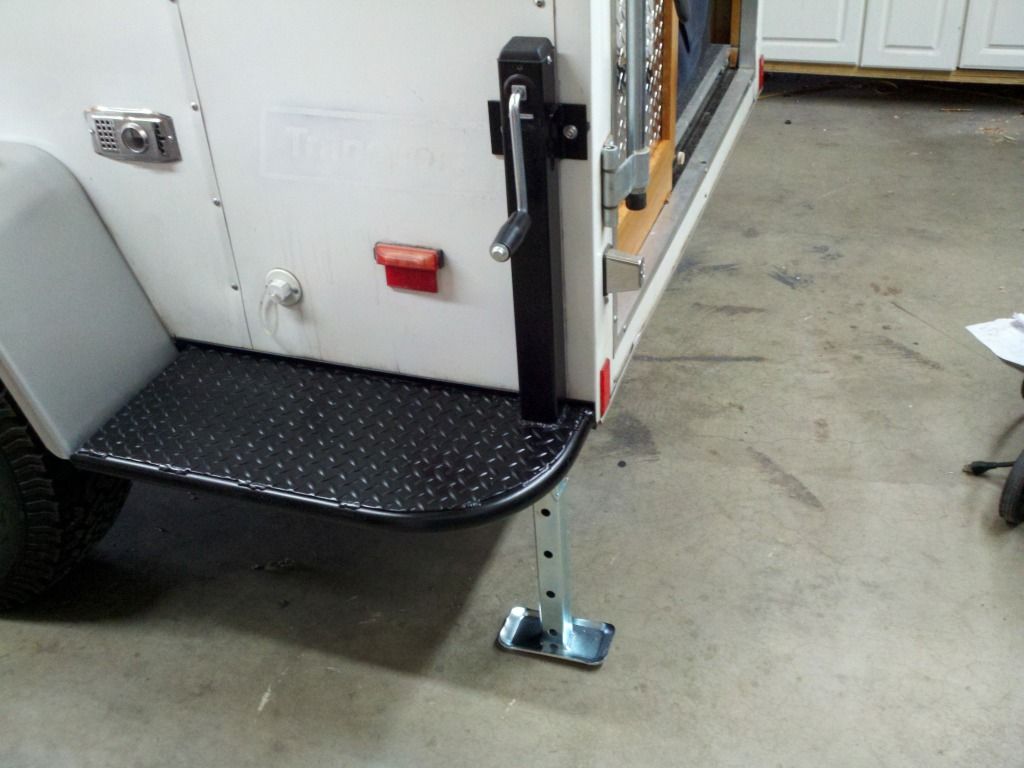
Taco Jeff...looks really durable, as does the first one. But in my case, I wanted to be able to use easily replaceable parts and be strictly bolt-on. I came up with this idea (which I later found had already been done before, drats, on some off-road forum). Simple, fast to make and deploy, realatively cheap, and should be able to hold 600lbs on each leg-per Harbor Freight (I've already tested it by using the tongue jack to lift the wheels off the ground, then putting 500+lbs on the rear).
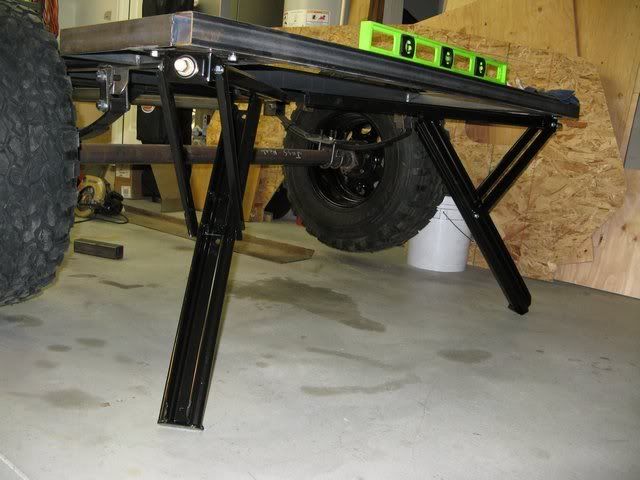
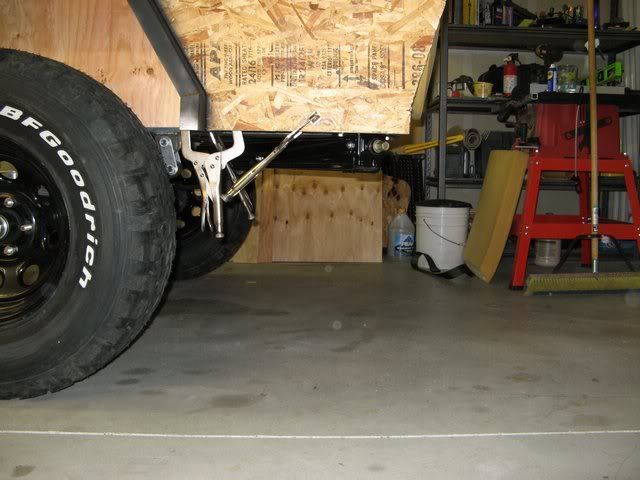
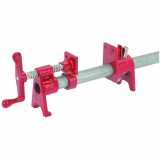
Harbor Freight pipe clamp stabilizer Use the right side part (as pictured) only, save the rest for future use? Get 3/4" diameter threaded iron pipe, end caps, and round feet (stanchions?). I used 30" long pieces (use longer if needed, for taller trailers). Use 1/4" bolts (and washers, and locknuts) to fit thru already drilled holes in clamps (refer to gallery photos of my trailer); grade 2 will be strong enough, I would've preferred grade 5 or 8, but didn't find any long enough. Use clamp to mark spots to drill 2 holes thru trailer frame, drill , then test fit clamp piece to dtermine lenghth of bolts needed.On workbench, insert pipe thru clamp, loctite on cap and feet (if you want to be able to remove the foot and completely withdraw the pipe for ground clearance while travelling, just screw it on w/o the locktite). Then, drill a hole thru pipe in the raised position to insert a locking pin to hold up for travel. Take assembly and mount to trailer. When you lift up on clamp relaese, the pipes will slide down to the ground, and when you let go of the release, you won't be able to raise the pipe. To raise the pipe, use the release and lift the pipe to travelling postion. Insert the safety pin. There you go!


 on here I might have to borrow one or two
  awesome photos
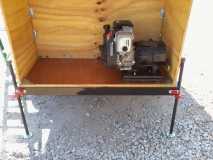
  now for that picture number two how'd they do that?