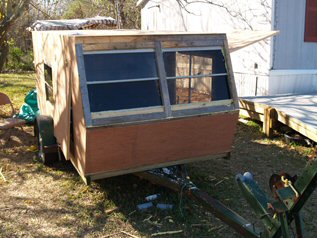
Converting a snowmobile trailer to an LQ/Toyhauler

Converting Cargo Trailers into TTTs

Re: Converting a snowmobile trailer to an LQ/Toyhauler

Postby roadinspector » Mon Jan 21, 2013 10:19 pm

jmsokol,

You can add airbags to the rear springs of the pickup to help stop the bucking if that is a problem. Glad you understand the 60/40 loading of a trailer. There are lots of people that don't and get in trouble. I like your idea of a solid wall folding room for the ramp. It can be done. New territory just intrugues the mind and creates a challenge to overcome. There are several ways, modular walls that lock in place, offset hinges, hinged two piece roof. The advantage to this is the CT would be an all season rig. It would take some planning to keep it from being a pain in the a@@ when setting up and the potential of leaks. I think it would work. Cost would be more than the canvas but hey, if your up for an adventure in the build go for it.

Earnest
Dadgum it! I cut that board 5 times and it's still too short!
2001 quad-cab Dodge Cummins 3/4 ton camper special, 16x7x7 CT work in progress toyhauler, 01 HD Ultra Classic, 98 HD Heritage Softail, 88 HD 1200 Sportster. viewtopic.php?f=42&t=51510
User avatar
roadinspector
500 Club
 
Posts: 599
Images: 127
Joined: Wed Mar 24, 2010 10:33 pm
Location: Texas

Re: Converting a snowmobile trailer to an LQ/Toyhauler

Postby mezmo » Mon Jan 21, 2013 11:12 pm

Hi Mike,

That Fibertech pricing doesn't sound too out of line, if that's in
your range, but of course I'm sure you'll be a better judge of that
from your research. If they can do the interior dividing wall and
any windows,doors, AC set ups etc. for a reasonable cost, that
may be worth it for you. Aerodynamics and weight are both important
and the Fibertech looks good on both parts - less trailer weight =
more cargo weight too.

I have some ideas on doing a hardwall extension, instead of the
canvas, that you should be able to easily do, or even have Fibertech
fabricate for you. If you're interested I'll pass it along if you want.

Cheers,
Norm/mezmo
If you have a house - you have a hobby.
User avatar
mezmo
1000 Club
1000 Club
 
Posts: 1817
Images: 194
Joined: Fri Jan 01, 2010 4:11 am
Location: Columbia, SC

Re: Converting a snowmobile trailer to an LQ/Toyhauler

Postby jmsokol » Mon Jan 21, 2013 11:34 pm

mezmo wrote:Hi Mike,

I have some ideas on doing a hardwall extension, instead of the
canvas, that you should be able to easily do, or even have Fibertech
fabricate for you. If you're interested I'll pass it along if you want.

Cheers,
Norm/mezmo


Norm,

Yes, please.... I see how this could work in my mind's eye, but really need to put it down on paper and build a model. I appreciate any ideas you can offer. Of course, this hardwall extension could be built on any trailer ramp-door which does offer a price advantage since I've seen a lot of used all-aluminum snowmobile trailers with a drive-off ramp on the front.

I've got a buddy who can fabricate all the interior cabinets and I think he knows a shop that does aluminum welding and fabrication. That could be a plan.
jmsokol
Teardrop Builder
 
Posts: 46
Joined: Fri Jan 11, 2013 5:45 pm
Location: Western Maryland
Top

Re: Converting a snowmobile trailer to an LQ/Toyhauler

Postby jmsokol » Mon Jan 21, 2013 11:52 pm

roadinspector wrote:jmsokol,
I like your idea of a solid wall folding room for the ramp. It can be done. New territory just intrugues the mind and creates a challenge to overcome. There are several ways, modular walls that lock in place, offset hinges, hinged two piece roof.

Earnest


Earnest,

Yes, I think that three fold-down walls made from 1" square aluminum tubing could be built on floor hinges with 1" and 2" offsets so they fold down flat to the ramp floor. Locking the walls together is not a real problem either. But I'm having trouble envisioning how the hard roof would work without having to lift it up above level first, then folding the walls up beneath it. And the roof perimeter needs to be larger than the wall perimeter so it could overlap the walls with a drip edge to eliminate leaks.

And it's not a problem to skin the walls with aluminum and stuff them with hard-foam insulation. Plus this room could also be close to full height if the roof on a small pitch with perhaps a 1 foot drop. This actually seems workable if I can get the aluminum wall frames welded up.

If you have any ideas, I'm all ears...
jmsokol
Teardrop Builder
 
Posts: 46
Joined: Fri Jan 11, 2013 5:45 pm
Location: Western Maryland
Top

Re: Converting a snowmobile trailer to an LQ/Toyhauler

Postby jmsokol » Tue Jan 22, 2013 5:11 pm

If I can come up with a workable hard-wall solution for the ramp-room, something like this steel-frame trailer would work well for around $4,300. http://www.racingjunk.com/Snowmobile-Tr ... -NOSE.html

Or for $7K I could get an all-aluminum trailer from ATC. I've been to their factory and they make a very nice product: http://www.racingjunk.com/Snowmobile-Tr ... ailer.html

This is the same price as the fiberglass on aluminum frame FiberTech trailer, so all comes down to which technology (all-aluminum or fiberglass/al frame) will stand up to 50,000 miles a year of driving on interstates. Or perhaps the steel-frame trailer is good enough as long as it's well built. I'm not doing any off-road snow or desert driving, but will drive 750 miles a day on a regular basis. I would upgrade to the best quality tires available and put a high-end brake controller in the truck.

I can drow this up on the computer, but I may have to resurrect my old balsa wood airplane skills and mock up an 1/8 or 1/16 scale example. That's a lot cheaper than cutting and welding aluminum more than once.
jmsokol
Teardrop Builder
 
Posts: 46
Joined: Fri Jan 11, 2013 5:45 pm
Location: Western Maryland
Top

Re: Converting a snowmobile trailer to an LQ/Toyhauler

Postby mezmo » Tue Jan 22, 2013 10:19 pm

Hi Mike,

Here is the info/ideas on a solid wall extension area/room that I mentioned.

It is based on a couple of vintage Australian expanding caravan
designs. As a hobby, I check out various travel trailers/caravans/RVs
etc. from around the world, and these are my favorite designs of
all those I've come across so far.

The Expandavan and "Fugly"

Both used single thickness plywood as their original wall material
[most of Australia is semi-tropical from what I gather], and later versions
of the Expandavan were done in fiberglass as well, and the last version used
light wood framing with aluminum sheeting outside. The Expandavan was
produced commercially by 3-4 different manufacturers, over time,
and "Fugly" was 1 of 5 separate sequential private builds done by a furniture
maker/cabitemaker for his own use and is thankfully being preserved
and used by a dedicated vintage caravan enthusiast.

This link is only a couple pages long, but very interesting.

Post # 4 is 'Fugly' ! [My very favorite] Note the rear extension.

There were a couple-three sizes of the Expandavan done [all compact
for travel] and 3-4 versions of the design were made by succeeding
manufacturers from the mid 1960s into the 1970s.

Post # 6 shows one of the original versions with the rear
extension in the bottom pics.
Post # 14 Shows a copy of the original patent. [I assume since expired.]
The patent drawings are at the end of it.
Post # 15 The first pic shows one with the rear extension.
Post # 22 Is a copy of a short news release with a pic of one with
the rear extension.

http://vintagecaravans.proboards.com/in ... 060&page=1

Here are a couple of good pics of an original 3 expansion design, with an
especially good pic of the rear extension. See the July 26, 2011 8:40am post
labeled "Mind-Expanding". [This is from issue #3 of the VintageCaravanMagazine.
Com.AU][Link: http://vintagecaravanmagazine.bigcartel ... ct/issue-3 ,
I sent for this last year. It has some more good pics of this 3Expansion version,
It is now a co-favorite of mine along with 'Fugly'. It's only $15.00 for the back issue.]

http://somewhereelse.com.au/?m=201107

If you click on the pic in this link below, you'll get a much larger view of the rear expansion.
[This is what we're really interested in adapting for your potential build.]
I believe this one used fiberglass on the front, as a roof covering and on the rear expansion's
travel cover/roof as well, and also the fenders too.

http://somewhereelse.com.au/?attachment_id=7276


These used thin panels and piano hinges that could easily be emulated using 3/4in - 1in
aluminum tubing for perimeter and opening framing and any additional panel stiffening
desired, sheet foam of corresponding thickness, and aluminum or fiberglass or even plywood
[as an interior face] sheeting all glued together into a SIP of sorts. Check out Linuxxxman
in the Foamie section for his methods of a version of the same. Hinge them together
in the manner the Expandavan does and you have a K.I.S.S.-worthy set-up.

The expansion operation is simple: Lift up the roof panel/travel door/cover, Pull forward/out
the multi-hinged walls, fasten the locating clips, then go inside and let down the floor
and/or bed bases, as the case may be. They are supported by internal cables so that no
exterior supports are necessary - but I'd add some corner ones just for extra stability. The
inexpensive portable aluminum ones would be fine. The bed a/o floor bases have about a
2in - 4in or so board/member/angle attached perpendicular to the panel at/under their
perimeter edges to act as a stiffening flange and a point of attachment for the cables. It is a
direct, easy, and simple operational method that doesn't allow the interior to get wet when
opening in the rain [assuming of course you have control of the extension roof panel and any
wind doesn't blow it out of your hands.] I'd make it so that it can't go past an inch or two
or so of it's open position, to try and prevent that occurance. A couple of appropriately sized
gas struts should lift and locate the roof panel. The spring assist for ramps would work for
your floor lowering and raising operation. These fold out sections are 'contained' in a
perimeter frame about 6-8in wide/deep, or so, that is mounted perpendicular to the interior perimeter
of the wall opening and acts as a stiffening flange as well as the attachment area for the
folding walls and mounting the ends of the bed/floor cables. This 'outside' flange also
becomes part of some internal storage cabinetry structure.

'Emulating' this design should be a piece of cake for Fibertech, and easy enough for you to
do [Famous Last Words !] if you have the time and can source the materials easily enough.
I would prefer an insulated solid wall and roof over canvas anytime - much easier to heat
and cool and modulate the temps plus more secure. $400 for half a tent to cover a ramp
and thus convert it into camping space seems a bit pricey, even granting it is made to fit the
openings and attachments. If you want to have the ramp as is, you could still make a solid
wall-n-roof enclosure for it that would fold inside before the ramp folds up by adapting the
principles of this overall design to that end. You'd just need to devise a way to deflect any
water that'd run down the exterior walls of the fold out extension walls off of the ramp floor
to prevent water from running in under the walls to the interior and wood rot on any wood
floor surface on the ramp etc.. The best method would still be the Expandavan design - flip-up
roof, pull-out/fold-out walls, then internal fold-down floor, but you could build that kind of
set-up to fit inside the opening of a fold-down ramp [especially if you you buy an existing
used unit and modify it]. The fold-out section would have a slightly raised floor doing that,
but no-big-deal if you use a deep enough transition opening threshold between the extension
floor and the inside of the V-nose floor. That would eliminate needing to figure out how
to keep water from running under the walls onto the floor [if still using the fold-down ramp] as
as the fold-down-floor bottom is internal and its perimeter 3wall flange is either level with or
slightly above the external wall's panel bottoms, so water'd just fall off the walls onto the
ground/ramp floor. I'd still try to have an air space [@ 1/4-1/2in] between the internal fold-down floor
and the fold-down ramp to manage any water that may get on the ramp surface. Again, if the
ramp has exposed wood as its surface, be aware of water damage/rot potentiasl to that with
continual exposure to rain/water.

And while I'm throwing out suggestions; consider making your bed in the living quarters a
side hinged murphy style bed. That way you can have your bed always fully made up and
easily available when needed. Attach fold-up/down benches and a tabletop to it for daytime
use that fold flat against the bed bottom when it itself is folded down, or try to emulate a
built-in dinette and murphy bed like in this 1955 Little Gem TT [pics are towards the bottom]:

https://plus.google.com/photos/10741252 ... banner=pwa

[To save some depth you could hinge the murphy bed base at its far edge @8in in on/above
the end of the dinette seat instead of @ 1/3 the way in as they show/did - doing it how they
did needs some space aft of the dinette seat <provided by the curved end body shape> for it
to operate. Hinging it at @ 8in in from the wall would let it fold down onto the dinette seats
<table folded away> and not require extra manoevering room for it to function.]

These are just some suggestions based on things I've seen that look like the real deal for their
purposes. I'll be glad to answer any questions on the info I've provided. Descriptions don't
always come across clearly at times. Hopefully, it will be useful for you. Your decisions may
vary ! Ha !

Have fun planning and good luck with your decisions. .

Cheers,
Norm/mezmo
If you have a house - you have a hobby.
User avatar
mezmo
1000 Club
1000 Club
 
Posts: 1817
Images: 194
Joined: Fri Jan 01, 2010 4:11 am
Location: Columbia, SC
Top

Re: Converting a snowmobile trailer to an LQ/Toyhauler

Postby roadinspector » Tue Jan 22, 2013 10:53 pm

jmsokol wrote:But I'm having trouble envisioning how the hard roof would work without having to lift it up above level first, then folding the walls up beneath it. And the roof perimeter needs to be larger than the wall perimeter so it could overlap the walls with a drip edge to eliminate leaks.

And it's not a problem to skin the walls with aluminum and stuff them with hard-foam insulation. Plus this room could also be close to full height if the roof on a small pitch with perhaps a 1 foot drop. This actually seems workable if I can get the aluminum wall frames welded up.

If you have any ideas, I'm all ears...


Simplest I can think of is just that. Raise the roof up and prop it up while setting up the walls. You wouldn't need an drip edge if you used 90 deg aluminum angle on the edges. When you lower the roof in place the down side of the angle would overlap the top of the walls. If I was doing it, even after I placed butyl sealant between the angle and the roof I would use Eternabond RV Roof Tape to overlap seal the edge of the angle to the roof. http://www.ebay.com/itm/Eternabond-RV-roof-repair-tape-White-4-50-foot-roll-/180968773322?pt=LH_DefaultDomain_0&hash=item2a229456ca

You could even go modular with the roof. Have an aluminum angle attached to the trailer side that would overlap the roof where it butts up to the trailer to deflect any rain water from the joint. After the walls are in place, slide the roof under the angle then secure the roof to the walls. This could be a pain setting up by yourself due to weight and if it was windy.

Earnest
Dadgum it! I cut that board 5 times and it's still too short!
2001 quad-cab Dodge Cummins 3/4 ton camper special, 16x7x7 CT work in progress toyhauler, 01 HD Ultra Classic, 98 HD Heritage Softail, 88 HD 1200 Sportster. viewtopic.php?f=42&t=51510
User avatar
roadinspector
500 Club
 
Posts: 599
Images: 127
Joined: Wed Mar 24, 2010 10:33 pm
Location: Texas
Top

Re: Converting a snowmobile trailer to an LQ/Toyhauler

Postby jmsokol » Wed Jan 23, 2013 8:25 am

mezmo wrote:Hi Mike,
Here is the info/ideas on a solid wall extension area/room that I mentioned.

Yes, now I see it!!!

Image

The trick is to split the side walls in half with piano hinges and hinge the two side walls on the ramp opening of the trailer. The ramp could be lowered to the ground, the roof flipped up out of the way, the walls pulled out, the ramp brought up to level and latched, and the roof set down onto the walls and latched. Now that I see there's no real structural strength required, I'm sure this could be built from a plywood/foam-core wall material of sorts. Would would save a lot of fabrication $$$ since it could be cut using a circular saw rather than welded up with aluminum tubing. I still could use aluminum angle for the top and bottom locking rails. Once the plywood/foam walls were completed it could be seriously weatherproofed. And yes, got to weatherproof the wood on the ramp floor as well.

Something to really think about. Thanks for the pictures and comments... :thumbsup:
jmsokol
Teardrop Builder
 
Posts: 46
Joined: Fri Jan 11, 2013 5:45 pm
Location: Western Maryland
Top

Re: Converting a snowmobile trailer to an LQ/Toyhauler

Postby jmsokol » Wed Jan 23, 2013 2:33 pm

Thinking about foam core plywood for my hard-side ramp-room walls, I found that boat-builders use this stuff by the ton. Hey, why reinvent the wheel?

Image

I don't know the price or availability, but it's gotta be really waterproof if you slap a few layers of fiberglass or marine varnish on it, right? Plus some of it is already aluminum wrapped and perhaps better (but more $$$) for this application. This seems like the perfect structural and insulating product for the walls. I've got a few marine buddies who probably know all about this stuff and can point me in the right direction.

See http://www.laminatorsinc.com/architectural/products/omega-foam-ply for one supplier who makes something exactly 1" thick for the sun-room and store-front trade.

Update: I found a version of this in 3/4" thickness with plywood skins for $65 for a 4' by 8' sheet. My WAG suggests this room might take four sheets of this material, so that's certainly reasonable. It's supposed to be a fraction of the weight of regular plywood, and I would use aluminum channel on the edges of this foam-core plywood and aluminum angle for the interlocks on the roof and floor.
jmsokol
Teardrop Builder
 
Posts: 46
Joined: Fri Jan 11, 2013 5:45 pm
Location: Western Maryland
Top

Re: Converting a snowmobile trailer to an LQ/Toyhauler

Postby mezmo » Thu Jan 24, 2013 1:36 am

Hi Mike,

How large do you think you will be making this fold-out room ?
4x6 or7 ?, 5x5 ?, 6x6 ?, 7x7 ? I know it'd depend on the opening's size on
whatever trailer you get, but is there a "ball-park" size ? And how
much roof pitch - 6in ?, 8 in ?, 1ft ? - or drop at its end ? Also, even a little
side overhang is a good idea too - so that water will drop off the roof
edge instead of running down/over the roof/sidewall connection area etc.

Fugly, here, is 6ft wide, and has about 6in roof overhang on each side, and
maybe @ 1ft at the low edge/eave, giving about a 4ft-4.5ft deep x @5ft
wide expansion room. [Click to enlarge]

Fugly's rear Extension from vintagecaravans.com 's Sutcac post of 041608 in DHL,
Rear dining area expansion.
101507

On the original Expandavan design, the rear roof/hatch edge overlaps the
sides for an offset of the thickness of the roof/hatch's plywood side's thickness
and whatever small amount it's edge trim gives it too. The Expandavan's body is about
5ft3in wide. So, this expansion room is also about 4ft-4ft6in deep x @5ft wide, as well.

Original Expandavan by Mintern from mid 1960s on somewhereelse.com.au 07-26-2011
Rear dining area expansion.
101506

I think you'd need eight (8) sheets of 4x8 size [of the premade foam core
panels, double that number for DIY SIP skins] to do a roomy expansion,
no matter what size you do - to eliminate any panel splicing. That'd just add
more work and time to the build. This assumes there will be some excess
material left over from the roof and walls, but that can be utilized on
interior fitting-out [cabinets, storage, etc.] so there shouldn't be much
ultimate "waste".

Since you'll have to get the same sheet size materials [4x8] for any size
expansion and the effort expended would be about the same for all sizes,
I'd max out the size available to allow for the largest room while still allowing
everything [ramp, lift roof, walls] to function as it needs to. Five (5) sheets
would allow you to do a 4ft deep extension, resting on the ramp, but that
would seem pointless to me since you'd probably be leaving 1/2 - 1/3 of the
ramp exposed and unused and the smaller size expansion would take pretty
much the same time and effort as the larger one.

Here's another foam core panel, many thicknesses available:
http://singcore.com/

I like this type of panel too, but cost, availability, and shipping may be a big factor,
although they would save a lot of work - to a degree.

I saw some extruded [XPS] green colored 3/4in foam [for the first time] at
Lowes today. It was very dense - i.e., you couldn't really crush it with your
thumb and fore-finger and very light and only @ $15 a 4x8 sheet. A good core if
you end up making your own. That, some 1x2s, and 1/8in or 1/4in skins laminated
with the 3M water-based contact cement [no-odor, light green color - as used
by linuxxxman] and stainless/rust-free piano hinges should do most of it. Also,
check out the paint and fabric [canvas] exterior covering method in the foamie
section for a more economical exterior covering method - 'oldtime' tech for
waterproofing.

Oh, I also wanted to mention or state, that I'm not trying to TELL you how to do
the build/project - or want to give that impression - since I'm sort of swamping you with
info/suggestions. It is your build, and your project alone, so you make all decisions on it.
One of these days I hope to do a TTT build very similar to the Expandavan and Fugly design
so I've been "cogitating" on all of this for some time, and have been doing my ongoing
researching on the whole scheme of it all. The way they expand seemed to be a perfect way
to accomplish what you wanted, and would be a much better method all-around than canvas,
so I thought I'd offer this approach to you for your consideration. Everything is offered in
the 'spirit of suggestion'.

And one last thing, for now, have you considered pre-building all of this as 'a unit' that you
can then install/mount in position at the opening ? The thought here being, that it'd be easier
to build it in a garage/shop or such, and if it is "an entity unto itself", it'd be transferrable
to a new-to-you future trailer by just undoing whatever waterproofing/flashing done to mate
it to the current trailer, and then just by unbolting the unit, it'd be able to be installed in a
new-to-you trailer, or even sold, if it no longer meets your needs.

Cheers,
Norm/mezmo
If you have a house - you have a hobby.

User avatar
mezmo
1000 Club
1000 Club
 
Posts: 1817
Images: 194
Joined: Fri Jan 01, 2010 4:11 am
Location: Columbia, SC
Top

Re: Converting a snowmobile trailer to an LQ/Toyhauler

Postby jmsokol » Thu Jan 24, 2013 8:22 pm

mezmo wrote:And one last thing, for now, have you considered pre-building all of this as 'a unit' that you
can then install/mount in position at the opening ?

Yup, my carpenter/plumber friend has a nice size garage/shop we can build and test this fold-out room in. So we would frame-out an opening that matches the ramp door dimensions, then build and test the folding walls and ceiling for fit. And yes, I would build this as large and tall as would fit on the ramp and do minimal modifications to the trailer itself. Hey, somebody should make a pre-cut kit of this design that includes stainless steel piano hinges and all the pieces.
jmsokol
Teardrop Builder
 
Posts: 46
Joined: Fri Jan 11, 2013 5:45 pm
Location: Western Maryland
Top

Re: Converting a snowmobile trailer to an LQ/Toyhauler

Postby jmsokol » Fri Jan 25, 2013 7:59 pm

This is the sort of thing I would do with an aluminum-frame snowmobile trailer, perhaps in 7' wide by 18' to 21' long. Of course, I would be putting my seminar gear in the rear "toyhauler" section against a bulkhead-partition, and an LQ/office with a folding ramp-room in the front. I'm considering the possibility of towing it with a Ford F-150 4x4 with an Ecoboost V6. Hoping to get MPG in the low teens, at least at 65 MPH, but there's a lot of variables to consider. I'm also concerned about engine life with a twin-turbo V6 gasser doing 50,000 miles a year, but that's subject for more research.

I could add a tool/generator box in the bed of the truck and get a 2.4KW Yamaha inverter generator for trailer power .That would supply enough wattage for electric heat inside the trailer or a roof air conditioner, and could run the microwave and fridge, but a lot of the time I'll have shore power so electric heat in the trailer is the way to go for this build. I could also add an 1,800 watt inverter with some house batteries for silent running, an Engle fridge for food storage, a microwave oven, plus an induction hotplate for warming up meals. I'm trying to avoid propane bottles, stoves and heaters, since I get a bit paranoid about open flames and compressed LP gas inside such a small space with all my seminar gear in the back.

I know that nearly everyone uses propane for heating and cooking, but to each his own.... ;)

Image
jmsokol
Teardrop Builder
 
Posts: 46
Joined: Fri Jan 11, 2013 5:45 pm
Location: Western Maryland
Top

Re: Converting a snowmobile trailer to an LQ/Toyhauler

Postby jwhite » Fri Jan 25, 2013 10:37 pm

Mike I am wondering about your thoughts on doing the sprinter van with the smaller trailer? I have been thinking about a used motorhome that I could pull the trailer I have now and have the best of both worlds and I lately have been thinking about the sprinter van conversion.?
I notice they make nice motorhomes and are pretty expensive to buy so building one would make since?
I have looked on Ebay and there are some really nice cargo vans for sale at a good price but it would take some expense to extend the roof if you wanted to stand and finish them out? and you could also buy a used class B for almost the same cost already done. and probably have a better resale than a home built one?
Does a sprinter van have enough power to pull a trailer? and what kind of MPG do you think you would get.?
I have a suburban and it get's 10mpg when I pull my 7x16 and that's at 55-60 I can easily run 70-75 but I will get 9 mpg
I read where you want to have a fold out room and this is just my opinion for what it's worth >=>nothing, but now I have built a trailer I would go with a 7x20 at least and just try and design and fit to the best of you ability all your equipment in the back and build the rest as your living area and insulate at least the living area so it's easy to heat and cool I think that would be the biggest problem with the fold out room,= great when the weather is good, and if it's part of your living design you have to use it rain or shine and that means up and down every day, I will soon be 55 and have Arthritis but the less I have to do the more I can enjoy what I built the trailer for.
For this reason I think in the next few years I am going to get a small B class Motorhome, but until then I will use the trailer I built.
jwhite
The 300 Club
 
Posts: 479
Images: 46
Joined: Wed Mar 24, 2010 10:11 am
Location: South GA
Top

Re: Converting a snowmobile trailer to an LQ/Toyhauler

Postby jmsokol » Sat Jan 26, 2013 8:42 am

jwhite wrote:Mike I am wondering about your thoughts on doing the sprinter van with the smaller trailer?


I have personally put 250,000 miles on my 2002 Long/Tall Sprinter cargo van, so I know a good bit about the breed. Yes, my alternative plan would be to convert my van into a basic Class-B motorhome and pull a small trailer. Since I have the 158" wheelbase model, there's about 14' of length from the back doors to the rear of the front seats. Plus, this is the high-roof version (not the super high-roof) so I have about 6' 2" height which allows me to walk around inside (I'm 6' 1" tall).

This Sprinter version is rated for 5,000# towing and has a class-3 hitch. By adding a nice brake controller I would be able to pull a tandem 6' x 14' aluminum-frame trailer with 6' 6" interior height. I would likely need to have this trailer built since most tandems are 7' wide, but since the Sprinter is almost exactly 6' wide, I want a trailer that fits within the slipstream for best MPG and mirror views without extensions. Also, a trailer with an extra 6" of height ends up with a 101" roof height, again almost exactly the same height as the sprinter tall van. So this combination would offer the best aerodynamics possible. The best deal I've found on a tandem V-nose 6' by 14' aluminum-frame, ramp-door trailer is R&R trailers, which costs in the low $5K range with e-tracks and LED lighting, etc... I really like the Featherlite 1610 trailers of similar dimensions, but that costs around $9K, so I don't think it's worth the extra $4K.

My 2002 Sprinter has the inline 5-cylinder diesel engine, and even loaded with 3,500# of gear in the back I can easily cruise at 75 MPH all day on the interstates. Even at that speed I can generally achieve 20 MPG on coast to coast runs. Yes, I solo drive from Maryland to Seattle, then down thru California and back thru Texas on a yearly basis. I'm not kidding about the 50,000 miles per year usage. If I limit speed to 60 MPH I can generally get 24 MPG, which is remarkable for 10-year old engine technology on a van that's 8.5 feet tall. I've pulled a small 5' by 8' trailer behind it a few times, and couldn't even see it in the mirrors for backing up, and I seriously couldn't tell it was behind me. I think my engine is 158 HP, but don't let that bother you. Diesel horsepower is a lot different than gasoline engine horsepower, so I'm sure my Sprinter would pull a 6' by 14' tandem trailer loaded to perhaps 5,000# quite easily and maybe lose 2 MPG.

Yes, if you buy a new Class-B Sprinter RV you'll pay between $100K and $130K. Very pretty, but not cheap, and terribly heavy. Hey, they load them down with marble countertops, for pete's sake. If I don't go the snowmobile trailer route I would probably sell my 2002 with 300,000 miles on the clock and pick a 2007 or 2008 Sprinter passenger van with less than 100K miles, yank out the rear seats, and build a lightweight LQ/office. This new Sprinter would have the V6 engine, but eliminate the latest emission controls and DEF additives. I've found excellent donor van possibilities for $25K or so, depending on mileage and condition. So this could be a $30 upgrade, allowing $25K for the new Sprinter, $5K for the trailer, and $10K for a new interior LQ/office. That's assuming I could sell my current Sprinter for $10K, which is about correct for it's year and condition.

If I had the bucks, this is the sort of thing I would buy or build, but since my seminar registrations took a big hit with the economy, I have to do things on the cheap. But here's the type of interior I would emulate, if possible. Take a look at Outside Van for what I think are the best Sprinter upgrades on the planet. See http://www.outsidevan.com/earthromper-2.php for what I'll get if I win the lottery.

One caveat though. Sprinter's are expensive and difficult to fix, so you'll need to find a good Freightliner or Mercedes shop for repairs. And since Dodge pulled out of the Sprinter business two years ago, you have limited options for repair. And sadly, most American Sprinter mechanics are not up to the task of working on a German sports car. But if you carry plenty of spare parts and can afford the repair shop, it's possibly the best van driving experience you can get in the USA.
jmsokol
Teardrop Builder
 
Posts: 46
Joined: Fri Jan 11, 2013 5:45 pm
Location: Western Maryland
Top

Re: Converting a snowmobile trailer to an LQ/Toyhauler

Postby jmsokol » Sat Jan 26, 2013 4:52 pm

jwhite wrote:I would go with a 7x20 at least and just try and design and fit to the best of you ability all your equipment in the back and build the rest as your living area and insulate at least the living area so it's easy to heat and cool I think that would be the biggest problem with the fold out room,= great when the weather is good, and if it's part of your living design you have to use it rain or shine and that means up and down every day...


Yup, the plan would be to design the front LQ/Office area to be fully usable without folding out the room. Many times I just need to overnight at a truck stop or Walmart lot for 8 hours of sleep and be on my way at first light. So that's when I would leave the ramp-room folded up. But there are times in my schedule where I'm stuck in a town for a few days or even a week and I would get stir-crazy in the small LQ area. So the idea of folding out a room and putting in an inflatable couch for kicking back would be pretty cool. Most Toyhaulers work on the idea of parking the motorcycles outside and using the rear "cargo" area for expansion. But that NEVER works for me. When I'm on the road I have the gear in the back 100% of my parking time. So any expansion area would have to be up front. Since the snowmobile trailer builders want to charge me the same price for a trailer with or without a ramp, I might as well get the ramp and figure out how to use it for expansion.
jmsokol
Teardrop Builder
 
Posts: 46
Joined: Fri Jan 11, 2013 5:45 pm
Location: Western Maryland
Top

PreviousNext

Return to Cargo Trailer Conversions

Who is online

Users browsing this forum: Bing [Bot] and 4 guests