Build #2 - The Log Cabin

...ask your questions in the appropriate forums BUT document your build here...preferably in a single thread...dates for updates, are appreciated....

Re: Build #2 - The Log Cabin

Postby M C Toyer » Wed Oct 31, 2012 10:57 pm

Norm -

Thanks, those are great.

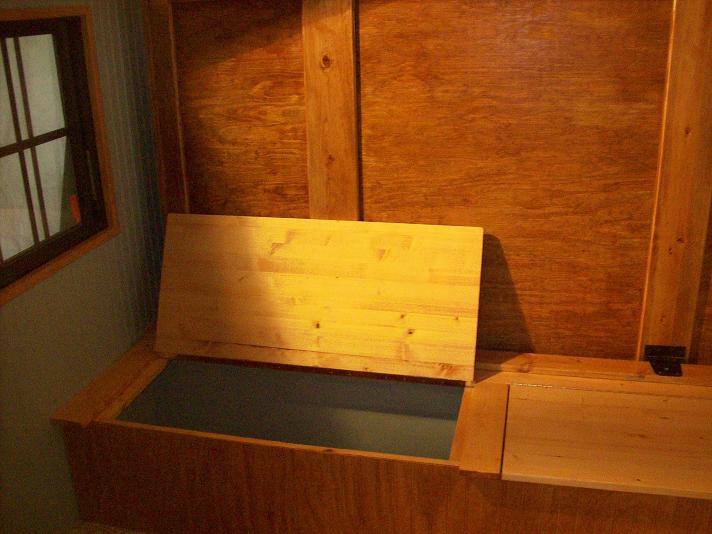
Looks like one strap hinge at each end of the bed frame and the pivot point about the same I plan.

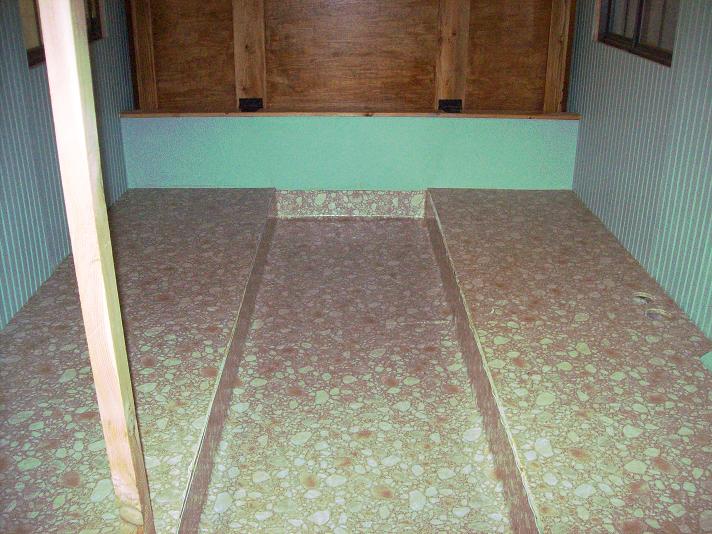
The profile of the rear wall seems to exactly match the arc of the bed frame when lowering taking max advantge of the trailer length.

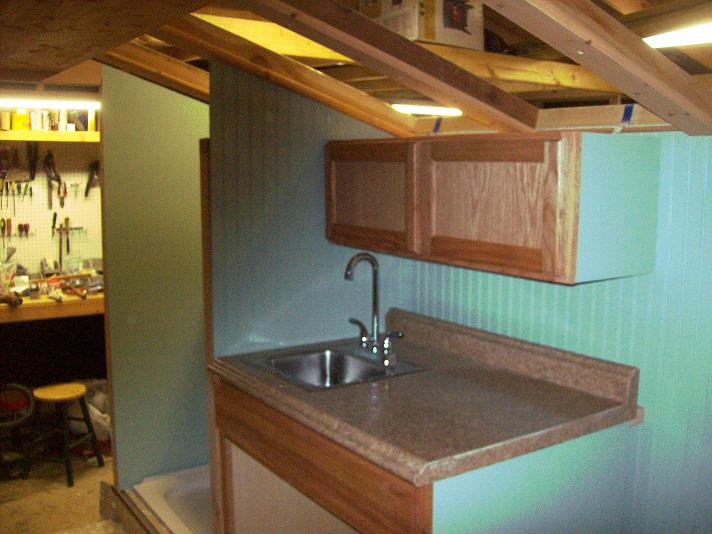
Looks like there is an overhead cabinet at each end of the trailer. They packed a lot of function in an 11 (I'm guessing) foot trailer.

M C
User avatar
M C Toyer
The 300 Club
 
Posts: 363
Images: 11
Joined: Thu May 31, 2012 8:59 pm
Location: Pilot Point (Denton County) Texas

Re: Build #2 - The Log Cabin

Postby M C Toyer » Wed Oct 31, 2012 11:03 pm

droid_ca wrote:What do you think your trailer will weigh when finished???


I would not be concerned if it went as high as 1800" but at this point of the planning I'm thinking probably 1200-1500# with all provisions aboard.

M C
User avatar
M C Toyer
The 300 Club
 
Posts: 363
Images: 11
Joined: Thu May 31, 2012 8:59 pm
Location: Pilot Point (Denton County) Texas

Re: Build #2 - The Log Cabin / Shower

Postby M C Toyer » Thu Nov 08, 2012 11:13 pm

Picked up my shower pan and surround earlier this week and have set them im place temporarily to check for clearances.

The manufacturer and distributor are in the Dallas - Fort Worth area and have a good selection and excellent service:

https://www.randgsupply.com/Warehouse/Tubshower/rv/rvtubindex.htm

This is the pan. The toilet will be placed in the pan on the left side and showering will be in the sitting position:

Image

The one piece surround will require a bit of trimming at the back to fit under the gable roof.

Image

An accordian stlye door similar to this will finish the package:

Image
M C
User avatar
M C Toyer
The 300 Club
 
Posts: 363
Images: 11
Joined: Thu May 31, 2012 8:59 pm
Location: Pilot Point (Denton County) Texas
Top

Re: Build #2 - The Log Cabin

Postby droid_ca » Fri Nov 09, 2012 2:16 am

That is going to be nice inside are you going to put in an exhaust fan to help remove the moisture from the shower?
There is a world, just beyond now,
where reality runs a razor thin seam between fact and possibility;

Anywhere I roam where I lay my head is home....
Image
“Fide Canem”
Please check out my build thread
viewtopic.php?f=5&t=52816
User avatar
droid_ca
Donating Member
 
Posts: 1981
Images: 176
Joined: Thu Sep 30, 2010 5:08 am
Location: Prince George BC Canada
Top

Re: Build #2 - The Log Cabin

Postby M C Toyer » Tue Nov 13, 2012 1:30 am

droid_ca wrote:That is going to be nice inside are you going to put in an exhaust fan to help remove the moisture from the shower?


I won't be using very much water for a shower or the kitchen sink but originally I planned on a powered vent at the top of the rear gable above the door but that won't fit with my current roof design. I may try to rely on the vent-a-hood (see the Camp Chef Camp Oven thread) which is located on the same back wall as the shower.

The shower surround extends to the ceiling but the shower door will leave a top opening about 12 x 36 inches facing the dropped walkway immediately opposite the vent-a-hood.

M C
User avatar
M C Toyer
The 300 Club
 
Posts: 363
Images: 11
Joined: Thu May 31, 2012 8:59 pm
Location: Pilot Point (Denton County) Texas
Top

Re: Build #2 - The Log Cabin / Update 12 Nov

Postby M C Toyer » Tue Nov 13, 2012 3:07 am

Update 12 November:

Completed well and bulkhead for Murphy Bed. Well at very front of cabin has 1/2 inch plywood floor 3 inches lower than elevated floor in rest of trailer. Bulkhead built with 2 x 2 ladder frame skinned with 1/8 inch luan on both sides.

Image


Murphy Bed finished and placed in final position. Two 1 x 6 braces added across width for support and mounting hinges. Dinette table top will fit in center recess between 1 x 6 es, be hinged to bottom of bed platform and have a cantilever brace from bulkhead.

Image


Stock cabinets temporarily placed in position. Bases (left done, right not yet) cut off 4 inches to compensate for 6 inch dropped floor in center of trailer. Will be topped with Formica countertops. Sink will be on left, right will be between refrigerator and stove top.

Image


Exterior wall framing begun. 2 x 3 studs placed flat along wall 16 inch OC.

Image


Rear door frame and roof truss. Door size 32 x 72 inch. Floor to bottom of collar tie 74 inches. Ground to top of rafter 96 inches. Actual rafters will be 2 x 3 red cedar placed on edge approximately 20 inch OC. Front and rear roof overhang approximately 12 inches. Side overhang 4 to 6 inches beyond finished wall.

Image


Interior walls will be skinned with 1/8 inch luan behind cabinets and dinette benches. Visible interior walls will be painted beadboard, prefinished paneling and/or artifical brick. Counter and stove backsplashes will be embossed tin or galvalume.

Final interior cabin size 7 foot wide, 13 1/2 foot long, 74" inches center ceiling height from dropped floor walkway, 54" from elevated floor at eaves.

M C
User avatar
M C Toyer
The 300 Club
 
Posts: 363
Images: 11
Joined: Thu May 31, 2012 8:59 pm
Location: Pilot Point (Denton County) Texas
Top

Re: Build #2 - The Log Cabin - UPDATE Interior

Postby M C Toyer » Sat Mar 02, 2013 3:07 am

Been a while since I posted any progress or photos.

Since my last post I have installed all the windows, rafters, and interior paneling - a combination of 1/4" luan and 5/16" beadboard either painted or stained depening on location. I also installed (though some temporarily for now) all the appliances and cabinets.

First photo - covered the entire floor with a single sheet of linoelum, glued to plywood subfloor.

Image

The roof will be a 3:12 gable. The 2 x 3 cedar rafters have 1 x 4 pine on bottom to simulate a beam ceiling and there is a 16" wide beam (edge glued 3/4 pine) down the center with recessed LED swivel lights. The roof panels and 2" rigid styrofoam insulation will drop in from above and be covered with sheating and a metal standing seam or shingle roof. The counter-sunk screw holes will be pegged.

Image

Image

Appliances and cabinets on right side: Atwood 3 burner propane stove and oven, Black and Decker double door refrigerator/freezer, 900 watt microwave. The electric appliances will only be used when connected to 110V shore power.

Image

Shower, sink and cabinets on left. I will have the fresh water tank, water pump and heater in the lower cabinet. Gray water tank below floor to the front of cabinet and black water tank at rear of trailer under toilet/shower.

Image

I built a cabinet/storage box the full width of the trailer in front of the murphy bed. The top of the box will serve as a desk top or table and additional seating. I will still have a table stored in the bottom of the murphy bed which will seat 4 -5 with the bench and chairs. The electrical converter will mount in the center of the box 3" above the linoleum floor and the batteries in a recessed box below the floor.

Image

Rather than padded bench tops for seating I opted for these bean bag chairs. They have arms and a back and are quite comfortable, portable and cheap.

Image

110V fireplace when on shore power or while completing the build in the shop. Quite cozy so far for glamping.

Image

I'm now running all the wiring on the outside before applying the insulation and siding. In addition to the recessed ceiling lights I will have reading lights over both windows, puck lights under the upper cabinets and in the lower cabinets, all 12V LED, plus a 12V exhanust fan on the back wall above the stove.

M C
User avatar
M C Toyer
The 300 Club
 
Posts: 363
Images: 11
Joined: Thu May 31, 2012 8:59 pm
Location: Pilot Point (Denton County) Texas
Top

Re: Build #2 - The Log Cabin

Postby KCStudly » Sat Mar 02, 2013 11:06 am

Nice work. :thumbsup:

Very unique build; lots of good ideas. :thumbsup:
KC
My Build: The Poet Creek Express Hybrid Foamie

Poet Creek Or Bust
Engineering the TLAR way - "That Looks About Right"
TnTTT ORIGINAL 200A LANTERN CLUB = "The 200A Gang"
Green Lantern Corpsmen
User avatar
KCStudly
Donating Member
 
Posts: 9640
Images: 8169
Joined: Mon Feb 06, 2012 10:18 pm
Location: Southeastern CT, USA
Top

Re: Build #2 - The Log Cabin

Postby Oldragbaggers » Sat Mar 02, 2013 5:38 pm

Very very nice!!
:applause: :applause:
Life is sooooo good.........
Sail...camp....bike...repeat
Becky

Build Journal http://www.tnttt.com/viewtopic.php?f=50&t=45917
Visit our blog at http://www.oldragbaggers.com
Image Image
User avatar
Oldragbaggers
Gold Donating Member
 
Posts: 1842
Images: 331
Joined: Mon Aug 01, 2011 9:22 pm
Location: Essex, MD
Top

Re: Build #2 - The Log Cabin

Postby S. Heisley » Sat Mar 02, 2013 9:18 pm

More! More! :applause: :applause:

That fireplace looks real, not electric. You fooled me!
User avatar
S. Heisley
Super Lifetime Member
 
Posts: 8867
Images: 495
Joined: Mon Sep 17, 2007 10:02 am
Location: No. California
Top

Re: Build #2 - The Log Cabin

Postby droid_ca » Sun Mar 03, 2013 12:09 pm

Great build, I had a look at it from the beginning some great pictures you took, love how you framed in the trusses and the wider board with the recessed lighting I might need to borrow that idea..... :thumbsup: :thumbsup: :thumbsup:
There is a world, just beyond now,
where reality runs a razor thin seam between fact and possibility;

Anywhere I roam where I lay my head is home....
Image
“Fide Canem”
Please check out my build thread
viewtopic.php?f=5&t=52816
User avatar
droid_ca
Donating Member
 
Posts: 1981
Images: 176
Joined: Thu Sep 30, 2010 5:08 am
Location: Prince George BC Canada
Top

Re: Build #2 - The Log Cabin

Postby Eric_kc0ahk » Mon Mar 04, 2013 11:16 pm

Awesome!!!!

:applause:
:thumbsup:
User avatar
Eric_kc0ahk
Teardrop Inspector
 
Posts: 11
Joined: Thu Jun 16, 2011 2:05 pm
Location: Nebraska
Top

Re: Build #2 - The Log Cabin

Postby mezmo » Tue Mar 05, 2013 1:22 am

Good to see progress on this build - I was wondering how it
was going - and it looks to be going splendidly.

Cheers,
Norm/mezmo
If you have a house - you have a hobby.
User avatar
mezmo
1000 Club
1000 Club
 
Posts: 1817
Images: 194
Joined: Fri Jan 01, 2010 4:11 am
Location: Columbia, SC
Top

Re: Build #2 - The Log Cabin

Postby nhstt » Mon Apr 29, 2013 8:52 am

This is coming along great! Can't wait to see more. I have dreams of a gypsy wagon as a three month home but wondered about the bathing part this gives me some great ideas.
Karen :thumbsup:
nhstt
Teardrop Master
 
Posts: 153
Joined: Sat Jan 26, 2013 1:31 pm
Top

Re: Build #2 - The Log Cabin

Postby Fyddler » Mon Apr 29, 2013 8:58 am

What a great build! Loving it.
To err is human, to really foul up requires a computer

Build Log: http://www.tnttt.com/viewtopic.php?f=50&t=55017
User avatar
Fyddler
The 300 Club
 
Posts: 349
Joined: Sat Sep 01, 2012 9:52 am
Location: Port Orchard, WA
Top

PreviousNext

Return to Build Journals

Who is online

Users browsing this forum: No registered users and 5 guests