A Minnesota Build - The Lily Pad

...ask your questions in the appropriate forums BUT document your build here...preferably in a single thread...dates for updates, are appreciated....

Postby GeoDrop » Tue Nov 09, 2010 4:24 pm

The face plate is removed by taking out the two visible screws. One is a long one in the lower right corner. The other one is more in the lower middle section. Once these are removed, it will will tilt from the bottom and come off that tabs at the top.


mcspin50 wrote:
N523RV wrote:
mcspin50 wrote: :scratchthinking: Found some great pics from N523RV/George & Sandi's build pics here that are helping me understand how to bring light and power to the Lily Pad. Thanks so much you two!


I have a draft post documenting my WFCO installation and all I've learned, which is a lot. I'll clean it up and get it posted soon. I've sort of outlined it already on my blog at http://teardrop.n523rv.com/?p=260.

Let me know if you have any specific questions or need help, will be happy to answer with what I know.


First off...sorry Matthew, I don't know why I called you George. :oops: I'm hopeless with names. :?

I was studying my WFCO 8725 after looking at your pics, and it looks like the two circles on the backside top right side are knockout plugs, right? Looks like you only had to knock out the one.
And I can remove the front panel and door by releasing the two tabs on the backside top, correct? Would a screwdriver work? I don't want to damage it. I'm really looking forward to your post. I try to ask folks (who I think should be knowledgeable about such stuff) about wiring 12v from scratch and they all just nod and smile and look a little stunned.

Matthew (& Sandi)
The GeoDrop
User avatar
GeoDrop
Donating Member
 
Posts: 243
Images: 2
Joined: Mon Sep 07, 2009 9:45 pm
Location: Northeast Kansas

Postby mcspin50 » Tue Nov 09, 2010 4:26 pm

aggie79 wrote:Lil,

:thumbsup: :applause: :thumbsup: Your teardrop is looking amazing! I'm jealous of the quality of your wood finishes. (I don't have the patience to make things look that nice.)

Tom


Hey Tom,

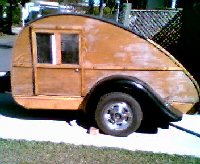
I did the wood finish because that is something I've had experience doing and felt I could make it look OK. Besides, the wood grain does all the work of lookin' purdy. Aluminum?? Now that would be a frightening thing for me to tackle! Your trailer looks amazing, so well finished. Love the tail lights as well. :thumbsup: :thumbsup:
Lil M.
In every walk with nature, one receives far more than he seeks. - John Muir
Generic Benroy Build Journal here - My LilScamper Update Journal here
The Lily Pad...Image My LilScamper...Image Image
User avatar
mcspin50
Gold Donating Member
 
Posts: 488
Images: 158
Joined: Mon Oct 12, 2009 6:35 pm
Location: Perham, MN

Postby GeoDrop » Tue Nov 09, 2010 4:41 pm

Oh yea.. I only used one of the knockout holes. Be sure and install an "NM Connector" in the knockout hole to protect the wires from rubbing. (I need to go back and install one. (Search the Lowe's site for "nm connector" and you'll see what I'm talking about).


N523RV wrote:The face plate is removed by taking out the two visible screws. One is a long one in the lower right corner. The other one is more in the lower middle section. Once these are removed, it will will tilt from the bottom and come off that tabs at the top.


mcspin50 wrote:
N523RV wrote:
mcspin50 wrote: :scratchthinking: Found some great pics from N523RV/George & Sandi's build pics here that are helping me understand how to bring light and power to the Lily Pad. Thanks so much you two!


I have a draft post documenting my WFCO installation and all I've learned, which is a lot. I'll clean it up and get it posted soon. I've sort of outlined it already on my blog at http://teardrop.n523rv.com/?p=260.

Let me know if you have any specific questions or need help, will be happy to answer with what I know.


First off...sorry Matthew, I don't know why I called you George. :oops: I'm hopeless with names. :?

I was studying my WFCO 8725 after looking at your pics, and it looks like the two circles on the backside top right side are knockout plugs, right? Looks like you only had to knock out the one.
And I can remove the front panel and door by releasing the two tabs on the backside top, correct? Would a screwdriver work? I don't want to damage it. I'm really looking forward to your post. I try to ask folks (who I think should be knowledgeable about such stuff) about wiring 12v from scratch and they all just nod and smile and look a little stunned.

Matthew (& Sandi)
The GeoDrop
User avatar
GeoDrop
Donating Member
 
Posts: 243
Images: 2
Joined: Mon Sep 07, 2009 9:45 pm
Location: Northeast Kansas
Top

Postby mcspin50 » Wed Nov 10, 2010 10:55 pm

The Baltic Birch 5x5 sheets are home in the garage...finally!!
Last night, with the help of one of my son's friends, we lifted the teardrop off the 5x8 trailer, braced the teardrop with wood scraps and coolers and recycling bins, and scooted the trailer out from under the teardrop.
Early this a.m., I made a cappuccino, hitched up the trailer to the minivan, took two 2x4's, a couple painter's drop cloths, a ratchet strap, and 4 bungee cords, and headed back up to Menahga. I called ahead and asked them to add 3 more 5x5 sheets of 1/8" Baltic Birch to my order. I figured that, since I had to make the extra trip up there anyway, I might as well finish off my need for the outer skin plywood. Then I wouldn't have to make any more trips for plywood anywhere. I figured I spent @ $15 more for the 3-5x5's, but I would save money and time by not driving into Detroit Lakes or Fargo for sheets of lauan plywood of questionable quality.
Got home, unhooked the trailer and wedged it inside the garage before I left to open my shop in Perham, which was a good thing, since @ noon it started to rain for the rest of the day.
Now I can just sit and figure what I want to do...and do it. Right?? I hope so!! :worship:
Lil M.
In every walk with nature, one receives far more than he seeks. - John Muir
Generic Benroy Build Journal here - My LilScamper Update Journal here
The Lily Pad...Image My LilScamper...Image Image
User avatar
mcspin50
Gold Donating Member
 
Posts: 488
Images: 158
Joined: Mon Oct 12, 2009 6:35 pm
Location: Perham, MN
Top

Postby parnold » Wed Nov 10, 2010 11:14 pm

Lil:

Your progress never ceases to inspire me! My hat is off to you!

Keep up the great work!

:thumbsup: :thumbsup:
User avatar
parnold
Donating Member
 
Posts: 2344
Images: 302
Joined: Mon Feb 08, 2010 4:49 pm
Location: Northwest New Jersey
Top

Postby TurboandMe » Sat Nov 13, 2010 2:40 pm

Looks great! I'm very interested in the stove you choose. Thanks for sharing and giving me good ideas.
Chateau Le Cargo build: Now for sale!
viewtopic.php?t=40569
User avatar
TurboandMe
Teardrop Builder
 
Posts: 49
Images: 41
Joined: Tue Sep 21, 2010 9:05 am
Location: Denver, CO
Top

Postby mcspin50 » Tue Nov 23, 2010 7:07 pm

Hey Paul and TurboandMe,
Thanks so much for your encouragement.
I think my build will be tucked away for the winter in its little instant garage tonight or tomorrow. :cry: :cry: We just got some cold weather and snow this weekend. But first rain tho, so a there was a nice sheet of glare ice on everything so we could practice our winter driving skills. Yippee! The lakes are frozen over. The garage is uninsulated and unheated. AND...my husband finally asked when I was going to relinquish his side of the garage. Besides, I too am not a fan of scraping windshields and sitting on car seats that feel like park benches when it gets down to 0 deg. F. which it did night before last.
More snow is predicted tomorrow, so tonight No. 3 Son and I will be moving the teardrop onto its trailer and stacking the wood and plywood in it and moving it out of the real garage and into the instant garage. No wood can stay on or close to the garage floor because, when husband gets done driving 100 miles per day on snowy or mushy rural roads delivering mail and then parks his car in the garage, it gets warm enough in there for all the snow, sand and dirt to fall to the garage floor and create a small, dirty lake. :x
I am sad about this. I hoped to be further along than I am, but c'est la vie. I'll try to find things that I can do/plan so I feel like I'm not just letting it sit all winter. But maybe that's what I'll have to do until a warm spell hits and I can work in the instant garage. I DID place it close enough to the real garage so I can run extension cords, etc.
Hey, I can move some tools and a table into the furnace room (once I clean it out a bit!!) and cut the spines for the hatch, and maybe even put the hatch together. There, I feel better already. :)
Have a great Thanksgiving everyone (in the USA). And have a great weekend the rest of the world. :D
Lil M.
In every walk with nature, one receives far more than he seeks. - John Muir
Generic Benroy Build Journal here - My LilScamper Update Journal here
The Lily Pad...Image My LilScamper...Image Image
User avatar
mcspin50
Gold Donating Member
 
Posts: 488
Images: 158
Joined: Mon Oct 12, 2009 6:35 pm
Location: Perham, MN
Top

Postby parnold » Tue Nov 23, 2010 7:17 pm

Lil:

If you get real stir crazy during the winter, you could always start on a quilt for the tear! I'm actually toying with that idea myself, just can't decide whether to buy a sewing machine or borrow my mother's. She doesn't use it anymore.

My mother was an avid sewer (hmmm maybe I should say seamstress), and I learned the basics at an early age. I know I'm going to start going crazy soon if I don't come up with a project.

Happy Thanksgiving to you and your family!
User avatar
parnold
Donating Member
 
Posts: 2344
Images: 302
Joined: Mon Feb 08, 2010 4:49 pm
Location: Northwest New Jersey
Top

Postby bdosborn » Tue Nov 23, 2010 8:04 pm

Lil,

You should see if you can keep the plywood in the real garage. It would be a shame if it got exposed to the weather somehow...

Bruce
2009 6.5'X11' TTT - Boxcar
All it takes is a speck of faith and a few kilowatts of sweat and grace.
Image
Boxcar Build
aVANger Build
User avatar
bdosborn
Donating Member
 
Posts: 5494
Images: 772
Joined: Wed May 05, 2004 11:10 pm
Location: CO, Littleton
Top

Postby mcspin50 » Tue Nov 23, 2010 9:47 pm

Paul,
Oh yeah, I forgot...I DO have some fabric to make a quilt. It's 3 colorways of the camping-patterned fabric that I used to sew the inaugural jammies...the original green, a soft yellow and a soft medium blue. And then I bought some solids to compliment, plus I found a couple plaids in the sale bin that I'll use to make two pillowcases using a free pattern I found on the internet. That'll keep me busy as well. Thanks for reminding me. :thumbsup:
Quilts, at least the ones I make (which is pretty rare since I opened my fiber arts shop) don't require very fancy machines. It's all basically straight lines. If your Mom was a seamstress, her machine should be fairly sturdy, I would think. I would try it out first and see how it goes before you shell out $$$ for a new machine. I have an older (80's) Riccar that I used to sew leather checkbook covers when we had the leather shop (during the hippie years :peace: ) It only has one plastic part, and I've replaced it so it works just fine.
No. 1 Son bought himself a commercial sewing machine and makes dog beds and covers. Who knew he'd take to it from watching me sew (plus taking FACS in high school). Makes me proud, as I'm sure your Mom is.
Take care,
Lil M.
In every walk with nature, one receives far more than he seeks. - John Muir
Generic Benroy Build Journal here - My LilScamper Update Journal here
The Lily Pad...Image My LilScamper...Image Image
User avatar
mcspin50
Gold Donating Member
 
Posts: 488
Images: 158
Joined: Mon Oct 12, 2009 6:35 pm
Location: Perham, MN
Top

Postby mcspin50 » Tue Nov 23, 2010 11:02 pm

bdosborn wrote:Lil,

You should see if you can keep the plywood in the real garage. It would be a shame if it got exposed to the weather somehow...

Bruce


Yeah, I was trying to think of a simple way to keep it raised off the floor in the real garage. I've seen plans for units on wheels that look pretty slick, but then I felt a severe attack of laziness and overwhelmitis coming on. :oops:

The garage wall framing sits on a row of regular size cement blocks, so I was thinking I could make a couple L-brackets out of the 2x4's and attach them to the walls studs and rest them on the cement blocks to hold the lumber up against the wall and off the floor.

No. 3 Son, his friend and I got the teardrop on the trailer, out of the garage and into the instant garage tonight. One of the ratchet thingies holding the corner of one wall of the IG is loose, so I'll have to check on it tomorrow in the light of day. Geez I hate winter...but in winter I can snowshoe and cross country ski...okay I guess I really don't hate winter. :snow
Lil M.
In every walk with nature, one receives far more than he seeks. - John Muir
Generic Benroy Build Journal here - My LilScamper Update Journal here
The Lily Pad...Image My LilScamper...Image Image
User avatar
mcspin50
Gold Donating Member
 
Posts: 488
Images: 158
Joined: Mon Oct 12, 2009 6:35 pm
Location: Perham, MN
Top

Postby mezmo » Sat Nov 27, 2010 2:05 am

Hi Lil/mcspin50,

I noticed your posts on Thomas/2bits's 'The Stand Inn' build thread.

I interjected a short message to you in my reply to Thomas but just
wanted to thank you again about posting that link to the Country Plans
website. It covers one of my interests very well and seems like it will
be as interesting a place as T&TTT is!

I also wanted to let you know your "Lily Pad" will be having a namesake.
We picked up a nice 1977 Avion TT in excellent shape that we are planning
to use as a summer home/base in western New York next year. The
"decider" chose "The Lily Pad" as the name, both because it will be
parked overlooking a pond. and if the economy goes totally down the
tubes, we can at least live in it - so it'd be a 'lily pad' to land on in that
dire scenario!

We need to escape the excruciating summertime South Carolina heat
[we're originally Yankees from NY State] so we are planning to go back
north for the summers and see if we want to go back full-time eventually.
We are finding we don't really need snow anymore so maybe we'll just
be reverse snowbirds for a while.

You're making good progress on your build. I just love nicely finished
birch paneling and your's looks great!

Norm/mezmo
If you have a house - you have a hobby.
User avatar
mezmo
1000 Club
1000 Club
 
Posts: 1817
Images: 194
Joined: Fri Jan 01, 2010 4:11 am
Location: Columbia, SC
Top

Postby absolutsnwbrdr » Fri Dec 03, 2010 2:20 pm

Sorry I'm late to the party! Just got done browsing through the progress so far... Lookin good! Looking forward to watching the rest of the build!
Zach
Coming Soon...
Image Image
User avatar
absolutsnwbrdr
Donating Member
 
Posts: 2657
Images: 412
Joined: Mon Jan 25, 2010 6:10 pm
Location: Hanover, PA
Top

Postby mcspin50 » Sat Dec 04, 2010 2:42 am

Hi there Norm & Zach and thanks for taking an interest in my project. I feel like I'm moving in slow motion compared to some of the builds taking place on the forum. I spend plenty of time doing research, that's for sure!

No. 3 Son and l moved all the build plywood and lumber out of the cold garage and down into the warm furnace room. Next 2 days off, I'll work on cleaning up and organizing the space to become the Lily Pad winter workshop. Then I can work on drawing out and cutting the ribs for the hatch frame. If you want some great advice on building your hatch, visit here in the Construction Tips forum where I asked about how many hatch ribs were necessary.

Well, that's my plan for now.
Lil M.
In every walk with nature, one receives far more than he seeks. - John Muir
Generic Benroy Build Journal here - My LilScamper Update Journal here
The Lily Pad...Image My LilScamper...Image Image
User avatar
mcspin50
Gold Donating Member
 
Posts: 488
Images: 158
Joined: Mon Oct 12, 2009 6:35 pm
Location: Perham, MN
Top

Postby Prem » Tue Dec 07, 2010 12:43 am

:thumbsup: Nice. Very nice, Lil! :thumbsup:

I especially like your gonzo, contagious attitude for building.
:beautiful:
My goal...

_____________________________________________
...is to live in a trailer.
User avatar
Prem
Gold Donating Member
 
Posts: 3222
Images: 144
Joined: Thu Aug 21, 2008 11:25 am
Location: State of Jefferson (Oregon side)
Top

PreviousNext

Return to Build Journals

Who is online

Users browsing this forum: No registered users and 39 guests