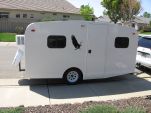
Terry's TTT Garageable Standy Build modifications

...ask your questions in the appropriate forums BUT document your build here...preferably in a single thread...dates for updates, are appreciated....

Postby terryjones1 » Fri Dec 10, 2010 2:59 pm

The only person that gets up in the middle of the night is I.
I, of course, will be sleeping on the side of the bed near the drop floor.

In addition, I use a Bi-PAP machine at night for my sleep apnea. The machine will need to be on the side of the bed.
My TTT Garageable Standy Build Journal: viewtopic.php?f=50&t=40591
User avatar
terryjones1
Gold Donating Member
 
Posts: 266
Images: 1
Joined: Wed Aug 25, 2010 2:09 pm
Location: Lincoln, Ca

Postby terryjones1 » Sat Dec 11, 2010 8:01 pm

I have completed splicing the front and back plywood floor panels. I used 1" #6 flathead screws to hold the splice together. I used RAKA 127/608 Epoxy as a glue. I will not be removing the screws.

In addition, I have coated the bottom of the plywood floor with RAKA 127/608 Epoxy. A picture of the bottom of the plywood showing the splices & the Epoxy coating is shown below.

Image

Next, I will paint the bottom of the plywood floor. I have not yet decided on the paint as yet.
My TTT Garageable Standy Build Journal: viewtopic.php?f=50&t=40591
User avatar
terryjones1
Gold Donating Member
 
Posts: 266
Images: 1
Joined: Wed Aug 25, 2010 2:09 pm
Location: Lincoln, Ca

Postby terryjones1 » Sun Dec 12, 2010 1:31 pm

Shown below is the lower part of the front & back inside of fenders with fiberglass and first coat of Epoxy applied. The front two plywood panels are for front side of fender at the drop floor. The two smaller plywood panels are for the back side of the fender.

Image

Next I will build "backup" plywood for under the floor, where the D4 AGM battery will be mounted.
My TTT Garageable Standy Build Journal: viewtopic.php?f=50&t=40591
User avatar
terryjones1
Gold Donating Member
 
Posts: 266
Images: 1
Joined: Wed Aug 25, 2010 2:09 pm
Location: Lincoln, Ca
Top

Postby terryjones1 » Wed Dec 15, 2010 3:00 pm

I have decided to modify frame to allow for under frame spare tire mount. I hve shown the modification below.

Image

Shown below is the plywood under floor reinforcement for where I will mount the D4 AGM battery. The battery will be mounted under the bed. The bottom side of the floor is shown. The break in the plywood is to allow for steel frame member.

Image
My TTT Garageable Standy Build Journal: viewtopic.php?f=50&t=40591
User avatar
terryjones1
Gold Donating Member
 
Posts: 266
Images: 1
Joined: Wed Aug 25, 2010 2:09 pm
Location: Lincoln, Ca
Top

Postby terryjones1 » Sat Dec 18, 2010 1:27 pm

I have just gotten around to taking pictures of my frame.

The first picture shown below is of the "side mount" attachment of the Rlexiride axle. The bolts used for attachment are 5/8".

Image

The next pictue is of the Flexiride axle spindle. You can also see that I am installing electric brakes.

Image

Next, is a picture of the rear receiver.

Image

Next, is a picture of the right rear leveling jack. I installed 4 leveling jacks in all.

Image

Next is a picture of the steel framing for the drop floor. Notice that I have set back the floor from the central drop to where the bed will be.

Image

Next, is a picture of the right front stabilizer jack.

Image

Next is picture of front jack (folded).

Image

Next is pictue of front jack in down position.

Image

Next is picture of frame looking towards the rear.

Image

Next is picture looking towards front.

Image

Next is picture of frame still on leveling jacks

Image

Next is picture of frame on the ground. The clearance from bottom of drop floor to ground is 9". As I add weight, I expect the clearance to be 8". If it doesn't, I will adjust the Flexiride axle.

Image

Next is picture of frame taken at an angle.

Image

I next plan to start installing the plywood floor.
My TTT Garageable Standy Build Journal: viewtopic.php?f=50&t=40591
User avatar
terryjones1
Gold Donating Member
 
Posts: 266
Images: 1
Joined: Wed Aug 25, 2010 2:09 pm
Location: Lincoln, Ca
Top

Postby Cliffmeister2000 » Sat Dec 18, 2010 1:38 pm

That is really looking good! :thumbsup:
God Bless

Cliff

♥God. ♥People.
1 John 4:9-11

My Teardrop build pictures
User avatar
Cliffmeister2000
Titanium Donating Member
 
Posts: 3622
Images: 157
Joined: Thu Jul 26, 2007 10:18 pm
Location: Phoenix, AZ
Top

Postby YuGun » Sat Dec 18, 2010 4:01 pm

Looks Great!

:applause: :applause: :applause:
User avatar
YuGun
The 300 Club
 
Posts: 445
Joined: Sun Apr 11, 2010 1:25 pm
Location: Turkey
Top

Postby pete42 » Sat Dec 18, 2010 7:29 pm

Terry when I use to weld aircraft tubing it to would bend and we needed to go back and heat all around the weled tube to do what they called "normalizing" when heated it would return to the unbent stage.
your big tubing may or may not do that did you ever get it straight or did I miss that part.?
User avatar
pete42
Super Lifetime Member
 
Posts: 2203
Images: 13
Joined: Sat Nov 07, 2009 11:52 am
Location: SouthWest Ohio
Top

Postby terryjones1 » Sat Dec 18, 2010 7:54 pm

The frame straightened a little. There is still a 3/16" dropoff from level on both sides, middle to front and middle to back. After reading what other builders are saying about warp, I will stick with the 3/16" dropoff. They seam to think that up to 1/4" warp is fine.
My TTT Garageable Standy Build Journal: viewtopic.php?f=50&t=40591
User avatar
terryjones1
Gold Donating Member
 
Posts: 266
Images: 1
Joined: Wed Aug 25, 2010 2:09 pm
Location: Lincoln, Ca
Top

Postby S. Heisley » Sun Dec 19, 2010 11:42 am

Terry:

It looks like you're doing a terrific job on that trailer. If you can do that with metal, I can hardly wait to see what you do with wood! :thumbsup: :applause:
User avatar
S. Heisley
Super Lifetime Member
 
Posts: 8813
Images: 495
Joined: Mon Sep 17, 2007 10:02 am
Location: No. California
Top

Postby terryjones1 » Sun Dec 19, 2010 5:28 pm

I have installed the plywood for the drop floor. I used 3M Marine Adhesive Sealant 5200 and self tapping #10 double coated screws for the attachment. The drop floor is shown below.

Image
My TTT Garageable Standy Build Journal: viewtopic.php?f=50&t=40591
User avatar
terryjones1
Gold Donating Member
 
Posts: 266
Images: 1
Joined: Wed Aug 25, 2010 2:09 pm
Location: Lincoln, Ca
Top

Postby terryjones1 » Mon Dec 20, 2010 6:05 pm

I have installed the front piece of plywood for the floor. The dinette goes here.

Image
My TTT Garageable Standy Build Journal: viewtopic.php?f=50&t=40591
User avatar
terryjones1
Gold Donating Member
 
Posts: 266
Images: 1
Joined: Wed Aug 25, 2010 2:09 pm
Location: Lincoln, Ca
Top

Postby terryjones1 » Tue Dec 21, 2010 1:46 pm

I have just installed the last sheet of plywood for the floor.
This is where the bed will be.
Next I will fill holes & sand.
Then, I will build the fenders.

Image
My TTT Garageable Standy Build Journal: viewtopic.php?f=50&t=40591
User avatar
terryjones1
Gold Donating Member
 
Posts: 266
Images: 1
Joined: Wed Aug 25, 2010 2:09 pm
Location: Lincoln, Ca
Top

Postby myoung » Tue Dec 21, 2010 2:07 pm

terryjones1 wrote:I have installed the plywood for the drop floor. I used 3M Marine Adhesive Sealant 5200 and self tapping #10 double coated screws for the attachment.


I'm curious about your choice of fasteners, a combination of adhesive and self-tapping screws. In my research on the forum for methods of attaching the body to the frame, it appears that most use just a few bolts.

I don't recall seeing any mention of adhesive between the body and the frame, presumably because there might be a need to separate the two at some future date.

Was your decision based on the contours of the floor and the possible difficulty attaching all the pieces to one another?

Inquiring minds want to know.
:thinking:
Mike Young
build thread: viewtopic.php?t=40459
User avatar
myoung
500 Club
 
Posts: 644
Images: 250
Joined: Sat Aug 07, 2010 11:21 am
Location: Nipomo, CA
Top

Postby Cliffmeister2000 » Tue Dec 21, 2010 2:57 pm

On one very scary trip, when I hit a huge hole in the pavement followed by a raised section, my 1300 lb Weekender became airborne, then landed on the left wheel before the right. This bent the axle, which was evident immediately. What took a second trip to discover was that the all of self taping screws on the tongue side of the axle had snapped. (there were 5 of them. I ended up drilling through the frame and bolting the unit together more traditionally, with bolts, washers, and nuts.
God Bless

Cliff

♥God. ♥People.
1 John 4:9-11

My Teardrop build pictures
User avatar
Cliffmeister2000
Titanium Donating Member
 
Posts: 3622
Images: 157
Joined: Thu Jul 26, 2007 10:18 pm
Location: Phoenix, AZ
Top

PreviousNext

Return to Build Journals

Who is online

Users browsing this forum: No registered users and 15 guests