Day 1 - Rip apart a twenty year old Hitchman Utility Trailer...
Day 1 - Remove wheels, hubs, Strip it down and sand...
Day 1 - Prime and rust proof the frame...
Day 2 - Paint the frame...
Day 2 - Add new hubs, bearings and grease...
Day 2 - Install new wheels and 3/4"G1S 4x8 sheet of Fir Plywood for look and possible binding in tight corners...
Day 3 - Build extra 2x4 frame as this only a 4x6 trailer body...
Day 3 - Insulate floor, undercoat, Seal and paint...
Day 3 - Attach Floor with carriage bolts, nuts and washers and added angle brackets that came from HID ballast mounts in light fixtures from a jobsite. All hardware used was stainless steel with Robertson heads (Gotta love living in Canada!)...
Day 4 - Note Day reference is really just to help me load pics and not really what I accomplished that day. This total build took about three months of evenings and weekends but has been continued over last three years and revised many times. The white panel that you see is called FRP which was glued to the plywood for a really neat inside finish. Available at most hardware stores. This photo shows a jig with fulcrum and pencil to draw a smooth radius on the front and radius on the rear...
Day 4 - Rear plywood and FRP body contour. I used a jigsaw and fine tooth blade to cut the FRP carefully...
Day 5 - Locate and cut out door. I suggest buying doors pre-made as they are easy to source but I made mine from scratch (never again!)...
Day 5 - Glue FRP panels to Plywood and add heavy weight to dry overnight...
Day 5 - Same thing for the doors. glue FRP and Plywood together. I chose going with two doors for safety and am glad that I did as it makes it feel more open...
Day 5 - Cut all pieces with square edge and tools for accuracy...
Day 5 - Used many clamps to glue the FRP to the Plywood. I used FRP adhesive for this step and not contact cement...
Day 5 - Coat all exposed edges with undercoating and / or paint to ensure long life and waterproof seals...
Day 6 - Install temporary braces to hold the sides square and screw and glue together...
Day 6 - Install short front skirt...
Day 6 - Let all dry overnight...Starting to resemble something now...
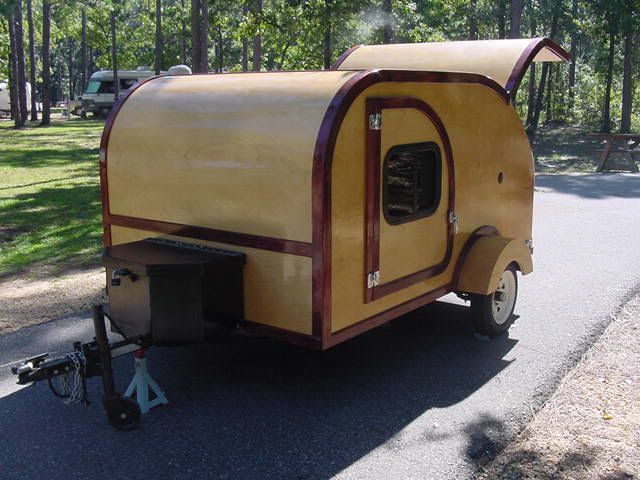
Day 7 - Starting the trunk today. I chose 15" depth and will not be building the traditional trunk and hinge. Details to follow...
By the way, here is the radius PDF that I used for the body and doors...
