The Poet Creek Express - Foamie Hybrid

Canvas covered foamies (Thrifty Alternatives...)

Moderator: eaglesdare

Re: The Poet Creek Express - Foamie Hybrid

Postby GPW » Fri Apr 19, 2013 6:01 pm

In a word .... Grommets ... Just a thought ... :thinking:
What about a decorative access panel over the wire runs for later inspection /renewal ... ??
There’s no place like Foam !
User avatar
GPW
Gold Donating Member
 
Posts: 14920
Images: 546
Joined: Thu Feb 09, 2006 7:58 pm
Location: New Orleans

Re: The Poet Creek Express - Foamie Hybrid

Postby KCStudly » Sat Apr 20, 2013 9:48 pm

Wow. There is so much activity on the forums that it is hard to keep up. Lots of spring has sprung and getting ready to camp.

Becky is almost there :thumbsup: , Dan has the Atma looking just dandy :applause: , plenty of other fine examples going together, and TPCE is still in the rough. :?

And still I put about 4 hrs in today. Let's get caught up.

I had a tough day at work Friday doing modifications and maintenance to a “live” system. The purified water system feeds sanitary water throughout the building under constant circulation and high temperature to avoid stagnation and microbial growth. When this system is down we are essentially out of business. No pure water for product ingredients and no pure water for sanitary washing of parts or mixer systems. It was a planned outage, and still I had the entire Compounding dept. awaiting my every move to get them back up and running. I hustled and got everything done ahead of my predicted schedule, but still had plenty to do after the system was restored. Not to mention that I have to suit up in a heavy rubber apron, long heavy rubber gloves, face shield, head, beard & arm hair guards in order to safely break into the system. It makes for a strenuous day what with all of the running up and down the stairs, hauling all of my tools, PPE and sanitary gear, etc.

Wha, wha, wha. I’m a big cry baby. Bottom line is on Friday I came home directly after the bell and surrendered to a nap until about 8pm!

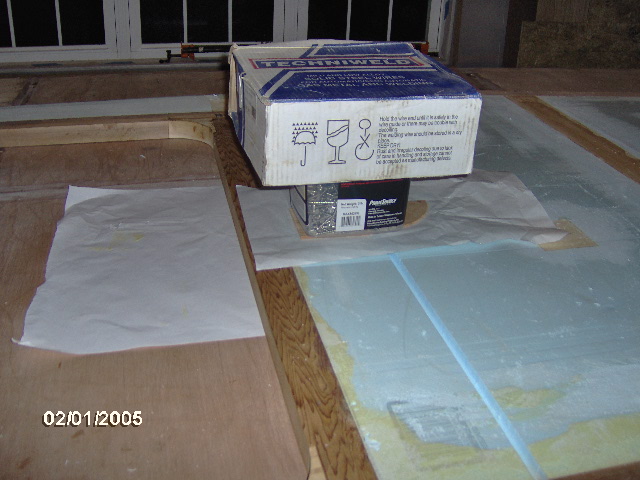
But let’s get up to date on Thursday’s and today’s efforts. Here are a couple of pics of the wing table cleats that I got from Sharon’s source.
Image
Image
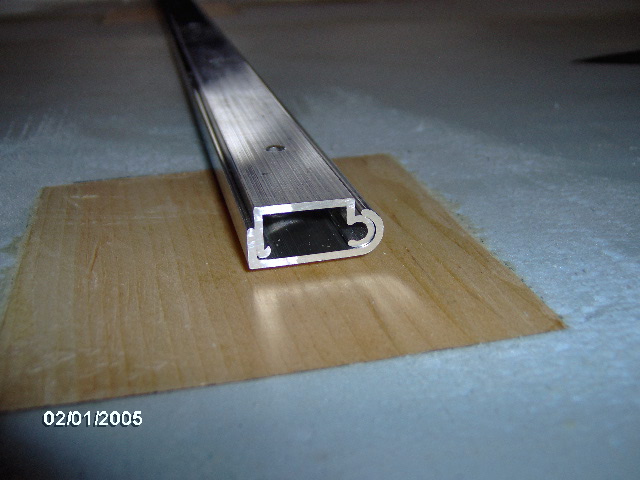
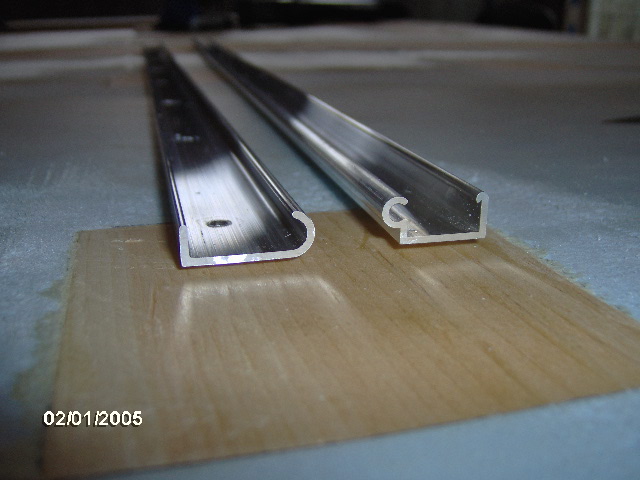
It is sometimes referred to as “Parker Rail”. (A web search found that Parker is a big name in aluminum extrusions.)

I bought one unit (2 pieces) at 30 inches long and plan to cut it into 2 sections each 15 inches long. This will allow me to make 2 wing tables, one for either side, about 24 inches wide with no problem. I’m pretty sure that the main galley counter will be a little on the high side, so I wanted to have the wing tables be a little lower. Also I was concerned about the repeated bashing the removable table edges and cleats would give to the soft canvas/foam wall sides while trying to join the tables to the walls, and the hole spacing on the cleats is only about 4 inches on center, so I decided that I wanted a generous and continuous block set into the wall. I’ll get into more detail below in the coverage of Saturday’s work.

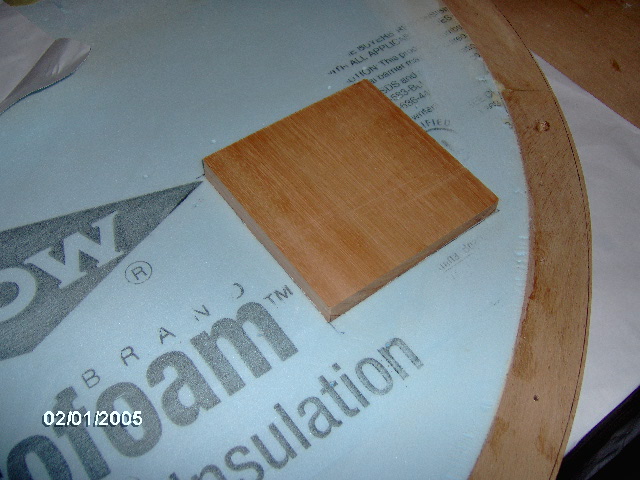
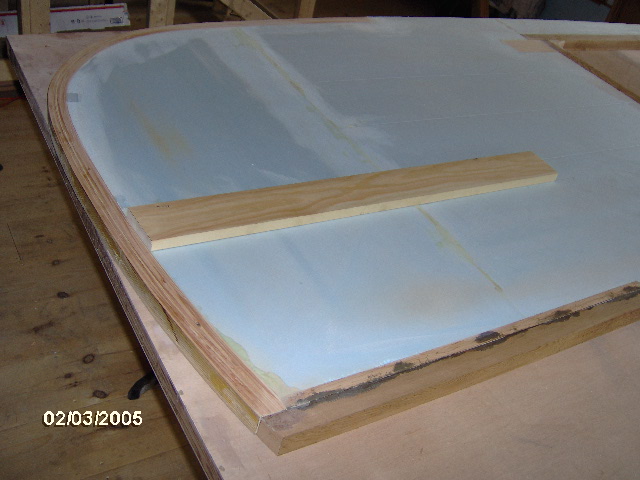
Okay, I completed routing out the curbside wall light switch blocking recesses and did a dry fit to check.
Image

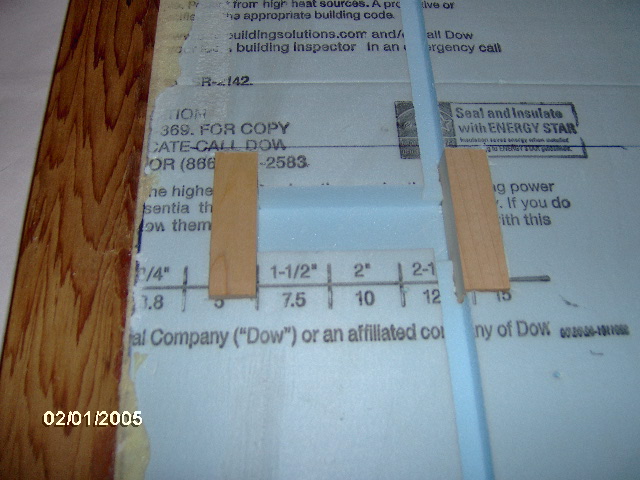
Here is the curbside hatch strut block and recess being dry fit. The fit was much tighter than the street side, and I dare not push it farther than half way into the recess for fear that I would not be able to get it back out to glue.
Image
Again, it is a Red Grandis scrap used for the block (harder than the soft pine I have been using for the other blocks and better suited for the high loads of the hatch strut.

And here it is being glued up.
Image

And here are the switch blocks under glue.
Image
(I have to stop showing boring pic’s of wall blocks under weights.)

Today, Saturday, I picked up a new filter for Karl’s shop vac (basically the same 16 gal one I have at home), and serviced same. It has much better performance now.

Removed weights, cleaned up and fared the curbside switch blocks.
Image

Removed weights and found that the strut block had risen up between 1/6 and 1/8 inch at one end. It had been forced up by the hydraulic action of the GG. (I wonder if the increasing humidity or the wider board preventing any escape route for the foam had been a factor, or maybe I just used too much glue…?)

I used the medium/small sized plane to shave it down. Took some fiddling and blade adjustment before I figured out that it wanted me to press down fairly firmly on the little dished thumb hold at the front. After figuring that out it went fairly quickly.
Image
Image
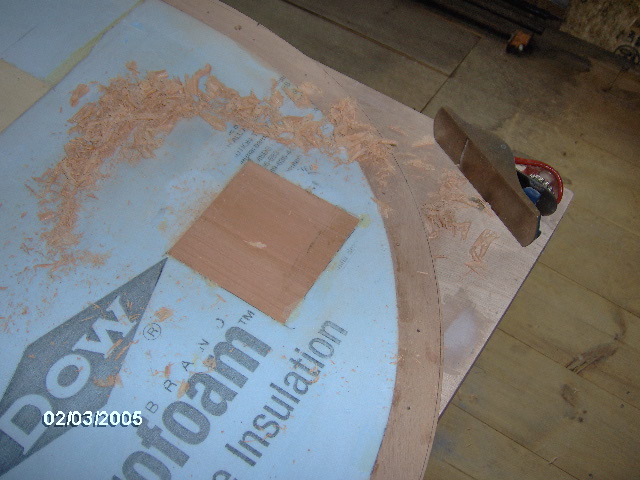
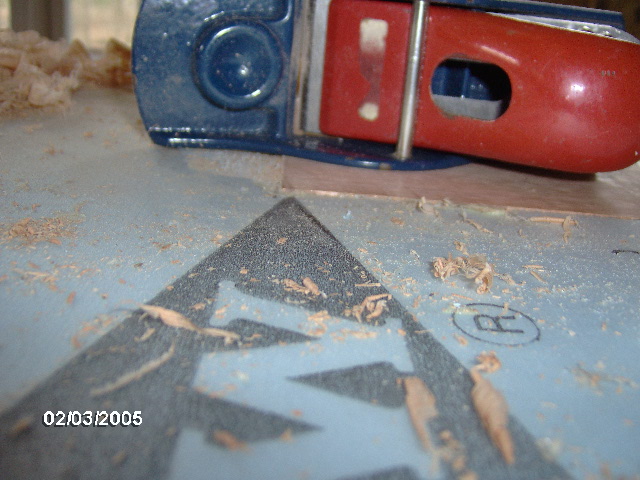
In the second pic I am almost there.

I finished that up with the belt sander, only undercutting the foam (accidentally) just a tad. Light weight spackle is in my future no matter what I do.

Okay, back to the wing table blocking. I decided that I would go lower than the inner galley counter, but thought it would be good to tie in the strength of the wing table blocking to the counter side edge blocking on the other side of the wall. And it made sense to tie the wing table blocking into both the wall edge at the rear, and the bulkhead vertical at the front. By using 1x4 (3/4 x 3-1/2 actual) I could be sure that there was plenty of wood around the area of the aluminum extrusion so that it would be robust against whacking it with the edge of the table or the table side cleat.

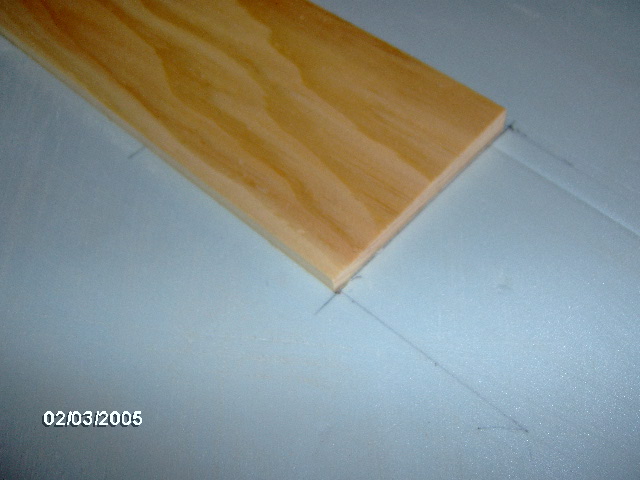
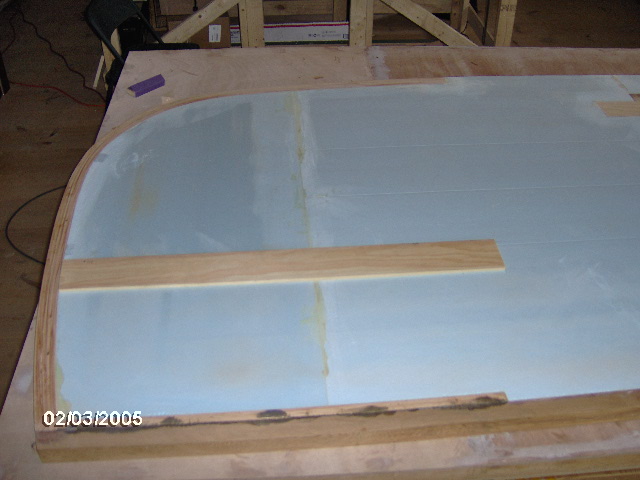
Here I have laid out the extents of the wing table cleat blocking so that it overlaps the bottom of the galley counter blocking by 1 inch, and the bulkhead blocking fully. I have also transferred the curve of the inside radius of the wall edging, and trimmed that with the band saw; sanded it to the line with the hand block.
Image

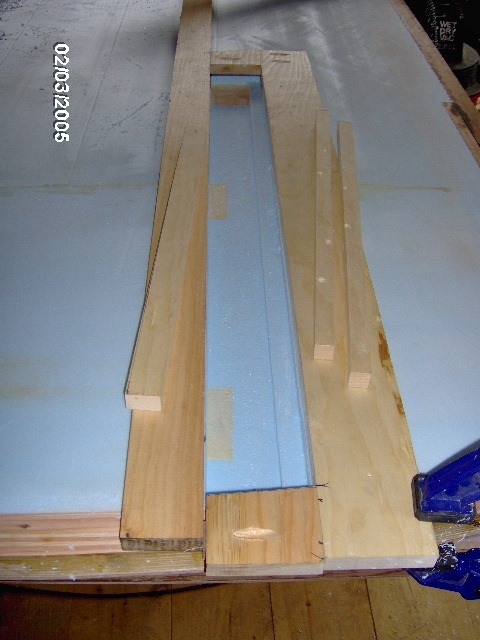
Then I knocked together this router jig using 1x pine (because I needed at least one longer piece that would reach to the door opening for clamping… raised the wall up on foam scraps so that I could clamp the jig to the edges… and was not willing to risk gouging any of the remaining 5mm pieces to the Eeyore oopsy demon).
Image
Image

Here you can see a little of the pocket screw detail in the jig and a hint of the spacers that I ended up using to prevent the router shoe from dropping into the hole. Also you can see the blocking on the far side of the wall starting to be exposed.
Image

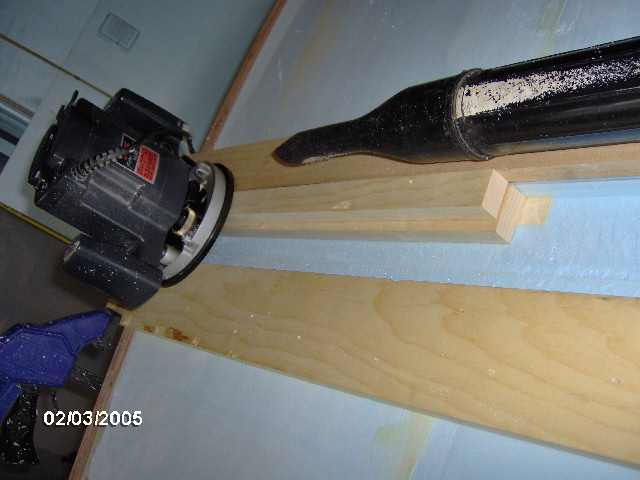
Here’s a better picture showing the progressive use of the shims. With the thicker template my router bit wasn’t long enough to make the cut in one pass, so I put a 1x spacer along one side of the template and routed out most of the first stage cut. Then I marked another piece of 1x and ripped it in the table saw so that I could set that in the hole and complete the other side of the first stage. Shown in the pic I have completed that second stage full depth cut on the far side, have doubled up the shims to two 1x’s and am about to clean out the rest of the pocket to final depth.
Image
I’m sure that there must be an easier and more accurate way of doing this, but this was the method that got it done using the bits and pieces on hand that I was willing to sacrifice at the time.

As it was, there was some twist in the board that I had chosen for the blocking and the jig didn’t sit super flat on the foam, so I had to do some tune up to the pocket after the routing stage. I have been using the 320 grit sand paper stuck to the milled flat surface of my router table as a honing surface to keep the blades for my planes and chisel tuned up, and while truing up the corners of this pocket with the chisel I managed to nick my finger. Let’s just say that my tools are sharp. Small clean nick and I hardly even felt it. Very minor, but I managed to impress myself with the sharpness.

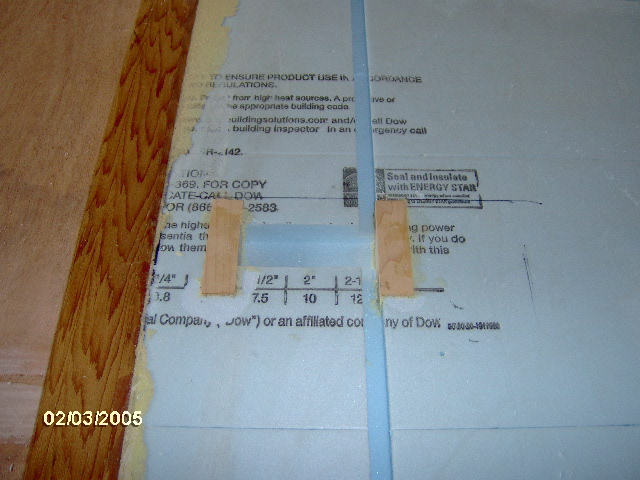
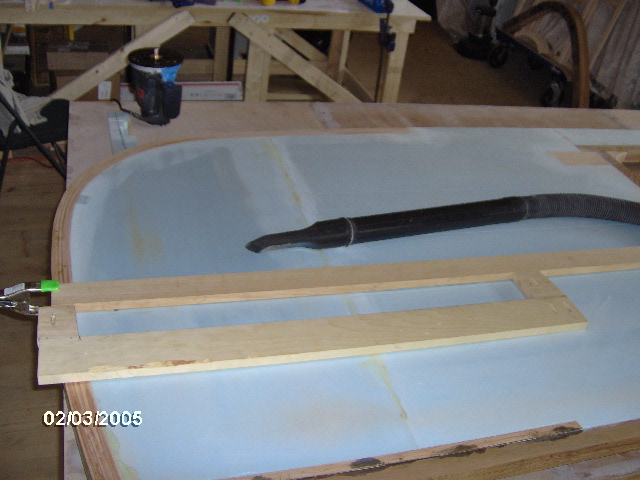
Here are some detail shots of the dry fit of the wing table blocking. It was almost too tight; I had to tune it up with the sanding block, and made an adjustment to the shims I had used in the jig so that the next one will fit a little looser.
Image
Image
Image
Image
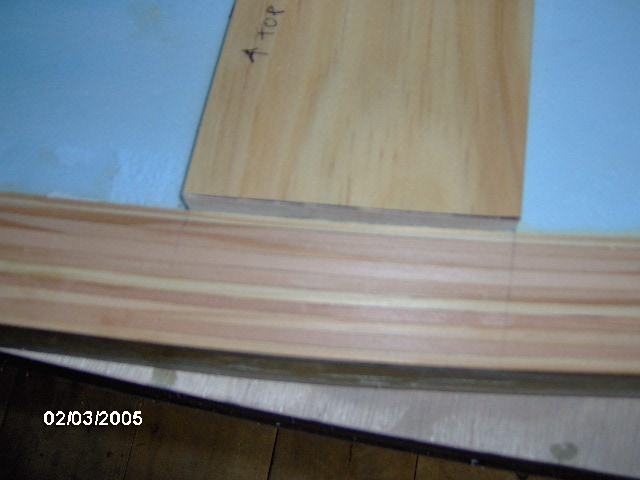
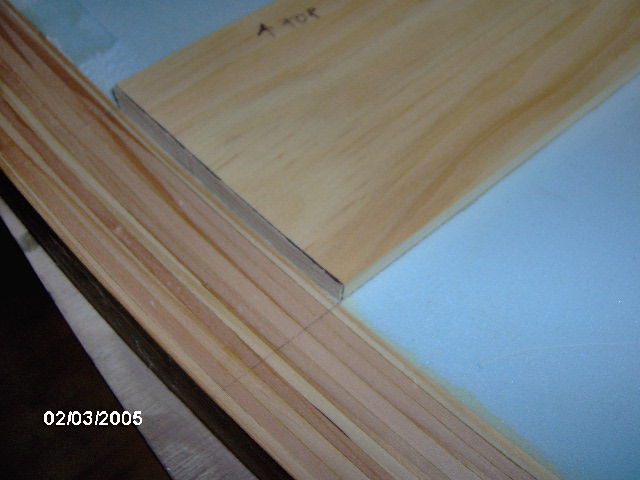
I didn’t dare press it all the way into the recess for the dry fit, lest I would have had a very hard time getting it out without having to run a screw into it for something to hold on to.

By running a smaller piece of 1x scrap around the inside of the recess I was able to tell that the depth of my routing was not uniform; from flush at the lower rear where I was able to get a good clamp fixed, to almost 3/32 high at the top front edge. Rather than trying to reset the jig and dealing with another cut and clean-up, I went ahead and glued it in, planning on shaving/sanding it down flush afterward.
Image

I plan to do the same thing to the street side on the morrow.
Last edited by KCStudly on Sun Apr 21, 2013 8:48 pm, edited 1 time in total.
KC
My Build: The Poet Creek Express Hybrid Foamie

Poet Creek Or Bust
Engineering the TLAR way - "That Looks About Right"
TnTTT ORIGINAL 200A LANTERN CLUB = "The 200A Gang"
Green Lantern Corpsmen
User avatar
KCStudly
Donating Member
 
Posts: 9640
Images: 8169
Joined: Mon Feb 06, 2012 10:18 pm
Location: Southeastern CT, USA

Re: The Poet Creek Express - Foamie Hybrid

Postby Wolffarmer » Sat Apr 20, 2013 11:37 pm

KC. You need a better block plane. :lol:

The one I have is a Anat Kamal from India. A pretty good one and after a bit tuning up suits me. And a lot cheaper than the other top tier planes.


Randy
"these guys must be afraid of the dark"
User avatar
Wolffarmer
Donating Member
 
Posts: 4612
Images: 309
Joined: Wed May 02, 2007 1:32 pm
Location: Idaho Rupert
Top

Re: The Poet Creek Express - Foamie Hybrid

Postby bonnie » Sun Apr 21, 2013 7:21 am

GPW wrote:In a word .... Grommets ... Just a thought ... :thinking:
What about a decorative access panel over the wire runs for later inspection /renewal ... ??


I like that idea. :)
Remember, the turtle won. :)
User avatar
bonnie
Donating Member
 
Posts: 1390
Images: 107
Joined: Sun Jul 24, 2011 4:14 pm
Location: Roxana, IL
Top

Re: The Poet Creek Express - Foamie Hybrid

Postby GPW » Sun Apr 21, 2013 8:05 am

All KC’s work is too pretty to seal in the wiring and if something needs to be changed (or fixed) , you’d have to tear into it ... :o Am sure KC’s got all this figured out already , but only he knows what the finished object d’art will look like ... just puzzle pieces to me as yet .. :roll:
There’s no place like Foam !
User avatar
GPW
Gold Donating Member
 
Posts: 14920
Images: 546
Joined: Thu Feb 09, 2006 7:58 pm
Location: New Orleans
Top

Re: The Poet Creek Express - Foamie Hybrid

Postby KCStudly » Sun Apr 21, 2013 9:29 am

Let's see if I can clarify. The battery (at least one) and fuse panel will either go in the tongue box, or possibly in the galley (haven't decided yet, but the tongue box is looking to be favored at the moment). Let's assume the tongue box for the moment. From there the wires will enter thru the front wall and into the Wiremold. The Wiremold and tongue box can be opened at any time, so no maintenance issues there.

+/- for the pillow lights will leave thru the large holes drilled in the back of the Wiremold, travel behind the inner wall skins in the routed channels in the foam up to a removable decorative mounting block (not made yet) that will be screwed into the recessed block that has already been glued into the wall. The removable decorative block will house the switch and will be a perch for the light fixture. It will also be the side support rail for the edge of the key catcher shelf. The wires will not be glued or taped into the channels, and because I made the channels a smooth path with no sharp corners I should be able to fish wires in and out at will.

Moving rearward thru the Wiremold, on the street side the wires for the red cabin, street side dome, and street side porch lights will exit the rear of the Wiremold, travel up the wall channel to the three switches that will be mounted in a removable decorative wall plate (not made yet) that will be screwed to the two small "pontoon" wall blocks recessed into the foam on either side of the switch recess. There will be a corresponding cut out in the inner skin giving access when the switch plate is removed.

From there the dome and part of the porch light circuit will continue up the wall channel. The porch wire will pass thru a hole to be drilled thru from the porch light mounting block on the outside (the channel was strategically located to pass over this location on the inside). The rest of the red cabin light circuit will go back down the wall channel, back into the Wiremold and on to the bulkhead. The red light will be mounted under the cabinet at our feet and will be facing the bulkhead wall for an indirect lighting effect (the fixture has a chrome shroud).

I haven't decided yet how I am going to get the porch foot light wire down under the floor. I can go back forward out the tongue box and route down under the cabin, but more likely it will be thru a sealed hole down thru the floor.

The curbside switch channel will be similar, except instead of the red light wires, the roof vent fan power will be routed up extending beyond the dome light and into the roof (the channel for this has not been extended yet).

The lead for the galley light will pass through the Wiremold up into a channel to be routed in the bulkhead wall, through a multiple pin plug connector into the hatch where the bar light will be located. The bar light has its own built-in switch.

Because the cabin will sit tight on top of the frame, and I don’t want wires going thru or under the frame rails, it only makes sense for the NHTSA required lighting to be wired thru the cabin, rather than under it. The running lights will be on the exterior of the wall screwed into the cedar sill with sealed holes drilled thru to the Wiremold. The rear tail, turn and brake lights, as well as the marker plate light will pass up thru the bulkhead to that same multi-pin plug and will be mounted on the back of the hatch. I’m not sure how I am going to do it yet, but I would like the hatch wires to be hidden and serviceable as well. Because I will be using two layers of 3/4 foam for the roof/hatch, I may be able to leave a path in the first layer and cap that over with the second layer of foam.

The only thing that will be routed from the tongue under the trailer will be the brake wires.

If the fuse panel and/or battery (or a second battery) ends up in the galley, it's no big deal. The wires will just be running forward thru the Wiremold instead of rearward, and I will have to run a longer charge wire from the tongue.

Clear as mud, right. It is sort of a work in progress build as you go deal. I haven't got all of the details worked out yet, but I think I have enough of a plan to get 'er done.

I do think that my build progress has slowed down a bit because I am getting into areas that are beyond what has been detailed in the computer model, but to go back and try to do some of this stuff there now will only take longer. So long as I don't "paint myself into a corner" or lose "the forest for the trees" I should be okay. :thumbsup:

On the grommets, I will deburr the edges of the holes in the Wiremold, which is reasonably pliable, so I don't see the need for grommets there, nor at any of the holes in the plywood. There just aren't any metal edges anywhere that would require a grommet. Where the bundle comes through from the tongue box, and/or where the trailer cord enters the tongue box I will consider using these boots in one of the smaller sizes. We use them at work often and they are a quality piece.
KC
My Build: The Poet Creek Express Hybrid Foamie

Poet Creek Or Bust
Engineering the TLAR way - "That Looks About Right"
TnTTT ORIGINAL 200A LANTERN CLUB = "The 200A Gang"
Green Lantern Corpsmen
User avatar
KCStudly
Donating Member
 
Posts: 9640
Images: 8169
Joined: Mon Feb 06, 2012 10:18 pm
Location: Southeastern CT, USA
Top

Re: The Poet Creek Express - Foamie Hybrid

Postby KCStudly » Sun Apr 21, 2013 9:41 am

Wolffarmer wrote:KC. You need a better block plane. :lol:

The one I have is a Anat Kamal from India. A pretty good one and after a bit tuning up suits me. And a lot cheaper than the other top tier planes.

Randy


That's cool Randy. I would love to have some better planes, but that just isn't a priority for me right now. Plus I think I need to get a little better with my technique before I can justify spending on the "spendy" ones.

I chose to use the smallish Stanley because it seemed to be an appropriate size for the job (didn't want to tear up the surrounding foam) and it is what I have.

Thanks for sharing.
KC
My Build: The Poet Creek Express Hybrid Foamie

Poet Creek Or Bust
Engineering the TLAR way - "That Looks About Right"
TnTTT ORIGINAL 200A LANTERN CLUB = "The 200A Gang"
Green Lantern Corpsmen
User avatar
KCStudly
Donating Member
 
Posts: 9640
Images: 8169
Joined: Mon Feb 06, 2012 10:18 pm
Location: Southeastern CT, USA
Top

Re: The Poet Creek Express - Foamie Hybrid

Postby Wolffarmer » Sun Apr 21, 2013 10:01 am

Yes I do have some fancy shmancy planes. Not every one needs or want the fancy stuff. But I do like mine. A couple of weeks back I bought a plane iron so I can build my own. Someday. Twenty five bucks for an iron and if the plane is successful will rival planes costing well over $150. Most important thing about ANY plane is to keep the blade sharp. A $500 dollar plane is a pile of junk if the blade is dull. Though it will probably look better.

Randy
"these guys must be afraid of the dark"
User avatar
Wolffarmer
Donating Member
 
Posts: 4612
Images: 309
Joined: Wed May 02, 2007 1:32 pm
Location: Idaho Rupert
Top

Re: The Poet Creek Express - Foamie Hybrid

Postby KCStudly » Sun Apr 21, 2013 6:18 pm

Another 4 hrs or so today.

Removed the weights and, as expected, the curb side (… is it curbside or curb side?) wall blocking was from a whisker to a lot proud of the foam. As I have said before, sometimes I am afraid that power tools (in this case the power hand plane) will get me into trouble too quickly. So I went with the Buck Bros. bench plane and made some curls.
Image
Image
Image

After a bunch of belt sanding (need a new belt), a bunch of hand sanding with the coarse medium size block, and a bunch more hand sanding with the small 100 grit block I got to a point where the fairness and my patience where in harmony. The rest will have to be dealt with at the spackle stage. It is pretty good, but looks better in the pic than it is.
Image

There was some GG bleed thru to the other side of the wall thru a screw hole from where I had positioned the smaller recess block router template (yellow circle in pic).
Image
This is the exact reason that I have been placing the freezer paper under the wall during all glue ups.

Here you can see the 1/4 inch hole that I have drilled thru the porch light block on the far side of the wall into the wire channel (seem to have lost the pic from the outside, hmm).
Image

Wash, rinse, repeat on the street side wall. Here I have set up the wing table cleat blocking router jig and used the spacer blocks to help route out the recess.
Image
Image

Everything went easier and came out more accurately on the second go around (no surprise). Rather than space the wall up on foam scraps to get a clamp into the door frame, I just screwed the jig to the door frame surround. Also, I sunk a couple of screws thru the jig into the foam to help keep the jig snug to the foam (it wanted to bow up a bit leaving a gap twixt jig and foam). Yeah, I vacuumed up all of the foam dust and chips before taking the photo. It’s just easier to do that while I still have my respirator on and ear plugs in.

Laid out the blocking, trimmed the curve, sanded to line, and dry fit. The curve part wasn’t as exact as the first one (…although I must admit that it looks pretty damn good in the pic!), but changes to the jig width worked great and the depth, although still a little shallow, was much more uniform. Here is the dry fit.
Image
Image
Image

On the outside surface of the wall I’d rather have the blocks sit a little high and have to fair them down, than have a bunch of suck out holes in the canvas where all of the blocks are.

Here is a shot demonstrating the use of a little scrap of 1x maple block to gauge the depth of the routed recess. Just a little proud works for me. Will give me a chance to practice my planing skills.
Image

I went ahead and drilled the street side porch light wire hole while I could still position the wall over the side of the floor/work table (before gluing and weighing the wing table block in place). Combine this picture in your head with the one above from the wire channel side of the other wall and hopefully it makes sense.
Image

Then I glued the wing table block in to the street side wall. Freezer paper under and over, board to concentrate the weights, row of SS screw bins, MIG welding wire spools in cardboard boxes, another board as a spreader, a custom carpenter’s box full of various sized drywall screws, and a couple of smaller rolls of MIG wire just for good measure.
Image

Yvette came by the shop to check on progress. She was trying to be enthusiastic. Later, when queried, she said (with reservation) that my work was neat and tidy and meticulous; and much more “3D” than the last time she had visited. Despite her outward appearance, I sensed a general lack of enthusiasm… or maybe she just doesn’t see it yet, but at least she is trying.
KC
My Build: The Poet Creek Express Hybrid Foamie

Poet Creek Or Bust
Engineering the TLAR way - "That Looks About Right"
TnTTT ORIGINAL 200A LANTERN CLUB = "The 200A Gang"
Green Lantern Corpsmen
User avatar
KCStudly
Donating Member
 
Posts: 9640
Images: 8169
Joined: Mon Feb 06, 2012 10:18 pm
Location: Southeastern CT, USA
Top

Re: The Poet Creek Express - Foamie Hybrid

Postby GPW » Mon Apr 22, 2013 7:08 am

KC , sometimes the Ladies prefer being presented with the finished product , (or jewelry) and have little concern for the building process... My wife could give a care for what I’m building .... till it’s done .... then she can criticize it ... :roll: .... :R

Just asking ... you planning any roof rafters ? Or just the stressed skin construction ?
There’s no place like Foam !
User avatar
GPW
Gold Donating Member
 
Posts: 14920
Images: 546
Joined: Thu Feb 09, 2006 7:58 pm
Location: New Orleans
Top

Re: The Poet Creek Express - Foamie Hybrid

Postby bonnie » Mon Apr 22, 2013 11:10 am

KCStudly wrote:Yvette came by the shop to check on progress. She was trying to be enthusiastic. Later, when queried, she said (with reservation) that my work was neat and tidy and meticulous; and much more “3D” than the last time she had visited. Despite her outward appearance, I sensed a general lack of enthusiasm… or maybe she just doesn’t see it yet, but at least she is trying.


Glenn made me laugh. KC, that is a really great completment Yvette gave you. It's sort like the middle of putting together a puzzle, some people are into the whole process and some people aren't. Just sayin' as a girl and all. ;)
Remember, the turtle won. :)
User avatar
bonnie
Donating Member
 
Posts: 1390
Images: 107
Joined: Sun Jul 24, 2011 4:14 pm
Location: Roxana, IL
Top

Re: The Poet Creek Express - Foamie Hybrid

Postby KCStudly » Mon Apr 22, 2013 3:04 pm

Geep, Funny thing is my wife has asked that I stop giving her jewelry. For some reason she thinks it is too easy of a way out from thinking up a more thoughtful gift. :? Go figure. When I finally figure out a woman I will win a Nobel Prize, or something equally magnanimous. :NC

There will be two cedar 2x2's spanning the walls on top of the ceiling skin ahead of and behind the roof vent fan (refer to images in my first post on page 1). These will also get some rib like blocking tying them together on either side of the fan. Between these two spars and the cabinet frames there will be spanning members at regular intervals. There is also going to be a 2x2 cedar sill across the bottom of the front wall, and another spar (probably maple or oak) at the hatch hinge, just behind the bulkhead.

Bonnie, They were very nice compliments, and Yvette's really good at, "if you don't have something nice to say, don't say anything at all". She can always find something nice to say. Still, she was hesitant, so I hazard to guess what else she was thinking that she didn't say. :thinking: :roll: :NC

Thanks for watching.

Not done yet.
KC
My Build: The Poet Creek Express Hybrid Foamie

Poet Creek Or Bust
Engineering the TLAR way - "That Looks About Right"
TnTTT ORIGINAL 200A LANTERN CLUB = "The 200A Gang"
Green Lantern Corpsmen
User avatar
KCStudly
Donating Member
 
Posts: 9640
Images: 8169
Joined: Mon Feb 06, 2012 10:18 pm
Location: Southeastern CT, USA
Top

Re: The Poet Creek Express - Foamie Hybrid

Postby KCStudly » Wed Apr 24, 2013 9:10 pm

Let’s get caught up; the short (?) version. Maybe.

On Monday I went to Mecca, unloaded the weights off of the street side wing table blocking and checked out how the glue up had gone.
Image
Not too bad, just about 1/16 high fairly even over most of it. There is a low valley in the foam where I had attempted to fair the joint in the foam blank previously (learning curve with the very coarse long board), but that will be taken care of with spackle. I was just concerning myself with the basic plane of the foam.

Here I have done the planing work and have switched to the small sanding block.
Image

Not too bad if you don’t count the gulley in the foam.
Image

Again, there was some GG bleed thru to the inside, but I had used less glue this time (higher temp. and humidity… don’t think I can ever dial it in just right because the conditions are always changing… fit, temp., applied level of moisture, and ambient humidity… too many variables, but always the results are acceptable… what choice do I have?).
Image

Here’s how we fix that. Serrated steak (or boning?) knife with keen edge down and serrated edge up (lest we shred the face of the foam), saw it flush, pick any remaining bits that will tear away evenly, kiss anything else a tad with the small sanding block and ignore the little depression that the expanding GG made in the blue stuff.
Image
Image

So now as I am approaching the next phase I sat and took stock of where I was at and what was to come. Karl suggested writing whatever came to mind, then arranging the items in a logical order. It’s what we all get all wrapped around in our minds when we are trying to plan and act, but it is such a simple technique to “get ‘er done”, or at least get to working in the right direction.

Out of that it was clear that it would be nice to know for sure where the fender blocking needs to go. I have it in the model and on the drawing where I think it needs to go, but I had always thought that I would check it against the trailer and tire before committing to the final cut. Sequence error. Then a light bulb went off in my head. I don’t need to fit the fender to the wall in order to determine its height, I just need to fit the fender to the tire and frame and transfer the height to the wall blocking. So that’s the next step planned for Wednesday (today). Temporarily fit the big Jeep tire and wheel to the axle and see how high the top of the fender wants to be, then transfer that height to the wall.

Additional fallout from this think session was a list of hardware that I will need. I need the hatch draw latches settled to make sure that the rear side marker light locations (and thus wire holes) don’t interfere; and while I’m thinking hatch I might as well order the hinge, the rubber strip to seal the hinge (remember my whole discussion about the rounded wall edges and incompatibility with hurricane style hinges), hardware to mount the hinge and the Wiremold, and a lift handle for the hatch.

Ordered all of that on Tuesday. The EPDM strip for the hinge was a special order from Thunder Technologies LLC (oh my, that was dear… but quick and easy…shipped same day… did not have to do any shopping around, got exactly what I wanted, and still cost less than buying a full pond liner from big box and having to cut my own strip, then dealing with the leftover excess). And the rest was from McMaster-Carr.

“The Knack” is really starting to add up.

So now my tale of woe. Ever since I did that mixer PM and moving the mixer drive guard housing by myself (I think I mentioned that?), my back has been a bit tweaked. I thought it was getting better, but between work, getting a new pair of work boots (don’t laugh, the difference between the old wear pattern and the new unworn soles really changes the way the muscles respond), and an incident where I had to suddenly shift my balance to avoid squashing my ever attentive kitten, Rocky… well, let’s just say that my back is as stiff as a board. There was no way that I was going to be able to haul that big heavy 31 inch tire/wheel out from behind the plastic tent, down the stairs, nor drag the trailer into the shop, nor etc. etc. etc., lest not this evening. No, an anti-inflammatory (Ibuprofen), a good muscle relaxer (Scotch), and lots of stretching were called for.

When I arrived at home the stuff I had ordered from McMaster-Carr had arrived (from Jersey is next day). Clockwise from front left: enclosed adjustable lockable SS draw latches; box of FH SS screws for hinge, the wrong hatch handle (story below), and 2 boxes of truss head screws for hinge weather strip and Wiremold.
Image

Lousy close up of the latches and truss head.
Image

The wrong handle.
Image

Here is the hinge, PN 1658A21, that shipped in a separate tube. It has “countersunk holes”, but when the thickness is only 0.060 inch it can be deceiving. The designated No. 6 FH screws fit great, nice and flush, but the thru hole is larger and the taper is scant.
Image

IIRC, the latches are the same ones that Planovet used on the little Swiss trailer (PN 1807A62). At first they seemed really nice, but then I found that the adjuster nuts were just one step away from seizing on the catch threads. I hit them straight away with some light mineral oil (what I had on hand in my kitchen for sharpening knives) and they freed up enough to not weld themselves together. I will chase the threads before installing and apply some anti-seize (I have some food grade stuff that doesn’t make a mess like the std. stuff… seems a shame to pay good money for something that is half a$$ed QC). The other thing I noticed is that if the tab and latch are mounted on the same surface, as the latch goes over knuckle, the adjuster mechanism drags on the frame and it forces the hook on the latch side up, putting a sideways strain on the tab. :thinking: They did advertise varieties that have positive lateral seal compression, but this was not supposed to be one of those. I don’t want the latch to try to rip the screws out of the hatch sill every time I latch it. I might have to shim the tab up some. :thinking:

The handle I wanted is an item that we have at work on a few doors, nice brushed finish, I think it must be stainless steel, sort of a tapered oval cross section in the handle with a nice swell the fits the palm nicely, and more of a rectangular profile (though still nicely rounded) compared to that shown. I had asked the guy at work, who should have known, to steer me toward the correct part number (1402A19 is shown), and between us we got it wrong. The one ordered and shown is cast aluminum (lighter!), is a dull gray (uh, ugh!), has larger washer faces (kind of clumsy looking), is more rounded in profile, and does not fit the palm as ergonomically.

The wife says send it back or I will never be happy, and she is right. I’ll get it straightened out tomorrow.

Details, details, details. The more I get ironed out now, the quicker things will go later (I hope).

And that is the short version.
KC
My Build: The Poet Creek Express Hybrid Foamie

Poet Creek Or Bust
Engineering the TLAR way - "That Looks About Right"
TnTTT ORIGINAL 200A LANTERN CLUB = "The 200A Gang"
Green Lantern Corpsmen
User avatar
KCStudly
Donating Member
 
Posts: 9640
Images: 8169
Joined: Mon Feb 06, 2012 10:18 pm
Location: Southeastern CT, USA
Top

Re: The Poet Creek Express - Foamie Hybrid

Postby aggie79 » Thu Apr 25, 2013 4:49 pm

KC,

Things are coming along nicely!

McMaster is tough to beat. They are a little pricey but their massive selection, quick delivery, and good customer service are worth it. I've not tried to return anything though.

With all the parts rolling in, have any of your neighbors wondered if the Mrs. was having a tango with the UPS guy? :lol: (All my neighbors thought mine was.)

Take care,
Tom
Tom (& Linda)
For build info on our former Silver Beatle teardrop:
Build Thread

93503
User avatar
aggie79
Super Duper Lifetime Member
 
Posts: 5405
Images: 686
Joined: Tue Aug 07, 2007 5:42 pm
Location: Watauga, Texas
Top

Re: The Poet Creek Express - Foamie Hybrid

Postby KCStudly » Fri Apr 26, 2013 2:37 am

Thanks for checking in, Tom, and thanks for the positive words.

Yeah, there has been a bunch of little stuff, and the little stuff will continue to add up. I think the bigger things left to get are the vent fan, the canvas (or glass/epoxy… still not decided), more contact cement for the interior panels, and the wiring (I would like to use marine grade tinned wire throughout, but it is dear by the time you buy a bunch of rolls of various insulation colors).

We’re friendly with the neighbors (hi, how ya’ doin’, small favors), but not to the point of sharing gossip, so what I don’t know won’t hurt me! :lol: The delivery guys all know that it’s okay to leave stuff on the covered side porch, so we rarely see them.

My back wasn’t as bad today so I decided to keep moving, keep from getting stiff, and go test fit a fender. Moved a few things in the loft to get one of the real wheel/tire's out from behind the curtain, got in front of it on the stairs and wheeled it down step by step, rather than carrying it, and wheeled it out to the trailer. Neither Karl or I wanted to drag his floor jack out, and he said it wasn’t working very well anyway, so I rigged up a 5 gal bucket, a piece of 6x6 and a broken 2x4 to “work like the Egyptians” using leverage to do the heavy lifting (i.e. Karl sat on the 2x4 while I changed out the temporary wheel for the real deal wheel).
Image
(Still not happy that Sears got the white letter vs. black wall wrong, but at least they were consistent).

Not sure if I am happy with the jeep style fenders. They are a little tall height wise vs. length front to rear, and although they are the widest flat top fender that I could find readily, and they do cover the tread, they are not as wide as the tire and will not be easy to fit a back splash to. Also, while centered over the tread, the gap to the frame/side wall is significant. And a lot of the fender extends below the frame where it will be difficult to support.
Image

I’d like to make them longer along the top section, but would be very difficult to do this and have them come out looking “fine”. Maybe I can split them and join them back together using a cap plate of diamond tread (?). Or I might be able to pie cut the flanges at the bends and flatten them some (all of which Karl has pooh poohed; he thinks I should have made my own fenders… a biased opinion… and thinks that I should have made them round with attachments to the frame… he has not grasped the concept that flat top fenders provide a place to put your; shoes at night; beverage; flashlight; etc.).

Still, this is the height that I settled on. The tire can’t reach them due to the bump stops, but the tire may still be further away after I extend the shackles. Bottom line is that I have set a maximum height for the fenders, and that has allowed me to determine the fender blocking height, no matter how I end up attaching them, and whether they end up being these or some other flat top fenders. And this more definite input was useful because it has set the blocking down 5/8 inch further than I had it in the model.

Here I have transferred the fender fit info to the street side wall and have laid the fender onto the wall to eyeball the fit.
Image
Image
Image

Not sure, but I think the fender needs to extend below the spindle centerline on the axle/wheel in order to be legal. Sure looks like a long way down below the wall, but I need to imagine the thickness of the floor and frame in the picture, too, so…

Here is the correct hatch handle.
Image
Image

I mentioned to my friend at work that we had got the wrong one, he produced this, told me to bring the other one in and swap it. Works for me.

With the adjustment to the fender blocking determined I made a small adjustment to the router fixture that I used for the wing table blocking and used that to route out the street side fender blocking recess (used the same shim technique as before).
Image
Note how it ties into the door jamb (partially obscured by freezer paper during prep for glue) and the far side bulkhead blocking.

Another boring picture of weights sitting on top of a glue up.
Image

Karl was most gracious and hauled the heavy tire/wheel back up to the loft (my back said to leave it under the downstairs bench until I felt up to it, but he was concerned that it would get grinding dust on it). Good friend, who’s back is permanently worse than mine, but better at the moment. (Hi to our chunker buddy Dave, who also has a bad back. :D )

Home, hot shower, stretch, Ibuprofen, and a few glasses of red wine. :wine:
Last edited by KCStudly on Tue Mar 15, 2022 11:00 pm, edited 1 time in total.
KC
My Build: The Poet Creek Express Hybrid Foamie

Poet Creek Or Bust
Engineering the TLAR way - "That Looks About Right"
TnTTT ORIGINAL 200A LANTERN CLUB = "The 200A Gang"
Green Lantern Corpsmen
User avatar
KCStudly
Donating Member
 
Posts: 9640
Images: 8169
Joined: Mon Feb 06, 2012 10:18 pm
Location: Southeastern CT, USA
Top

PreviousNext

Return to Foamies

Who is online

Users browsing this forum: jgmahoney and 5 guests