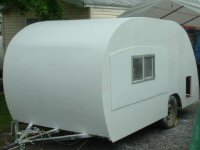
Ethel has began

...ask your questions in the appropriate forums BUT document your build here...preferably in a single thread...dates for updates, are appreciated....

Re: Ethel has began

Postby Ben » Sun May 12, 2013 7:05 pm

Alright here we go had a good working weekend and I feel like I got some progress done to start off I finished welding the frame up, ground all the welds smooth and then wire wheeled the entire frame and put the first coat of paint on
Image
And yesterday I went over to the RV parts shop and picked up a few parts
Image
Image
And I have some of the 31" B.A.L. C type stabilizer on the way so I have a lot of stuff going on and in the works. I also started the finishing the head board but I got board doing upholstery work so I didn't finish with what I started oh well I'll save that for a rainy day when I don't feel like doing something else. the door latches are going to be a little tricky to install. A lot of router work from the look of it. I also picked up the door framing wood. Again another thing I need more parts to really start them like the windows! I feel that's here's no end in parts that have to be ordered. I try to just get what I can get when I can. Too many choices and never enough money for all the stuff at once! Any advice on the handle install might be helpful so input would be great!
This next week were in shut downs again so it might be a while before another post so hope everyone had a good weekend and as always more to come later! :beer:
Going broke quick fixing a bad start!
Ben
Teardrop Master
 
Posts: 200
Images: 221
Joined: Sun Aug 05, 2012 8:39 pm
Location: Hocking hills Ohio

Re: Ethel has began

Postby KCStudly » Sun May 12, 2013 8:31 pm

Here's a link to where I started my door frames (1-1/2 thick, plus 5 mm inner skin, plus an estimated scant 1/16 inch canvas and paint outer skin yet to come).

And here's one to where I start making the router jigs to fit the latches to a test piece that I mocked-up to make sure that I could get the door latches to fit my door configuration before I went too far (scroll down past the boating pictures). I based the templates on the dimensions that I downloaded from the manufacturers website.

Intermixed in this post is construction of the test piece and toward the end is a practice run through the install, first roughing out the latch and bolt holes, then using the router fixtures and some hand work to fit the latch.

Hope this helps you. Any questions, feel free to ask, but know that I have not got to the final install yet.
KC
My Build: The Poet Creek Express Hybrid Foamie

Poet Creek Or Bust
Engineering the TLAR way - "That Looks About Right"
TnTTT ORIGINAL 200A LANTERN CLUB = "The 200A Gang"
Green Lantern Corpsmen
User avatar
KCStudly
Donating Member
 
Posts: 9640
Images: 8169
Joined: Mon Feb 06, 2012 10:18 pm
Location: Southeastern CT, USA

Re: Ethel has began

Postby Ben » Sun May 12, 2013 8:57 pm

Thanks kc I was browsing your post and so much info! Wow is all I can say.
Going broke quick fixing a bad start!
Ben
Teardrop Master
 
Posts: 200
Images: 221
Joined: Sun Aug 05, 2012 8:39 pm
Location: Hocking hills Ohio
Top

Re: Ethel has began

Postby Silvrzuki77 » Mon May 13, 2013 10:43 am

Looking good!! Nice choice on the stabilizers! Hey i posted up a LED light link in the electrical area might wanna check out. Make sure you take lots of pics of your door latch setup when you do it!
Silvrzuki77
Teardrop Master
 
Posts: 188
Joined: Thu Jun 21, 2012 3:55 pm
Top

Re: Ethel has began

Postby Ben » Mon May 13, 2013 11:12 am

I figured someone would want pics of that it might be a while before I get there but I will when I do. I seen that post on the LEDs. That's pretty handy how he done that.
Going broke quick fixing a bad start!
Ben
Teardrop Master
 
Posts: 200
Images: 221
Joined: Sun Aug 05, 2012 8:39 pm
Location: Hocking hills Ohio
Top

Re: Ethel has began

Postby KCStudly » Mon May 13, 2013 2:55 pm

Ben wrote:Wow is all I can say.


Ah shucks, thanks. :)
KC
My Build: The Poet Creek Express Hybrid Foamie

Poet Creek Or Bust
Engineering the TLAR way - "That Looks About Right"
TnTTT ORIGINAL 200A LANTERN CLUB = "The 200A Gang"
Green Lantern Corpsmen
User avatar
KCStudly
Donating Member
 
Posts: 9640
Images: 8169
Joined: Mon Feb 06, 2012 10:18 pm
Location: Southeastern CT, USA
Top

Re: Ethel has began

Postby Ben » Mon May 13, 2013 8:02 pm

Well I know I said that this week was going to be crazy but were only working 10's this week. So I couldn't keep away from the shop and by surprise I received my stabilizers this morning via fed ex
Image
So I wanted to see how I was going to mount them their a lot bigger than I thought they would be. So here was a couple ideas that I had.
Image
Or
Image

I think I like the second pic better do to there's nothing exposed or to hit your leg/knee on.
And I couldn't take having material sitting there and not doing anything with it so.... I had to start the door framing
Image
I used 1/8" ply shim to hold the frame in place to mark the corners and then used a jig saw to cut the corners. I still need to sand the corners some so they fit nice
Image
So with that started I can say without a doubt ill be at the shop every chance I can to be working on getting a door done.
As alway more to come later.. :beer:
I feel that I need to mention that I made the frame 1/4" smaller than the opening.
Going broke quick fixing a bad start!
Ben
Teardrop Master
 
Posts: 200
Images: 221
Joined: Sun Aug 05, 2012 8:39 pm
Location: Hocking hills Ohio
Top

Re: Ethel has began

Postby Oldragbaggers » Mon May 13, 2013 8:14 pm

Your build is looking great. I have chassis envy.
Life is sooooo good.........
Sail...camp....bike...repeat
Becky

Build Journal http://www.tnttt.com/viewtopic.php?f=50&t=45917
Visit our blog at http://www.oldragbaggers.com
Image Image
User avatar
Oldragbaggers
Gold Donating Member
 
Posts: 1842
Images: 331
Joined: Mon Aug 01, 2011 9:22 pm
Location: Essex, MD
Top

Re: Ethel has began

Postby Ben » Mon May 13, 2013 8:20 pm

Lol women can weld too... Jessie combs check her out. You just can't be afraid to get burnt or shocked lol... It only hurts for a little bit. :D
Going broke quick fixing a bad start!
Ben
Teardrop Master
 
Posts: 200
Images: 221
Joined: Sun Aug 05, 2012 8:39 pm
Location: Hocking hills Ohio
Top

Re: Ethel has began

Postby Silvrzuki77 » Tue May 14, 2013 11:42 am

Ben on page 4 middle of the page what did you use for the trim for the corners around the walls and ceiling?
Silvrzuki77
Teardrop Master
 
Posts: 188
Joined: Thu Jun 21, 2012 3:55 pm
Top

Re: Ethel has began

Postby Ben » Tue May 14, 2013 11:50 am

It's 1/4" x3/4" oak trim it took a bit to bet it to conform just take you time and brace it
Going broke quick fixing a bad start!
Ben
Teardrop Master
 
Posts: 200
Images: 221
Joined: Sun Aug 05, 2012 8:39 pm
Location: Hocking hills Ohio
Top

Re: Ethel has began

Postby KCStudly » Tue May 14, 2013 7:29 pm

I like the jacks in the outer position shown in the first pic.

The wider stance will provide a more stable base, the mitered corners look like you planned it that way, and with just the hex nut sticking out you will never have to hunt for it when you are trying to engage the crank wrench. Seems unlikely to me that you will ever stand or walk so close to the corner (although I could be wrong on that).

Looking good! :thumbsup:
KC
My Build: The Poet Creek Express Hybrid Foamie

Poet Creek Or Bust
Engineering the TLAR way - "That Looks About Right"
TnTTT ORIGINAL 200A LANTERN CLUB = "The 200A Gang"
Green Lantern Corpsmen
User avatar
KCStudly
Donating Member
 
Posts: 9640
Images: 8169
Joined: Mon Feb 06, 2012 10:18 pm
Location: Southeastern CT, USA
Top

Re: Ethel has began

Postby Ben » Tue May 14, 2013 8:12 pm

Ok. I need input I was looking at some options at jack placement let me know what you all think
Option A
Image

Option B
Image

Option C
Image

I know there's pro and cons with each, I just want opinions. I usually take a drill for the jacks, lazy I guess but oh well I go to enjoy myself not work. I would like to keep the back open for a water tank and ease of plumbing and access. Ill be putting supporting steel over the jacks just to keep them strong in the middle as well as the ends.
Going broke quick fixing a bad start!
Ben
Teardrop Master
 
Posts: 200
Images: 221
Joined: Sun Aug 05, 2012 8:39 pm
Location: Hocking hills Ohio
Top

Re: Ethel has began

Postby bc toys » Tue May 14, 2013 8:43 pm

option A from me but like that frame work Ben
bc toys
2000 Club
2000 Club
 
Posts: 2217
Images: 42
Joined: Sun Jun 28, 2009 2:45 pm
Location: LAS VEGAS NV
Top

Re: Ethel has began

Postby Shadow Catcher » Wed May 15, 2013 1:17 pm

very good looking frame, looking forward to the rest of the build.
User avatar
Shadow Catcher
Donating Member
 
Posts: 6008
Images: 234
Joined: Sat Apr 11, 2009 8:26 pm
Location: Metamora, OH
Top

PreviousNext

Return to Build Journals

Who is online

Users browsing this forum: No registered users and 9 guests