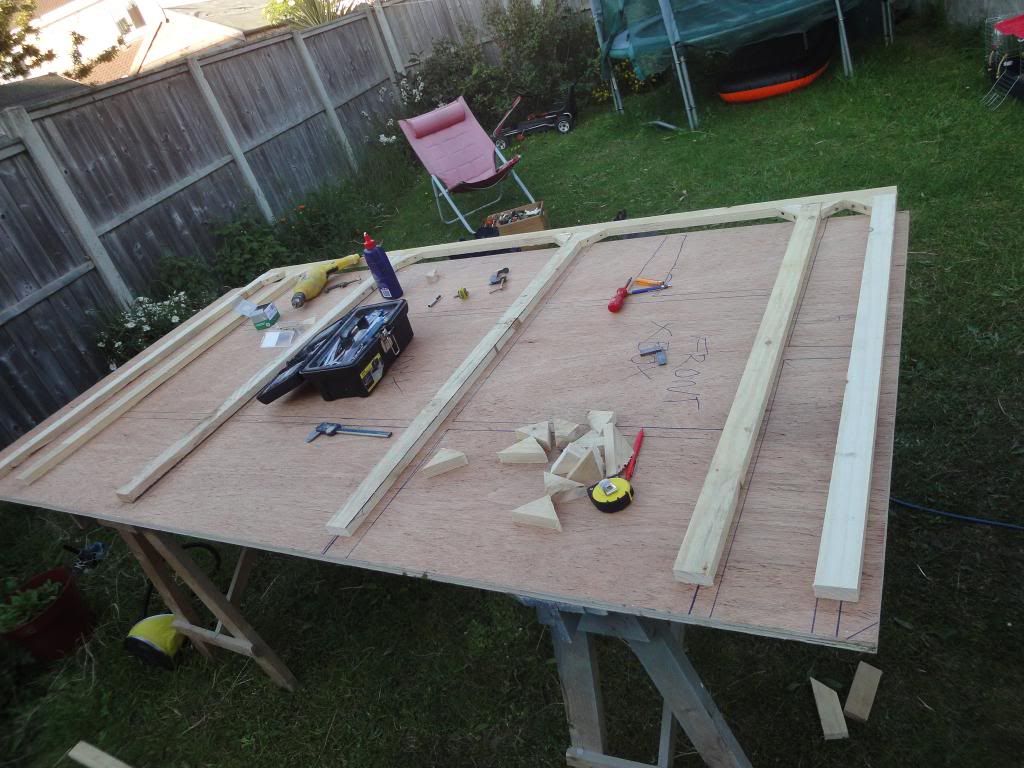
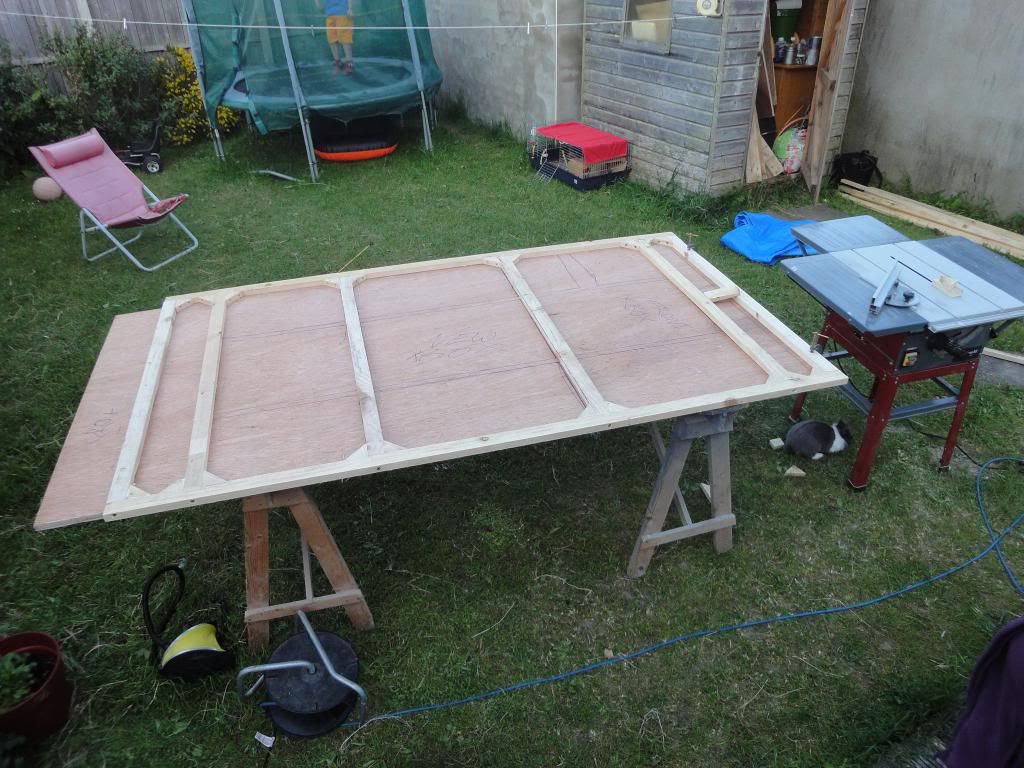
Here's Humphrey..Now a trolly top..Finished!!

...ask your questions in the appropriate forums BUT document your build here...preferably in a single thread...dates for updates, are appreciated....

Re: Here's Humphrey..

Postby 3nero » Fri Jun 07, 2013 4:53 pm

danlott wrote:Always great to see a new trolley top "Molly Croft Roof" idea. Will be watching your build progress.

Dan


Cheers Hope it works out in real life the way it's working in my head.
Measure once, cut twice....throw away and repeat.
Image Image

http://www.tnttt.com/viewtopic.php?t=55971
3nero
Teardrop Master
 
Posts: 129
Joined: Mon May 13, 2013 3:40 pm
Location: Co.Wicklow Ireland

Re: Here's Humphrey..

Postby 3nero » Fri Jun 07, 2013 5:06 pm

donal94 wrote:Are the 4mm sheets from goodwins I can't see them for €8


I think the sheets are €11 each but if you buy 10 or more the price drops per sheet.. so 10 sheets was cheaper to buy than 9. If you look at the prices of the sheets it has the same discount on most of them.

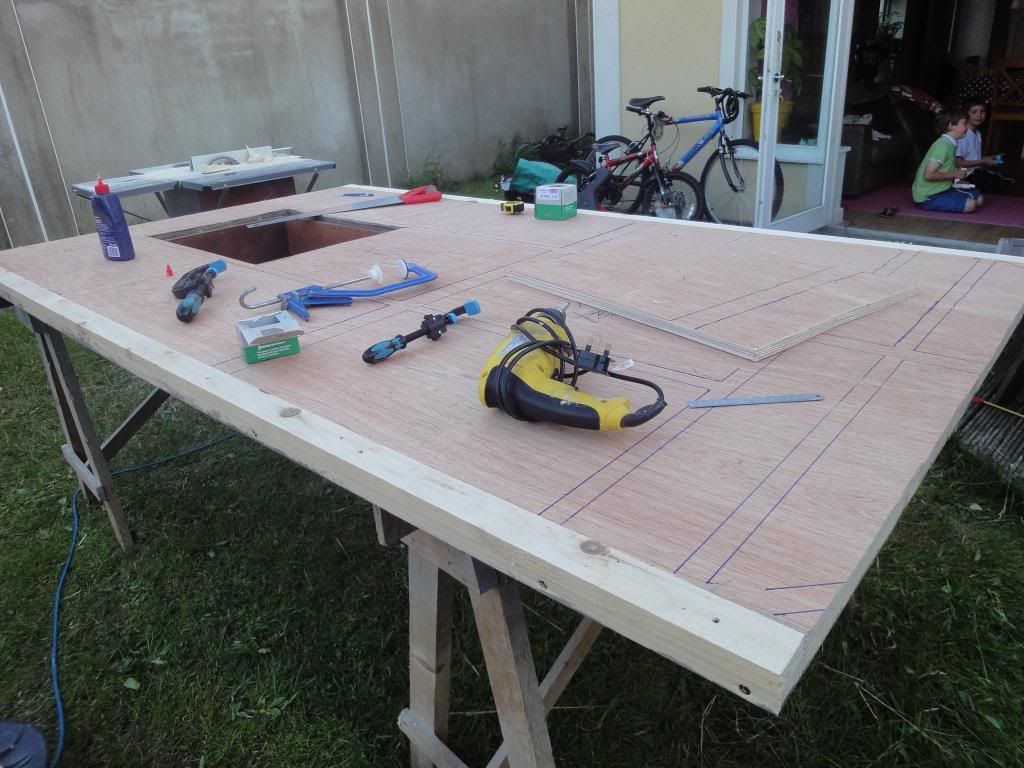
Well here's todays effort
Saw dust has been officially spilt :D

Image

Image

It was getting late so i had to pull the plug on the saw to keep the neighbours happy.
Measure once, cut twice....throw away and repeat.
Image Image

http://www.tnttt.com/viewtopic.php?t=55971
3nero
Teardrop Master
 
Posts: 129
Joined: Mon May 13, 2013 3:40 pm
Location: Co.Wicklow Ireland

Re: Here's Humphrey..

Postby donal94 » Fri Jun 07, 2013 5:11 pm

God you're powering ahead keep up the good work
donal94
Teardrop Builder
 
Posts: 48
Joined: Tue May 17, 2011 10:59 am
Top

Re: Here's Humphrey..Now a trolly top

Postby 3nero » Sat Jun 08, 2013 4:39 pm

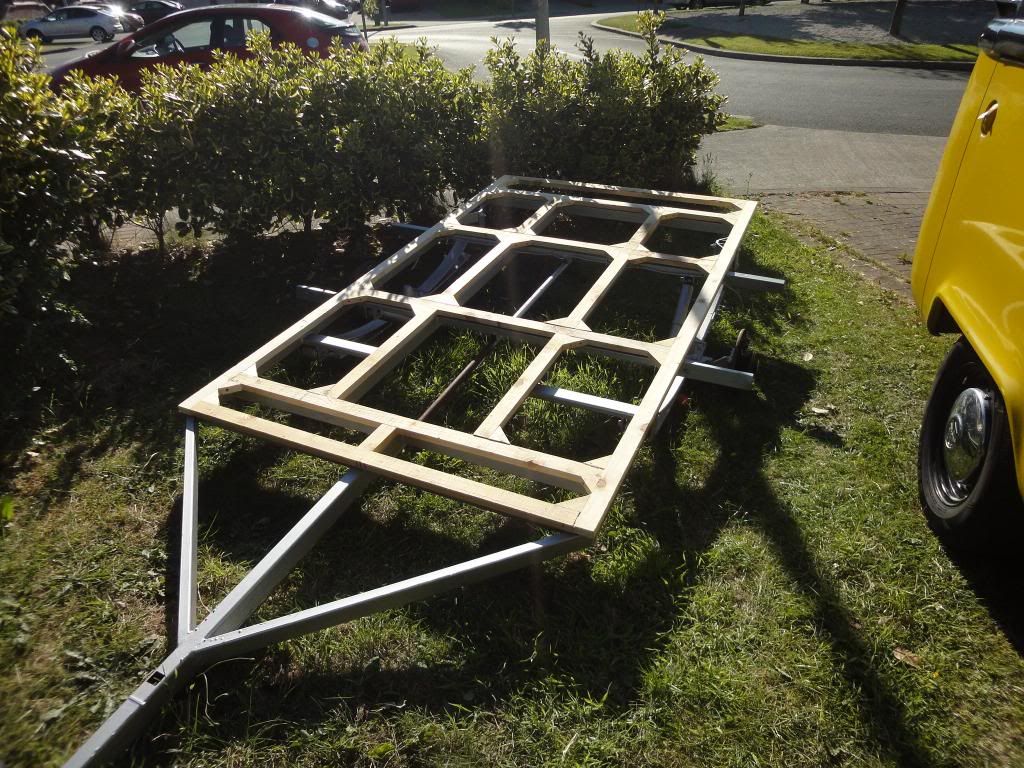
Managed to get a bit more done today.

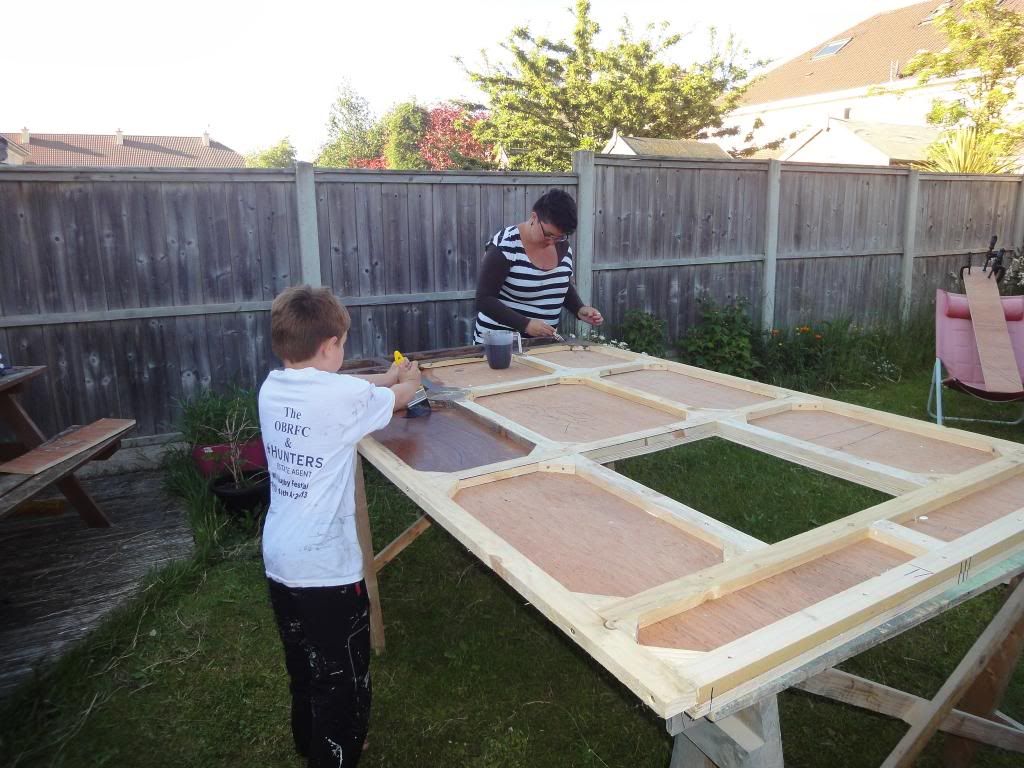
Finished of the frame and tried it on the trailer...

Image

It seems to fit.

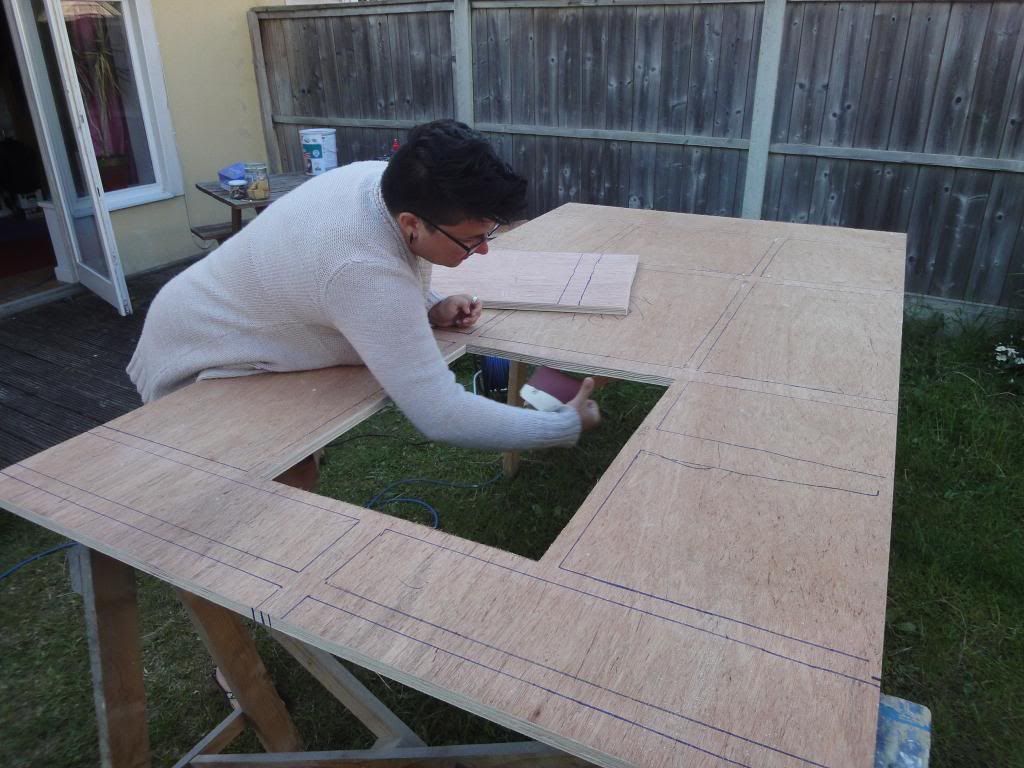
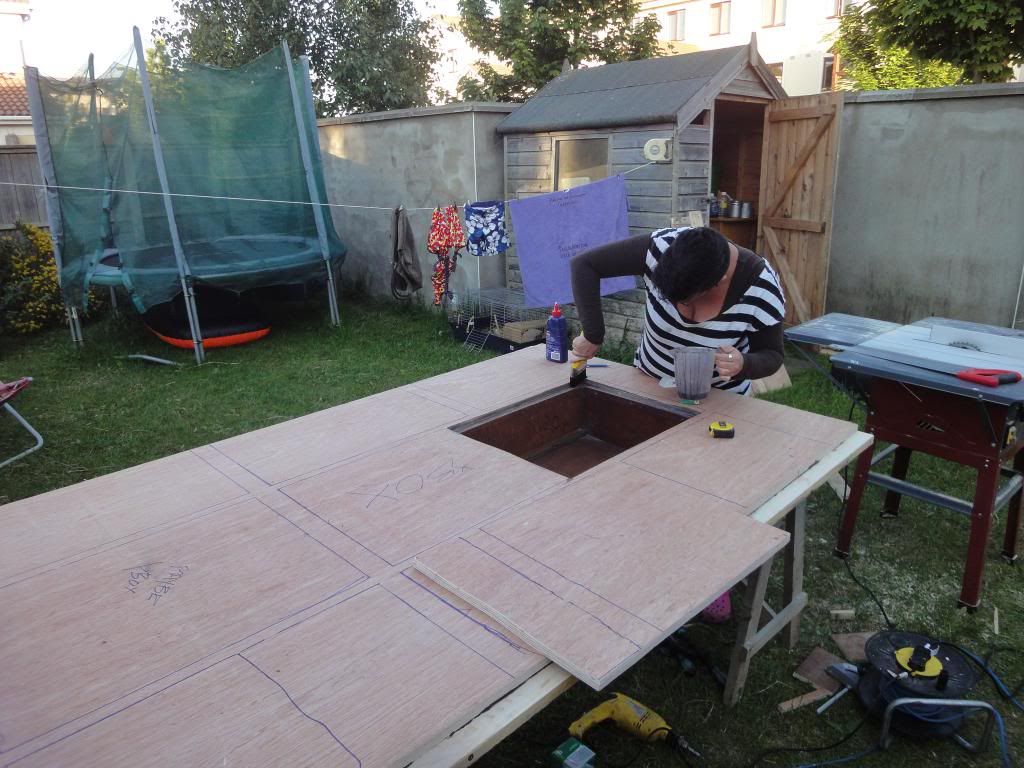
Then i cut the hole for the under bed storage box.. used one of my slaves to sand the edges :R

Image

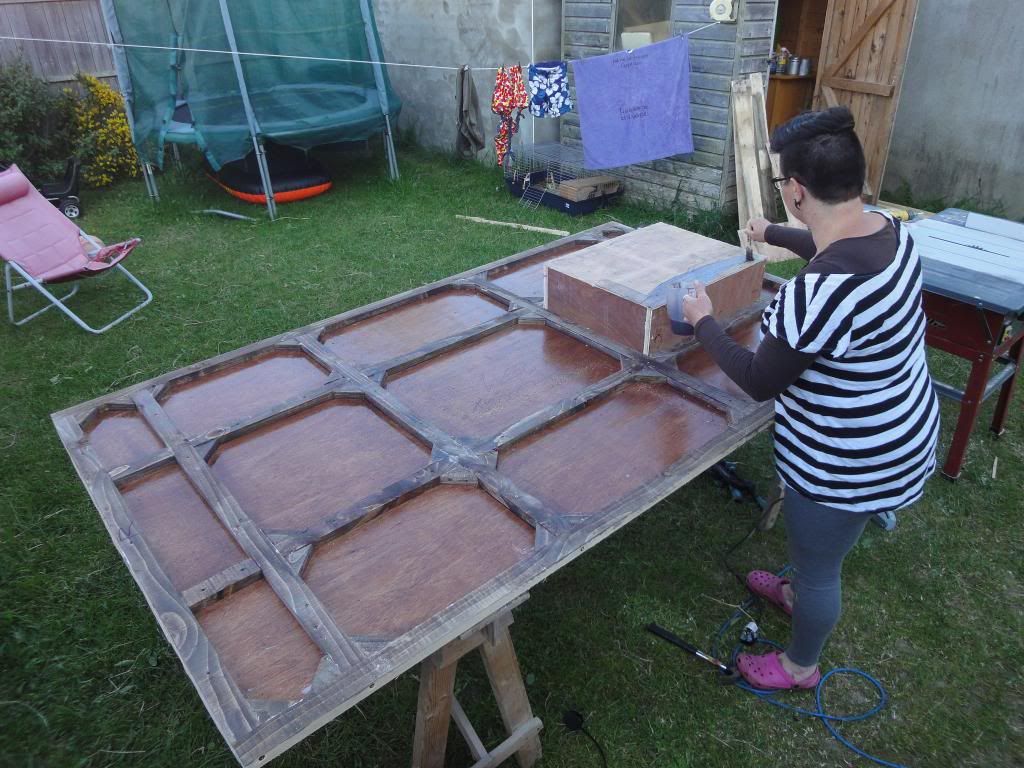
Then glued and screwed the frame to the floor... first coat of varnish going on while i make the storage box. We are using varnish with a stain in it because we got a free gallon of the stuff.

Image

Box done and in getting varnished.

Image

Inside and out for the box..

Image

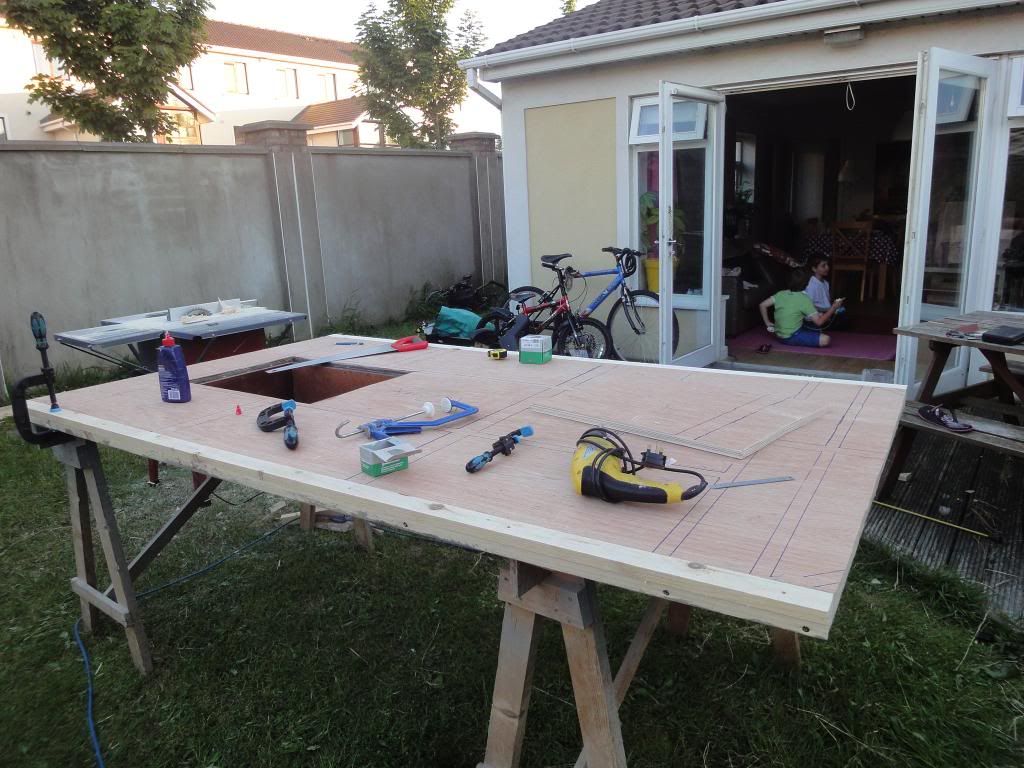
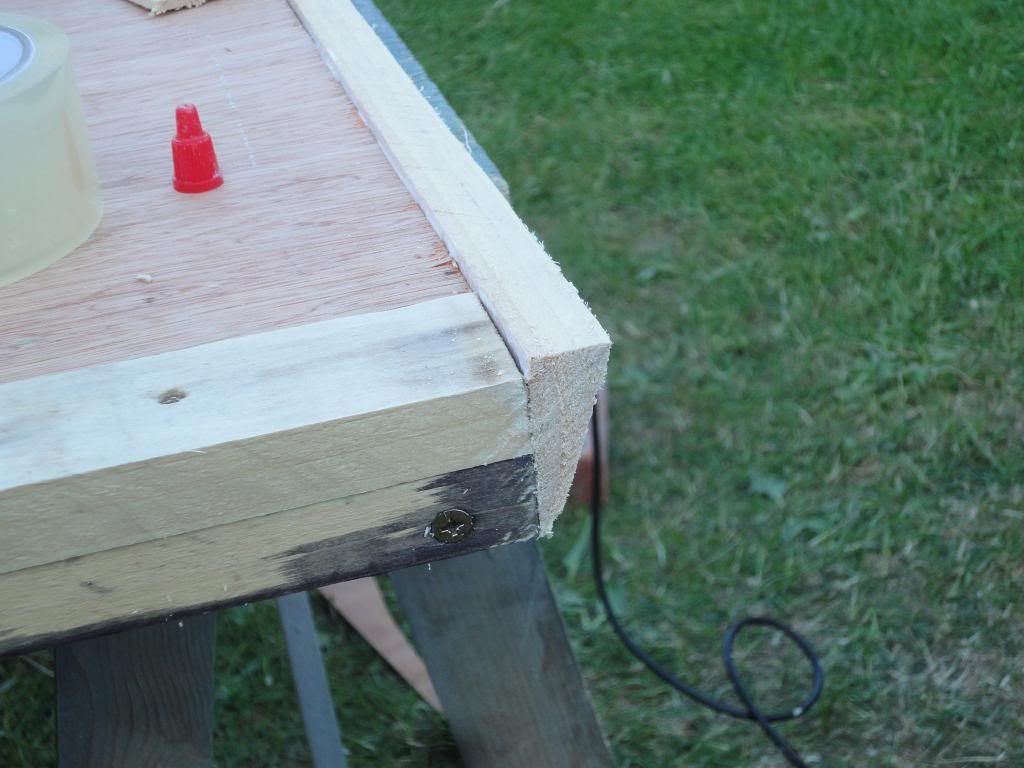
final bit for today was to rip down a 2x1 to 2 and em... less than 1 to match the floor height either side of the ply sheet.This gives me a width of 4'4" now and better wood to attach the walls to later.

Image

Image

So that's all for today, hoping to make a start on walls tomorrow 8)
Measure once, cut twice....throw away and repeat.
Image Image

http://www.tnttt.com/viewtopic.php?t=55971
3nero
Teardrop Master
 
Posts: 129
Joined: Mon May 13, 2013 3:40 pm
Location: Co.Wicklow Ireland
Top

Re: Here's Humphrey..Now a trolly top

Postby 3nero » Sun Jun 09, 2013 5:06 pm

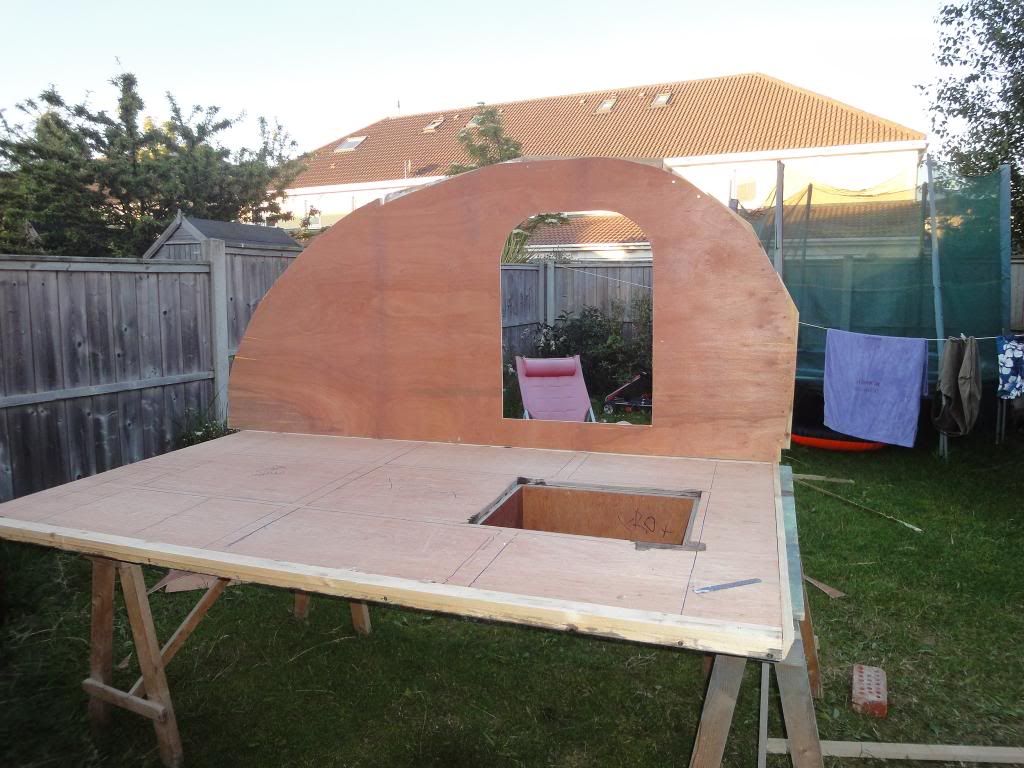
Well didn't get as much done as i wanted to day but did make some progress.

First i stuck on the angled bit on the front for the roof to meet later on.

Image

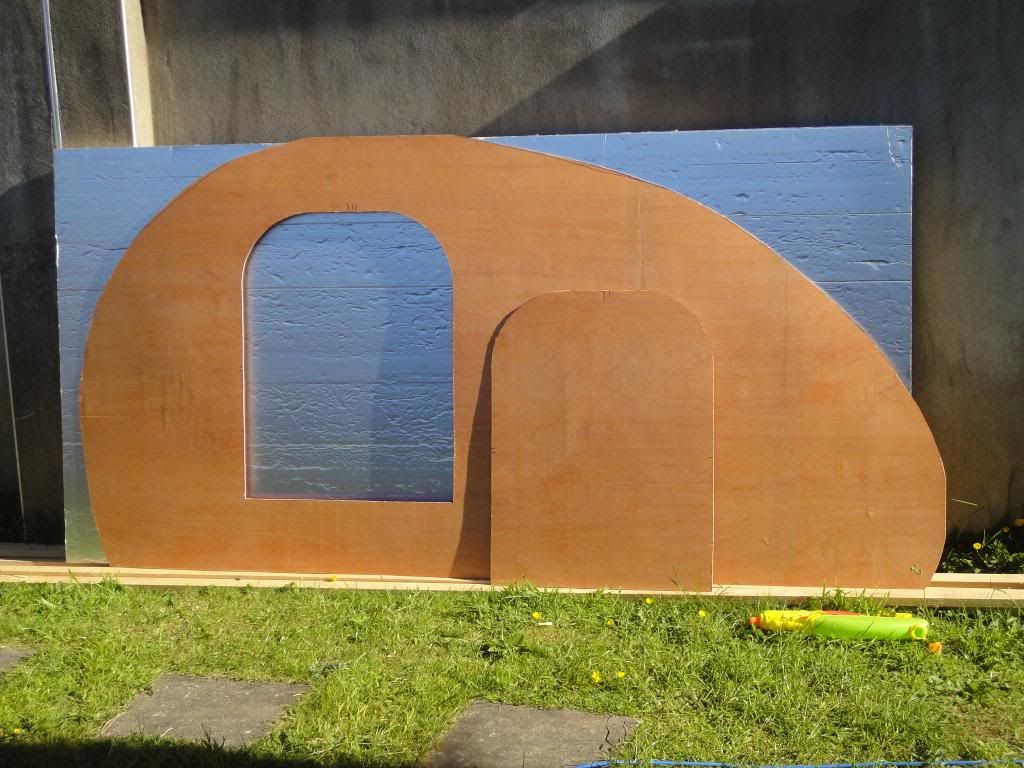
Then i got a profile cut and cut the door out off it.. I'm using the piece i cut out to make the door later.

Image

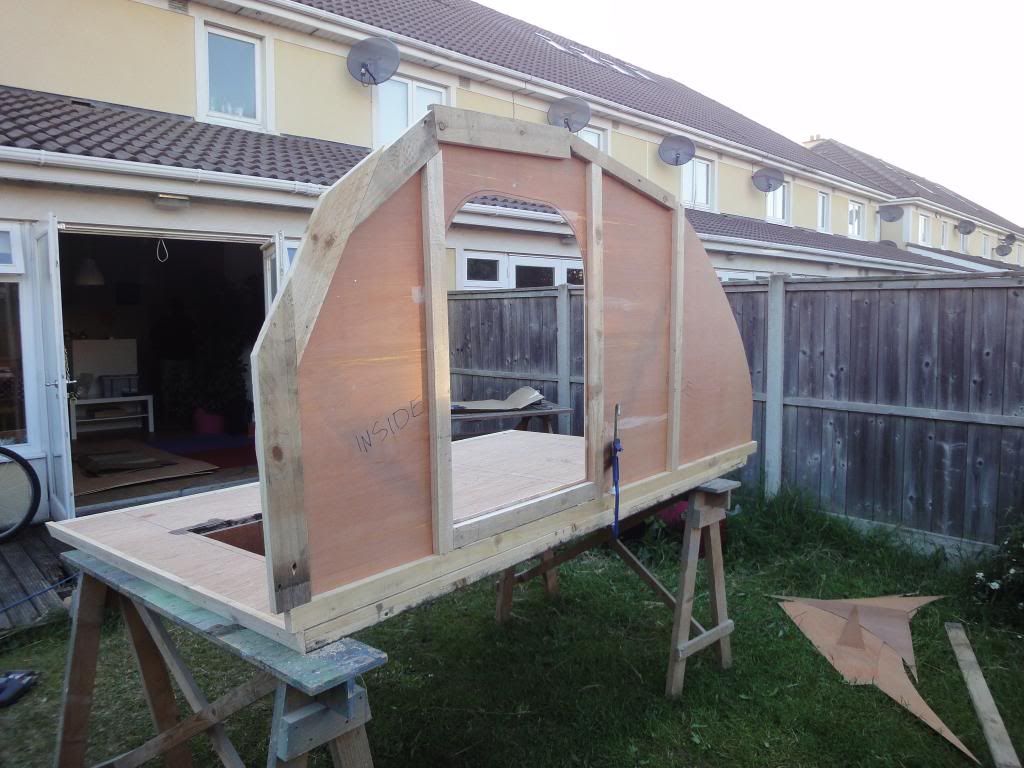
Then i cut the inside profile and started the framing. I cut the inside door opening 1cm smaller all round to act as a door stop... i hope it works.

Image

I will trim the bits of framing that are sticking out later...

Image

then we ran out of glue and screws. which meant an end to the days work.
Measure once, cut twice....throw away and repeat.
Image Image

http://www.tnttt.com/viewtopic.php?t=55971
3nero
Teardrop Master
 
Posts: 129
Joined: Mon May 13, 2013 3:40 pm
Location: Co.Wicklow Ireland
Top

Re: Here's Humphrey..Now a trolly top

Postby Oldragbaggers » Sun Jun 09, 2013 6:41 pm

Looks like a good days work though. I love that the kids are involved. Camping in it will be so meaningful for them since they helped build it. Great family project!!
Life is sooooo good.........
Sail...camp....bike...repeat
Becky

Build Journal http://www.tnttt.com/viewtopic.php?f=50&t=45917
Visit our blog at http://www.oldragbaggers.com
Image Image
User avatar
Oldragbaggers
Gold Donating Member
 
Posts: 1842
Images: 331
Joined: Mon Aug 01, 2011 9:22 pm
Location: Essex, MD
Top

Re: Here's Humphrey..Now a trolly top

Postby mezmo » Sun Jun 09, 2013 8:06 pm

The MollyCroft/TrolleyTop approach is a very creative way
to deal with your conflicting trailer and sheet goods dimensions.
I'm sure you'll be happy with the design when it's completed.

I've often wondered if building each 'side' of the trailer body,
like mirrored cabinets [including the MolleyCroft side beams],
and then joining them together later with the center section/roof,
would be a good approach.

And the MollyCroft idea could be carried further to have the center
section go from the front wall base over to the rear bumper...

Cheers,
Norm/mezmo
If you have a house - you have a hobby.
User avatar
mezmo
1000 Club
1000 Club
 
Posts: 1817
Images: 194
Joined: Fri Jan 01, 2010 4:11 am
Location: Columbia, SC
Top

Re: Here's Humphrey..Now a trolly top

Postby 3nero » Tue Jun 18, 2013 6:16 pm

mezmo wrote:The MollyCroft/TrolleyTop approach is a very creative way
to deal with your conflicting trailer and sheet goods dimensions.
I'm sure you'll be happy with the design when it's completed.

I've often wondered if building each 'side' of the trailer body,
like mirrored cabinets [including the MolleyCroft side beams],
and then joining them together later with the center section/roof,
would be a good approach.

And the MollyCroft idea could be carried further to have the center
section go from the front wall base over to the rear bumper...

Cheers,
Norm/mezmo
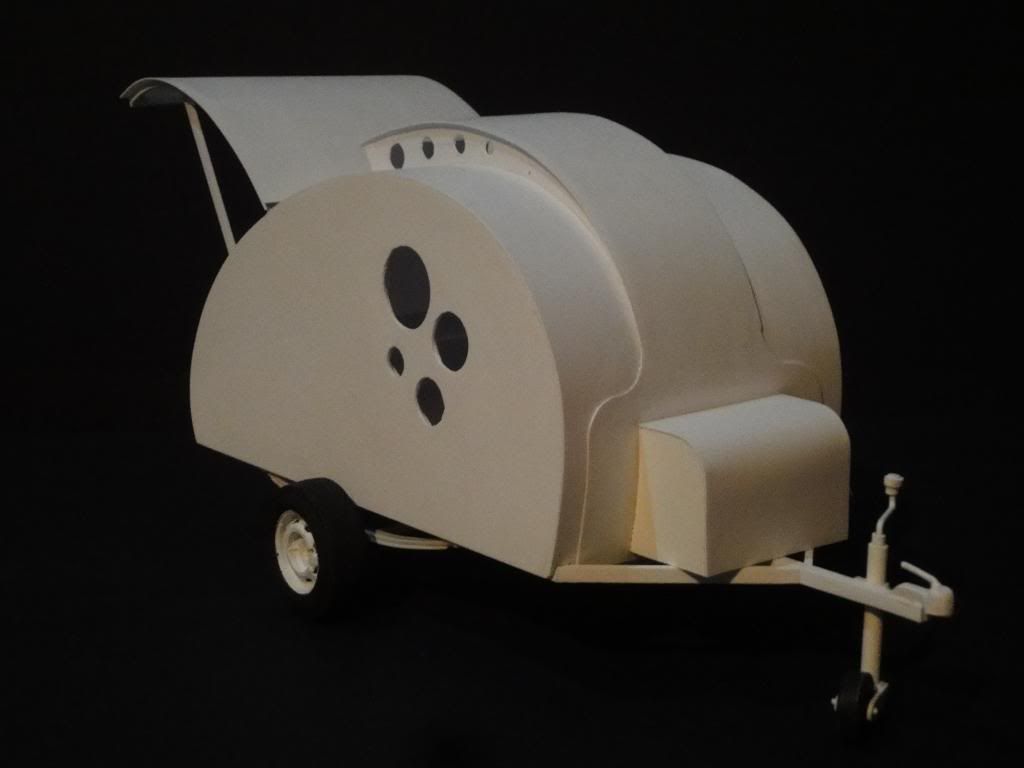

If the trolley top went all the way to the back it would only leave the middle section of raised roof to hinge the rear hatch. although if it was built strong enough i'm sure it could work.

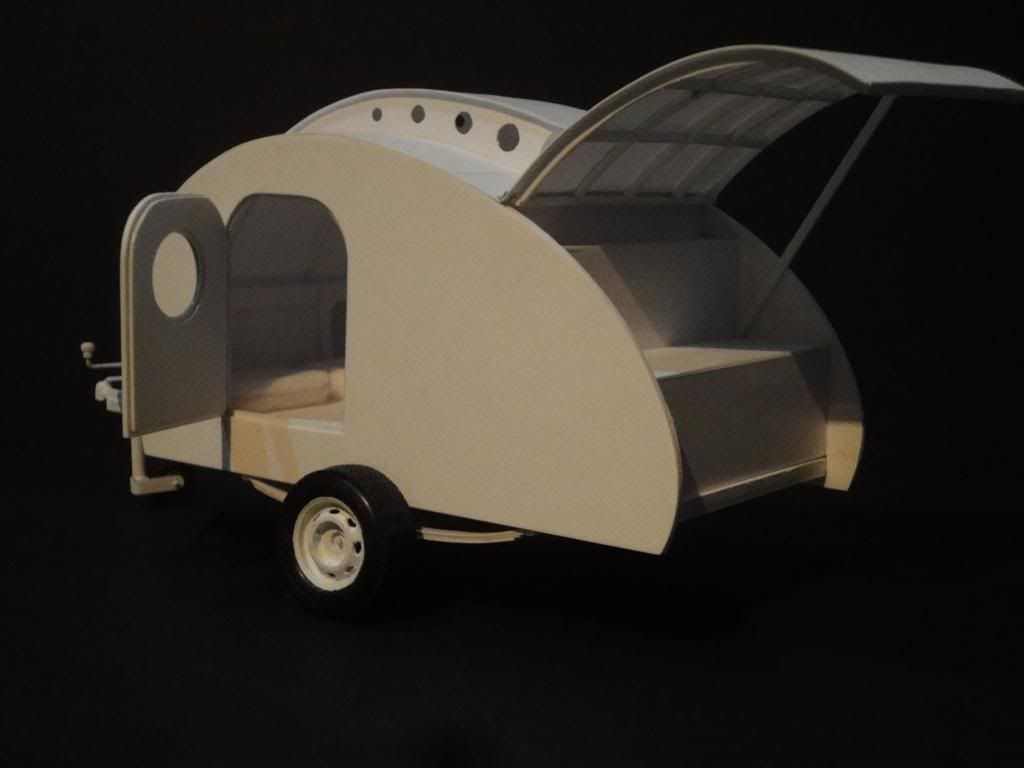
Anyway due to weather and work i did'nt get anything done on humphrey in the last week...6 straight days of rain..So instead i decided to go small scale because some parts of the build where sticking in my brain and i needed to get them out.

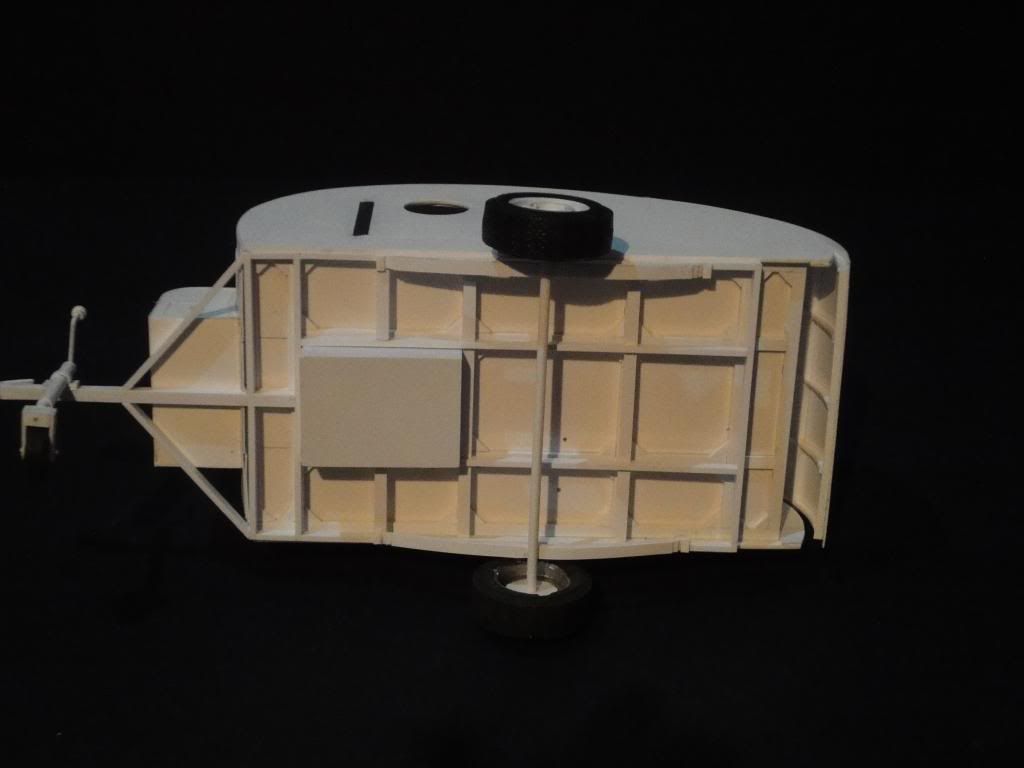
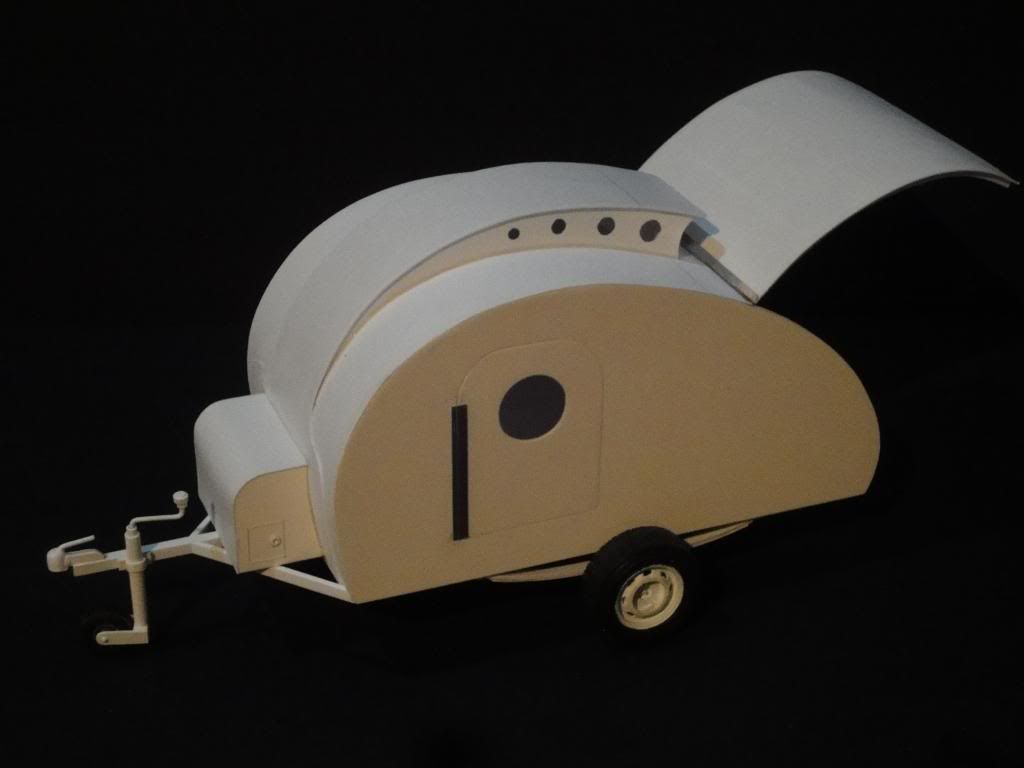
I started by cutting up my plastic into scale sized sheets in the amount of the real size sheets i have. I then built a model the same way i'm building the real trailer.
The model has taught me a few things....

Image

Image

Image

Image

...the first thing i learned is i don't have enough wood to skin the inside of the rear hatch and the second was i need to redesign the rear galley floor slightly because there will be a large gap between the cupboards and the hatch which could suck up a lot of road dirt when on the move. The model has been named little hump and willl be used to design the galley later when we get to that stage.
Measure once, cut twice....throw away and repeat.
Image Image

http://www.tnttt.com/viewtopic.php?t=55971
3nero
Teardrop Master
 
Posts: 129
Joined: Mon May 13, 2013 3:40 pm
Location: Co.Wicklow Ireland
Top

Re: Here's Humphrey..Now a trolly top

Postby KCStudly » Tue Jun 18, 2013 7:43 pm

Wow, that is a seriously detailed model!

Is it scratch built or did you start with some sort of kit for the jack wheel, hitch, etc.? Maybe a 3D printer?

If a kit, which one? If not, and hand built, WOW! Great detail.

I noticed that the leaf springs are really long (which should yield a nice soft ride). Is that to your plan, or...?

Nice model. :thumbsup: :applause: :thumbsup: :applause: :thumbsup: :applause:
KC
My Build: The Poet Creek Express Hybrid Foamie

Poet Creek Or Bust
Engineering the TLAR way - "That Looks About Right"
TnTTT ORIGINAL 200A LANTERN CLUB = "The 200A Gang"
Green Lantern Corpsmen
User avatar
KCStudly
Donating Member
 
Posts: 9640
Images: 8169
Joined: Mon Feb 06, 2012 10:18 pm
Location: Southeastern CT, USA
Top

Re: Here's Humphrey..Now a trolly top

Postby 3nero » Tue Jun 18, 2013 7:57 pm

KCStudly wrote:Wow, that is a seriously detailed model!

Is it scratch built or did you start with some sort of kit for the jack wheel, hitch, etc.? Maybe a 3D printer?

If a kit, which one? If not, and hand built, WOW! Great detail.

I noticed that the leaf springs are really long (which should yield a nice soft ride). Is that to your plan, or...?

Nice model. :thumbsup: :applause: :thumbsup: :applause: :thumbsup: :applause:


Thanks...it's 99.9% scratch built in 1:12 scale (or 1inch=1foot). the wheel for the jack was borrowed from a 1:50 scale truck model. the rest i made myself. my everyday job is as a modelmaker so this was just a quick model to see if my plans are going to work. The leaf springs are how they came on the secondhand chassis. I didn't bother with shocks and i still havn't settled on the fender design yet. Oh and by the way..we model makers hate those 3D printers..not nice being replaced by a machine :(
Measure once, cut twice....throw away and repeat.
Image Image

http://www.tnttt.com/viewtopic.php?t=55971
3nero
Teardrop Master
 
Posts: 129
Joined: Mon May 13, 2013 3:40 pm
Location: Co.Wicklow Ireland
Top

Re: Here's Humphrey..Now a trolly top

Postby KCStudly » Tue Jun 18, 2013 8:16 pm

It was a compliment of the highest order, the fact that you, a true craftsman, can make something so time consuming for us mere mortals to even consider,and so exacting.

Sweet.

Mind if I ask what business you are in making models? I am impressed. :thumbsup: :applause:
KC
My Build: The Poet Creek Express Hybrid Foamie

Poet Creek Or Bust
Engineering the TLAR way - "That Looks About Right"
TnTTT ORIGINAL 200A LANTERN CLUB = "The 200A Gang"
Green Lantern Corpsmen
User avatar
KCStudly
Donating Member
 
Posts: 9640
Images: 8169
Joined: Mon Feb 06, 2012 10:18 pm
Location: Southeastern CT, USA
Top

Re: Here's Humphrey..Now a trolly top

Postby 3nero » Wed Jun 19, 2013 7:42 pm

KCStudly wrote:It was a compliment of the highest order, the fact that you, a true craftsman, can make something so time consuming for us mere mortals to even consider,and so exacting.

Sweet.

Mind if I ask what business you are in making models? I am impressed. :thumbsup: :applause:


I'm an architectural model maker, but we also do models for museums and movies, but since the recession hit we have mostly being doing maritime models, big fancy yachts and ships. we also made models for the military but if i told you about that someone would have to kill you :R

I spend my working days building stuff to other peoples plans so in my time off i like to build stuff to my own plans. I built little Hump in about 10 hours which would be considered a quick model because most of the models we build take around 3 to 400 hours to build. Little hump is missing a lot of detail that i might add later...stuff like lights and the cupboards plus the cooker and sink are all missing. but the main reason for the model was because i couldn't quite picture in my head how the inside of the trolley top would work where it joins at the front. you can't tell from the pictures but the walls have the same framing inside as the real trailer. i had to build it the same way as the real one just to work out how everything worked. It saved me from making mistakes i was on the way to making later on, which saved me from buying more wood to fix those mistakes.
But today i got the rest of the one wall framed and installed the insulation and noticed that the foam is 1/8 thicker than the wood i'm using to frame with. I'm hoping it will squash down when i screw on the outer skin, if it doesn't i'm going to have to try something to make it fit.
Measure once, cut twice....throw away and repeat.
Image Image

http://www.tnttt.com/viewtopic.php?t=55971
3nero
Teardrop Master
 
Posts: 129
Joined: Mon May 13, 2013 3:40 pm
Location: Co.Wicklow Ireland
Top

Re: Here's Humphrey..Now a trolly top

Postby pchast » Wed Jun 19, 2013 8:34 pm

:thinking: I'd be reluctant to try to squash the insulation. The pressure inside your structure may loosen the wall up.
Pop glue joints? Unless its something porous like a fiberglass bat. I've read on here of people sanding or
even planing insulation to thickness.

I have no personal experience about this...

I'm also in awe of your modeling skills. :)
pchast
Platinum Donating Member
 
Posts: 2065
Images: 97
Joined: Mon Jan 28, 2013 5:47 pm
Location: Athens, NY
Top

Re: Here's Humphrey..Now a trolly top

Postby doug hodder » Wed Jun 19, 2013 9:59 pm

It's been my experience that if you want it to "squash" down, it won't do it when you put on the skin. I'd think you would be better off to "pre-squash" it prior to installing it. I do it by setting the material on the floor and walking on it to compress the material. You won't get enough pressure/ sq. in. to get it to compress and hold it with just the skin. Just what I've experienced. It does depend on the type of styro. that you are using for insulation though. There are lots of more involved methods, but this is a cheap quick one for something that will never be seen. Doug
doug hodder
*Snoop Dougie Doug
 
Posts: 12625
Images: 562
Joined: Tue Dec 14, 2004 11:20 pm
Top

Re: Here's Humphrey..Now a trolly top

Postby mezmo » Thu Jun 20, 2013 3:19 am

I guess this is probably a matter of 'personal choice" but, have
you thought of having two doors ? It would make using the TD
so much more convenient, besides the two routes of escape
safety advantage.
If you have a house - you have a hobby.
User avatar
mezmo
1000 Club
1000 Club
 
Posts: 1817
Images: 194
Joined: Fri Jan 01, 2010 4:11 am
Location: Columbia, SC
Top

PreviousNext

Return to Build Journals

Who is online

Users browsing this forum: No registered users and 17 guests