
It rains here 80% of the year. We go a couple of weeks with no rain and they start banning hose pipes
 I can't build when it's raining and i know it will be coming back soon. I can always go back later and smooth out the rough edges
Teardrops n Tiny Travel Trailersor t n ttt for short (tnttt.com) |
![]() by 3nero » Sat Jul 20, 2013 6:23 pm
by 3nero » Sat Jul 20, 2013 6:23 pm
I can't build when it's raining and i know it will be coming back soon. I can always go back later and smooth out the rough edges ![]() by 3nero » Mon Jul 22, 2013 5:25 pm
by 3nero » Mon Jul 22, 2013 5:25 pm


![]() by Ron Dickey » Mon Jul 22, 2013 9:20 pm
by Ron Dickey » Mon Jul 22, 2013 9:20 pm
 nice job
  Love it.

![]() by 3nero » Sat Jul 27, 2013 4:45 pm
by 3nero » Sat Jul 27, 2013 4:45 pm
Ron Dickey wrote:Very Very Very
You are moving right along. can you put your pictures in the Tolley top Questions site
viewtopic.php?f=21&t=56057
I think it would be a swell addition.
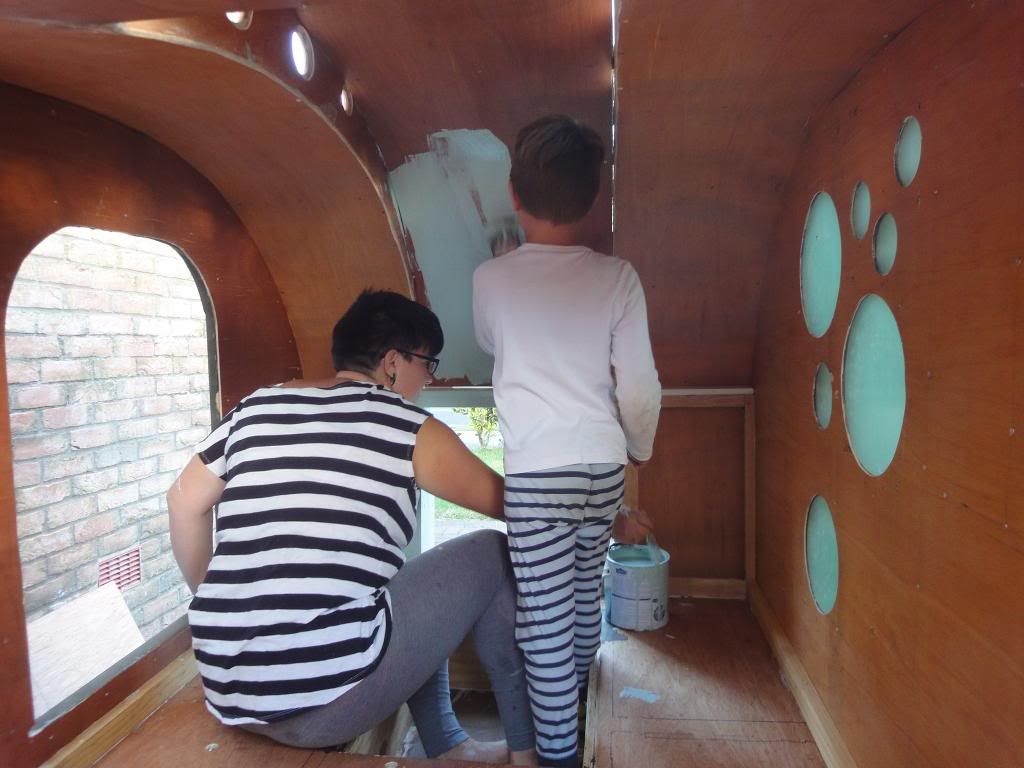
The fogging the glass idea is terrific.
Looking forward to watch more of your build.
Ron


![]() by 3nero » Mon Jul 29, 2013 5:12 pm
by 3nero » Mon Jul 29, 2013 5:12 pm


![]() by rebapuck » Mon Jul 29, 2013 10:15 pm
by rebapuck » Mon Jul 29, 2013 10:15 pm


![]() by doug hodder » Fri Aug 02, 2013 8:08 am
by doug hodder » Fri Aug 02, 2013 8:08 am
![]() by 3nero » Sun Aug 04, 2013 7:00 pm
by 3nero » Sun Aug 04, 2013 7:00 pm


![]() by 3nero » Sun Aug 18, 2013 7:59 pm
by 3nero » Sun Aug 18, 2013 7:59 pm


![]() by stonykill » Mon Aug 19, 2013 5:32 am
by stonykill » Mon Aug 19, 2013 5:32 am

![]() by 3nero » Mon Aug 26, 2013 4:48 pm
by 3nero » Mon Aug 26, 2013 4:48 pm


![]() by stonykill » Mon Aug 26, 2013 5:07 pm
by stonykill » Mon Aug 26, 2013 5:07 pm
![]() by rebapuck » Thu Aug 29, 2013 11:22 pm
by rebapuck » Thu Aug 29, 2013 11:22 pm
![]() by 3nero » Sat Aug 31, 2013 6:26 pm
by 3nero » Sat Aug 31, 2013 6:26 pm


![]() by Johnysteam » Thu Sep 19, 2013 5:18 am
by Johnysteam » Thu Sep 19, 2013 5:18 am

Users browsing this forum: No registered users and 15 guests

