first hiccup!!

Anything to do with mechanical, construction etc

first hiccup!!

Postby TwoStarsTeardrop » Sun Feb 09, 2014 7:20 pm
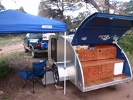
ok, we bought a tear drop that was well built but only half done - then, I found these old doors on the side of a country road, and attached them to the existing table structure built in the galley. now, the problem can be seen below - the door to the galley no longer shuts because of the doors. I feared this would be a problem but was gun-ho and put the doors on. I am really hoping to not have to tear out the insides of the galley, but we really want doors on the cabinets inside the gally and there is no room to do that unless we start over. SO - any ideas? I thought about using rubber insulation and lining the gap. what else can be done other than ripping it all out? :thinking:

Image

Image
User avatar
TwoStarsTeardrop
Teardrop Inspector
 
Posts: 13
Joined: Sun Jan 19, 2014 3:34 pm
Location: Providence Village, TX

Re: first hiccup!!

Postby Gage » Sun Feb 09, 2014 11:00 pm

I'm not going to say a thing because it would most likely offend you and then I would get my hand slapped by an admin. :o It is fixable without tearing into the galley. Think it out and then ask for opinions. That's how you learn to build a teardrop. ;)
Image Image Image
Remember 'Teardrop Time'.......Take your time, you don't have to have it finished NOW.
User avatar
Gage
8000 Club
8000 Club
 
Posts: 8321
Images: 28
Joined: Sat Apr 17, 2004 9:14 pm
Location: Palmdale, CA

Re: first hiccup!!

Postby bobnlyd » Sun Feb 09, 2014 11:22 pm

thinner spars you have a pattern..otherwise youll have to cut your cabinets back
bobnlyd
Teardrop Builder
 
Posts: 34
Images: 0
Joined: Fri May 04, 2012 10:58 pm
Top

Re: first hiccup!!

Postby grant whipp » Sun Feb 09, 2014 11:40 pm

Yes, those ribs are massive and could easily be cut back to nearly half as broad! Make an accurate pattern first, and if, after all the trimming is done, you have any springback, make a couple of 1/8" aluminum partners and screw them to each of the outside ribs.

Good Luck, and as always ...

CHEERS!
Celebrating Retirement after over 32 Years of Building, Promoting, Supporting, Supplying, Living the Lifestyle, and Loving Teardrop Trailers!
"Life Moves a Little Slower When You're On Teardrop Time"
The nature of Life, itself, is change ... "Those who matter, don't mind, and those who mind, don't matter."
Image
User avatar
grant whipp
Teardrop Manufacturer
 
Posts: 1815
Images: 117
Joined: Sun Jan 16, 2005 2:00 pm
Location: Jefferson State ('tween CA & OR!)
Top

Re: first hiccup!!

Postby bobhenry » Mon Feb 10, 2014 7:27 am

Creative trim work !

Just extend your side profile to match the hatch in the closed position with thin trim. It looks as if you have enough overhang on the skin to cover it !

I had a raw edge on the chuckwagon I wanted to hide and I added a scrap of bronze lexan from an older build to hide it.

Here is the before and after.

Image


Image
Growing older but not up !
User avatar
bobhenry
Ten Grand Club
Ten Grand Club
 
Posts: 10368
Images: 2623
Joined: Fri Feb 09, 2007 7:49 am
Location: INDIANA, LINDEN
Top

Re: first hiccup!!

Postby Colorado_Carter » Mon Feb 10, 2014 12:56 pm

I had a little distortion after building the rear hatch, I took a 1/2" flush trim router bit and with the hatch closed ran the router bit along the inside of the hatch to leave an exact profile of the the hatch. It also left room for weather stripping. Based on my experience now I would try a smaller 1/4" or 3/8" flush bit and shave off a bit at a time.
User avatar
Colorado_Carter
Teardrop Advisor
 
Posts: 72
Images: 102
Joined: Mon Jun 04, 2012 12:17 pm
Top

Re: first hiccup!!

Postby TwoStarsTeardrop » Mon Feb 10, 2014 1:18 pm

Colorado_Carter wrote:I had a little distortion after building the rear hatch, I took a 1/2" flush trim router bit and with the hatch closed ran the router bit along the inside of the hatch to leave an exact profile of the the hatch. It also left room for weather stripping. Based on my experience now I would try a smaller 1/4" or 3/8" flush bit and shave off a bit at a time.


stupid question, but if you dont ask, you dont know - would I be able to fit a router in that space and trim the wood back while its attached to the galley door?
User avatar
TwoStarsTeardrop
Teardrop Inspector
 
Posts: 13
Joined: Sun Jan 19, 2014 3:34 pm
Location: Providence Village, TX
Top

Re: first hiccup!!

Postby Woodbutcher » Mon Feb 10, 2014 1:22 pm

If the hatch closed before the doors were installed then remove the doors. If they were installed on a face frame, you could trim the doors down and make them inset doors. Those are doors mounted on the same plane as the face frame and would not protrude into the space. All the doors and face frames would be flush.
User avatar
Woodbutcher
Platinum Donating Member
 
Posts: 4191
Images: 45
Joined: Fri Mar 10, 2006 10:01 pm
Location: Chicago Suburbs
Top

Re: first hiccup!!

Postby aggie79 » Mon Feb 10, 2014 3:02 pm

It is difficult to tell what is causing the interference.

At first glance, it looks like your hatch ribs/spars were notched to clear the counter. Did you raise the counter height when you installed the doors? If so the notches probably won't align with the new counter height. You may be able to increase the size of the notch (on the side closest to the hinge) rather than cutting down the entire length of the spar.

If you didn't raise the counter height, then the depth/thickness of the doors is causing the interference. If this is the case, then you'll need to "thin down" the ribs/spars where they contact the cabinet doors.

If you can't tell what is hitting what, you may be able to place a camera inside of your teardrop and set it for a timed picture. Close (gently) the hatch until the picture is snapped. Then see where things are hitting.
Tom (& Linda)
For build info on our former Silver Beatle teardrop:
Build Thread

93503
User avatar
aggie79
Super Duper Lifetime Member
 
Posts: 5405
Images: 686
Joined: Tue Aug 07, 2007 5:42 pm
Location: Watauga, Texas
Top

Re: first hiccup!!

Postby Redneck Teepee » Mon Feb 10, 2014 3:53 pm

Woodbutcher wrote:If the hatch closed before the doors were installed then remove the doors. If they were installed on a face frame, you could trim the doors down and make them inset doors. Those are doors mounted on the same plane as the face frame and would not protrude into the space. All the doors and face frames would be flush.
I agree that this is the easy quick fix, once the doors are removed get you some clay or silly putty and put it on the corner of the existing cabinets, close the lid and it will show you just how much room you have to correct and modify.
I fear the day that technology will surpass our human interaction, the world will have a generation of idiot's.
User avatar
Redneck Teepee
Silver Donating Member
 
Posts: 853
Images: 21
Joined: Fri Dec 27, 2013 5:00 pm
Location: Central Ca.
Top

Re: first hiccup!!

Postby mezmo » Tue Feb 11, 2014 9:13 pm

It looks like you could trim the top and bottoms of the
doors some to fit, perhaps.

You also may be able to notch out the hatch spars a little
where they hit the counter/doors. The spars are large and
thick enough that 1/2 to maybe a max of 1 inch notch - just
do what's necessary to give clearance - shouldn't hurt their
function.

If that doesn't solve the problem, then I'd say to re-evaluate
the NEED to use them. In the big scheme of things , I'd set
them aside and save them for a future build, and not delay
your getting this one camp-able. Adapting these doors may
not be worth the cost in time and aggravation for this TD.

Cheers,
Norm/mezmo
If you have a house - you have a hobby.
User avatar
mezmo
1000 Club
1000 Club
 
Posts: 1817
Images: 194
Joined: Fri Jan 01, 2010 4:11 am
Location: Columbia, SC
Top

Re: first hiccup!!

Postby Jdw2717 » Tue Feb 11, 2014 10:41 pm

Woodbutcher wrote:If the hatch closed before the doors were installed then remove the doors. If they were installed on a face frame, you could trim the doors down and make them inset doors. Those are doors mounted on the same plane as the face frame and would not protrude into the space. All the doors and face frames would be flush.


^^^^^^^ This x 100. I would make the doors fit flush in the face frames. This will be easier to do and you won't risk messing up the hatch, sides or cabinet structure. Check out Rockler on line to find the hinges that will work for inset doors.
"Twenty years form now you will be more disappointed by the things that you didn't do than by the ones you did. So throw off the bowlines... Explore. Dream. Discover" Mark Twain

John & Tatanya
User avatar
Jdw2717
Teardrop Master
 
Posts: 180
Images: 34
Joined: Tue Feb 14, 2012 8:34 pm
Location: Knoxville, TN
Top


Return to Teardrop Construction Tips & Techniques

Who is online

Users browsing this forum: No registered users and 1 guest