The Poet Creek Express - Foamie Hybrid

Canvas covered foamies (Thrifty Alternatives...)

Moderator: eaglesdare

Re: The Poet Creek Express - Foamie Hybrid

Postby KCStudly » Thu Feb 13, 2014 9:38 pm

In machining, I'm not as precise as I'd like to be on some things, but then again most things that I do don't need to be that precise.

There was a day when I would have tried to hold the bolted stack of plates up against the belt sander to fair them all up, but now I just do the radii that way. :D

On each of these little projects I am learning new techniques and methods, hopefully becoming a better machinist. I know my carpentry skills have improved, probably ten fold.

So that is part of the challenge from the beginning. Do something, learn something, have a goal, get it done, get off the couch! :thumbsup:

Thanks for posting.
KC
My Build: The Poet Creek Express Hybrid Foamie

Poet Creek Or Bust
Engineering the TLAR way - "That Looks About Right"
TnTTT ORIGINAL 200A LANTERN CLUB = "The 200A Gang"
Green Lantern Corpsmen
User avatar
KCStudly
Donating Member
 
Posts: 9640
Images: 8169
Joined: Mon Feb 06, 2012 10:18 pm
Location: Southeastern CT, USA

Re: The Poet Creek Express - Foamie Hybrid

Postby capnTelescope » Thu Feb 13, 2014 11:57 pm

KCStudly wrote:On each of these little projects I am learning new techniques and methods, hopefully becoming a better machinist...

So that is part of the challenge from the beginning. Do something, learn something, have a goal, get it done, get off the couch! :thumbsup:


+1
Half the fun here is getting yourself into some situation, then getting yourself out of it. :D
I'll burn that bridge when I come to it.

Brad
ImageImageImage

Building the Bed & Breakfast
User avatar
capnTelescope
Lifetime member
 
Posts: 1222
Images: 368
Joined: Sun Jun 27, 2004 3:44 pm
Location: Round Rock, TX

Re: The Poet Creek Express - Foamie Hybrid

Postby KCStudly » Sat Feb 15, 2014 1:01 am

The weather was pretty far off from the forecast; it was about 42 deg F when I left work! 39 on top of the hill. The same in the loft. Karl must have had the wood stove stoked pretty well during the day, as it was 68 downstairs in the shop. Didn't take long to get the loft up to 49 and comfortable to work.

I made some simple ledger stock for the perimeter of the counter top; 3/4 (1x) x 5/8 inch with one corner rounded over 1/4 inch. Used pine that I scavenged from the router jig that was used to cut the fender and side table blocking pockets.

The drive pulley on the table saw slid on the motor shaft and came out from under the belt again, but I caught it quick this time and did not damage the belt. Was able to set it right again.

Did some material forecasting for the galley under counter supports. I hadn't worked out all of the details for these frames when I gave my cut list to Rover Mike, so some adjustments will be necessary. After figuring out a small transposition of panel names on my cut list (accounting for the supposed "missing" panel that wasn't... it was just named wrong), the only true mistake I have found is that the four panels for the under counter supports were cut short at 25 inches instead of the specified 28. I'll have to butt 3 inch wide strips of ply (cut from drops) to extend them, but they will be back under the counter so should not be obvious, if visible at all.

I have four 2x2 cedar spars, but I will switch the ones for the rear roof edge and hatch front (where the hatch hinge attaches) to oak or maple. I have a 1x2 for the front wall toe kick, but I may switch that with one of the 2x2's and use the 1x2 to make up for a piece on the rim of the tongue box that I am short. I may be able to rip the other one to use for some of the under counter dividers/support frames.

I had originally planned to fill these sandwiched dividers (5 mm + 1x flat way + 5 mm) with 3/4 foam and glue them up solid, but now I am thinking that I will just leave them hollow with the outboard panels glued on, just screw them into the floor and bulkhead, and only screw the inward facing panels on. That way I will have a little flexibility to reconfigure things later if I don't like the way my simple galley works.

The piece of maple that I have left from the 1x6 that I thought I might be able to use for the lower rib cap on the hatch is about 1/8 inch too narrow. I can still use it, but if I want it to be fair with the inside taper at the bottom of the ribs, I will have to taper the tail ends of the ribs a touch more. I probably will trim the template to suit and adjust the ribs with the router.

I'll get into more details and pics later, perhaps as early as tomorrow. Seems like I didn't get much done, but I spent a couple of hours doing it!
KC
My Build: The Poet Creek Express Hybrid Foamie

Poet Creek Or Bust
Engineering the TLAR way - "That Looks About Right"
TnTTT ORIGINAL 200A LANTERN CLUB = "The 200A Gang"
Green Lantern Corpsmen
User avatar
KCStudly
Donating Member
 
Posts: 9640
Images: 8169
Joined: Mon Feb 06, 2012 10:18 pm
Location: Southeastern CT, USA
Top

Re: The Poet Creek Express - Foamie Hybrid

Postby KCStudly » Sat Feb 15, 2014 10:44 pm

Image

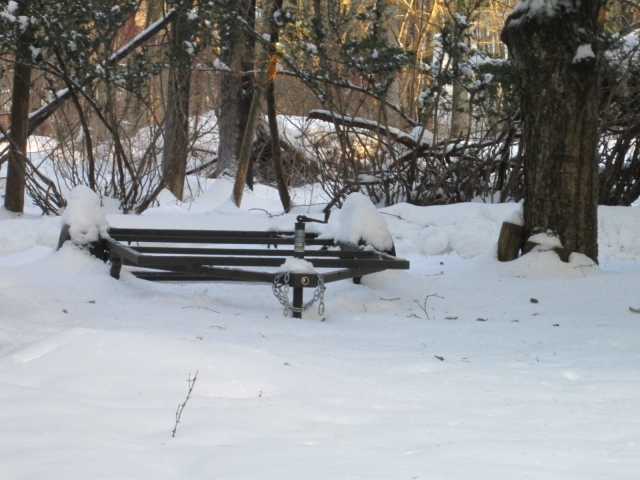
Recapping, it’s cold and we have had a lot of snow around here lately.

Here is how I did that under the galley counter side ledger I mentioned previously. Ran one corner of a 1x something thru the 1/4 inch 1/4 round bit in the router table.
Image
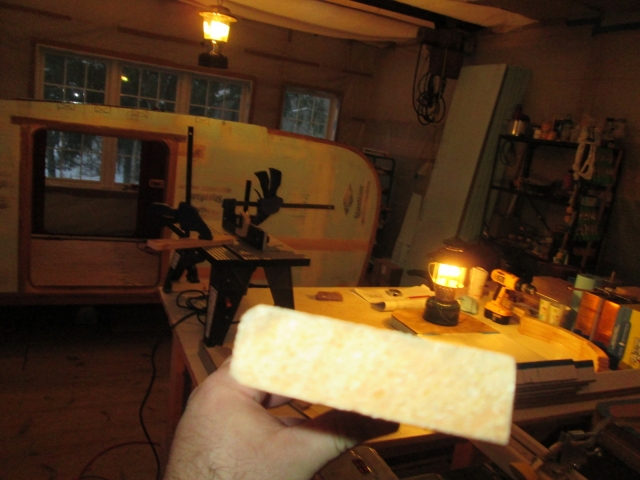
The lower left corner by my hand isn’t rounded over; it just has a chip or dent in the rough piece that will not come into play after the finished part is trimmed to length.

Next was ripping to 5/8 inch on the table saw.
Image

Wash, rinse, repeat to get the required footage.

So in the above pic the top of the ledger is on the left. I’ll use screws with small diameter flat heads to screw these ledgers into the side wall blocking giving the galley counter something to land on at the side walls and bulkhead, and then I’ll screw down thru the counter plywood into these to fix it in place; with glue, of course.

I suppose I need to seal these and the underside of the counter ply with something. Since they won’t really be seen, maybe I’ll just use some of the other dark stain that I’ve got kicking around, or the same as the walls.

The “front” of the counter (at the rear of the trailer) will be supported by the three legged face frame and an edge rail spanning across from wall to wall. Underneath the divider that carries the inboard glide for the cooler tray will support the counter at roughly 1/3 of its span. If you refer to the 3D model images in the very first post of this thread, you will see the under counter dividers and face frame (don’t forget that I have shifted the cooler to the street side now). I am still considering leaving the other divider out. Despite still having the leg from the face frame, I would be able to stow larger objects under the counter if I leave the other divider out. The thing is, I don’t think the large lounge style bag chairs that I got will fit either way, so they will either need to go on the galley counter or mattress while on the road.

Anyway, the reason I mention this is that I planned to cut out and fit the wood for these frames today, because it is something that I can get done in the cold. I decided that it would be an inefficient use of the cedar that I have remaining (too much waste and not enough to do the job), so I stopped and got some select pine. <Start rant> Do you think you can get a 1x4 x 8 ft board at the big orange? No. Two bins of 6 footers, and 10 footers, but no 8 footers :x . And I only had to pick thru eight or ten 1x2’s before I found an acceptably straight specimen. <end rant>

Once at Mecca I started up the heaters, refueled and lit the lanterns, then decided to give Karl’s big kerosene heater (stored under the eaves of the loft) a quick once over, like I have been threatening to do for some time now. Fueled it and let it sit for a couple of hours to let the wick soak; since it had been sitting idle and on “empty” for some long time.

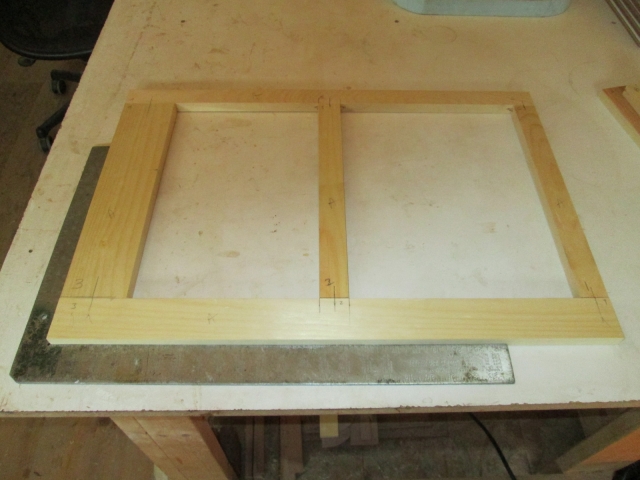
Then I got into building the under counter divider frames. I will build them both and decide later whether to install both.

After posting last night I had a brainstorm. If I use 1x4 (3-1/2 wide) for the rear vertical stiles, they will support the narrow 3 inch wide panel filler pieces and provide a backer for the butt joints in the panels. The bottom rail will be 1x4 ripped to 2-1/4 wide, matching the height of the bottom rail and filler block in the side wall, giving the cooler tray glide plenty to screw into. The top rail, and two other verticals pieces will be 1x2’s.

Cross cut two sets, ripped the bottom rails and did a dry fit to lay out the biscuit joints (pocket screws will be used to install the assembly, so biscuits to join so that the installation screws don’t clash later).
Image

Hmm, it had been a couple of hours. Let’s see if we can get that big kerosene heater to light.
Image

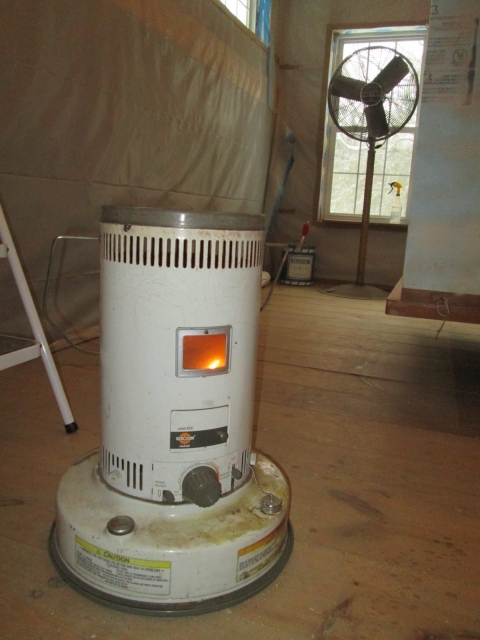
With the other junk running I could get it from 39 to 49 in about 2 hrs, and that was it. With this sucker running I could watch the thermometer coming up from there in tics every few minutes. Should have done this ages ago!

Back to work, I ran the jointer around and plunged all slots in the mating surfaces, taking the time to clamp each piece down to the bench for both accuracy and safety. I used the large #20 biscuits for the 1x4 style, and the small #0 size for the rest. Then I put the jointer away.

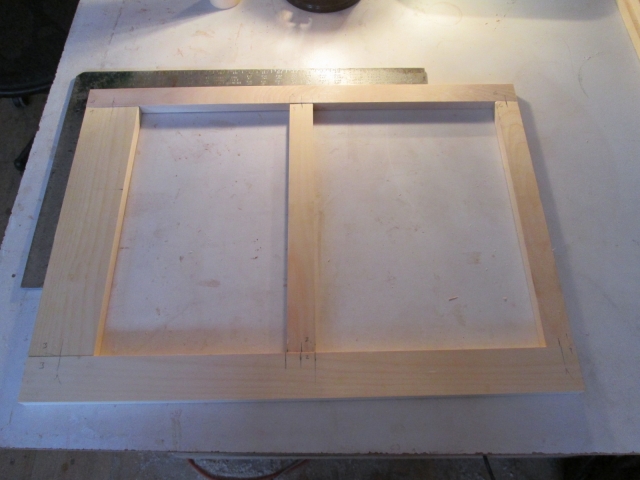
For some reason I decided to do a dumb idiot check on the dry fit and found the assembly height to be 1 inch strong. Checked my math and found that I had made a subtraction error when allowing for the rails. Well at least it wasn’t too short. Back to the miter saw, get the biscuit jointer back out, and run those slots again. Here is the dry fit again, only the correct height now.
Image

Snowing out again,
Image
…but hey, looky here, it was now over 50 deg F in the loft!

Let’s see, the wood came from the store (warm), the glue came from my house (warm), and the loft was quickly approaching minimum gluing temp of 55 deg.

Let’s move on and see what we can do about dry fitting the panels. Here is one of the four “too short” panels. Technically it is too narrow, not too short.
Image

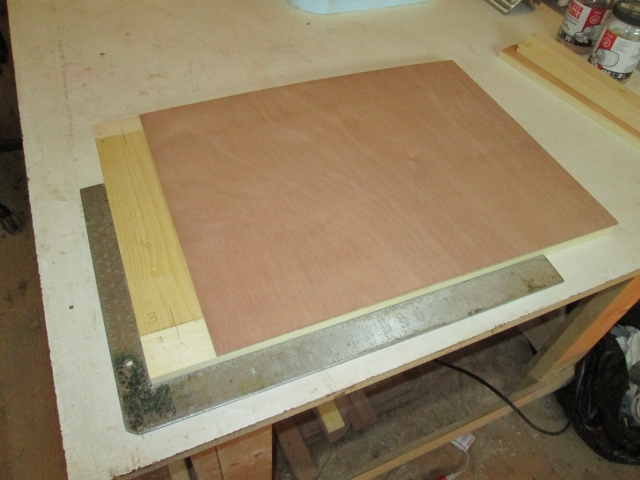
Not shown, I dug into my pile of narrow drops of the 5 mm ply, and found a couple of pieces with the grain running the long way. Cross cut and ripped 4 pieces just slightly oversize so that I can patch them on, filling the void at the backs of the panels, and trim them flush with the router later.

Well looky here, it was now 56 deg F and still rising. Time for glue!
Image

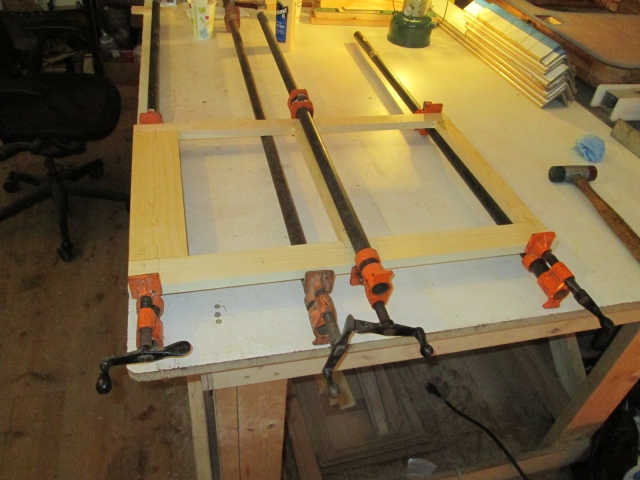
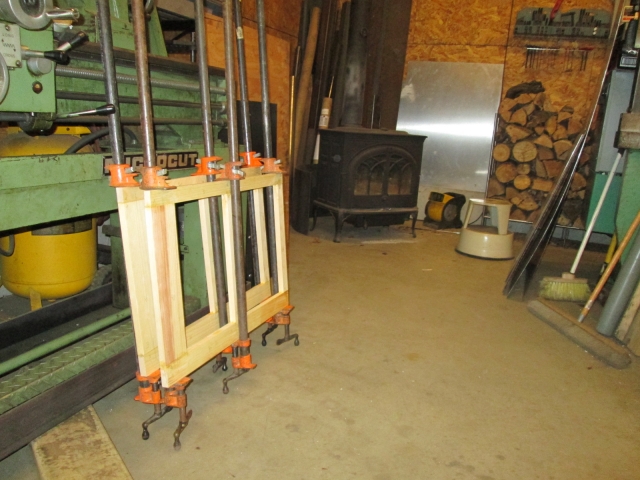
Do that twice and then bring the clamp ups down to sit sort of by the wood stove overnight; stoked a few more logs onto the coals and called it a night.
Image

And none too soon! Driving in the snow was no big deal…
Image
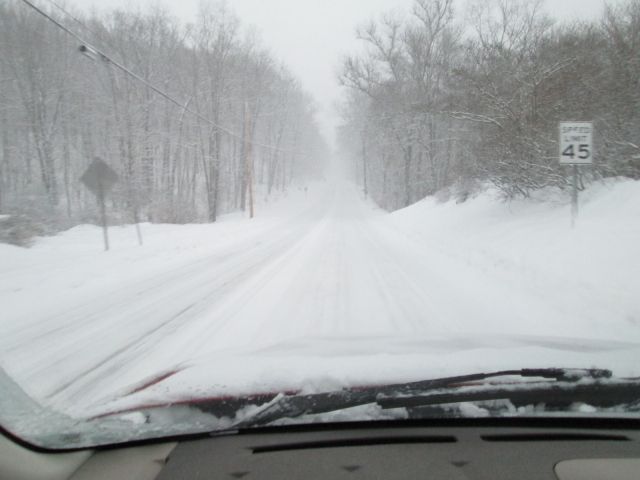
… until I got down off the hill. Then it was packing up into hard ice and people were getting stuck and spinning out all over the place.

The Escape did great though and I was able to weave my way thru with no trouble getting up and down the hills.

If I can get out and about tomorrow, I will fire that big heater up straight away and see if I can carry on.
Last edited by KCStudly on Sat Feb 22, 2014 10:41 pm, edited 1 time in total.
KC
My Build: The Poet Creek Express Hybrid Foamie

Poet Creek Or Bust
Engineering the TLAR way - "That Looks About Right"
TnTTT ORIGINAL 200A LANTERN CLUB = "The 200A Gang"
Green Lantern Corpsmen
User avatar
KCStudly
Donating Member
 
Posts: 9640
Images: 8169
Joined: Mon Feb 06, 2012 10:18 pm
Location: Southeastern CT, USA
Top

Re: The Poet Creek Express - Foamie Hybrid

Postby GPW » Sun Feb 16, 2014 6:15 am

Looks pretty COLD KC!!! But you’re getting it done ... :thumbsup: 8) ;)
There’s no place like Foam !
User avatar
GPW
Gold Donating Member
 
Posts: 14920
Images: 546
Joined: Thu Feb 09, 2006 7:58 pm
Location: New Orleans
Top

Re: The Poet Creek Express - Foamie Hybrid

Postby KCStudly » Sun Feb 16, 2014 9:18 pm

Thanks GPW. Yeah, it was probably 4 hrs yesterday and another 4-1/2 today. Sometimes it doesn't seem like I have enough to show for the time, but there are a lot of little steps that don't get mentioned (if you can believe that!) and, of course, at least some time is spent noodling and doing QC.

Woke up to about 3 or 4 inches of snow. We have a guy in our neighborhood that is nutty about his John Deere garden tractor. The last couple of snow storms he has gone around the neighborhood and plowed out the pile left by the town truck at the end of everybody’s drive way. A nice gesture and it made my job easier with the snow blower today… but it piles a big berm and limits my ability to push the snow back for the next storm.

Anyway, I made it out to Mecca and took the divider frames out of the clamps. Trimmed the biscuit tips, scrapped some glue drips, and gave them a quick scuff with 100 grit. When I checked the overall heights they were both about 1/16 taller than the face frame, so I ripped the fat (bottom) edge on the table saw.

Then I referenced the bulkhead and floor assembly plans to confirm were the subframe work and blocking locations are so that I could layout for the pocket screw holes. All of the pocket screws will go in from the inboard side which is in the wider middle bay.
Image

In the above pic and here you can see how I squared up the reference lines and extended them out so that they would be easy to align with the tics on the Kregg jig.
Image
Image

Also note in the above pic and here how the frame is resting on a couple of shims to match the height of the jig bed. This made it easy to square the frame in the jig w/o having to worry about it being cocked.
Image
I guess I didn’t need to use the shim under the clamp in this case, since the frame will be covered by the panel, but I have just made a habit out of it to prevent marking the wood.

I did both divider frames thru to this point, then set the curb side one aside. I’ve decided to just put a brace under that side and leave the divider out.

Went ahead and glued and stapled the panels onto the cooler side of the street side divider.
Image
Image
Image
In the last pic you can see how the middle screw pocket does not line up under the middle vertical support; but it does line up with the 1x cross member in the floor frame… I hope.

This next pic is out of sequence, but it flows better here. I gave the glue time to set then ran the bottom bearing bit around to flush the panels to the frame.
Image

I had a piece of 1x pine left over that was an odd width at 1-13/16 inch. I don’t suppose it mattered, but I ripped it to an even 1-3/4 inch and cross cut it to the same length as the divider. Then I put a pair of screw pockets at either end. This will be the brace that takes the place of the curb side divider panel.
Image
(I guess I had the pockets down against the bench in this pic.)

Karl came up for a visit and was having some trouble figuring out what I was doing (and I suspect that you maybe are, too), so I did some dry mockups to show what is what. Here you can see how the street side divider/support panel separates the cooler bay on the left from the face framed areas on the right.
Image
Image
An additional “spar”, really the front edge board of the counter, will overlap the top of the face frame and the edge of the ply counter base, spanning from wall to wall and bridging the cooler bay.

If you look at where the curb side leg of the face frame comes down to the floor you can see the dark line of a gap. Karl saw this and thought that the wall was not square to the floor, but I had already checked this and it was as square as I could measure with a framing square. The leg has a little flex and will be screwed tightly to the wall.

Here I am holding the face frame tight to the panel with the brace also roughly positioned so you can see how it will support that side of the counter plywood without separating the areas behind the face frame on that side.
Image

I know this seems like a lot of trouble but I wanted to carry the three compartment theme thru the whole trailer, and I would rather have a light weight framework making the counter rock solid, than having a big slab of heavy 3/4 ply back there. By building this network of support I am sure that the 1/2 inch ply I have on hand will be rock solid, and I’m sure I could even use 3/8 inch if I didn’t already have the 1/2 inch.

Another thing; I have decided not to glue any of the galley cabinetry in. I will use only screws. That way, if I decide I want to change things down the road, I can take it all back out again and will only have screw holes to deal with, rather than splintered wood and spoiled finish.
KC
My Build: The Poet Creek Express Hybrid Foamie

Poet Creek Or Bust
Engineering the TLAR way - "That Looks About Right"
TnTTT ORIGINAL 200A LANTERN CLUB = "The 200A Gang"
Green Lantern Corpsmen
User avatar
KCStudly
Donating Member
 
Posts: 9640
Images: 8169
Joined: Mon Feb 06, 2012 10:18 pm
Location: Southeastern CT, USA
Top

Re: The Poet Creek Express - Foamie Hybrid

Postby grantstew8 » Mon Feb 17, 2014 5:20 pm

Good idea just to use screws rather than glue and screw. I've found the kreg screws really good. The shine/ reflection on the surfaces is awesome.
User avatar
grantstew8
The 300 Club
 
Posts: 448
Images: 77
Joined: Tue May 28, 2013 5:26 pm
Location: Dunfermline, Scotland
Top

Re: The Poet Creek Express - Foamie Hybrid

Postby KCStudly » Mon Feb 17, 2014 10:29 pm

grantstew8 wrote:Good idea just to use screws rather than glue and screw. I've found the kreg screws really good. The shine/ reflection on the surfaces is awesome.

Thanks, Grant. Yeah, I haven't planned the galley specifically for my gear or what I plan to pack, with the exception of my cooler; and it isn't an especially good one so is subject to change. With the solar panels I would love to have a 12v fridge, but they are rather dear and I just can't justify the expense. It sure would be nice to not worry about ice melting while out in the mountains

I had always just figured I would do this "simple" generic layout and worry about the specifics later. It probably would have been better to drag out all of my "stuff" and get organized with the kitchen basics that I haven't put together yet, buy plastic bins in advance, etc. It will work itself out I'm sure, but not gluing gives me a hedge.

I got some more wood today. I stopped in at a local custom wood shop that stocks a bunch of hardwood (the place where I got the Red Grandis) to see if they had maple and/or oak in thicker stock sizes than the big orange. Of course they did but I would have had to buy an 8/4 x 6 plank at a premium to get the 64 inches of 1-3/4 x 2 actual that I need for the contoured bottom sill on the hatch. They didn't have any 2x oak that I wanted for the hatch hinge spars either.

I ended up going to the orange and getting a 1x4 x 11-1/2 ft piece of red oak. I cross cut that in half and will glue the pieces into a 2x4 (1-1/2 x 3-1/2 actual), then I will rip it into two 1-1/2 x 1-11/16 hinge spars. The extra 3/16 will allow me to rabbet a step in each spar to cap the raw edge of the ceiling skin where it lands on the bulkhead, and the hatch inner skin where it would otherwise be exposed under the hinge.

For the tricky piece that completes the contoured edge under the back of the hatch I got two pieces of 1x3 poplar, one at 12 ft and the other at 11 ft. I cross cut the 11 footer in half and cut another at the same length. This will get glued into a 2-1/4 x 2-1/2 blank. I ended up going with the poplar after I realized that it will be wrapped with canvas anyway.

Here are the components; red oak on the left, poplar on the right.
Image

I stacked each grouping, clamped to align, and ran a screw in each corner on either side (in the waste area) so that I can pin them and keep them from sliding around during glue up.
Image

It was colder again today, and with the sun down I was only maintaining 50 deg F in the loft, so no gluing, but I did use the leftover piece of poplar as a strong back and did a dry run with the clamps.
Image
I figure I might as well “kill two birds” with one clamping and will stack both together.

Then I piddled around and checked the actuator brackets to confirm what I thought I would need for shoulder bolts and washers. The shoulder bolts that were with the actuators when I got them are too long, and the zinc chromate washers shown in the following pics will be replaced with PTFE (Teflon), Delrin, or Zytel, depending on what is available.

Here are a pair of the upper brackets straddling a scrap of 1x and the actuator strut rod.
Image
Image

And a lower actuator bracket on one of the actuator lower pivot points. The work bench represents the rear face of the bulkhead; just turn it clockwise in your head.
Image
Image

I dug out the other skin for the under counter divider, but need to pick up some shorter screws to pre-fit it. The skin had a little curl to it, so I left it sitting under the frame assembly with some weight on it, more as a “let’s see” than actually needing it to return to flat. The screws will draw the panel flat either way.
Last edited by KCStudly on Sat Feb 22, 2014 10:55 pm, edited 1 time in total.
KC
My Build: The Poet Creek Express Hybrid Foamie

Poet Creek Or Bust
Engineering the TLAR way - "That Looks About Right"
TnTTT ORIGINAL 200A LANTERN CLUB = "The 200A Gang"
Green Lantern Corpsmen
User avatar
KCStudly
Donating Member
 
Posts: 9640
Images: 8169
Joined: Mon Feb 06, 2012 10:18 pm
Location: Southeastern CT, USA
Top

Re: The Poet Creek Express - Foamie Hybrid

Postby KCStudly » Thu Feb 20, 2014 10:14 pm

Well I've been battling a head cold and haven't been feeling well these last few days. Actually took yesterday off work and didn't feel up to going to Mecca even though it was warmer out; lost opportunity. I did feel a little better when I woke up this morning and the boss started a scheduled two day vacation today, so I had agreed to go in and cover for him. Made it thru the day and decided it was just too nice out (48 deg F) that I needed to get those spar blanks glued up.

As soon as I got there I fired off all of the heaters and laid the wood on edge to expose as much surface area as possible. While waiting for the temp to come up to 55 I stained that fixed panel on the under counter divider.
Image

Then I futzed around some, and contemplated options for how to go about applying the ceiling panels to the tops of the walls.

I know it probably was not ideal, but once the surfaces of the wood no longer felt cool to the touch, I went ahead and glued them up.
Image
Image
I had wiped up most of the excess glue by the time I took these pic’s, but note the drips of glue on the floor under the edge of the bench. Plenty of saw dust there so they shouldn’t stick; easier to just leave them and clean up later.

I really wanted to bug out and go home, but I also wanted to hold as much temperature in the loft for as long as I could to give the glue a chance to kick off. So I futzed around and was going to oil the galley face frames (can’t remember if I did these yet or not, but they don’t look like it… guess I can read back thru the build and see), but the little bit of oil I had left in the can had separated and gelled. Added that to the shopping list.

I was able to hold 57 deg for about an hour before calling it quits and shutting down.
KC
My Build: The Poet Creek Express Hybrid Foamie

Poet Creek Or Bust
Engineering the TLAR way - "That Looks About Right"
TnTTT ORIGINAL 200A LANTERN CLUB = "The 200A Gang"
Green Lantern Corpsmen
User avatar
KCStudly
Donating Member
 
Posts: 9640
Images: 8169
Joined: Mon Feb 06, 2012 10:18 pm
Location: Southeastern CT, USA
Top

Re: The Poet Creek Express - Foamie Hybrid

Postby KCStudly » Sun Feb 23, 2014 12:20 am

Last night I stopped and got some more Natural stain, wiping rags and a couple of different styles of coat hooks. They have a brushed nickel plate finish that kind of matches the SS light switch plates.
Image
I think the high/low version would be more useful than the side-by-side, but they may extend up higher and, when things are hung on them, block light from the dome lights. I’ll check that out and take the ones I don’t use back for a refund. Which do you like better and why?

Next I fit the inner panels to the under counter divider and laid out the screws. I wanted to have the screws installed first so that I could trim the edges flush before staining.
Image
The holes in the corners on the right ended up going into the Kregg pockets below. Oops. Rather than use another of the panels from the other divider, I decided to save those for future use and just shift the screws to suit. I’ll stuff these with colored putty, and they will be hidden up tight behind the face frame anyway, so I saw no need to start over.

Here is a close up of one of the screws. I just pilot drilled the hole and let the screw head make the counter sink by impressing the ply as it sank in. Set them just below flush so that they would not catch the router shoe when I flushed off the edges of the panel. Just one or two had a small whisper of grain pop up when driven, so I scuffed them off with 320 grit on the small block.
Image

After running the router around the outside I pulled them back off for staining.

I tried to call my BIL about the jointer during the day, but got his voice mail, so I decided to have a go at the oak hinge spar glue up the old fashioned way. The boards were pretty close and only needed a whisper removed.
Image

Since the bench doesn’t have dogs or a carpenter’s vice I used quick clamps to block it in place so it would not move around on me. This kept the clamps out of the way, yet still located the blank.
Image
Image

Oak curlycues for your consideration.
Image

Today was really much warmer, almost 50! Started off by staining the loose divider panels (in Red Chestnut), counter ledger stock, and curb side counter brace (in Natural). The divider with fixed panel is also shown again.
Image

Ripped the oak into two spars and then just a whisker more on one so that they are exactly the same height.
Image

Here is a little mock-up showing what I have been trying to describe on the hinge spars. They are 1-1/2 inch wide but 1-11/16 tall. The scrap of ply in the foreground represents the ceiling panel that will end on top of the bulkhead. The spar will be rabbeted 3/16 deep by 3/4 wide to allow it to drop down over the edge of the ceiling panel and cap the edge of the ply. The 1-1/2 thk foam roof will butt up to the spar and be flush on top.
Image

Rather than take time to go use the jointer, I just made a few skim cuts ripping the hatch bumper blank on the table saw to true it up; shown here on the right of the oak hinge spars.
Image

Switching gears I scuffed the front cabinet ledgers, riblets, and key catcher shelf rail with 320 grit for another round of poly. When compared to a raw piece of maple in the daylight I could clearly see that the galley shelf and under counter face frames had clearly already been oiled, so those got a first coat of poly, too.
Image
Image

Grotto Jeff had invited me up to join him and his brother for some smoked baby back ribs and corned beef brisket, shivery style. Not too cold but there is still a lot of snow on the ground. I figured they would ask how I was doing on the build so I took a few extra pics so I would have them with me on the camera and could share. Figure I may as well show them here, too, despite that they are sort of reruns.

Curb side pillow light.
Image

Street side cabin rear seen thru curb side door.
Image

Street side light switch panel.
Image

Rear cabinets seen from street side door.
Image

Front cabinet face frame seen thru curb side door.
Image

Curb side dome light looking rearward.
Image

Looking thru front cabinet face frame towards rear.
Image

Looking down into the cabin from over the front.
Image

What a journey it has been so far!
Last edited by KCStudly on Sun Feb 28, 2021 3:08 pm, edited 1 time in total.
KC
My Build: The Poet Creek Express Hybrid Foamie

Poet Creek Or Bust
Engineering the TLAR way - "That Looks About Right"
TnTTT ORIGINAL 200A LANTERN CLUB = "The 200A Gang"
Green Lantern Corpsmen
User avatar
KCStudly
Donating Member
 
Posts: 9640
Images: 8169
Joined: Mon Feb 06, 2012 10:18 pm
Location: Southeastern CT, USA
Top

Re: The Poet Creek Express - Foamie Hybrid

Postby GPW » Sun Feb 23, 2014 6:22 am

Really coming together ... looking like a camper !!! 8) 8) 8)
There’s no place like Foam !
User avatar
GPW
Gold Donating Member
 
Posts: 14920
Images: 546
Joined: Thu Feb 09, 2006 7:58 pm
Location: New Orleans
Top

Re: The Poet Creek Express - Foamie Hybrid

Postby kudzu » Sun Feb 23, 2014 8:12 am

Oh Em Gee! Love it!! That overhead shot really shows how much you've accomplished. Very impressive.
kudzu
Donating Member
 
Posts: 439
Images: 16
Joined: Wed Mar 27, 2013 3:20 pm
Top

Re: The Poet Creek Express - Foamie Hybrid

Postby Hardryder56 » Sun Feb 23, 2014 8:41 am

Beautiful work. Your trailer will be a rolling piece of art when finished.
Tom
Coffee is like liquid hugs, it warms you from the inside out
Hardryder56
Teardrop Advisor
 
Posts: 92
Joined: Mon Nov 25, 2013 5:04 pm
Location: Lake Conroe, TEXAS
Top

Re: The Poet Creek Express - Foamie Hybrid

Postby SLUG36 » Sun Feb 23, 2014 9:32 am

Those Hatch Strut Brackets look great. If I were doing a hatch, I would steal that idea too.

Looking great! :applause:
Making big pieces of wood into the wrong size..... for over 30 years....
User avatar
SLUG36
Teardrop Master
 
Posts: 212
Images: 137
Joined: Wed Mar 28, 2012 6:51 am
Location: Sabine/Neches river Delta
Top

Re: The Poet Creek Express - Foamie Hybrid

Postby KCStudly » Sun Feb 23, 2014 9:55 am

Thank you everyone. Your feedback is a nice motivator!
KC
My Build: The Poet Creek Express Hybrid Foamie

Poet Creek Or Bust
Engineering the TLAR way - "That Looks About Right"
TnTTT ORIGINAL 200A LANTERN CLUB = "The 200A Gang"
Green Lantern Corpsmen
User avatar
KCStudly
Donating Member
 
Posts: 9640
Images: 8169
Joined: Mon Feb 06, 2012 10:18 pm
Location: Southeastern CT, USA
Top

PreviousNext

Return to Foamies

Who is online

Users browsing this forum: No registered users and 0 guests