The Poet Creek Express - Foamie Hybrid

Canvas covered foamies (Thrifty Alternatives...)

Moderator: eaglesdare

Re: The Poet Creek Express - Foamie Hybrid

Postby KCStudly » Thu Mar 06, 2014 9:01 am

Better you than me, Randy. I have more or less decided that slogging it out under my daily driver is no longer for me. If I had an active hobby vehicle (other than TPCE) it would be a different story, but my time has a narrow focus right now.

Good luck putting it all back together. Should be much nicer when you are done. :thumbsup:
Last edited by KCStudly on Tue Mar 18, 2014 8:41 pm, edited 1 time in total.
KC
My Build: The Poet Creek Express Hybrid Foamie

Poet Creek Or Bust
Engineering the TLAR way - "That Looks About Right"
TnTTT ORIGINAL 200A LANTERN CLUB = "The 200A Gang"
Green Lantern Corpsmen
User avatar
KCStudly
Donating Member
 
Posts: 9640
Images: 8169
Joined: Mon Feb 06, 2012 10:18 pm
Location: Southeastern CT, USA

Re: The Poet Creek Express - Foamie Hybrid

Postby Wolffarmer » Thu Mar 06, 2014 9:08 am

I always thought the clutch on it felt a little weird. I just chalked it up to being a cable release. I bought it at 138,000 and it now has about 210,000 miles. I do not believe it has ever been taken apart. I just can not see where it had been done before. Or they did a super duper bang up job. Which I have never seen before. But really I just can't see where it has ever been pulled. I try to keep at least 2 cars drive able. They are all older so I really do not have that much money tied up in them.
But it is getting hard for this fat old fart to work on them.

:oops: :oops: Randy
"these guys must be afraid of the dark"
User avatar
Wolffarmer
Donating Member
 
Posts: 4612
Images: 309
Joined: Wed May 02, 2007 1:32 pm
Location: Idaho Rupert

Re: The Poet Creek Express - Foamie Hybrid

Postby GPW » Thu Mar 06, 2014 1:32 pm

New cars are Impossible to work on .... Computers ... AARGH !!! :duh: I used to do much hot rod and Van stuff in the old days , re-building Everything .... Now ... forget it ...
I’m looking for another 96V4 Saab wagon to rebuild ... I can work on that :thumbsup: ... had one , sold it like a fool ... :oops:
Luckily today , my buddy who is an excellent mechanic , and has all the computer stuff, works on our current vehicles , and helps me with the trailers too .. 8)
There’s no place like Foam !
User avatar
GPW
Gold Donating Member
 
Posts: 14920
Images: 546
Joined: Thu Feb 09, 2006 7:58 pm
Location: New Orleans
Top

Re: The Poet Creek Express - Foamie Hybrid

Postby Wolffarmer » Thu Mar 06, 2014 1:48 pm

What is a Saab doing in NOLA? They are cold country cars.

I have a hand held OBDII reader that tells a lot. I don't know what more a fancy smanchy computer can do that the one between your ears can't. The OBDII and a volt/ohm meter really is all a person needs. IMHO. Oh, and a good shop manual, one from the factory if you can get one. The hardest thing I have found is there is so many things in the way and undoing those electrical connectors. Those are pitas.

Randy
"these guys must be afraid of the dark"
User avatar
Wolffarmer
Donating Member
 
Posts: 4612
Images: 309
Joined: Wed May 02, 2007 1:32 pm
Location: Idaho Rupert
Top

Re: The Poet Creek Express - Foamie Hybrid

Postby GPW » Thu Mar 06, 2014 2:07 pm

Randy , I has Three... Loved em, and the back seat folded down into a bed... instant TD camper :thumbsup: 8) New cars too complicated for my old points and condenser brain ... :duh:
There’s no place like Foam !
User avatar
GPW
Gold Donating Member
 
Posts: 14920
Images: 546
Joined: Thu Feb 09, 2006 7:58 pm
Location: New Orleans
Top

Re: The Poet Creek Express - Foamie Hybrid

Postby mezmo » Fri Mar 07, 2014 11:20 pm

RIP SAAB.

We had an '89 900 2 door Hatchback - BEST CAR we've ever had !

We also had a couple of 9000s - a '91 and a '96. They were good too.
Switched to VW and Nissan when the SAABs became too expensive
to get repaired and too expensive to buy, - a few years before the
demise. I can remember the 3cylinder's "ring-a-ding-dinging" along
when they first came over here in the late 1950s. The Dodge dealer
in the little county-seat town back in NY State sold them - suicide
doors and all. And a great uncle had one of the V4s when they came
out in the late 1960s-early1970s. [Whenever they changed the powerplants.]

Once they became a "yuppie-mobile" they were doomed !

Cheers,
Norm/mezmo
If you have a house - you have a hobby.
User avatar
mezmo
1000 Club
1000 Club
 
Posts: 1817
Images: 194
Joined: Fri Jan 01, 2010 4:11 am
Location: Columbia, SC
Top

Re: The Poet Creek Express - Foamie Hybrid

Postby Wolffarmer » Sat Mar 08, 2014 1:08 pm

Ready for thread hijacking? Guess I been talking about my Suzuki clutch job I am doing here so here is update with pics.

Been working on the bugger for a few weeks. Ok just a bit here and there and this fat old fart does not bend like the old days and as much as I like the Suzuki Sidekick and they do seem rugged. There are small and tight places in there. I think if i have to change the starter might have to pull the motor, or get someone else, or trade.

Image

Transmission out but on the rack, 2 feet above the floor

Image

Tranny on floor after the guys I work for came over and helped me.

Image

Friction disk, arrows pointing to worn out spring pockets and one spring had come out and was floating around between plate and flywheel. No wonder it was making a weird noise and felt funny. Notice there is still a lot of friction material. From what I can tell this is probably the original clutch. I could not seen any signs it has ever been pulled. I still have never burned a clutch, even driving farm trucks. Throw out bearing is another thing.

Image

Pressure plate fingers are worn a bit over 1/2 way threw. Bearing still spins and feels fine but it is getting replaced. Oh, no damage to the fly wheel at all and no groves or bad things.

Image

Rear shot. Notice nice new blue shocks? Jack up axle. Use air wrench to pull tire and a lot easier to work on than on the floor with tire on. Can be done but phoey. Shocks I took off where Suzuki originals. 200,000 + miles. Brakes still look ok. get another 2 years out of them. Also notice the home made hitch? I can cheap out at times, no matter how much it costs.

Randy
"these guys must be afraid of the dark"
User avatar
Wolffarmer
Donating Member
 
Posts: 4612
Images: 309
Joined: Wed May 02, 2007 1:32 pm
Location: Idaho Rupert
Top

Re: The Poet Creek Express - Foamie Hybrid

Postby KCStudly » Sun Mar 09, 2014 12:05 am

:lol: I’m not a Saab fan. Never had one, so I guess I wouldn’t really know the difference, but everyone I have ever known that had one said they were difficult to work on and repairs were expensive.

Thanks for sharing Randy (Wolffarmer). Nothing like a good old thrash on your beloved beater.

But that’s not why we are here, so let’s get back on topic (at least for a little bit ).

I’ve been working some OT at my day job, and will be doing more over the next week or two (and maybe longer). I knew today’s weather was supposed to be really good, so instead of going in to work today, I took it off to work on TPCE and will go in tomorrow for a 1/2 day.

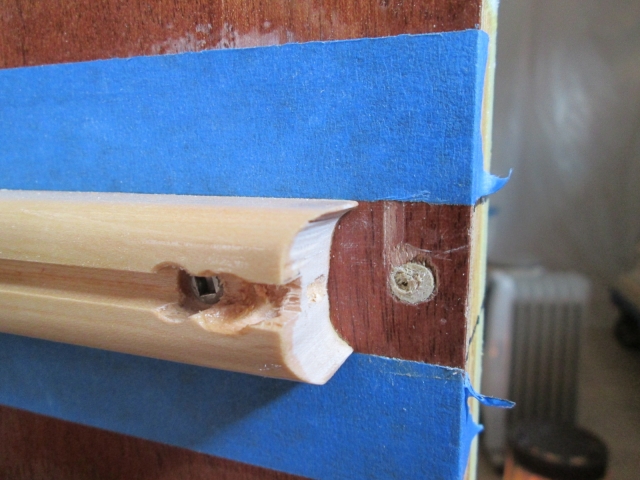
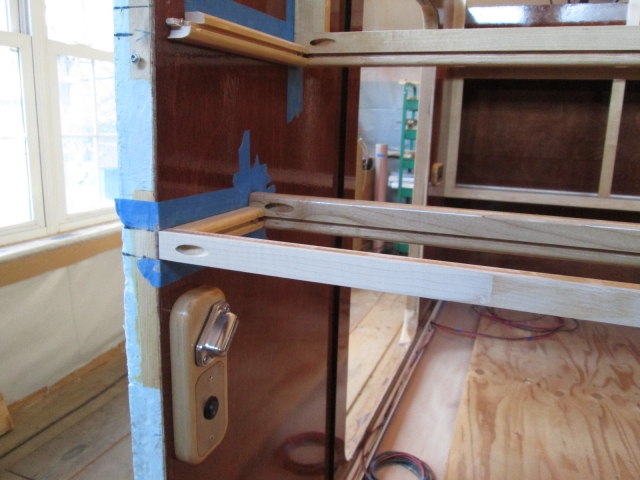
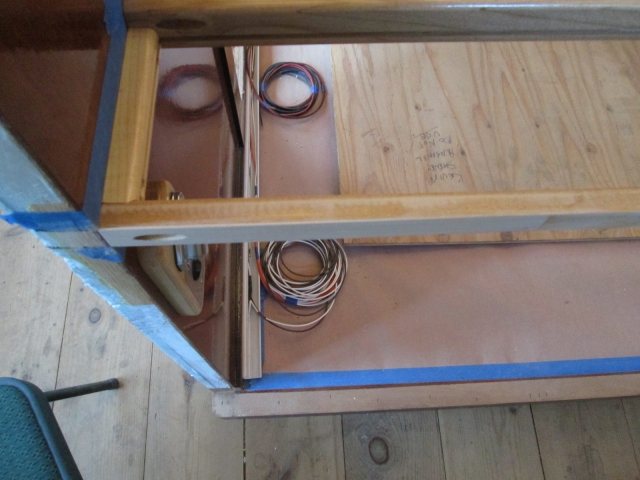
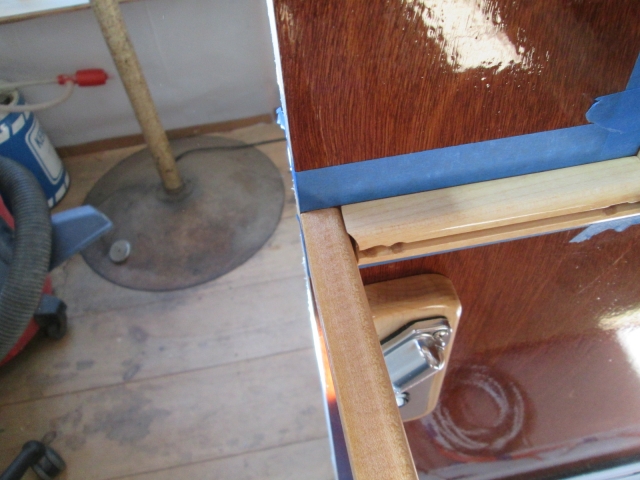
Anyway, as I mentioned way back, the “rear” ledger (front of cabin) for the key catcher shelf ended up with a big gap between it and the side ledger on the curb side. I think the “front” edge/rail of the shelf shifted a little when I ran the Kregg screw in. The street side was not as bad but still left room for improvement. Here in this dry fit of the curb side you can see that the ledger is flush at the front of the cabin (on the left) and there is a big gap at the side ledger where it is coped.
Image

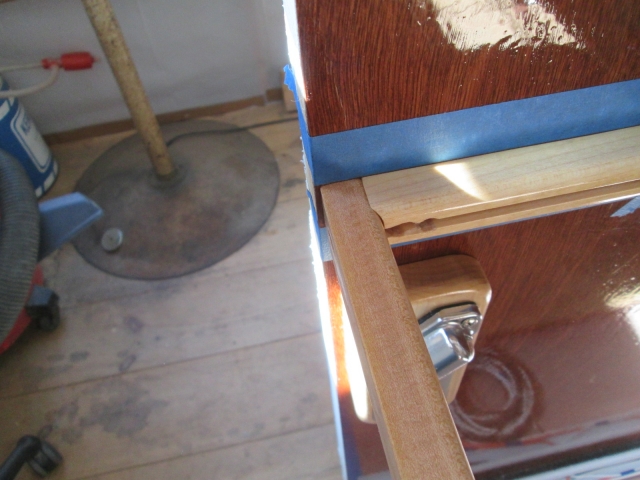
Here I have pulled the screw from the “back” of the ledger and pushed it tight to the cope. Now there is a big gap between the “back” of the ledger and what would be the front wall inner skin, and the pocket screw no longer aligns to its hole.
Image

Since the side ledger and shelf face rail are already glued to the wall, they cannot be shifted easily.

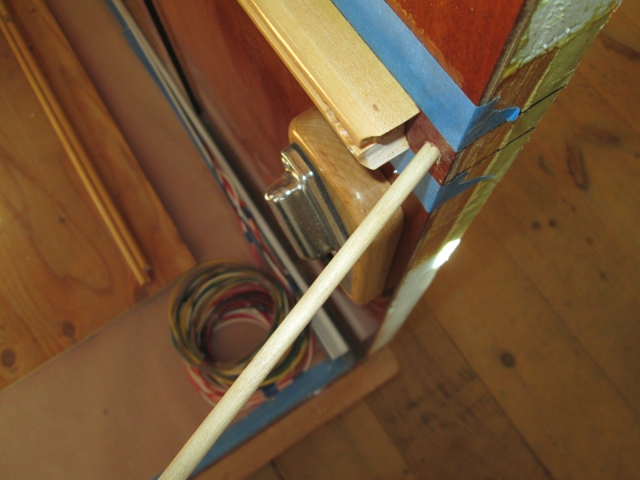
So in order to shift the “rear” ledger I drilled out the existing screw holes to fit 1/4 inch dowel plugs. Here I am showing the street side with the dowel stock dry fit so that I can mark the depth and angle of cut.
Image

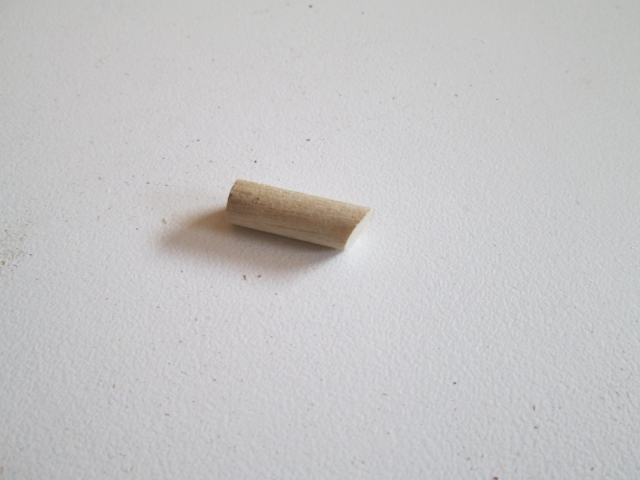
I cut the first one on the bench with the serrated steak knife, but then realized I could get a cleaner cut on the miter saw if I went nice and slow (haven’t worked on the camper enough lately that I am feeling a bit like a fish out of water in the shop).
Image

Swished some glue around inside the holes with a little splinter, smeared some on the dowels and tapped them into the holes with a block of wood as a punch and the mallet. Used the narrow 3/8 chisel to trim them flush. Here’s the curb side.
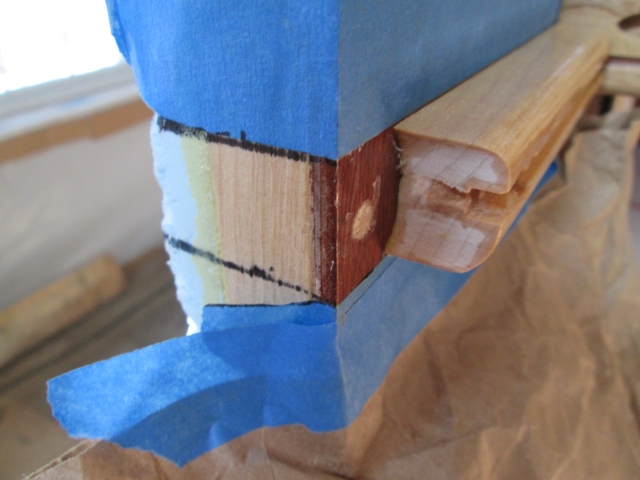
Image

I thought about just remaking the front ledger and making it a little thicker, but that would mean another piece of maple and I don’t know how well the new (cheesy) table saw is going to work. (Side note: Karl and I bid on a Rockwell 66 but did not win.) Also, I already have a bunch of time on the finish work for this piece, and I figured it would be easier to patch a shim on and match it.

I had saved this thin strip of maple from when I ripped some of that 1/4 round earlier, but it was not wide enough to cover the 15/16 thick ledger and had taken a pretty good set from storing it rolled up like this.
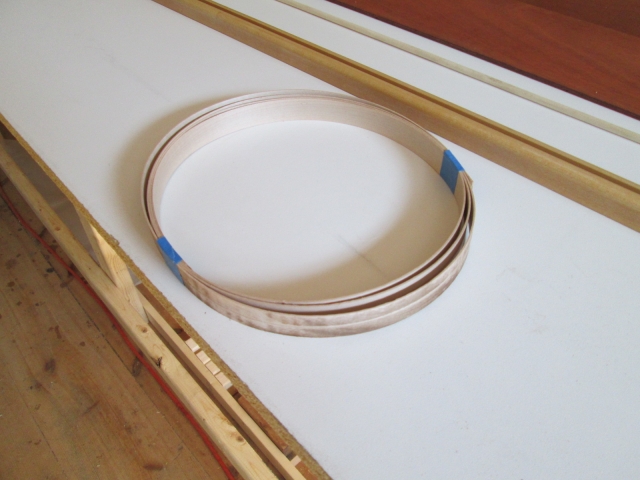
Image

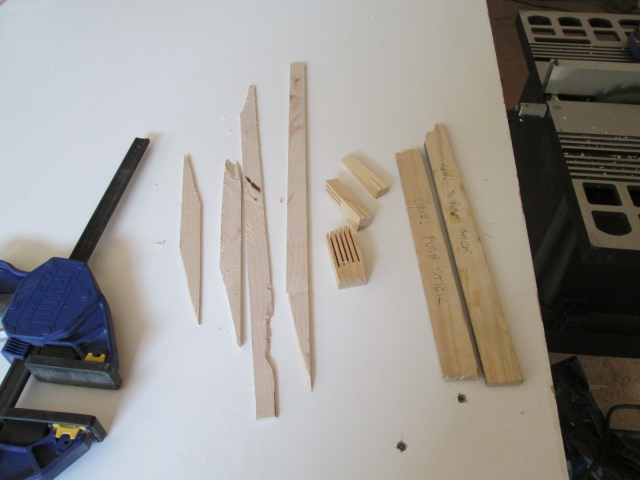
So I decided to cut a thin slat from a larger piece of maple to scab on to the back of the ledger. I figured I'd go a little bigger and that would give my something to work with after gluing. After fiddling with the saw some just to get the rip fence set right and true to the blade, the first cut at 1 inch went okay but wasn’t a super clean cut. On the next thin cut things went wrong fast. This is why you don’t stand in line with the blade; shattered the work, busted one of my feather boards into pieces and sent shrapnel flying into the plastic drape wall.
Image
Image

I do not like this saw. Ben’s saw would have laughed and made these cuts like butter.

So now what? Well, I could at least dry fit the ledger again and see where I was.

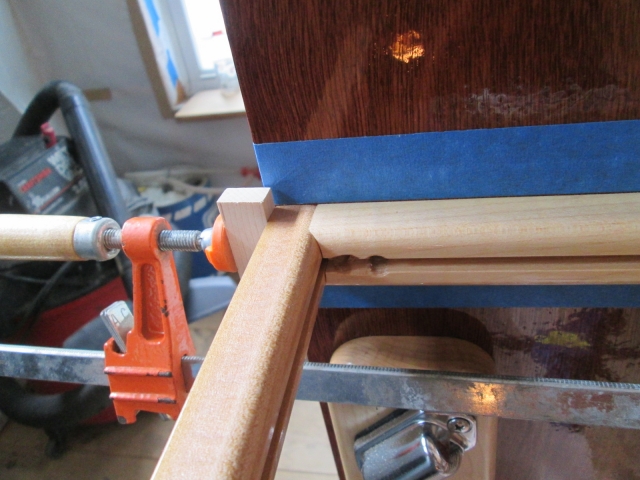
To make sure that the Kregg screws didn’t move the ledger out of position when I drove them in I made sure to clamp it in place securely.
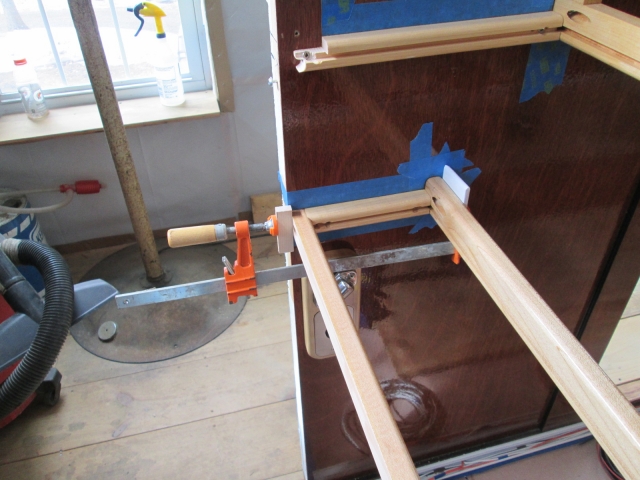
Image

This little block of maple kept the clamp from blocking the screw hole.
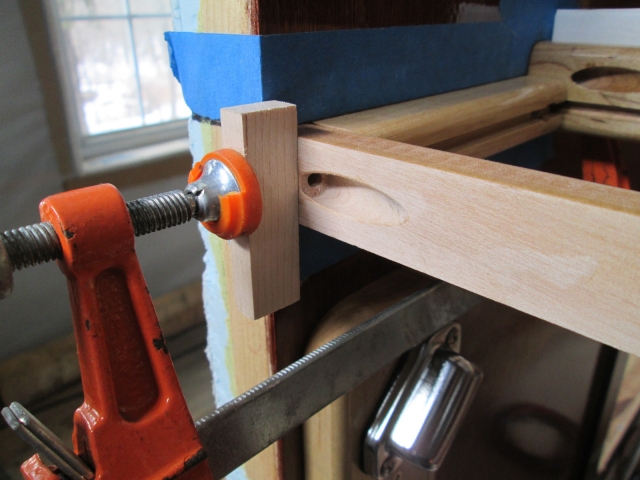
Image

The cope fit much better now.
Image

But I need to make up a scant 1/8 inch (actually less) gap.
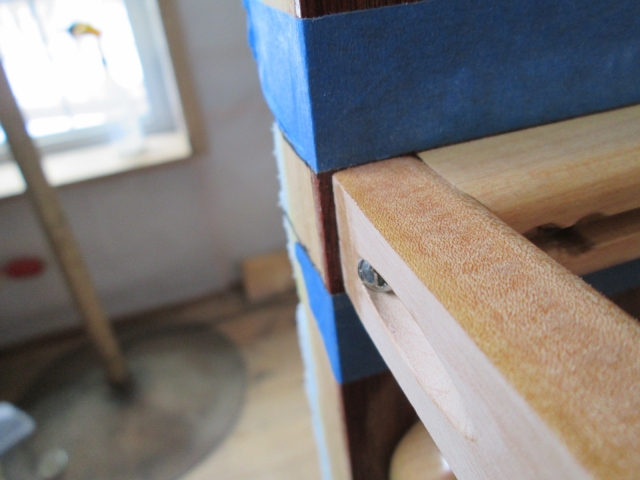
Image

The street side only has about 1/32 inch gap.
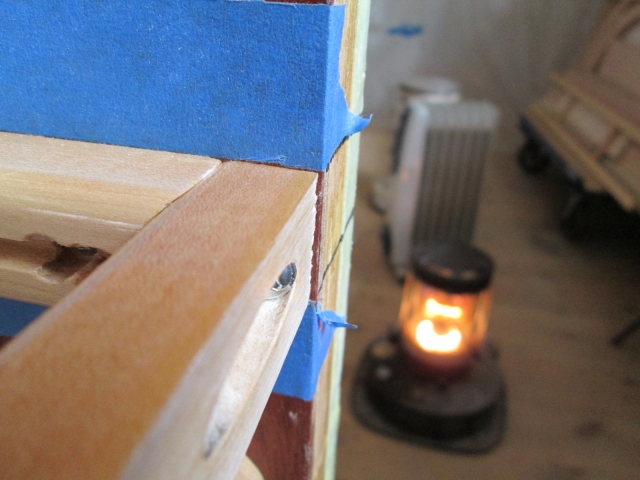
Image

Here I am holding a piece of 1x2 maple up across the front of the walls. It turns out that the ledger was bowing into the cabin just a little, and by just gently squeezing it into the board I could see that the shim would only need to be about 12 inches long (from the wall to about where my hand is in this pic).
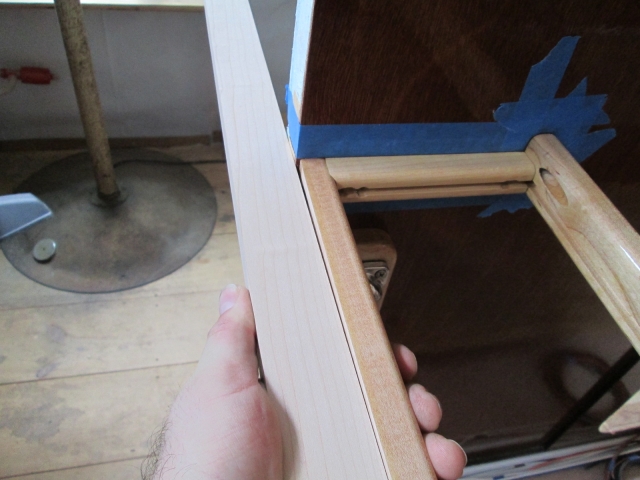
Image

Why go to all of this trouble? Well, the underside of the key catcher is what I am going to see when I’m laying there in bed looking up, and a big dark gap would just not do, despite the fact that no one else would likely ever see it.

I pre drilled the shim using a piece of wood backing it up in the Kregg jig. The alignment to the “back” of the ledger was not critical; I just need to be able to get the screw into the hole. Also note the rough cut on the shim that the saw left.
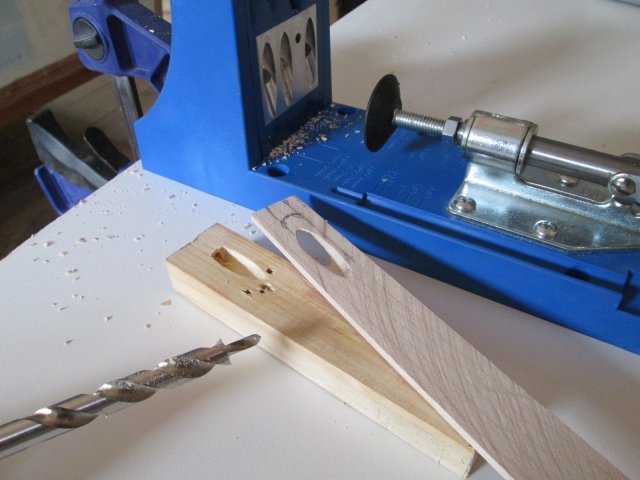
Image

Here I am just holding the shim up to double check.
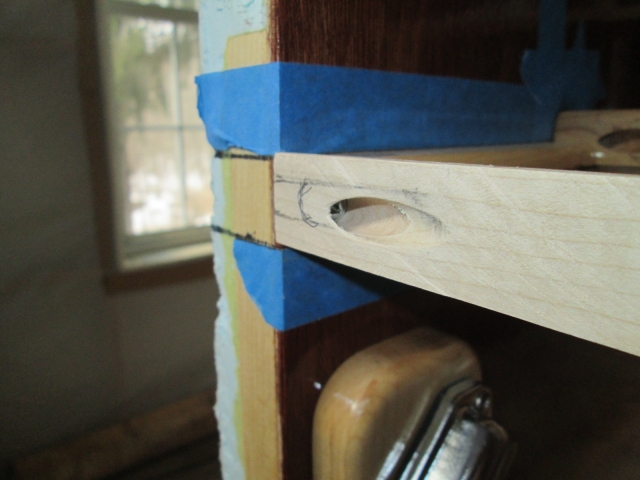
Image

Knowing that I would be fairing the shim down to nothing at one end, I cut a bevel on the other end to make it easier to plane (not sure if it was really necessary; probably not).
Image

After pulling the ledger back down to glue the shim on you can see how much the screw holes had moved. Curb side.
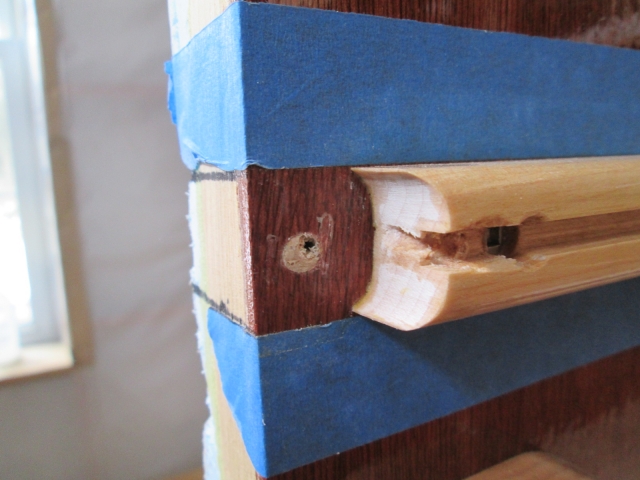
Image

Street side.
Image

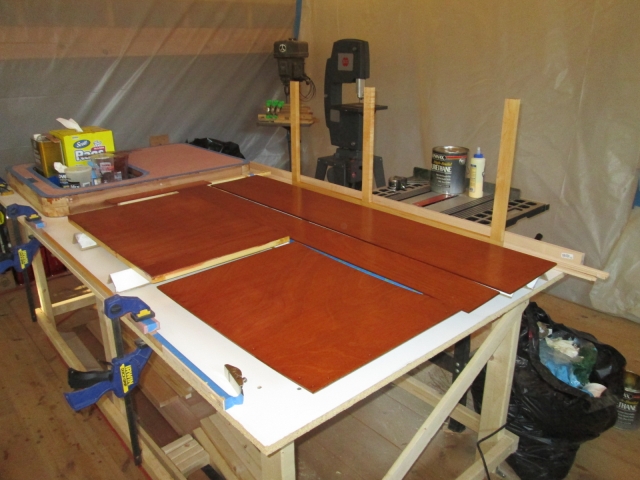
I glued the shim up and clamped it to the back of the bench with the spring clamps (forgot to take a pic) while I did another round of polyurethane on the shelf panels and galley bits.
Image
Image

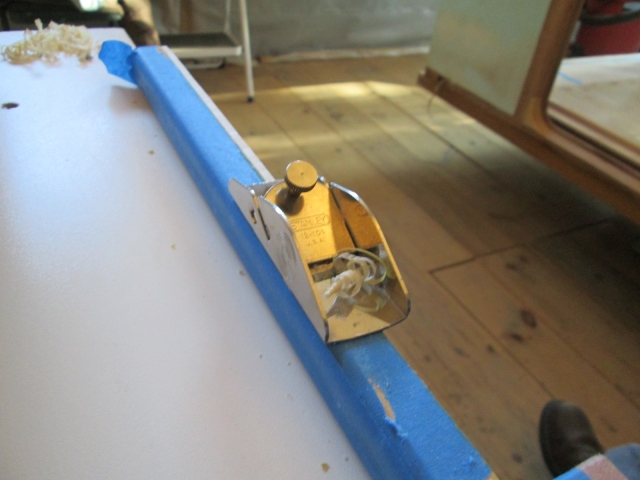
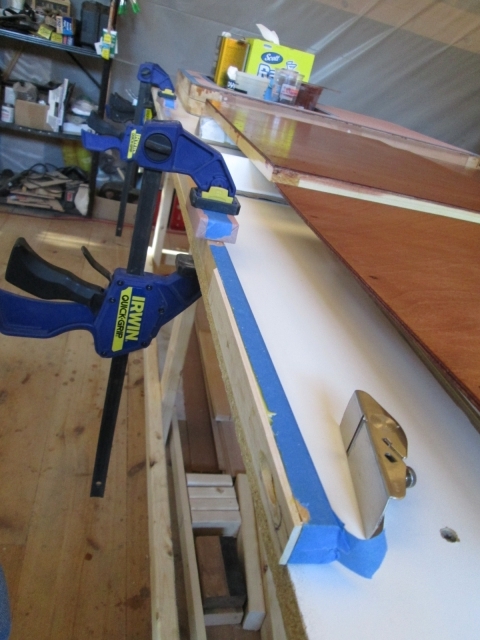
That took a while, so after lunch I felt okay shaving the edges of the shim flush. I left the tape from the glue up on to start. That protected the finish some and acted as a gauge; when the plane shaved the tape I peeled it off and did the final clean-up with the sanding block.
Image
Image

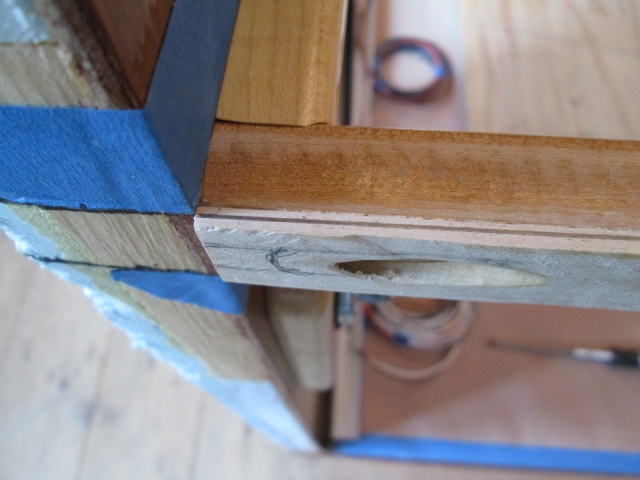
Next I dry installed the ledger again and used a framing square as a straight edge to mark the taper on the shim top and bottom. Need to remove about half of its thickness at the wall end, down to nothing at the other end of the shim.
Image
Image

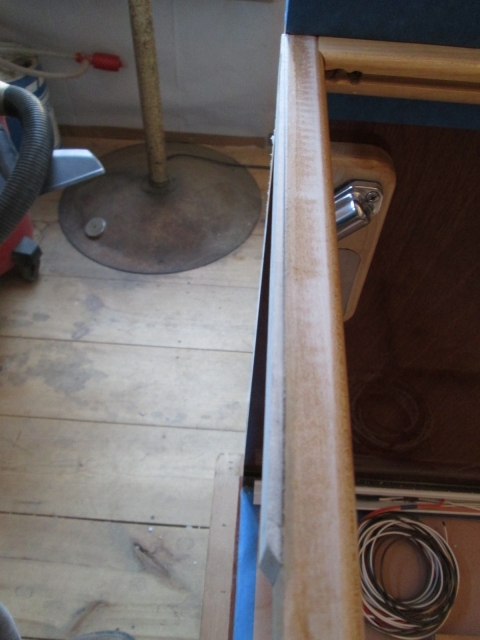
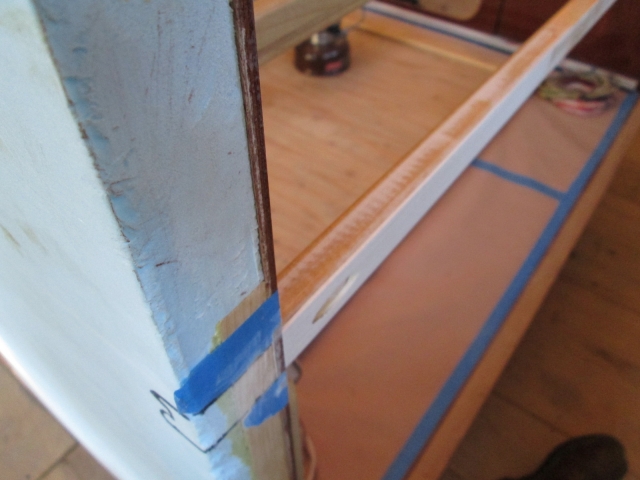
Took it back and clamped it to the bench on top of a few scraps of rosin paper to help protect the finish on the “front” side. Then used a combination of the plane, Surform rasp plane, and sanding block to get down to the line. Back dry fit to the walls I only needed to do a little more hand sanding to make it match.
Image
Image
Image

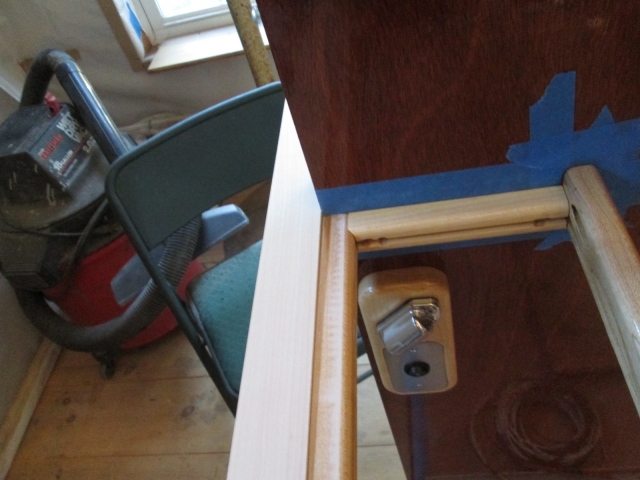
The straight edge showed that the fix was good, but the whites blended together and came out overexposed so you can’t really see. The main thing is there isn’t a big dark shadowy gap.
Image

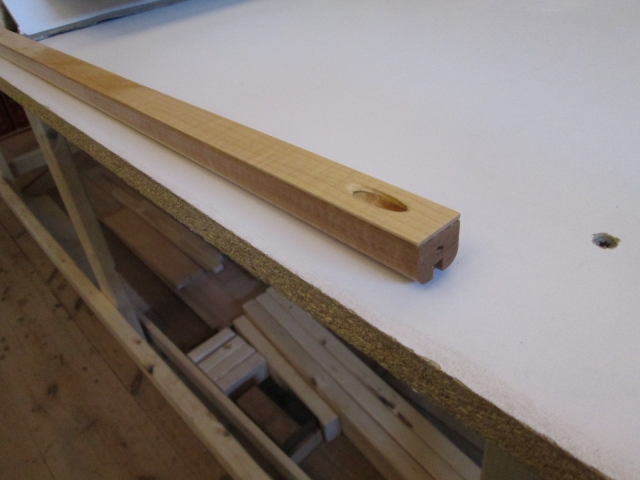
Finally, I hit the shim and scuffed up areas of the ledger with some of the natural oil. Once I get some more poly on it I think it will blend in well enough.
Image

The best part was that by midday the loft was up to 60 deg F and I was able to turn all of the heaters off! It was actually warmer outside than it was downstairs.

So that was another 7-1/2 hrs of work.
Last edited by KCStudly on Sun Mar 09, 2014 6:48 am, edited 1 time in total.
KC
My Build: The Poet Creek Express Hybrid Foamie

Poet Creek Or Bust
Engineering the TLAR way - "That Looks About Right"
TnTTT ORIGINAL 200A LANTERN CLUB = "The 200A Gang"
Green Lantern Corpsmen
User avatar
KCStudly
Donating Member
 
Posts: 9640
Images: 8169
Joined: Mon Feb 06, 2012 10:18 pm
Location: Southeastern CT, USA
Top

Re: The Poet Creek Express - Foamie Hybrid

Postby Wolffarmer » Sun Mar 09, 2014 12:15 am

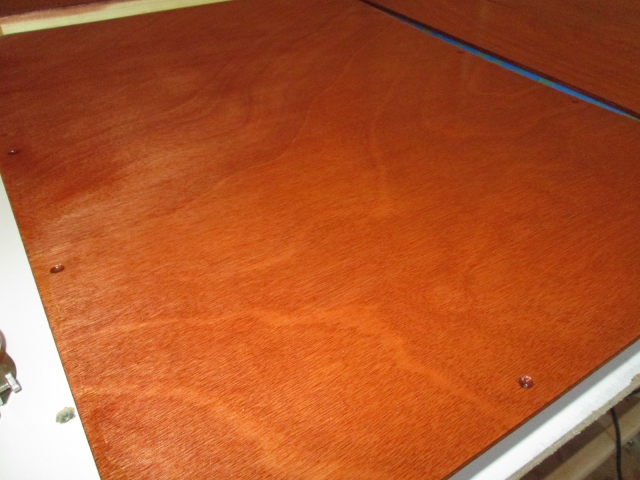
That first photo the finish so deep thought I was looking down a hole for a moment.

Them saws can eat a person up real fast if one is not careful. Still need to be careful even on the super duper ones. I do like my Harbor Freight cabinet saw. Not the worlds greatest but it is better than I and I got it for a good price.

Had to work for real this afternoon and by the time we was done it was to late for the guys I work for to come over and hoist the tranny up. Maybe Monday if it rains.

Randy
"these guys must be afraid of the dark"
User avatar
Wolffarmer
Donating Member
 
Posts: 4612
Images: 309
Joined: Wed May 02, 2007 1:32 pm
Location: Idaho Rupert
Top

Re: The Poet Creek Express - Foamie Hybrid

Postby KCStudly » Mon Mar 10, 2014 10:43 pm

Wolffarmer wrote:That first photo the finish so deep thought I was looking down a hole for a moment.

Now that you mention it, it does make for a mild optical illusion.

Tonight I did another round of poly on the front shelf and cabinet floor panels; the under counter divider, removable panels and support strut; and the reworked ledger for the key catcher shelf.

Same old, same old. Gently scrape any gooey drips; scuff with 220 grit; wipe with rag damped with mineral spirits (seems like I forget this step sometimes); and brush on more poly. Took one pic I will load next time.

The under counter face frame came out pretty good from the last go around except for a couple of sags that weren't too obvious in the poor light (they will stand out horrifically in broad daylight, tho). I'm going to try something a little different this time. I mean, how many times and how many coats do you put to get to a point where there are no glaring issues?

So this time I think I will let it get good and hard; maybe shave the sag; then progressive sanding with fine grits; buffing compound; polish; then wax (options?). Not sure yet if this is what I really want to do, so I just left this aside. Like I said, it looks really good in dim light. :thumbsup:
Last edited by KCStudly on Tue Mar 18, 2014 9:23 pm, edited 1 time in total.
KC
My Build: The Poet Creek Express Hybrid Foamie

Poet Creek Or Bust
Engineering the TLAR way - "That Looks About Right"
TnTTT ORIGINAL 200A LANTERN CLUB = "The 200A Gang"
Green Lantern Corpsmen
User avatar
KCStudly
Donating Member
 
Posts: 9640
Images: 8169
Joined: Mon Feb 06, 2012 10:18 pm
Location: Southeastern CT, USA
Top

Re: The Poet Creek Express - Foamie Hybrid

Postby GPW » Tue Mar 11, 2014 5:55 am

KC, it’s only Yourself that Must be pleased !!! The rest of us are still in awe about the details of this project already ... :thumbsup: 8) :applause:

(disclaimer) Although we’ve Never been to a Teardrop gathering , I’m almost sure there aren’t any people going around taking notes of other folks trailer faults (trailer Critics) ... Or at least I hope not anyway ... :frightened:
There’s no place like Foam !
User avatar
GPW
Gold Donating Member
 
Posts: 14920
Images: 546
Joined: Thu Feb 09, 2006 7:58 pm
Location: New Orleans
Top

Re: The Poet Creek Express - Foamie Hybrid

Postby KCStudly » Tue Mar 11, 2014 6:54 am

You're right, GPW. Most people wouldn't notice the little things. Some might notice and not react. Some might notice and have a small disappointed reaction. Some will notice and offer sympathy, condolence, perhaps constructive advice on how I might have avoided the warts and maybe how to fix them (in a constructive environment like this forum, that is very common and accepted). Some may even scoff, something to the effect of, "too bad you worked so hard and that run ruined the whole thing", then walk away disillusioned by the reality of the world (maybe not realistic, but there is always "that guy").

Me? I'm definitely not the first guy, and I certainly hope I'm not the last guy. I am somewhere in between and for some reason I hope to silence that last guy... the naysayer. My inner self? ;)

It will never be perfect. I know that, but if I give it that little bit of extra (... okay, too much) attention, then it will be something really nice that I can be very proud of, and I like that feeling when people enjoy and respect my efforts. That is my reward and it is worth it to me. :thumbsup:
KC
My Build: The Poet Creek Express Hybrid Foamie

Poet Creek Or Bust
Engineering the TLAR way - "That Looks About Right"
TnTTT ORIGINAL 200A LANTERN CLUB = "The 200A Gang"
Green Lantern Corpsmen
User avatar
KCStudly
Donating Member
 
Posts: 9640
Images: 8169
Joined: Mon Feb 06, 2012 10:18 pm
Location: Southeastern CT, USA
Top

Re: The Poet Creek Express - Foamie Hybrid

Postby wagondude » Tue Mar 11, 2014 9:04 am

If you set your goals high but fall short, you still come out better than if you set your goals lower and exceed expectations. That just means the bar wasn't set high enough.
Bill

TnTTT ORIGIONAL 200A LANTERN CLUB
101137
User avatar
wagondude
1000 Club
1000 Club
 
Posts: 1535
Images: 35
Joined: Sun Jan 16, 2011 7:41 pm
Location: Land of the Jayhawks
Top

Re: The Poet Creek Express - Foamie Hybrid

Postby KCStudly » Wed Mar 12, 2014 10:08 pm

Thanks WD.

Worked over today at the day job, but still put in 3 more hrs prepping and laying on more poly. On the shelf panels I'm up to 2 coats on one side with a 2nd coat to go on the other side. This also makes 2 strong coats on the outsides of the under counter divider and strut, and hopefully the last coat on the key catcher ledger.

Karl and I scrutinized the galley under counter face frame and he thinks it's pretty good; thinks I should call it done, but I may sneak a little touch-up on a couple of small dry spots. The runs aren't as noticeable as I had thought at first, although it was nighttime and we were using light from the turd to inspect.

After finishing up the last bits, cleaning the brushes, taking a couple of pics and getting ready to walk out the door, I looked back at the glistening parts to see some big saggy pools on the shelf panels. :x They each have a small cup shape warp to them, presumably from putting poly on one side at a time. Nothing that the shelf frames and ledgers won't put right, but enough to cause the thinned poly to run and collect. It was already 8pm and I didn't want to have to clean the brush again, so I just grabbed a shop towel and mopped up the bulk of the excess. My thought was if it is too tacky and doesn't flow out, at least it will dry quicker and I will be able to sand it quicker for another attempt. Just can't seem to get past this stage building the front cabinets. :?

No end to the OT in sight, so we'll see how tomorrow goes.

Thanks for stopping in. :thumbsup:
KC
My Build: The Poet Creek Express Hybrid Foamie

Poet Creek Or Bust
Engineering the TLAR way - "That Looks About Right"
TnTTT ORIGINAL 200A LANTERN CLUB = "The 200A Gang"
Green Lantern Corpsmen
User avatar
KCStudly
Donating Member
 
Posts: 9640
Images: 8169
Joined: Mon Feb 06, 2012 10:18 pm
Location: Southeastern CT, USA
Top

Re: The Poet Creek Express - Foamie Hybrid

Postby bonnie » Thu Mar 13, 2014 6:39 am

GPW wrote:KC, it’s only Yourself that Must be pleased !!! The rest of us are still in awe about the details of this project already ... :thumbsup: 8) :applause:

(disclaimer) Although we’ve Never been to a Teardrop gathering , I’m almost sure there aren’t any people going around taking notes of other folks trailer faults (trailer Critics) ... Or at least I hope not anyway ... :frightened:


i didn't see any of that. :thumbsup:
Remember, the turtle won. :)
User avatar
bonnie
Donating Member
 
Posts: 1390
Images: 107
Joined: Sun Jul 24, 2011 4:14 pm
Location: Roxana, IL
Top

PreviousNext

Return to Foamies

Who is online

Users browsing this forum: No registered users and 15 guests