The Poet Creek Express - Foamie Hybrid

Canvas covered foamies (Thrifty Alternatives...)

Moderator: eaglesdare

Re: The Poet Creek Express - Foamie Hybrid

Postby GPW » Fri May 16, 2014 5:54 am

The book idea was Not an attempt to boost your Ego , but more about sharing all this with the world ... 8) Think how many poor people might benefit from a small mobile HOME ... as a primary residence ... :thinking: Better than a tent , more portable than a Mud hut ... Not all of us are blessed with Real Estate ... :roll:
There’s no place like Foam !
User avatar
GPW
Gold Donating Member
 
Posts: 14920
Images: 546
Joined: Thu Feb 09, 2006 7:58 pm
Location: New Orleans

Re: The Poet Creek Express - Foamie Hybrid

Postby KCStudly » Fri May 16, 2014 8:53 am

Geep, I have copies of all of my progress posts. I could make it into a book someday... if people are still reading books. For now I am sharing the build here.


You kind of made me laugh a little there... helping homeless people build over budget campers like TPCE! :lol: That's kind of funny. Me think'st they'd be much better off looking at some of Mike's POD ideas. :thinking:
KC
My Build: The Poet Creek Express Hybrid Foamie

Poet Creek Or Bust
Engineering the TLAR way - "That Looks About Right"
TnTTT ORIGINAL 200A LANTERN CLUB = "The 200A Gang"
Green Lantern Corpsmen
User avatar
KCStudly
Donating Member
 
Posts: 9640
Images: 8169
Joined: Mon Feb 06, 2012 10:18 pm
Location: Southeastern CT, USA

Re: The Poet Creek Express - Foamie Hybrid

Postby GPW » Fri May 16, 2014 10:06 am

Well, just sayin’ , they might not build exact to your descriptions , but they would KNOW how to after looking at all the pictures ... :thinking: Wonder how fast you could get a TD up to behind an Ox or Mule ..  :roll:
There’s no place like Foam !
User avatar
GPW
Gold Donating Member
 
Posts: 14920
Images: 546
Joined: Thu Feb 09, 2006 7:58 pm
Location: New Orleans
Top

Re: The Poet Creek Express - Foamie Hybrid

Postby KCStudly » Fri May 16, 2014 10:08 pm

Tonight was just a short hour and 20 minutes. I was tired from the daily grind and got to a good stopping point early, so…

Started by pulling the locker door and hardware back off, then miter cut the lower sill trim piece. As with the upper piece, I crept up on the length until it would just fit between the sides, so I will probably have to do a final trimming once the vinyl liner is installed.
Image

In order to match the trim flush to the striker plate and sill, I will need to rabbet the leading edge of the sill by 1/16 inch. I need to pick up the proper size bearing for my rabbeting bit, but more importantly, I would need to do something so that the guide bearing doesn’t drop into the recess for the striker. I rummaged thru the left over slats from the galley wall edge laminations and found one that was the right thickness; cut it to fit; and double sticky back taped it into the striker recess to act as a temporary Dutchman.
Image

If you compare that last pic with this one you can see that the 1/2 inch leg of the trim overlaps the Dutchman (ergo the striker plate).
Image

So I made a couple of reference marks, took the aluminum to the mill and notched it out.
Image
From the pic it looks like I might have to open that right side up a little bit. I’ll have to double check that again tomorrow.

Getting closer to the next step with the locker (…though I haven’t decided on the order of the next few assembly steps) at some point I will prime and paint the sill, divider and any other corners where the wood might possibly peek out from under the vinyl and/or trim. I still had a couple of slightly low spots in the pocket hole filler. Rather than mixing up another small batch of Bondo, I just hit it with some of the spackle. I don’t want the holes to print thru the vinyl.
Image

So I have some decisions to make as I go forward assembling the front wall. First I have to finish placing the T-nuts for the long gun mounts, and cut in/jamb out the gray paint, but after that it gets a little fuzzy. Do I line the locker with vinyl next and assemble the little cleats first (easy access), then maybe finish dry fitting the trim? Attach the interior skin to the locker before or after applying poly to the skin? (I’m thinking after… easier to sand the finish with it flat on the bench.) Then its masking the inside edges of the locker (and probably more); gluing and stapling the skin to the locker; gluing and stapling the toe kick to the front side of the skin; gluing and screwing the toe kick to the notch in the bottom of the locker; and, finally, installing the whole front wall assembly to the cabin (with lots of masking).

Anybody see any flaws in this plan? Have any better thoughts and reasoning?
KC
My Build: The Poet Creek Express Hybrid Foamie

Poet Creek Or Bust
Engineering the TLAR way - "That Looks About Right"
TnTTT ORIGINAL 200A LANTERN CLUB = "The 200A Gang"
Green Lantern Corpsmen
User avatar
KCStudly
Donating Member
 
Posts: 9640
Images: 8169
Joined: Mon Feb 06, 2012 10:18 pm
Location: Southeastern CT, USA
Top

Re: The Poet Creek Express - Foamie Hybrid

Postby KCStudly » Sat May 17, 2014 7:42 pm

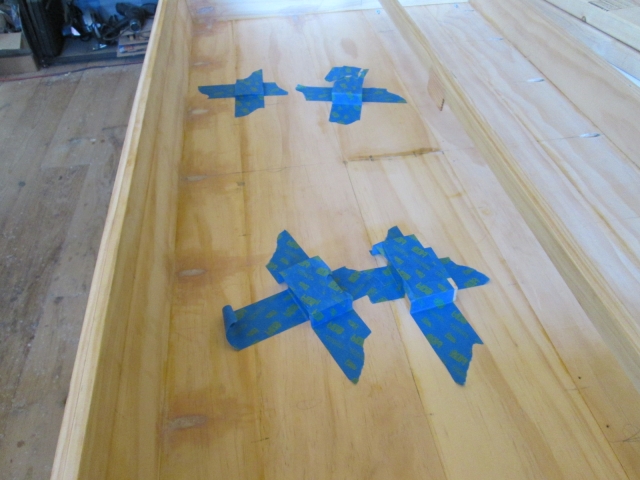
Spent the afternoon/early evening continuing to work on the front locker.

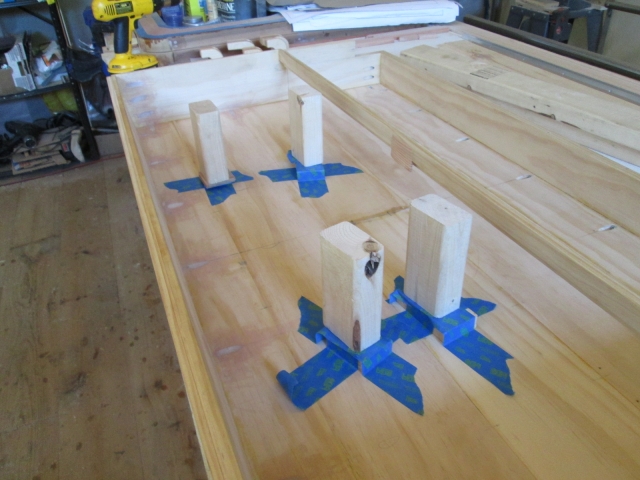
Karl gave me a second set of hands, helping to hold the gun mount perches down and confirm their locations while I simulated placing and retrieving each arm. I couldn’t do this by myself because there was no practical way to clamp them and without enough hands it was too easy to bump them out of position. Once we had checked that there was ample clearance between sights, brackets, and the top and divider panel of the locker, I knew that I was good to go drilling for the T-nuts.

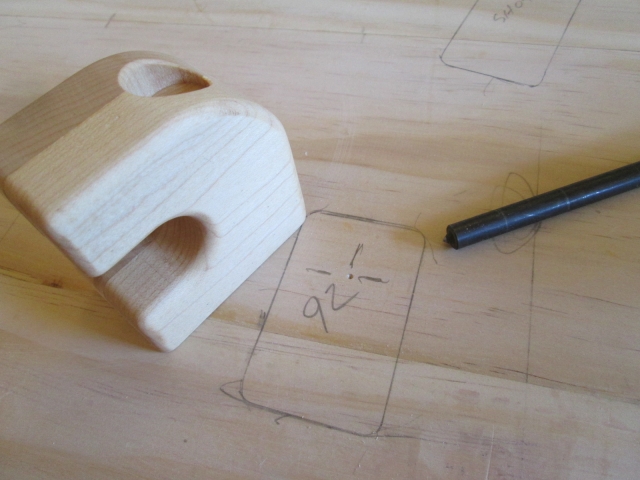
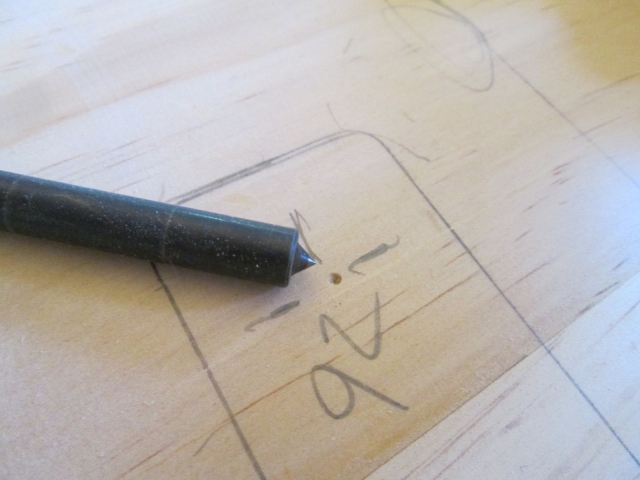
I’ve mentioned transfer punches before. Here’s how they work. They are cylindrical shaped punches that come in sets of various diameters. By selecting the punch that matches the diameter of your thru hole, you can transfer a center mark to the mating surface to accurately position for drilling a mating hole.
Image
Image
Image

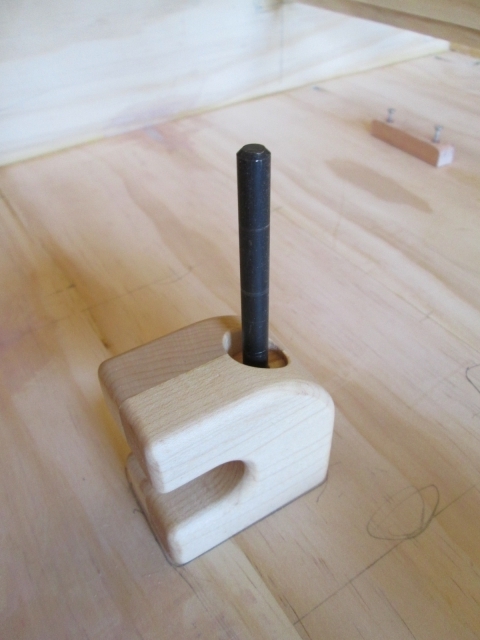
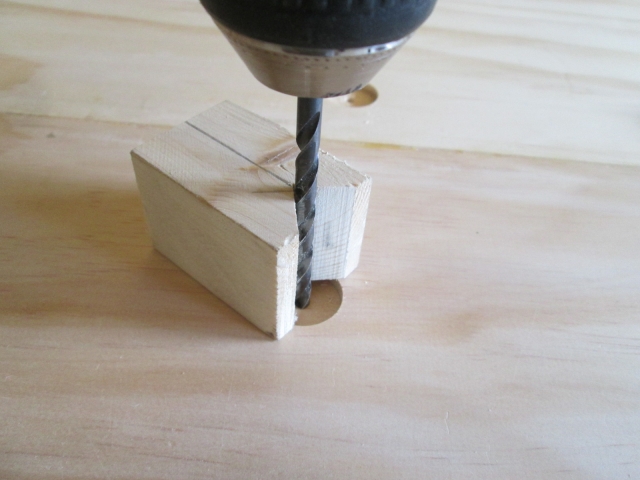
I used a little chunk of the grooved shelf ledger stock as a V-block to help plumb the drill bit and drilled pilot holes for the mounting bracket T-nuts. This transferred the location of the fasteners to the front/outside of the locker.
Image

Before flipping the locker over, I taped some scraps of 5 mm ply over the pilot holes to help guard against chip out.
Image

Then I backed these up with some chunks of 2x that would hold the locker up off of the bench and support the ply shims.
Image

To recess the T-nuts to a fixed depth and help make sure to keep the counterbores parallel to the face, I marked the Forstner bit with a wrap of tape.
Image

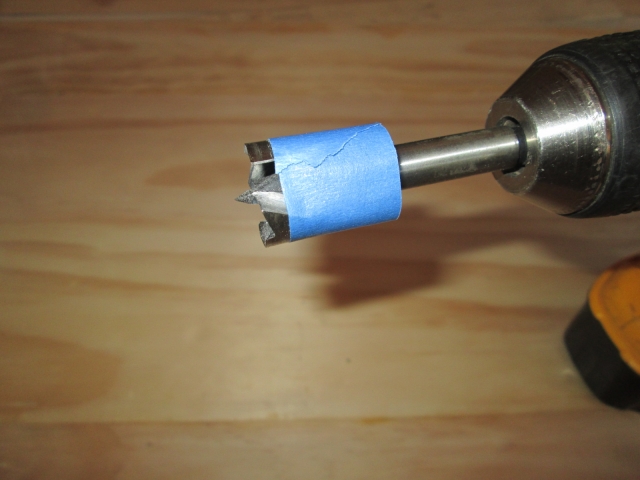
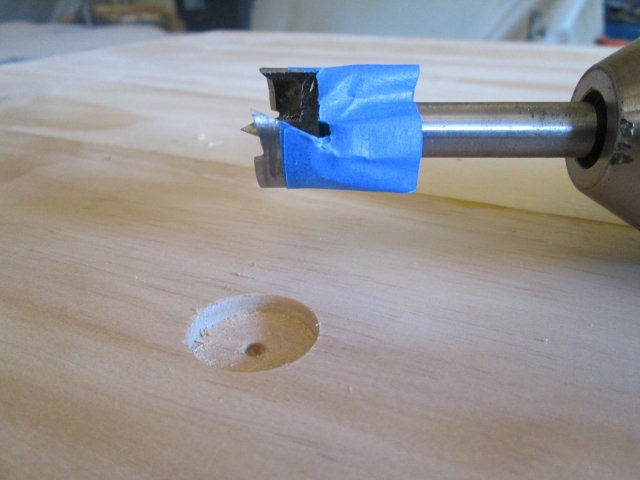
After the first hole I trimmed that tape away from the flute recesses to give the chips an escape route. You can also see one of the T-nut recesses.
Image

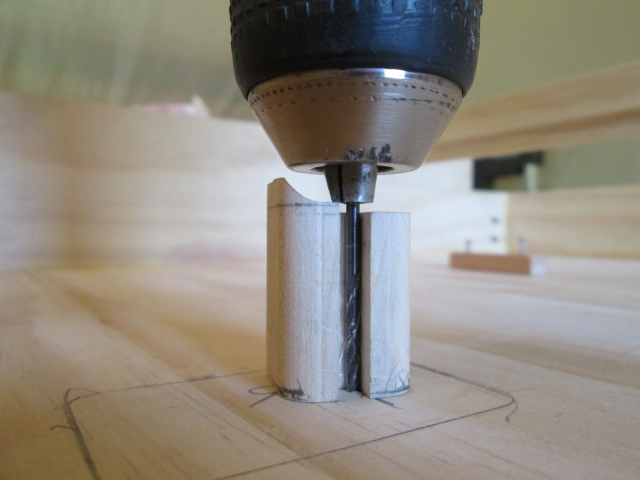
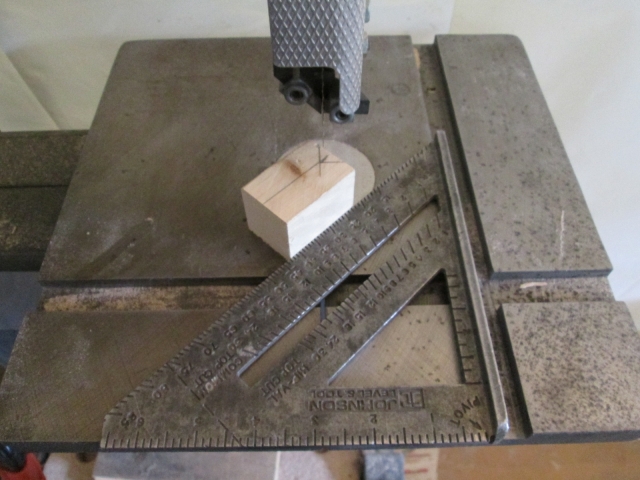
To span the recessed hole and work with larger diameter drill bits I needed a bigger drill guide V-block. Here you can see the V-block layout and how I used the quick square as a miter gauge on the band saw.
Image
Image

A series of successively larger drill bits was used to increase the hole size until it was a snug fit with the barrel diameter of the T-nuts.
Image

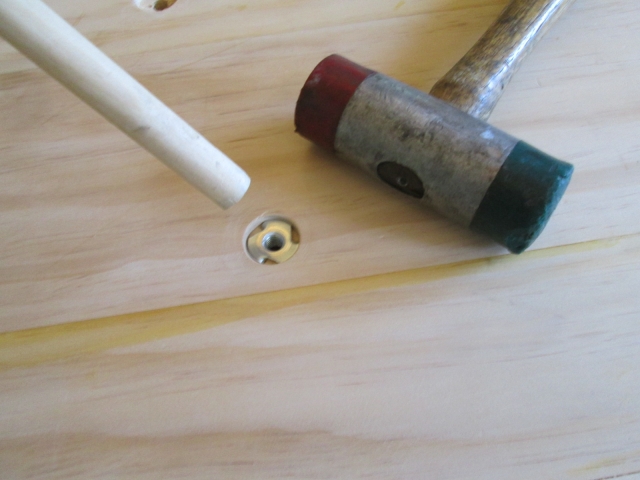
I used a length of dowel to drive the T-nuts down into the recessed holes.
Image

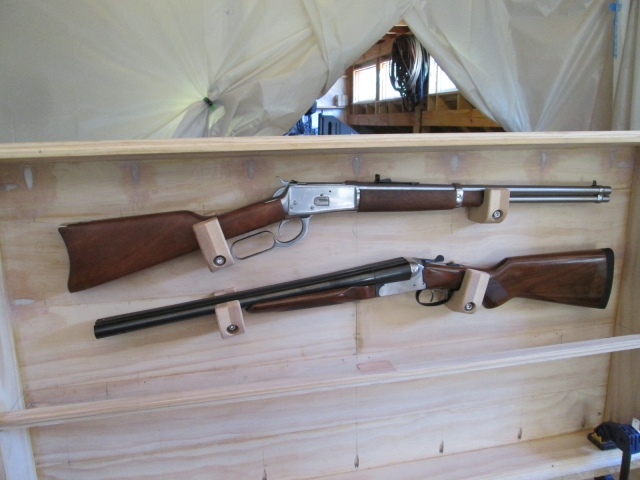
After shortening one of the bolts about 1/4 inch for the rifle barrel perch, I got to bolt the perches in for a test fit.
Image

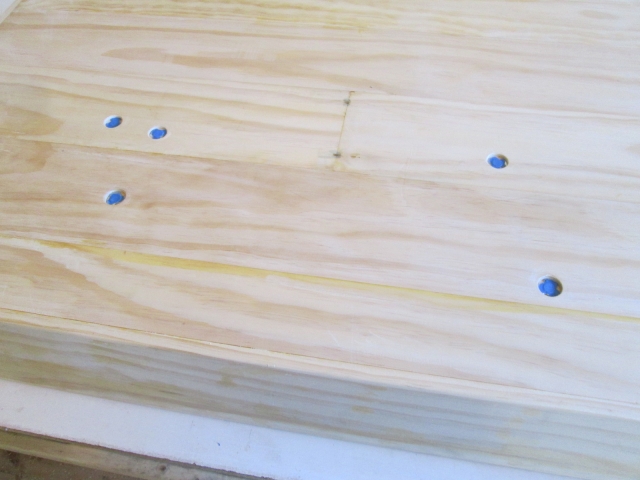
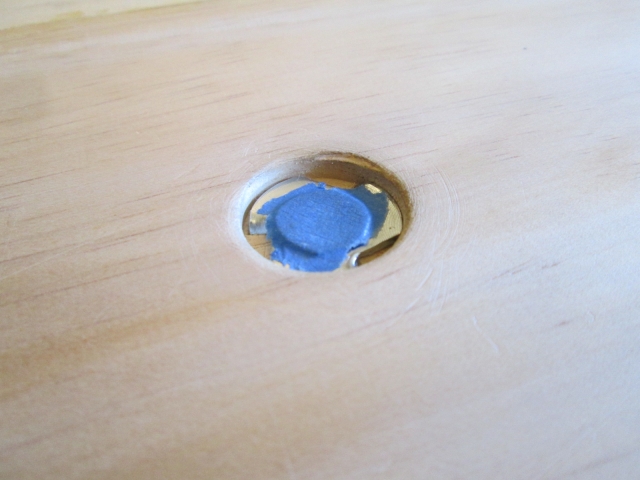
I wanted to fill the T-nut recesses in so that later, when the canvas and paint goes on there is a stable base underneath. Otherwise I would be concerned that the canvas could flex, allowing the paint to break down, and a leak to form. To make sure that the filler didn’t ooze into the threaded holes, I cut little round discs out of the wax paper box chipboard (that I have been using as thin shim material) and taped them on with blue tape. You can also see how I trimmed the tape away from the voids using the utility knife, giving the filler a chance to key in to the voids.
Image
Image

There is a certain anxiety on construction sites when you are trying to finalize all of the forms, rebar, anchor bolts and whatnot before a concrete pour. Invariable when the mixer truck arrives someone will yell out, “Muds here!”
Image

If you catch it just right you can use the “cheese grater” rasp to knock the bulk down while it is still relatively pliable, yet firm enough to avoid clogging.
Image

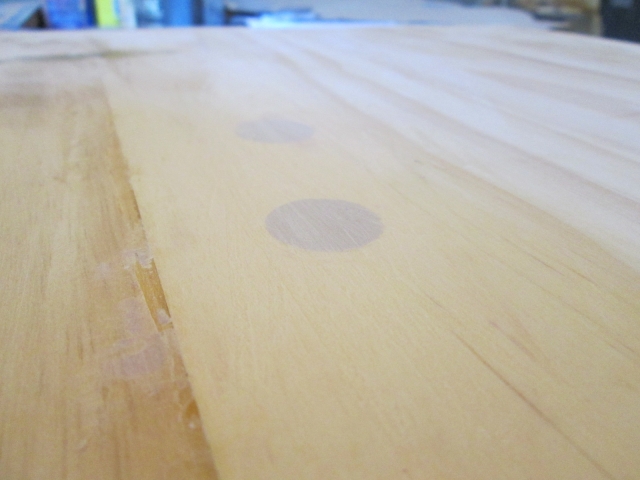
Not long after that the filler was firm enough to smooth out the rest of the way using the sanding block.
Image

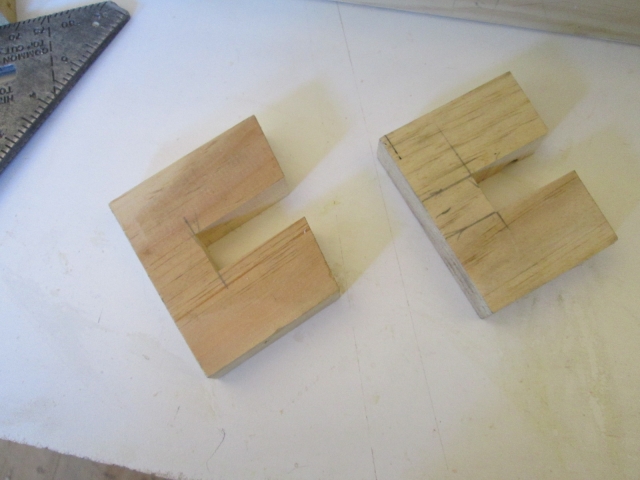
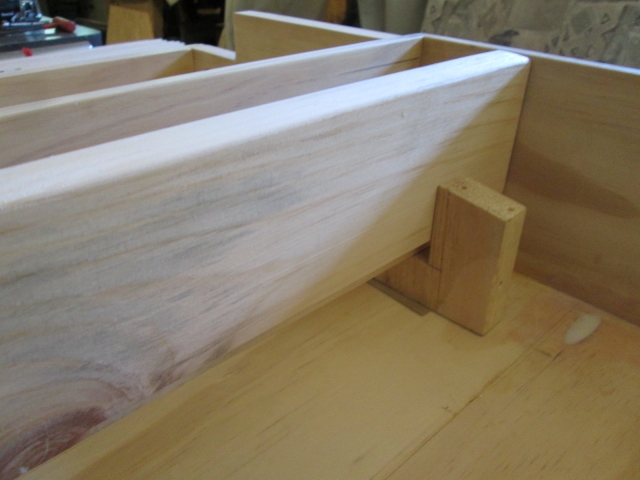
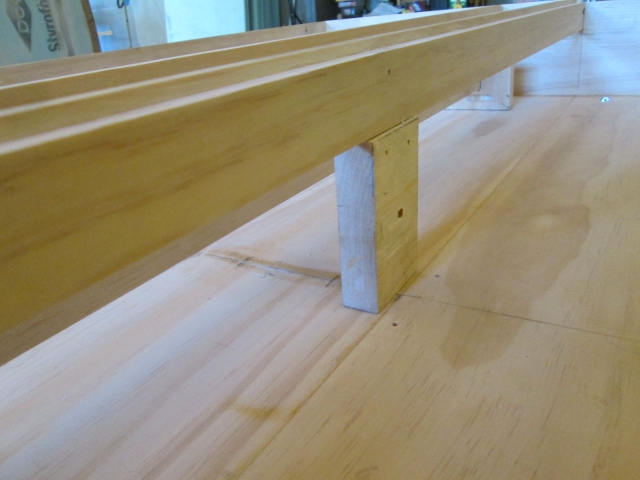
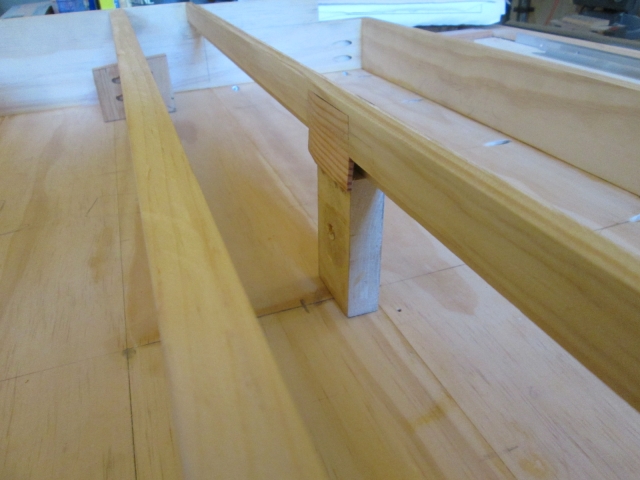
Even though I don’t have the correct diameter guide bearing for my rabbeting bit (I ordered it later when I got home), I worked on setting up supports to stabilize the router shoe when I cut the inlay rabbet for the trim piece on the locker sill. Here are a couple of temporary chocks that will be used to hold the divider panel up on edge to support the router while cutting the sill. I decided to use the divider panel as a prop because it was already the correct length to fill the locker.
Image
Image

Cut this little scrap as a temporary perch to stick under the middle of the sill to keep it from flexing under the router.
Image
Image

Last job for today was oiling the little center support piece and staining the little divider support ledgers.
Image

Tomorrow I will probably get into polyurethane on the locker door, the above small parts, and the galley shelf ledgers that were completed previously. I will have to wait to prime and paint the locker "jambs" until I get the bearing and can cut the rabbet for the trim.
KC
My Build: The Poet Creek Express Hybrid Foamie

Poet Creek Or Bust
Engineering the TLAR way - "That Looks About Right"
TnTTT ORIGINAL 200A LANTERN CLUB = "The 200A Gang"
Green Lantern Corpsmen
User avatar
KCStudly
Donating Member
 
Posts: 9640
Images: 8169
Joined: Mon Feb 06, 2012 10:18 pm
Location: Southeastern CT, USA
Top

Re: The Poet Creek Express - Foamie Hybrid

Postby RandyG » Sat May 17, 2014 8:57 pm

I've used transfer punches while fixing a B-52 wing root crack (a major repair to stop the wing from falling off). They come in very handy and my shop doesn't have any.
Very nice work, again! How long do you have to think about each step you take? You seem to be very meticulous but some people can work without even thinking about the process.
Randy
Aircraft fabricator, novice carpenter, electrical apprentice, audio engineer dropout.
Build thread - http://www.tnttt.com/viewtopic.php?f=50&t=54126
User avatar
RandyG
500 Club
 
Posts: 695
Images: 115
Joined: Thu May 10, 2012 6:52 pm
Top

Re: The Poet Creek Express - Foamie Hybrid

Postby Wolffarmer » Sat May 17, 2014 9:01 pm

I learned about transfer punches the winter I spent building snow plows. I now have a HF set in my shop. It is amazing how long I lived with out them. Used them to build the trailer for the trailer I am working on now to make a telescoping tongue. Would not have been possible with out them. Well, not a easy anyway. There is always more than one way to do something. ( right and wrong )

Randy
"these guys must be afraid of the dark"
User avatar
Wolffarmer
Donating Member
 
Posts: 4612
Images: 309
Joined: Wed May 02, 2007 1:32 pm
Location: Idaho Rupert
Top

Re: The Poet Creek Express - Foamie Hybrid

Postby KCStudly » Sat May 17, 2014 9:22 pm

RandyG wrote:Very nice work, again! How long do you have to think about each step you take? You seem to be very meticulous but some people can work without even thinking about the process.


Thanks RangyG. Sometimes I just work along as I figure things out. The trick is once you know what you are going to do and how you are going to do it, just do it. Don't waffle. On things that take a little more confidence and assurance that you aren't doing something that: paints you into a corner; is working out of order and will make rework necessary; or will end up needing to be undone, I will sleep on it, think about it during the day for a couple of days, and work on other things in the meantime. Same thing when I am behind on my material sourcing. If I can’t work on “this”, work on “that” instead. Working on the 3D model in advance, although not complete to the last detail, has given me “the big picture” in my head so I can see how it all must come together; more or less. Having those hard detailed dimensions has helped me many times to keep working and have the confidence that things will fit together later.

Wolffarmer wrote:There is always more than one way to do something. ( right and wrong )

True dat. If I did not have access to a transfer punch, I would have found a pencil that fit in the hole, circled it around and prick punched a mark in the center of the tracing, but Karl has a set of the punches, so I was in luck.
KC
My Build: The Poet Creek Express Hybrid Foamie

Poet Creek Or Bust
Engineering the TLAR way - "That Looks About Right"
TnTTT ORIGINAL 200A LANTERN CLUB = "The 200A Gang"
Green Lantern Corpsmen
User avatar
KCStudly
Donating Member
 
Posts: 9640
Images: 8169
Joined: Mon Feb 06, 2012 10:18 pm
Location: Southeastern CT, USA
Top

Re: The Poet Creek Express - Foamie Hybrid

Postby Wolffarmer » Sat May 17, 2014 10:08 pm

The HF ones did not cost much and for occasional use they are plenty good.
"these guys must be afraid of the dark"
User avatar
Wolffarmer
Donating Member
 
Posts: 4612
Images: 309
Joined: Wed May 02, 2007 1:32 pm
Location: Idaho Rupert
Top

Re: The Poet Creek Express - Foamie Hybrid

Postby GPW » Sun May 18, 2014 5:51 am

Transfer punches .... we learn something new every day ... :thumbsup: 8)
There’s no place like Foam !
User avatar
GPW
Gold Donating Member
 
Posts: 14920
Images: 546
Joined: Thu Feb 09, 2006 7:58 pm
Location: New Orleans
Top

Re: The Poet Creek Express - Foamie Hybrid

Postby Wolffarmer » Sun May 18, 2014 7:46 am

Just give them a light tap and then finish the mark with a center punch. Transfer punches are not meant to make the final mark. Do that and they will last most of us a life time. Years ago BHF ( before Harbor Fright ) I got a 1/4 inch punch and have used that a lot building farm equipment. Now with HF have the set that goes up to 1/2 inch.
"these guys must be afraid of the dark"
User avatar
Wolffarmer
Donating Member
 
Posts: 4612
Images: 309
Joined: Wed May 02, 2007 1:32 pm
Location: Idaho Rupert
Top

Re: The Poet Creek Express - Foamie Hybrid

Postby KCStudly » Sun May 18, 2014 8:40 am

+1 what Randy said. On steel, just tap them a little and us a regular center punch to increase the mark. For some reason transfer punches don't hold up to gorilla tactics. I've seen more sets with the tips busted off from heavy hitting. On wood, like above, I didn't even use a hammer. I just pressed down by hand.
KC
My Build: The Poet Creek Express Hybrid Foamie

Poet Creek Or Bust
Engineering the TLAR way - "That Looks About Right"
TnTTT ORIGINAL 200A LANTERN CLUB = "The 200A Gang"
Green Lantern Corpsmen
User avatar
KCStudly
Donating Member
 
Posts: 9640
Images: 8169
Joined: Mon Feb 06, 2012 10:18 pm
Location: Southeastern CT, USA
Top

Re: The Poet Creek Express - Foamie Hybrid

Postby KCStudly » Sun May 18, 2014 2:36 pm

No work on the camper today. We had a lot of wind Friday night and it blew down the large mass of bittersweet vine that had been growing up our chimney. Had to go get a decent pruning/lopping shear, butcher the snake's nest of growth back, hack thru it a few times to get it into manageable size chunks, and haul it around to the brush pile in back. While I was at it I cleaned the leaf debris out of the bed of the '72.

Man that stuff is tenacious! It's like the northern version of kudzu.
KC
My Build: The Poet Creek Express Hybrid Foamie

Poet Creek Or Bust
Engineering the TLAR way - "That Looks About Right"
TnTTT ORIGINAL 200A LANTERN CLUB = "The 200A Gang"
Green Lantern Corpsmen
User avatar
KCStudly
Donating Member
 
Posts: 9640
Images: 8169
Joined: Mon Feb 06, 2012 10:18 pm
Location: Southeastern CT, USA
Top

Re: The Poet Creek Express - Foamie Hybrid

Postby Hardryder56 » Sun May 18, 2014 3:39 pm

"Kudzu, the plant that ate the south" LOL
Wild grape is my nemesis today, have a dead fall hanging about 4 feet off the ground but I am by myself and can't deal with it till my Bride comes home from "shopping"
Tom
Coffee is like liquid hugs, it warms you from the inside out
Hardryder56
Teardrop Advisor
 
Posts: 92
Joined: Mon Nov 25, 2013 5:04 pm
Location: Lake Conroe, TEXAS
Top

Re: The Poet Creek Express - Foamie Hybrid

Postby KCStudly » Mon May 19, 2014 11:00 pm

Arrived at Mecca and got caught up with Karl (chatted for a bit). I had a little trouble getting motivated and deciding what to work on; still waiting on the guide bearing for the locker sill.

I thought I would do a round of polyurethane and figured I would start with the front wall inner skin before moving on to some smaller items. However, I needed to fix my little boo-boo first. I had started to stain this panel before remembering to mask off the glue edge. So first I tamped a length of tape on my T-shirt and laid it down to protect where I didn’t want to sand.
Image

Then sanded.
Image

Then peeled up the tape on the stained portion and laid fresh tape down on the sanded section. You can see here how the tape pulled up a few wood fibers taking the stain with it.
Image

So I ended up hitting the edge with a bit more stain and rubbing that out to match until I was happy with it. Have to let it dry fully before poly. I think it blended fairly well. There is a slightly darker area near the top, but that is where there is a whorl in the grain. The lighter area across the top is the dry section that I did not touch. Keep fingers crossed that the wet area fades the same.
Image

The other side didn’t peel, but for some reason I felt compelled to touchup along the tape edge; hope it fades out when dry, too.
Image

My brush pot of poly had gelled up, so I had to clean that out, then I had to work at the lid of the gallon can to get it off in order to pour some more. With that out of the way, I laid the first round of poly down on the “front” (cabin side) of the locker door.
Image

Then the galley upper shelf and locker divider ledgers.
Image

So for a “light” build day, I still managed to stay until nearly 8pm, a solid 3 hrs (maybe only 2-1/2 after visiting with Karl).

Since I don’t have ready access to hot water in the loft (and don’t want to invade Karl and Chris’ kitchen on a regular basis) when I finish up I clean my brushes with mineral spirits, wrap them in a disposable plastic shopping bag, and bring them home to wash out. So how do I hang them to dry and remember to bring them along with me the next day? Stick them on the side of the fridge with magnet clips next to my lunch bag (my man purse) where I will see them in the morning. Not only that, but the cover slip for the smaller natural bristle brush is clipped to the strap of my bag.
Image
KC
My Build: The Poet Creek Express Hybrid Foamie

Poet Creek Or Bust
Engineering the TLAR way - "That Looks About Right"
TnTTT ORIGINAL 200A LANTERN CLUB = "The 200A Gang"
Green Lantern Corpsmen
User avatar
KCStudly
Donating Member
 
Posts: 9640
Images: 8169
Joined: Mon Feb 06, 2012 10:18 pm
Location: Southeastern CT, USA
Top

PreviousNext

Return to Foamies

Who is online

Users browsing this forum: No registered users and 7 guests