The Poet Creek Express - Foamie Hybrid

Canvas covered foamies (Thrifty Alternatives...)

Moderator: eaglesdare

Re: The Poet Creek Express - Foamie Hybrid

Postby KCStudly » Thu May 29, 2014 11:23 pm

Funny you should mention that. It doesn't get washed very often, but the wife must have taken it somewhere today. When I got home it was nice and clean and had tire dressing slung all up on the sides of it; flung off of the wide tires. :roll:
KC
My Build: The Poet Creek Express Hybrid Foamie

Poet Creek Or Bust
Engineering the TLAR way - "That Looks About Right"
TnTTT ORIGINAL 200A LANTERN CLUB = "The 200A Gang"
Green Lantern Corpsmen
User avatar
KCStudly
Donating Member
 
Posts: 9640
Images: 8169
Joined: Mon Feb 06, 2012 10:18 pm
Location: Southeastern CT, USA

Re: The Poet Creek Express - Foamie Hybrid

Postby GPW » Fri May 30, 2014 5:31 am

Self Cleaning cars .... We’re all for that !!! 8) They have self driving cars now , why not self-cleaning ? Black vehicles (as Randy G knows ) here are good for baking cookies in ... :o I had a black van once , a real monster to keep clean , and I leaned on it once in the mid summer sun and got 3rd degree burns ... :frightened:
We’ve noticed a great difference in the Sun’s angle and intensity , between the white Hot heat here a, and the rather angled yellowish sunlight up North ... Painting up North required different colors and observations ...

KC, looking Super as usual !!! :applause:
There’s no place like Foam !
User avatar
GPW
Gold Donating Member
 
Posts: 14920
Images: 546
Joined: Thu Feb 09, 2006 7:58 pm
Location: New Orleans

Re: The Poet Creek Express - Foamie Hybrid

Postby KCStudly » Fri May 30, 2014 6:19 am

GPW wrote:KC, looking Super as usual !!! :applause:


Thanks! :)
KC
My Build: The Poet Creek Express Hybrid Foamie

Poet Creek Or Bust
Engineering the TLAR way - "That Looks About Right"
TnTTT ORIGINAL 200A LANTERN CLUB = "The 200A Gang"
Green Lantern Corpsmen
User avatar
KCStudly
Donating Member
 
Posts: 9640
Images: 8169
Joined: Mon Feb 06, 2012 10:18 pm
Location: Southeastern CT, USA
Top

Re: The Poet Creek Express - Foamie Hybrid

Postby GPW » Fri May 30, 2014 7:07 am

KC, I’ve used up all my compliments for your most exemplary work ;) ... All I can say anymore is WOW !!! ... and drool ... :lol: :lol: :lol:
There’s no place like Foam !
User avatar
GPW
Gold Donating Member
 
Posts: 14920
Images: 546
Joined: Thu Feb 09, 2006 7:58 pm
Location: New Orleans
Top

Re: The Poet Creek Express - Foamie Hybrid

Postby KCStudly » Fri May 30, 2014 8:54 am

Thanks again. :D
KC
My Build: The Poet Creek Express Hybrid Foamie

Poet Creek Or Bust
Engineering the TLAR way - "That Looks About Right"
TnTTT ORIGINAL 200A LANTERN CLUB = "The 200A Gang"
Green Lantern Corpsmen
User avatar
KCStudly
Donating Member
 
Posts: 9640
Images: 8169
Joined: Mon Feb 06, 2012 10:18 pm
Location: Southeastern CT, USA
Top

Re: The Poet Creek Express - Foamie Hybrid

Postby atahoekid » Sat May 31, 2014 12:35 pm

GPW wrote:KC, I’ve used up all my compliments for your most exemplary work ;) ... All I can say anymore is WOW !!! ... and drool ... :lol: :lol: :lol:


+1
Mel

"Believe in your abilities... Remember amateurs built the ark, professionals built the Titanic"

"Indecision may or may not be my problem" Jimmy Buffet

Image

The Road Foamie Build Thread: viewtopic.php?t=45698
User avatar
atahoekid
Platinum Donating Member
 
Posts: 1773
Images: 158
Joined: Sat Jul 24, 2010 2:49 am
Location: Incline Village, NV
Top

Re: The Poet Creek Express - Foamie Hybrid

Postby KCStudly » Sun Jun 01, 2014 8:41 am

Thanks, Mel! :)
KC
My Build: The Poet Creek Express Hybrid Foamie

Poet Creek Or Bust
Engineering the TLAR way - "That Looks About Right"
TnTTT ORIGINAL 200A LANTERN CLUB = "The 200A Gang"
Green Lantern Corpsmen
User avatar
KCStudly
Donating Member
 
Posts: 9640
Images: 8169
Joined: Mon Feb 06, 2012 10:18 pm
Location: Southeastern CT, USA
Top

Re: The Poet Creek Express - Foamie Hybrid

Postby KCStudly » Sun Jun 01, 2014 8:56 pm

I guess I’ve been slacking off some lately. It seems that I haven’t been putting in as much time each session and I haven’t been getting as much done. It seems to be a trend as I approach slightly (?) daunting tasks. I slow down and try to think things through so that I don’t steam roll myself into trouble. By default it gives me a chance to focus on little details as I work on the lesser things at hand, while I imagine how I will handle things on the next big task.

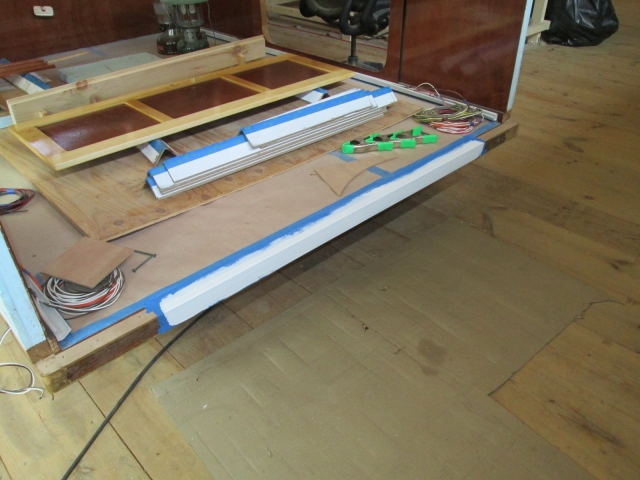
So in the not too distant future I will be assembling all of these front wall parts and sticking the assembly on the front of the cabin. A few things come to mind that might be important: what order to assemble; where and how to mask so I don’t get glue all over the nice finishes; and how best to attach the front wall skin to the edges of the walls where there is no blocking or shelf ledgers to screw to (I’m considering using long drywall screws directly into the foam, but haven’t decided which type of glue to use).

Anyway, I’m creeping up on it.

Friday I was asked to stay late at work and help repair a piece of machinery with a failed mechanical seal, which ran late, so no progress.

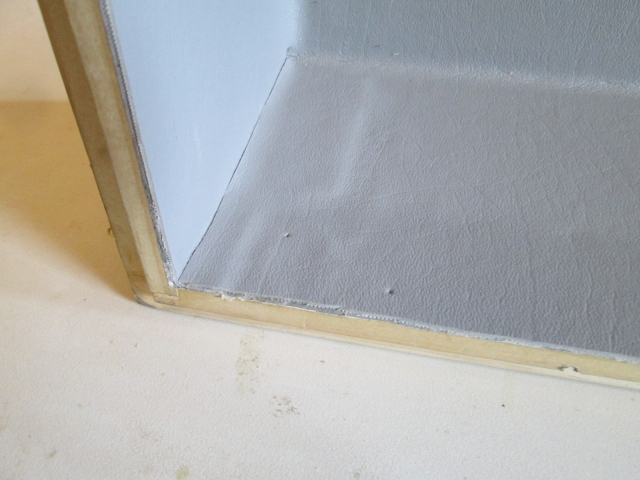
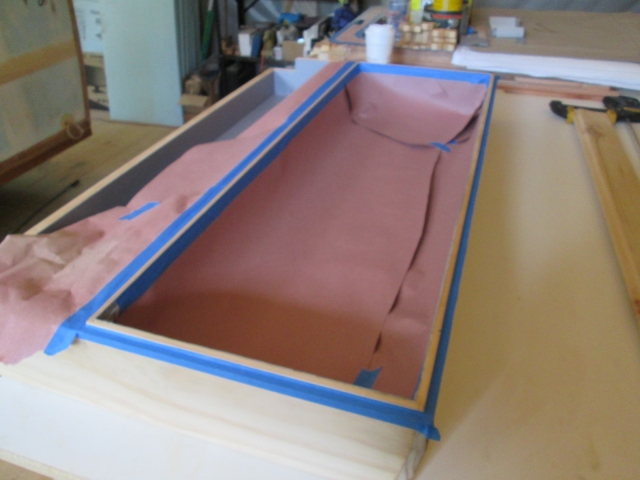
Saturday I made a little progress on the locker details. Where I had overlapped the corners of the vinyl at the top, I had forgotten to trim the underlying layer to clear the hinge location, and by chance the flap would have made the hinge cockeyed. So I peeled up each corner, trimmed the underlying flap, found the hinge screw holes and glued the outer layer back down. You can see the difference in the lumps of the corner tabs printing through after trimming.
Image

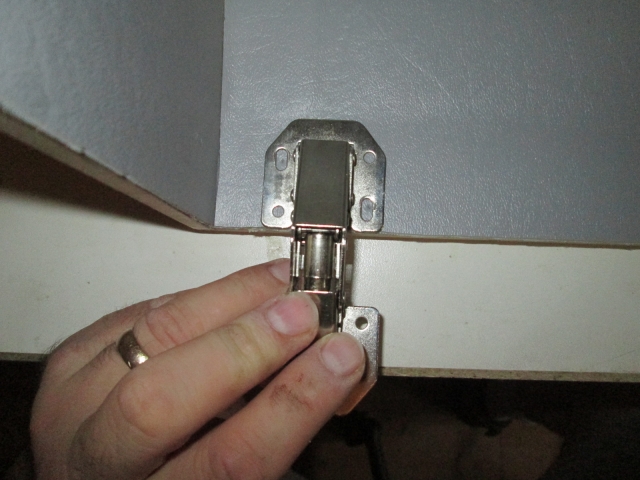
Here it is with the hinge mocked into place so you can see how the hinge only sits on one layer of vinyl now.
Image

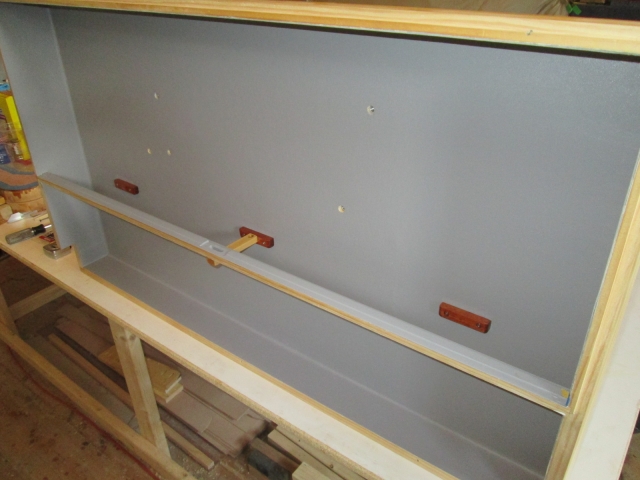
I used prior measurements and a piece of dowel sanded to a dull point to poke around and find the screw holes for the divider shelf ledgers; poked thru the vinyl with the tip of my compass, and screwed the ledgers in place with the divider bar.
Image
Image

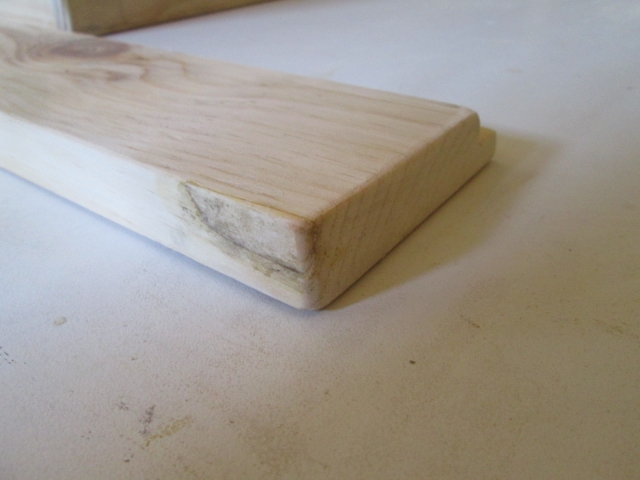
I started to make some adjustments to the divider shelf so that it would fit with the addition of the vinyl. Trimmed the length and shaved the back some with the small matchbox plane, but I ended up chipping out a piece on the corner. I suppose I should have kept going and got it to fit, then glued the chip back into place, but I didn’t think that thru too well and stopped to glue it up. Here it is, later, all better.
Image

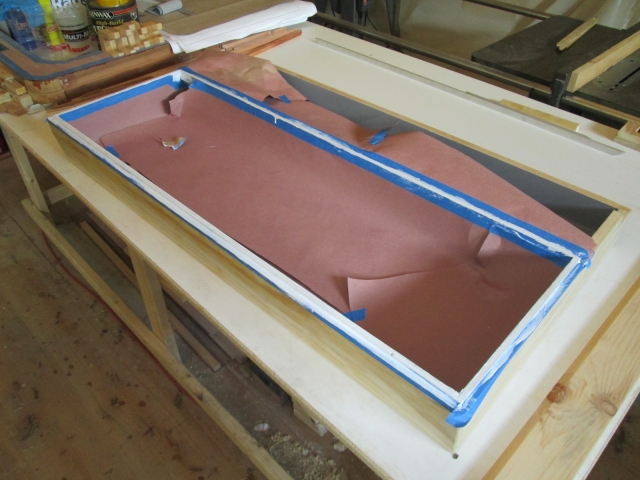
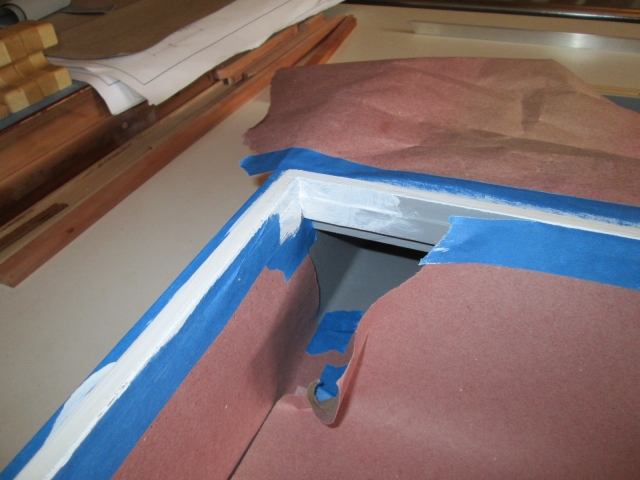
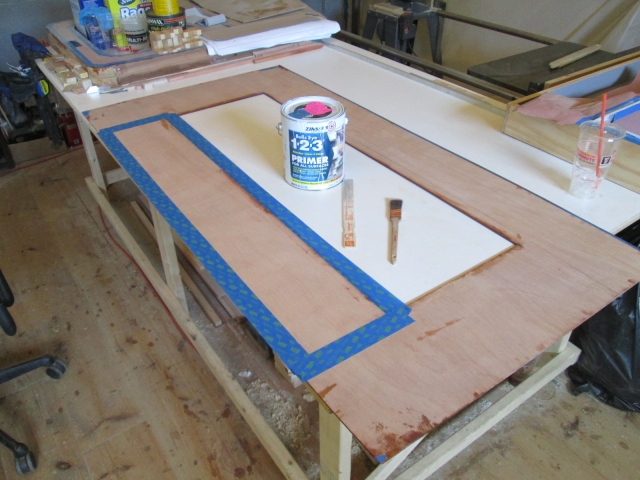
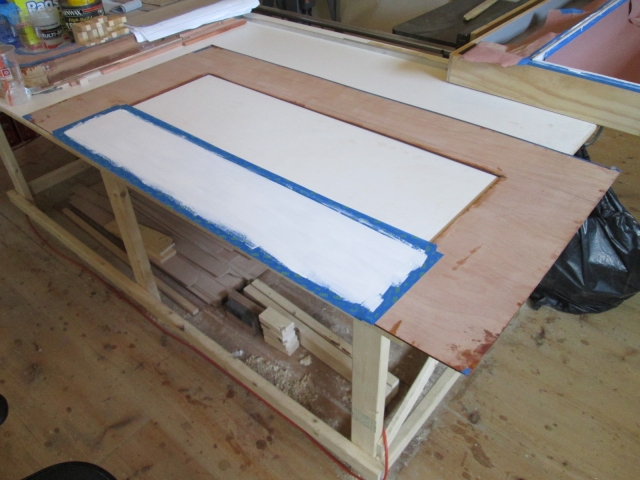
In hindsight it would have been better to keep fitting the divider because the next move was to mask off the locker case so that I could paint the rabbet edge. With the case masked, after the divider glue was set, I couldn’t go back to fitting it, and I would have liked to have included it in the painting process. Oh well, I’ll get to it later. Here is the case first masked then primed, including the little area on the sill that needed to be touched up.
Image
Image
Image

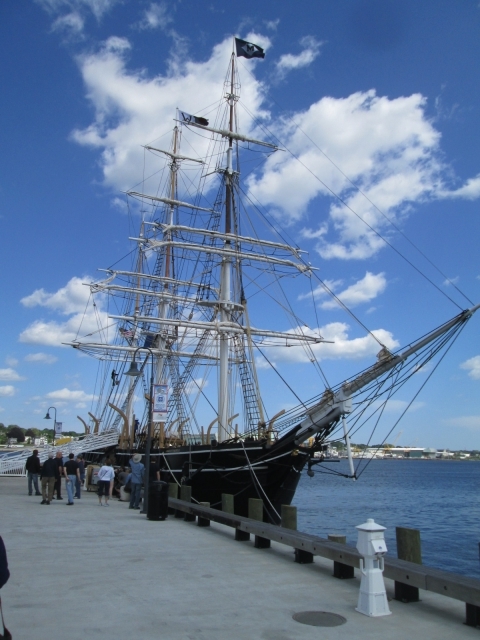
Cut work short on Saturday to go see the Charles W. Morgan in New London. Bill (of mom and Bill) has been volunteering at the Mystic Seaport for some time and has worked on the restoration of this, the oldest commercial sailing vessel in the US. Mystic is historically significant for its shipbuilding, and New London for its whaling history. As the restoration of the Morgan nears completion, they moved it out of the shallow Mystic River over to the Thames River (which is much deeper due to being dredged for the submarine traffic) to the state pier so that they could load the remaining ballast. This is the first time since (IIRC) 1941 that the ship has been out of the Mystic. After final preparation the Morgan will sail under her own power on a tour of ports here in New England (including a visit to the USS Constitution in Boston), before returning to the Seaport.

Anyway, I took some pictures that I thought you all might enjoy.
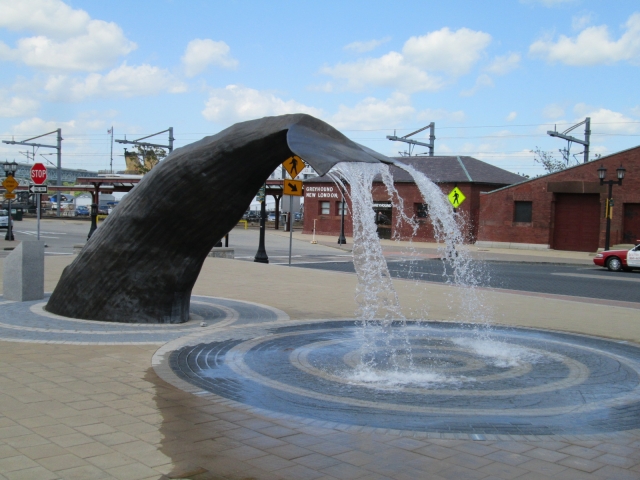
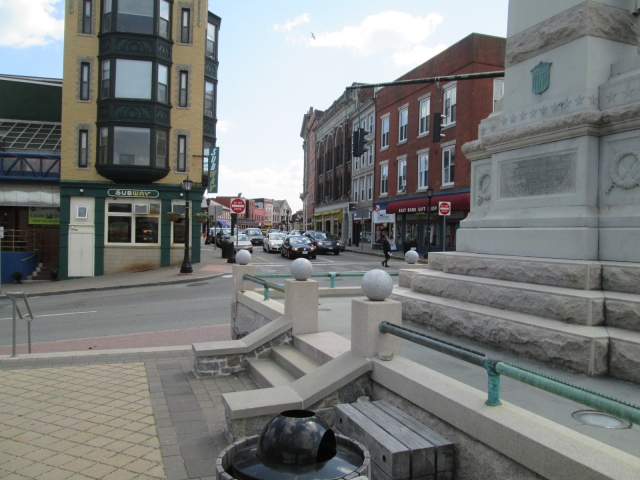
Whale tail fountain, New London, CT.
Image

Historic Bank St., downtown New London.
Image

The Morgan.
Image

The main mast and rigging.
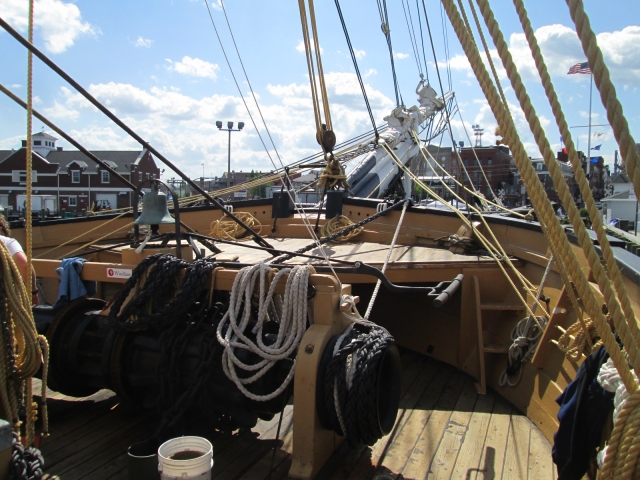
Image

The foredeck.
Image

Today I just spent a couple of hours getting some more of the primer down.
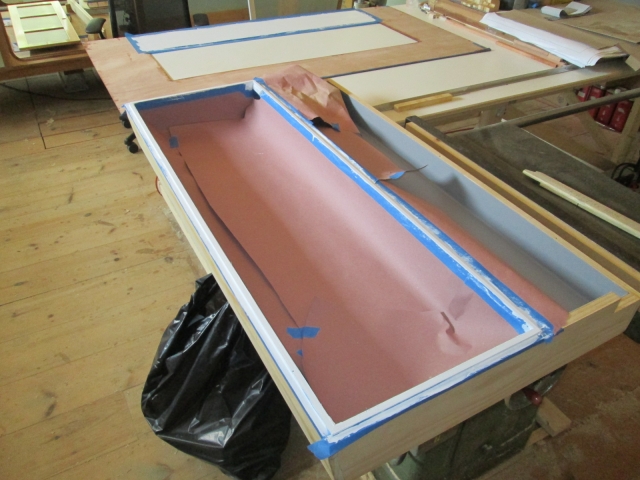
Scraped some poly drips off the front of the front wall skin and masked the area that will end up being inside of the locker well.
Image

Then primer.
Image

Put a second coat on the front edge of the floor.
Image

A 2nd coat on the lip of the locker case.
Image

And while I was at it, a 2nd coat on the front toe kick spar in way of the locker.
Image

This morning Yvette had dropped an earring down the sink drain and I had pulled the trap out to retrieve it. I stopped at the hardware to get a fresh trap gasket and wanted to get home early to complete the repair (and watch the drags from Old Bridge Township!), so it was a short day.
KC
My Build: The Poet Creek Express Hybrid Foamie

Poet Creek Or Bust
Engineering the TLAR way - "That Looks About Right"
TnTTT ORIGINAL 200A LANTERN CLUB = "The 200A Gang"
Green Lantern Corpsmen
User avatar
KCStudly
Donating Member
 
Posts: 9640
Images: 8169
Joined: Mon Feb 06, 2012 10:18 pm
Location: Southeastern CT, USA
Top

Re: The Poet Creek Express - Foamie Hybrid

Postby Hardryder56 » Mon Jun 02, 2014 10:38 am

KC,
Looking great there, lots of great design ideas coming from this build. Thanks for posting the Mystic Seaport pictures, been a few years since I have been there.
My truck is "dirt colored" so I don't wash it as much as I should. ;)

Tom
Coffee is like liquid hugs, it warms you from the inside out
Hardryder56
Teardrop Advisor
 
Posts: 92
Joined: Mon Nov 25, 2013 5:04 pm
Location: Lake Conroe, TEXAS
Top

Re: The Poet Creek Express - Foamie Hybrid

Postby KCStudly » Mon Jun 02, 2014 11:08 am

Thanks Tom/Hardryder. Glad you are enjoying the show!
KC
My Build: The Poet Creek Express Hybrid Foamie

Poet Creek Or Bust
Engineering the TLAR way - "That Looks About Right"
TnTTT ORIGINAL 200A LANTERN CLUB = "The 200A Gang"
Green Lantern Corpsmen
User avatar
KCStudly
Donating Member
 
Posts: 9640
Images: 8169
Joined: Mon Feb 06, 2012 10:18 pm
Location: Southeastern CT, USA
Top

Re: The Poet Creek Express - Foamie Hybrid

Postby KCStudly » Mon Jun 02, 2014 8:43 pm

More of the same, so a quick update.

Contemplated the path of the electrical wiring forward to the tongue box. I was thinking that I would route it from the front Wiremold “baseboard” thru the base of the wall into the curb side corner of the locker well. There it would be wrapped in corrugated split loom where it would then turn down and enter a Sealtite style flexible electrical conduit that would jumper from under the locker to the underside of the tongue box. I’m glad I didn’t make any rash decisions and start cutting holes. First there are the mounting pocket holes under the locker to avoid, and then there is the tongue A-frame to avoid. I should have worked this all out before I put the vinyl down inside of the locker, but hey, progress is progress. Once you leave the 3D design and start building as you go, you need to have your crystal ball really dialed in and shined up bright. I’ll have to get the Sealtite fittings and see what needs to happen for that.

Then I painted the primed areas of locker well gray. Front of front wall skin and toe kick spar.
Image

Gray lip around locker opening.
Image

Gray locker sill touch-up.
Image

Gray front floor edge.
Image

I had a little bit of time left so I went ahead and installed the galley shelf ledgers; at least the ones that I have made so far.
Image

So bit by bit, step by step, I am making progress.
KC
My Build: The Poet Creek Express Hybrid Foamie

Poet Creek Or Bust
Engineering the TLAR way - "That Looks About Right"
TnTTT ORIGINAL 200A LANTERN CLUB = "The 200A Gang"
Green Lantern Corpsmen
User avatar
KCStudly
Donating Member
 
Posts: 9640
Images: 8169
Joined: Mon Feb 06, 2012 10:18 pm
Location: Southeastern CT, USA
Top

Re: The Poet Creek Express - Foamie Hybrid

Postby KCStudly » Fri Jun 06, 2014 5:05 pm

Thursday I stopped and picked up a couple of these liquid tight 90 electrical flex conduit connectors in 1 inch nominal size. These will be used, along with some 1 inch flex conduit to jumper from where the main electrical bundle leaves the bottom of the tongue box and enters the bottom of the locker.
Image

I’m not sure how I want to try and seal these. They have a gasket and gland nut, but the grip is only 3/8 of an inch. The Locker case is 3/4 thick and the floor of the tongue box will be 1/2 ply.
Image

I decided that there was enough gray paint on everything that was going to get gray paint (except for the locker divider shelf), so I pulled all of the masking off and worked at getting the divider to fit nicely again now that the vinyl was installed. I used the little churches I had made for the router operation on the sill as rests for the little matchbox plane.
Image
Image

It fits well enough again.
Image

Lots of measuring twice to make sure that I did not place the holes for the wire chase in a bad spot relative to the trailer tongue A-frame or tongue box mounting tabs. I had hoped to have the wire pass thru the locker in the corner of the well, but it made more sense to put it in board of the A-frame.
Image

Temporarily installed the toe kick spar and transferred the wire way location to it.
Image

This wire loom, that will cover the wire as it passes thru the locker well, is about 1 inch OD, but the flat area at the back of the Wiremold toe board trim only has a vertical flat of about 3/4 inch.
Image

So I bored two smaller holes adjacent to each other and chiseled out a slot in the toe kick spar.
Image

This allowed me to squeeze the loom into an oval shape to fit the hole.
Image
If I had done a test run I could have made this fit better, but it will be down inside the locker well and won’t even be visible under the locker sill, unless you use a mirror. This is not an “America’s Most Beautiful Roadster” entrant, so no mirrors are allowed during tours. ;) :lol:

The other end of the loom fits nice and snugly right into the end of the Sealtite connector (not that it needs to be water tight here), so that will be nice and tidy once I figure out how I am going to connect this to the box.
Image

Next I reinstalled the toe kick spar (with the slotted hole) on the locker and set the front wall skin in place over both. Reached up inside with a pencil and traced the slot onto the back of the masking tape.
Image
Image

The Wiremold will run across the bottom of the front wall, connecting the wires from the curb and street sides together at this location. The oval hole should help the large-ish bundle of wires from each side make the turn into the hole.

And that was about all I got done.

Today, Friday, at the day job was the first day that they were ready to run one of the blister packagers that I had restored, so I got to play set-up guy and tend the machine all day; which ran into 2nd shift training them how to make it do its thing. Plus, it is Yvette’s and my 15th wedding anniversary, so I’m taking the night off. 8)
KC
My Build: The Poet Creek Express Hybrid Foamie

Poet Creek Or Bust
Engineering the TLAR way - "That Looks About Right"
TnTTT ORIGINAL 200A LANTERN CLUB = "The 200A Gang"
Green Lantern Corpsmen
User avatar
KCStudly
Donating Member
 
Posts: 9640
Images: 8169
Joined: Mon Feb 06, 2012 10:18 pm
Location: Southeastern CT, USA
Top

Re: The Poet Creek Express - Foamie Hybrid

Postby cpinetree » Fri Jun 06, 2014 7:10 pm

I’m not sure how I want to try and seal these. They have a gasket and gland nut, but the grip is only 3/8 of an inch. The Locker case is 3/4 thick and the floor of the tongue box will be 1/2 ply.


How about a floor flange? https://www.google.com/search?q=floor+flange&tbm=isch&tbo=u&source=univ&sa=X&ei=TliSU5-sAqmssQTMo4DgAg&sqi=2&ved=0CDUQsAQ&biw=1252&bih=567
cpinetree
Donating Member
 
Posts: 51
Images: 18
Joined: Tue Feb 14, 2012 7:29 pm
Location: N Ft Myers, FL
Top

Re: The Poet Creek Express - Foamie Hybrid

Postby KCStudly » Fri Jun 06, 2014 8:53 pm

That's not a bad idea at all!!! ...but I'm not sure that I have a big enough foot print for it on the locker side.

What I originally thought I'd do was counter bore the 3/4 inch case for the gland nut (like I did for the locker door lock set), but I don't have any way to drive a cutter that big on the inside now that the case is assembled. (I can still do this for the tongue box side.) Maybe a good enough excuse to buy a small trim router?

What I did grab are a couple of Sch 80 PVC threaded union halves and a CPVC threaded coupler. The union halves have cog like serrations and a small lip like a flange; I might be able to epoxy these into a large drilled hole. The coupler could be cut in halve to make two threaded half couplings that could also be glued in.

Another option would be to make a thinner flange plate, perhaps rectangular that would work similar to the linked floor flange, but would use the gland nut instead of internal threads.

Decisions, decisions.
KC
My Build: The Poet Creek Express Hybrid Foamie

Poet Creek Or Bust
Engineering the TLAR way - "That Looks About Right"
TnTTT ORIGINAL 200A LANTERN CLUB = "The 200A Gang"
Green Lantern Corpsmen
User avatar
KCStudly
Donating Member
 
Posts: 9640
Images: 8169
Joined: Mon Feb 06, 2012 10:18 pm
Location: Southeastern CT, USA
Top

Re: The Poet Creek Express - Foamie Hybrid

Postby KCStudly » Sat Jun 07, 2014 9:38 pm

So here we go again; progress on a detail.

Here are the PVC and CPVC fittings I picked up to see what might work as a bulkhead fitting for the Sealtite. Screwed onto the elbow (above the yellow seal ring) is a Sch 80 threaded PVC union half (dark gray). To the right of that is another union half in CPVC (light gray), and a CPVC threaded coupling. Below that I took the compression fitting apart so that you can see how it clamps the flexible conduit onto the spigot end. The black ferrule grips onto the spiral core of the flex and the nut pulls it tight to the elbow, while the plastic jacket makes everything seal up tight.
Image

The union half is just about a perfect match for the 3/4 inch thick locker case, and the small flange will cap the vinyl nicely, shown here just sitting on the edge of the locker well floor for eyeballing.
Image

The serrated portion of the union half measured about 1-7/8 OD, but I wanted to do a test before committing to putting a hole in the locker. So I took a piece of the same stock and did a test hole using a 1-7/8 inch hole saw. For the first test I was very careful to keep the drill true and plumb.
Image

The fit was too tight to be a drop in (good!) so I made up this little press set-up using a threaded rod.
Image

Now this test hole was right at the end of the test board, and it was a tight press, so I was not entirely surprised that the board split, but the union was still in there good and tight and would not spin due to the serrations having “taken a bite”.
Image

So I reversed the press and used the hole saw slug as a mandrel to pull it back out again.
Image

Second test hole, also near the end of the board, I wobbled the drill to wallow out the hole some while drilling. Had a similar result; split out. Third test hole I used a 2 inch hole saw, but it was “like a mop in a bucket” fit. Further down on the test board I ran another 1-7/8 inch hole, wobbled, and, lacking a drum sander, resulted to using a 1-3/4 hole saw with a piece of sandpaper folded over and stuffed into one of the cleanout slots.
Image
Image

That did the trick!
Image
Image
Image

Here you can just see how the serrations bit into the ID of the hole helping to prevent unwanted rotation of the “threaded insert”.
Image

Deep breath; no time like the present! Backed the vinyl side of the locker floor with a piece of scrap clamped into place and made a small adjustment to the hole location to account for the added diameter of the union half.
Image

I threw caution to the wind regarding breaking thru the vinyl (tearing and a big nasty wad were some unfavorable visions) and hoped that the clamp block would do the job well enough. It worked great! Once the saw broke thru the wood I could just feel it drag on the vinyl a little. When I pulled the slug out the vinyl was cut cleanly almost all the way around and only needed a little trimming with the razor knife to clean up. The clamp block had worked perfectly!
Image
Image

To protect the vinyl during the sanding operation I clamped the board with the test holes in it to the inside of the locker floor with one of the test holes lined up.
Image

Here’s the finished hole shown from the inside.
Image

I wanted to make sure that the elbow fitting points forward along the trailer tongue A-frame once it is tightened up with the gasket seated. Since the thread only has one start, there is only one orientation that will work. The tongue ‘A’ is the standard 50 degrees, so I used the quick square to layout half of this; 25 deg. (I actually walked out to the trailer to set the square on it just as a dumb idiot check that I was not twisting things around backwards in my head… 25 deg indicated on the square, not the complement 65 deg that I was aiming for.)
Image
Image

From there I made a sharpie mark in the serration at the “top” (kind of in the shadow here).
Image

I decided to do a test pressing to confirm everything before applying any goop. In case disaster was to strike and the case were to split, it would be easier to deal with a repair w/o a bunch of goop getting in the way.
Image
Image
Image

That went well. I thought about using some GG to glue the insert in, but I was afraid of messing up the vinyl. I decided that the press fit should be tight enough to hold, and just ran a bead of paintable caulk around the inside to seal the serrations.
Image
Image
Image

I’m happy with the result, but I think on the tongue box floor, since it is thinner and plywood, I’ll mill a counterbore (or just sand thru one ply) and use the gland nut that comes with the Sealtite elbow fitting.
KC
My Build: The Poet Creek Express Hybrid Foamie

Poet Creek Or Bust
Engineering the TLAR way - "That Looks About Right"
TnTTT ORIGINAL 200A LANTERN CLUB = "The 200A Gang"
Green Lantern Corpsmen
User avatar
KCStudly
Donating Member
 
Posts: 9640
Images: 8169
Joined: Mon Feb 06, 2012 10:18 pm
Location: Southeastern CT, USA
Top

PreviousNext

Return to Foamies

Who is online

Users browsing this forum: Bing [Bot] and 5 guests