
Next, I turned my attentions to the rain gutter at the top of the hatch. It turns out the really cool corner piece I made isn't usable. It is too close to the hatch ribs to clear with the weather strip installed:

Nuts.

Next I got out the two pieces of angle for the rest of the gutter to see what that looks like. (same end)

That's better. Back to ye olde drawing board.
I also spent some time looking at the back end, trying to visualize something for the hatch bottom seal.
If you remember back to the days when I was doing all that hatch prototyping, making the gutter narrow at the center and wider at the ends creates a down hill for water to drain. So I laid that out, made a cut on the downhill angle, and tried to stick it all together.

It looked nice, but failed as soon as I picked it up. Memo to self: Caulking doesn't work well as a glue. I think I'll try epoxy next, unless someone can suggest something better for gluing Al to Al.
Speaking of gluing Al, I've had about 50 views of my "how much Sikaflex?" question, and nary a reply. Apparently, everyone reading my post wants to know, too.
 Maybe the Sikaflex fumes cause memory loss?
I'm finding it harder to contain myself as things take shape. Earlier in the day, I took one of my 5x5 sheets of 1/8 ply and did a test fit for the roof.
 That's what I'm talking about! The fit was very good. Later, I got bored with the gutter. Dragged 2 sheets of 5x5 to the table saw and cut 1-1/2" off the ends to make a couple of ceiling sheets This, too, was good.
  So, to contain or not to contain, that is the question. Today, I contained. Tomorrow?
Fit to the profile with gravity only was good:

Although there was a little sag towards the middle. Nothing a little glue on the bottom of the spar couldn't handle.
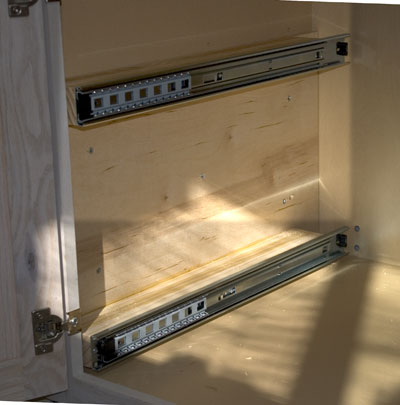
There's a little mismatch going on back at the bulkhead:

But it's in the back of the cabinets, where it doesn't show. Persons pointing this out will be ejected from the tour.
The second piece of ceiling takes care of the front.


Looking along the edge where the ply meets the wall.

My aluminum sheet is supposed to get delivered tomorrow. Gotta get that hatch figgered out soon.
Thanks for stopping by!


 That makes no sense. Floors and ceilings hardly ever meet. So the parts need a redesign. I think. Or I'll need to cut the ceiling off while it's still above the floor.


 Good to see you're back, GuyllFyre.

 But, then again, my CAD program does ellipses and doesn't do parabolas. So there.


 You're camping in the cool and I'm working in the heat. It's more than a day's drive from here to get any altitude enough to cool off. It's been pushing 100 lately.
  Slowing me down.


