Over the weekend took some time to fit up the rubber dampers and the curb side fender. couple pictures here of the progress, still waiting for the wheel adapters so I just had the wheels/tires mock up in place while the trailer was set on a couple jack stands under the axle (to make sure the suspension was compressed). fabricated a bracket for mounting the tool box/fender. turned out very solid! hopefully I will get the drivers side done next weekend, unfortunately it took the better part of a day scheming up how to mount the one, so hopefully the second one will got a bit quicker now that I have all the material, dimensions and hardware.
- 20140920_164730_resized.jpg (117.98 KiB) Viewed 2584 times
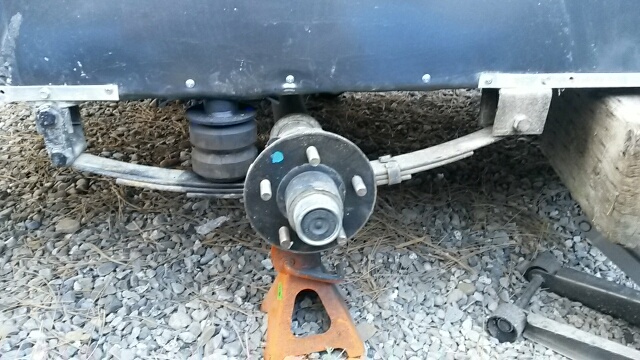
here is the rubber damper thing. made a couple angle brackets that then face weld to the inside of the trailer frame. (HATE welding upside down/overhead/under trailers!) we shall see how it rides once we get rolling again, it might be too tall for such a set up, if that is the case I have a plan to either get longer shackles to move the springs away from the damper or cut down the rubber damper. we shall see.

- 20140920_182516_resized.jpg (77.2 KiB) Viewed 2584 times
here is the bracket I made up to mount the tool box/fender. the angle brackets are 1/4" steel. the one towards the back of the trailer had to be heated up with my cutting torch to twist the angle to match the slope of the tool box. only took two tries. painted the whole thing and found some nice square plastic tube caps for the ends of the square tube to give it a pretty clean look.
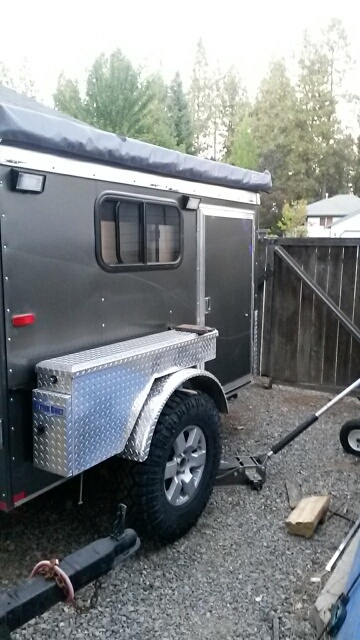
- 20140920_185134_resized.jpg (98.25 KiB) Viewed 2584 times
here it is all fitted up. the lower inner radius fender is not attached yet, just sitting in place but gives you the idea. I want to wait until I get the tires mounted on the adapters so I can dial in the in/out dimension to just cover the outter most point of the tire. up until this point I wasn't too sure how this was going to all turn out, but with it all in place I am really liking it.