
I though about the Raindrop design because of the interior space, but I gave up due to the complexity of its design and construction.
I admire you for taking on the challenge and doing such a great job.

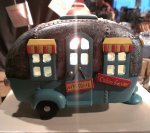
Teardrops n Tiny Travel Trailersor t n ttt for short (tnttt.com) |
![]() by ryuandwings » Mon Nov 10, 2014 9:54 am
by ryuandwings » Mon Nov 10, 2014 9:54 am
![]() by Gunguy05 » Mon Nov 10, 2014 11:02 am
by Gunguy05 » Mon Nov 10, 2014 11:02 am
ryuandwings wrote:That looks great!
I though about the Raindrop design because of the interior space, but I gave up due to the complexity of its design and construction.
I admire you for taking on the challenge and doing such a great job.

 , so no need to the other transportation issues to get it in my hands (or in my garage).
![]() by S. Heisley » Mon Nov 10, 2014 9:27 pm
by S. Heisley » Mon Nov 10, 2014 9:27 pm
Gunguy05 wrote:
Serendipitously when we were cleaning up tonight my son had left a sheet of the underlayment material that we had used for the templates lying out in the grass where it had collected dew and was quite bendy. SO...I tried to see how well it would bend to the front curve and ... bingo!
We were going to use an extra layer of the oak ($$ and not too bendy) for the outside sub layer under the skin. This is where the window hole will be cut, and the trimlok gasket will sit. I had been concerned about the stability of this given the thin top later of oak and it's proneness to splinter (thus not giving a good sealing surface for the gasket).. BUT this stuff works great and takes a clean cut on the edge.
Anyways, I gave in and went back outside a few minutes ago and cut a piece to fit and bent it into place. Works like a charm. The outline is where the side window will be, but with radius corners.

![]() by Gunguy05 » Mon Nov 10, 2014 9:50 pm
by Gunguy05 » Mon Nov 10, 2014 9:50 pm
S. Heisley wrote:Gunguy05 wrote:
Serendipitously when we were cleaning up tonight my son had left a sheet of the underlayment material that we had used for the templates lying out in the grass where it had collected dew and was quite bendy. SO...I tried to see how well it would bend to the front curve and ... bingo!
We were going to use an extra layer of the oak ($$ and not too bendy) for the outside sub layer under the skin. This is where the window hole will be cut, and the trimlok gasket will sit. I had been concerned about the stability of this given the thin top later of oak and it's proneness to splinter (thus not giving a good sealing surface for the gasket).. BUT this stuff works great and takes a clean cut on the edge.
Anyways, I gave in and went back outside a few minutes ago and cut a piece to fit and bent it into place. Works like a charm. The outline is where the side window will be, but with radius corners.
Your original sketch showed the window in the flat front portion. What window material can be bent into that curve?

![]() by S. Heisley » Tue Nov 11, 2014 10:06 pm
by S. Heisley » Tue Nov 11, 2014 10:06 pm
Thanks for your reply. It seems you've done your homework on those windows. You'll probably be successful.![]() by Gunguy05 » Sat Nov 15, 2014 11:46 pm
by Gunguy05 » Sat Nov 15, 2014 11:46 pm


![]() by KCStudly » Sun Nov 16, 2014 10:41 am
by KCStudly » Sun Nov 16, 2014 10:41 am

![]() by Gunguy05 » Thu Nov 20, 2014 9:02 pm
by Gunguy05 » Thu Nov 20, 2014 9:02 pm
KCStudly wrote:Gettin' er done, and looking nice.


![]() by pchast » Thu Nov 20, 2014 9:52 pm
by pchast » Thu Nov 20, 2014 9:52 pm
![]() by Gunguy05 » Tue Dec 02, 2014 2:17 pm
by Gunguy05 » Tue Dec 02, 2014 2:17 pm

![]() by KCStudly » Tue Dec 02, 2014 2:20 pm
by KCStudly » Tue Dec 02, 2014 2:20 pm

![]() by Gunguy05 » Tue Dec 02, 2014 2:40 pm
by Gunguy05 » Tue Dec 02, 2014 2:40 pm
KCStudly wrote:Looking good!
The lines of the TB match the cabin very nicely.
![]() by KCStudly » Tue Dec 02, 2014 3:35 pm
by KCStudly » Tue Dec 02, 2014 3:35 pm

![]() by Gunguy05 » Mon Dec 08, 2014 10:25 pm
by Gunguy05 » Mon Dec 08, 2014 10:25 pm


![]() by KCStudly » Mon Dec 08, 2014 10:35 pm
by KCStudly » Mon Dec 08, 2014 10:35 pm
Users browsing this forum: No registered users and 13 guests
