Professors 7x14 Toy Hauler
Re: Professors 7x14 Toy Hauler
![]() by zroadhouse » Sat Feb 28, 2015 11:48 am
by zroadhouse » Sat Feb 28, 2015 11:48 am
Looks great! I will be drawing on your thread when I get to my upper cabinets and kitchenette!
- zroadhouse
- Teardrop Master
- Posts: 143
- Images: 103
- Joined: Mon Apr 07, 2014 3:23 pm
- Location: Austin, TX
Re: Professors 7x14 Toy Hauler
![]() by professorkx » Mon Mar 02, 2015 2:14 pm
by professorkx » Mon Mar 02, 2015 2:14 pm
The trailer is essentially finished and ready to be used. This past weekend, I finished all of the final items in order to use the trailer.
I started by making the piece that fits above the rear doors. Once again, I used my marking gauge to cut the curve of the roof and attached to the frame.
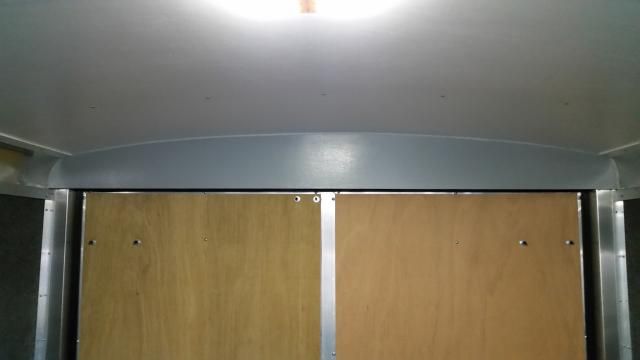
The trim piece from the ceiling to the walls gave me fits, and I had trouble finding something I liked. In the end, I purchased a 51 foot roll of 7" roof flashing from Home Depot for just over $30 to use to build trim pieces. I started by cutting the flashing to length with my chop saw. This throws some metal shavings, and the edges are sharp, so goggles and gloves are a must.
Once a piece was cut to length, I used a 6 foot piece of black sewer pipe I had left over from a remodel, and gently rolled the flashing around the pipe from one end to the other. I had to be careful not to roll to close to the end of the pipe, as this tended to put a wrinkle in the flashing, so I tossed my first attempt. I rolled from one one end to the other to get the curve started, then back again for my final pass.
The flashing is not very thick, so difficult to carry even with the curl, and especially difficult to carry a 14 foot long piece. So, using blue painters tape, I attached a 1x2x8 down the middle of the flashing. I had already marked the ceiling with a pencil for the top edge of the flashing, and the staple gun was standing at the ready. We carried the flashing into the trailer, my wife helped hold it in place and I stapled the top edge to the ceiling about every 10 inches. Once the top was attached, I pushed the flashing up for a tight fit and stapled the bottom to the wall. The last step was to install 1 1/2 inch trim pieces made out of 1/4 inch plywood. The top was painted white to match the ceiling and the bottom was painted gray to match the walls. A few pictures. I should note that the reflection makes it looks like there are creases, but that's just the way the light is hitting the aluminum.
The 14 foot piece
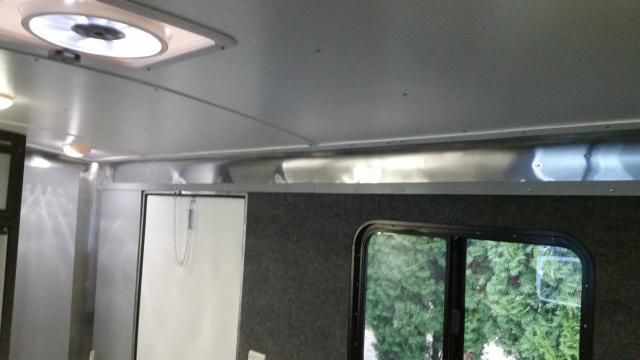
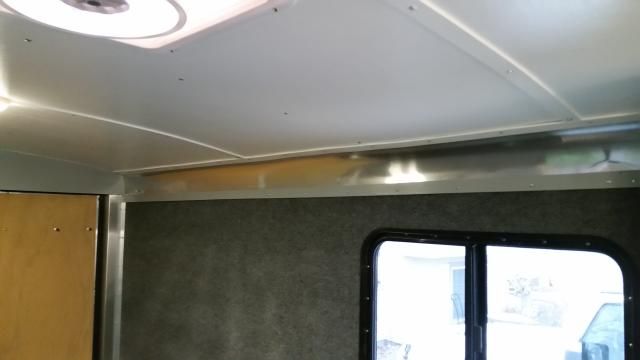
The 10 foot piece, both ends
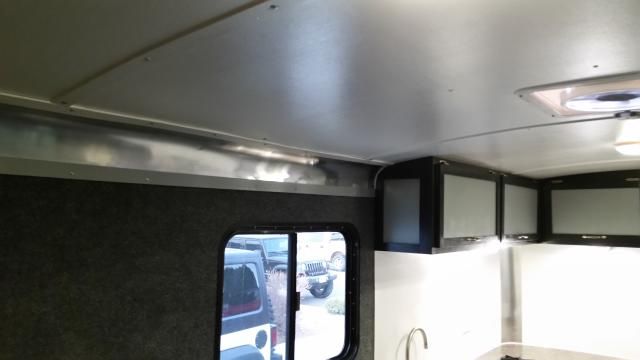
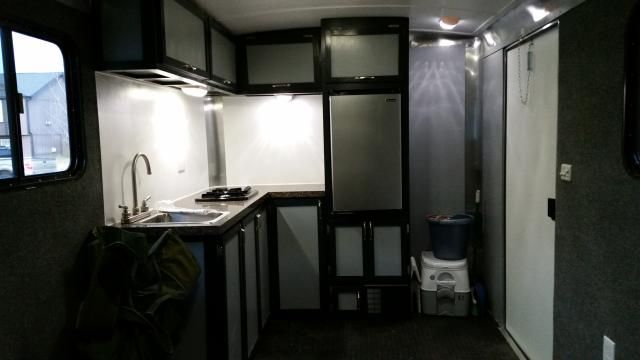
In the bathroom area, I decided I didn't like the rough plywood finish nor the white paint, so I skinned the walls with 1/4 plywood painted gray. This left white in the kitchen and on the ceiling, so I think I have a nice contract throughout the trailer. Final pictures of the entire front of the trailer.
With the interior complete, it was time to add a tongue box, battery and propane tank for the two burner stove. With the stove the only propane item, a small tank should last a very long time.
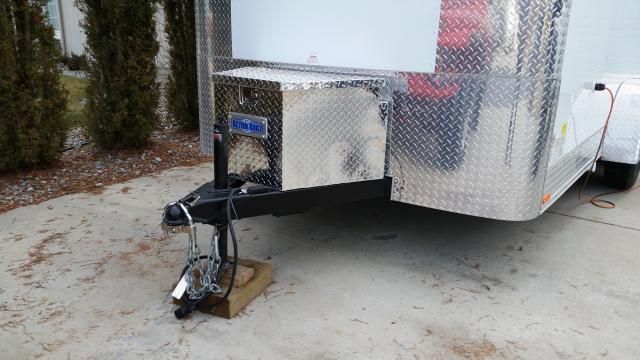
I selected this tongue box for several reasons:
1. It locks, a must since I am using an Optima group 31 blue top battery that costs $300
2. The propane tank will fit inside with the lid closed and still have about 1/4" to spare
3. The aluminum diamond plate matches the look of the trailer.
One problem I noted was that the jack handle hit the front of the box. So, I removed the handle, drilled out a 7/8 inch nut for a tight fit on the jack shaft and drilled/pinned the nut onto the shaft. This allows me to use either my 12 volt impact I keep in the jeep or a drill adapted to accept a 7/8 socket. Either way, down and up on the jack is pretty quick.
I still need to paint and install a bike shoe so the bike will stay securely in place and we will be ready for our first camping trip, so probably two weeks away. I will post pictures from the first camping trip, as well as the solar in a few months when I install.
I wanted to say thanks to everyone who has posted over the years, many of whom are probably long since gone. I tried to give back by providing detailed instructions on my process. I'm a perfectionist with a lot of different skills, so I probably put more into this trailer than many feel is necessary. However, I believe my conversion shows that just because these are DIY projects, they can still look as good as any factory built trailer.
I started by making the piece that fits above the rear doors. Once again, I used my marking gauge to cut the curve of the roof and attached to the frame.

The trim piece from the ceiling to the walls gave me fits, and I had trouble finding something I liked. In the end, I purchased a 51 foot roll of 7" roof flashing from Home Depot for just over $30 to use to build trim pieces. I started by cutting the flashing to length with my chop saw. This throws some metal shavings, and the edges are sharp, so goggles and gloves are a must.
Once a piece was cut to length, I used a 6 foot piece of black sewer pipe I had left over from a remodel, and gently rolled the flashing around the pipe from one end to the other. I had to be careful not to roll to close to the end of the pipe, as this tended to put a wrinkle in the flashing, so I tossed my first attempt. I rolled from one one end to the other to get the curve started, then back again for my final pass.
The flashing is not very thick, so difficult to carry even with the curl, and especially difficult to carry a 14 foot long piece. So, using blue painters tape, I attached a 1x2x8 down the middle of the flashing. I had already marked the ceiling with a pencil for the top edge of the flashing, and the staple gun was standing at the ready. We carried the flashing into the trailer, my wife helped hold it in place and I stapled the top edge to the ceiling about every 10 inches. Once the top was attached, I pushed the flashing up for a tight fit and stapled the bottom to the wall. The last step was to install 1 1/2 inch trim pieces made out of 1/4 inch plywood. The top was painted white to match the ceiling and the bottom was painted gray to match the walls. A few pictures. I should note that the reflection makes it looks like there are creases, but that's just the way the light is hitting the aluminum.
The 14 foot piece

The 10 foot piece, both ends


In the bathroom area, I decided I didn't like the rough plywood finish nor the white paint, so I skinned the walls with 1/4 plywood painted gray. This left white in the kitchen and on the ceiling, so I think I have a nice contract throughout the trailer. Final pictures of the entire front of the trailer.

With the interior complete, it was time to add a tongue box, battery and propane tank for the two burner stove. With the stove the only propane item, a small tank should last a very long time.

I selected this tongue box for several reasons:
1. It locks, a must since I am using an Optima group 31 blue top battery that costs $300
2. The propane tank will fit inside with the lid closed and still have about 1/4" to spare
3. The aluminum diamond plate matches the look of the trailer.
One problem I noted was that the jack handle hit the front of the box. So, I removed the handle, drilled out a 7/8 inch nut for a tight fit on the jack shaft and drilled/pinned the nut onto the shaft. This allows me to use either my 12 volt impact I keep in the jeep or a drill adapted to accept a 7/8 socket. Either way, down and up on the jack is pretty quick.
I still need to paint and install a bike shoe so the bike will stay securely in place and we will be ready for our first camping trip, so probably two weeks away. I will post pictures from the first camping trip, as well as the solar in a few months when I install.
I wanted to say thanks to everyone who has posted over the years, many of whom are probably long since gone. I tried to give back by providing detailed instructions on my process. I'm a perfectionist with a lot of different skills, so I probably put more into this trailer than many feel is necessary. However, I believe my conversion shows that just because these are DIY projects, they can still look as good as any factory built trailer.
-

professorkx - Teardrop Master
- Posts: 140
- Joined: Wed Nov 12, 2014 4:54 pm