Alto(Pop-Up) Inspired Foamie - Build Progress

...ask your questions in the appropriate forums BUT document your build here...preferably in a single thread...dates for updates, are appreciated....

Alto(Pop-Up) Inspired Foamie - Build Progress

Postby thelastlokean » Thu May 07, 2015 5:28 am

I have been planning and researching a teardrop build for some time, I have been quite inspired by this place!

I have finally settled on an Harbor Freight trailer... The 1720 lb 4'x8' Utility one. I will be towing with an automatic 2005 Ford Focus ZX4 2.3 L 4-Cylinder (sedan)...

After a bit of research, my most inspiring design on the market I have found is the 'Safari Alto', I could see it meeting my needs perfectly for a part timing in.

I found this thread on the Alto Winter Warrior now with plans, it looks like the plans stopped around model construction?

The only thing is, its a bit heavy and large for my intended application. I've been working out my personal changes and plans. As I am towing with a small car, the aerodynamics is just as important as weight. My goal is to have a Tiny Trailer when parked, but a Teardrop when on the road.

The first and primary change I am making, is to replace the pop-up solid walls with a heavy duty and waterproofed fabric. This will greatly simplify and lighten the design, with the added complexity of affixing the 'fabric' portion, and keeping them water proof, but I have a few simple ideas to get it done.

the plan.png
the plan.png (41.25 KiB) Viewed 3919 times


I also intend on having a roof overhang when fully closed, allowing for a very high ceiling when propped, I tried to show in the above image how a little overhang adds a lot of height and front space. Being as the extra side walls will be made of insulated fabric, the weight impact should be minimal.

My personal plan is to have a 1' over hang all around the trailer frame, giving me a 6'x10' teardrop. The width of a Focus is 2" short of 6'.

So far, here is my rough-draft top view:

top view.png
top view.png (51.45 KiB) Viewed 3919 times


For me a shower of some form is a must, a toilet is a bonus that I could live without... I can effectively shower with 1-2 gallons of hot water. A 20 gallon water tank is a hefty 200 lbs, but if it gets me 10 showers and a few days of water, I could realistically dry camp for 5-7 days between stops at hookup locations. I might settle with an outside shower of some form, but I would much rather shower inside as a MN resident the weather is rarely nice enough for an outside shower...

Total Weight Limit: 1500 lbs 75% vehicle limit of 2000 lbs...
Water: 200 lbs
Propane: 20 lbs
Battery: 120 lbs
Solar Cell: 20 lbs
Trailer Frame Itself: 250 lbs

Leaving me with 890 lbs for everything else. I hope to make the entire shell out of foam, canvas and glue, and hopefully under 300 lbs, leaving some lbs for gear and furnishings. 300 lbs does get you a lot of foam and canvas :worship:

I plan on making both the hinges very heavy duty, most likely incorporating some form of gas spring for easy lifting. I am prepared to add some minor framing bits to the large hatch roof if needed for support.

My current and most basic plan for installing the canvas, pretty much involves snap button rivets, like the things found on jeans, with it going inside on the top, and outside on the bottom. This cross-section attempts to show what I mean, I have limited artistic ability...
cross section.png
cross section.png (5.54 KiB) Viewed 3919 times

As such, one would unbutton the canvas from the bottom, tuck it inside, then fold the roof down. It might also be nice to setup a basic bug-screen that can be used in place of the canvas on nice days.

More photos to come as I move along, I intend on picking up the 4'x8' HF trailer unless its a terrible idea to overbuild it by 1' in all directions... I'm currently unemployed with a decent amount in savings, so I should be able to get this done in a reasonable time-span!
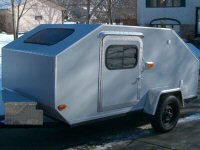
Last edited by thelastlokean on Mon Jun 01, 2015 1:45 pm, edited 3 times in total.
“The real truth of the matter is, as you and I know, that a financial element in the larger centers has owned the Government ever since the days of Andrew Jackson.” – FDR letter to Colonel Edward House, Nov. 21 1933
User avatar
thelastlokean
Teardrop Inspector
 
Posts: 10
Joined: Thu Apr 16, 2015 3:55 pm

Re: Foamie Alto Build - Just the Basics

Postby KCStudly » Thu May 07, 2015 6:29 am

Welcome and good luck with your project! :thumbsup:

Staying under 1k lbs is going to be a challenge with a shower, porta-pot, water tank and slide out galley. Don't forget the weight of your 5 day ice chest. 6 x 10 is large and easy to have all of the weight add up.

Also, consider moving your roof hinge further back. You don't need a lot of head room over the seating/sleeping area and the way the hinge is down on the front isn't getting you much extra height there anyway. Cabin will be much stiffer with more fixed roof and the roof itself will be easier to make with less curve to it; same for the canvas.
Last edited by KCStudly on Fri May 08, 2015 8:33 pm, edited 1 time in total.
KC
My Build: The Poet Creek Express Hybrid Foamie

Poet Creek Or Bust
Engineering the TLAR way - "That Looks About Right"
TnTTT ORIGINAL 200A LANTERN CLUB = "The 200A Gang"
Green Lantern Corpsmen
User avatar
KCStudly
Donating Member
 
Posts: 9640
Images: 8169
Joined: Mon Feb 06, 2012 10:18 pm
Location: Southeastern CT, USA

Re: Foamie Alto Build - Just the Basics

Postby daveesl77 » Thu May 07, 2015 7:35 am

Welcome and like KC said, good luck on the project.

The HF frame is rated at 1,700#+, but remember that is the max load carrying capacity. The trailer weight is not included, thus the total of everything can be 2,000#. That said, you would really want to do a lot of reinforcing for a max load on one of these, I have one under mine. In addition, while the stock tires are ok, I wouldn't use them on a max weight build.

On the water thing, you don't need to carry all 20 gals in the trailer and/or in a single place. Granted, I have a pickup so if doing a long boondock I'll have a bunch of 5-7 gal containers filled in the truck, but in the trailer I'll carry probably 8 gals or so. In addition, when traveling between locations, in many instances you can have your tanks almost empty, but I always have some water loaded no matter what.

On the shower thing, mine is an exterior enclosure I made out of an EZ up canopy that got whacked in a big wind storm in New Mexico. I kept the legs and a few of the scissor joints, which allowed me to create a collapsible 3x3x7' enclosure. I use a beige tarp as the outer wall and roof. Inside it has the shower head and porta-potty. While never having used in super cold like a MN winter, we have used it in the 20s out west and it worked great. It is light, collapses and bigger than most commercial shower tents. The floor is linoleum with the stiff foam floor panels you can get at HF or Big Lots. We only use the shower facility though if doing dispersed camping.

The design looks really cool and good luck on it. The folks here are a very deep pool of knowledge, I would not have even attempted mine without TNTTT.

dave
*******
Dave and Regina - Enjoying old age, a LOT!

Build Journal - http://www.tnttt.com/viewtopic.php?f=50&t=62386
User avatar
daveesl77
Donating Member
 
Posts: 871
Images: 273
Joined: Tue Jan 27, 2015 4:33 pm
Location: Pocahontas County, West Virginia
Top

Re: Foamie Alto Build - Just the Basics

Postby thelastlokean » Thu May 07, 2015 8:17 am

Thanks for the input, I've seen quite a few builds put the hinge quite a ways back, like the ladybug/army, etc... I haven't seen anyone attempt to move the hinge all the way up... I have a decent amount of experience glassing and molding, even done a few large items.

If you compare the cross section view I posted above with this one, if the hinge is moved back just a little ways the total volume of expansion really is diminished.

rotate.png
rotate.png (6.1 KiB) Viewed 3872 times


You get ~30% total volume increase. Where as with the hinge all the way back, it is pretty easy to achieve 200% volume increase. Most importantly, a short person 5'8" like myself, will be able to stand upright everywhere. Hinging the front enough to change the front angle to curve 'out' instead of 'in' will also make the front space a lot more usable, I only want the sliding kitchen because I would rather cook outside and it frees up some nice inside space. I'd like to have the kitchen usable from the inside by removing the top on the front bench that houses it.

I'm gonna give it a shot, unless someone shows me that it has already been attempted and failed! After doing some more digging on my particular vehicle, a 2005 Ford Focus, it seems the UK and Canada have its tow capacity at 1,000 kg! For some reason, the same car int he US is technically specified at 1,000 lbs, but such information makes me feel much more at ease with possibly towing 1,500 lbs... I imagine however, if you are pulling beyond the rating your SOL when it comes to insurance if any accidents do occur.

The fabric material I intend to use for the expansion, is some type of chemically insulated canvas used to make pop-up ice fishing houses.. In my experience, they are amazingly well insulated for the weight and thickness, completely wind blocking, a single propane heater can keep a very decent shelter above 70 F with being off most of the time, even on a windy -10 F day... I'll probably end up cutting up an old damaged ice house, the exact materials seems hard to find and expensive but damaged pop ups can be had for cheap.

Regarding the large curved 1-piece roof construction, I do have a plan worked out in my mind. After the floor and side walls are good and cured, the top lip of the side walls (where the roof would normally be glued on), will be waxed, possibly just wax paper folded in half and tapped in place with masking tape. The piece(s) of roof foam will have release slices added where needed for curves. Then the roof will be positioned and held in place with tape. Once it is all positioned, I will then carefully seal all the release slices with glue on the inside, and canvas/glue the outside. If all goes well, the wax paper will stop the walls and roof from merging, so I will be using the teardrop itself as the mold to form the roof. After that cures, I plan to remove the roof, flip it over and canvas/glue the inside without being stuck on the inside. I will then attach the roof to the floor with multiple heavy duty hinges. Doing the roof in such a way will also ensure it lines up perfectly with the walls for a good seal while traveling.

I suppose, the worst case is it doesn't work and I waste $50 on foam, but then I'll just shrug it off and rebuild it with the hinge moved further back.

Those are some interesting points with regards to the water supply, I could realistically put some water in my vehicle as well, I could get by with 10 gallons of water on board and put some more in my car if necessary. I'm pretty sure I'm gonna have a corner be a shower, it seems pretty essential in my mind, without it I might as well just sleep in a tent. Also I plan to setup my shower so that the shower curtain can be tucked to one side, and it is just a small tub/drain on the floor.
“The real truth of the matter is, as you and I know, that a financial element in the larger centers has owned the Government ever since the days of Andrew Jackson.” – FDR letter to Colonel Edward House, Nov. 21 1933
User avatar
thelastlokean
Teardrop Inspector
 
Posts: 10
Joined: Thu Apr 16, 2015 3:55 pm
Top

Re: Foamie Alto Build - Just the Basics

Postby jstrubberg » Thu May 07, 2015 11:22 am

This will be an interesting build to follow with your weight limitations.

I have one suggestion. Consider Velcro rather than snaps for your fabric panels. You will get a "seal" down the fabric that way that will be much more effective in keeping out dust and critters, it should be the same weight or lighter, and it will be many times easier to install. You can buy Velcro in 1/2" to 2" width rolls at most any craft store.

As far as a shower goes, you might consider just using an enclosure outside the camper. It's one more thing to set up and tear down, but you get many times the volume inside the shower and a lot less headaches inside the camper. Showering inside leaves you working out all kinds of question, such as "What happens in a small space with all that extra humidity?".
The more stuff I take along, the more time I spend taking care of my stuff!
jstrubberg
500 Club
 
Posts: 691
Joined: Tue Nov 08, 2011 8:26 pm
Location: mid-Missouri
Top

Re: Foamie Alto Build - Just the Basics

Postby thelastlokean » Thu May 07, 2015 4:34 pm

I hadn't considered velcro! Thanks much for the idea, consider the button rivets idea dropped and the velcro idea welcomed.

I've found my weight restrictions aren't that demanding and I updated my first post with the new information, my car manual in the US specifies very vaguely 1,000 lbs. However, I have done some further digging, and based on my rear axle, engine size and HP, I'm quite confident I won't have any issue up to 1,000 kg total load. I have found many Europeans who pull 1,500-2,000 lb caravans with a 1.6 or 2.0 liter Focus and a slightly weaker rear axle...

Also, I am at 120,000 miles. At 100,000 miles, I replaced and upgraded the struts, tie rod inner & outer, sway bar link, and front control arms with the Moog parts, they are at least twice as rugged and the car handles better than it did brand new.

With this new information, I have a good 900 lbs for the floor, walls, canvas, furniture/galley/gear. Then I will still technically be '500' lbs under the maximum I should ever tow, from what I've read I will be a lot better off in terms of MPG and general performance up to 1,500 lbs. Between the experience I have read of others towing with this vehicle, and my experience with how well it stops, I'm pretty confident it will stop very well while towing. I have had 1,500+lbs of passengers (3 big people and myself), along with a trunk crammed beyond reason and could still stop astonishingly well. This was before I upgraded the suspension, and it was certainly overloaded. I haven't had the opportunity to push the new suspension system as hard, but I've heard from some larger folks that the Moog suspension upgrade makes a world of difference for them, as in the car no longer sinks/rises dramatically as they get in/out.

Working out some further details, I ordered the 2,000 lb 200 lb tongue weight Reese Towpower 77114 1 1/4", for my vehicle... No welding or hole drilling, it just bolts onto the frame with a little work.

It will be here by Monday, I will also pick up the HF trailer this weekend. So weather permitting, I will begin bolting together the frame next week.

Did some hunting on craigslist, I'm most certainly going to buy a damaged ice house to source my insulated canvas, they usually have some decent 'window' ports made of some type of thick flexible, yet transparent rubber, that I will try to make work.

I have my foam and glue picked out, the next big thing I have to tackle and decide before I go crazy building is the canvas to use for covering the foam.

I have made some more design changes, I am going to attempt having the entire roof hinge:

the plan 2.png
the plan 2.png (78.31 KiB) Viewed 3735 times


As this is being custom built for myself I want the latched height to be 57.5" or smaller from the ground, as that is the height of my vehicle. I want the popped up height to be over 5'10" throughout most of the inside...
“The real truth of the matter is, as you and I know, that a financial element in the larger centers has owned the Government ever since the days of Andrew Jackson.” – FDR letter to Colonel Edward House, Nov. 21 1933
User avatar
thelastlokean
Teardrop Inspector
 
Posts: 10
Joined: Thu Apr 16, 2015 3:55 pm
Top

Re: Foamie Alto Build - Just the Basics

Postby daveesl77 » Fri May 08, 2015 5:24 pm

One area you'll need to address is the "racking" forces of moving such a large, essentially unsupported structure. I'm not saying it won't work, as I think with a fair amount of thought, you can pull this off. There are some really smart structural engineers on this site that would probably love to give you some input. This will be an interesting build and I look forward to it. I love new ideas!

dave
*******
Dave and Regina - Enjoying old age, a LOT!

Build Journal - http://www.tnttt.com/viewtopic.php?f=50&t=62386
User avatar
daveesl77
Donating Member
 
Posts: 871
Images: 273
Joined: Tue Jan 27, 2015 4:33 pm
Location: Pocahontas County, West Virginia
Top

Re: Foamie Alto Build - Just the Basics

Postby thelastlokean » Tue May 12, 2015 11:10 am

I have been tweaking the plan a little bit more, I just got my hitch installed today, it went surprisingly well, took less than an hour, including watching a youtube video of someone else do it first...

I started planning my build out step-step, and after looking at pop-up ice houses, I think I'm going to make the rear door be heavy duty canvas, with a zipper-open door. Instead of using the door to hold it open, I plan on implementing some gas-springs to hold the lid open. I want it to 'spring' open on its own when the latch holding it shut is released. Should seriously help with my weight limitations...

This is a tall picture, showing my brainstormed step-step process, scale is 1' ~ 40 pixels.

Untitled.png
Untitled.png (67.16 KiB) Viewed 3624 times


Regarding the roofs strength, and resistance from bending, etc...
I plan on turning the roof into a composite with some framing in order to achieve the desired strength.

My current plan, unless someone has a better suggestion, is to use some decent gauge welded wire mesh that is commonly used for making fences, rabbit cages, etc. between the foam/canvas, so in the 'glue' layer. Combined with a couple of framing support beams on the inside.
“The real truth of the matter is, as you and I know, that a financial element in the larger centers has owned the Government ever since the days of Andrew Jackson.” – FDR letter to Colonel Edward House, Nov. 21 1933
User avatar
thelastlokean
Teardrop Inspector
 
Posts: 10
Joined: Thu Apr 16, 2015 3:55 pm
Top

Re: Alto(Pop-Up) Inspired Foamie - Build Progress

Postby thelastlokean » Mon Jun 01, 2015 1:42 pm

Been busy starting the build... and I snapped a few photos with my terrible phone...

First I put the hitch on my car, and built the harbor freight frame.

starting trailer build inside rainy day.jpg
starting trailer build inside rainy day.jpg (177.3 KiB) Viewed 3476 times


Then I hauled my inflatable dinghy and around 600 lbs of gear on a week long fishing trip, had a wonderful time and caught many rainbow trouts! (sorry no pictures of this yet)

I just recently picked up plywood for my decking. After much debate, I went with 3/4" 11 ply birch veneer core plywood, a little pricey at $40 each but I think it will be well worth it. Each 4x8 weighs ~63 lbs... My 6x10 should weigh ~120 lbs in plywood, not yet counting some epoxy and foam.

Another note/issue, the harbor freight trailer has an 1/8" vertical gap between the side channels and cross beams, I've seen this dealt with in many ways, I'm trying something a little different. I just laid down decent foam weatherstripping about 1/2" thick on every cross beam.

weather stripping the gap.jpg
finished the frame weatherstripping the gap
weather stripping the gap.jpg (175.12 KiB) Viewed 3476 times


plywood floor progress.jpg
starting the plywood floor
plywood floor progress.jpg (203 KiB) Viewed 3476 times


Rather than building up a wooden frame, I'm going to lay the plywood directly onto the metal frame, glued down and screwed with self-tapping screws meant to go from wood-metal. I'll insulate inside the frame with foam sheets and good-stuff expanding foam, then seal the bottom with something thin and weatherproofed like 1/8" HDPE plastic sheeting, or maybe something lighter like fiberglass + epoxy...
“The real truth of the matter is, as you and I know, that a financial element in the larger centers has owned the Government ever since the days of Andrew Jackson.” – FDR letter to Colonel Edward House, Nov. 21 1933
User avatar
thelastlokean
Teardrop Inspector
 
Posts: 10
Joined: Thu Apr 16, 2015 3:55 pm
Top

Re: Alto(Pop-Up) Inspired Foamie - Build Progress

Postby daveesl77 » Mon Jun 01, 2015 4:23 pm

On the gap issue of the HF frame, I had some 1/8" aluminum bar laying around and made up pieces to fit between the floor and crossmember. You could pretty much put anything there, some even just used washers, which is fine. One thing I made sure of is that every though hole was fully sealed with caulk and then put a thin cushion of silicon on any rub/stress areas. You may or may not wish to do one more add-on, but for me putting a 2" square steel tube from the second crossmember back out through the tongue and then extended 18" gave me peace of mind and made the trailer handle much better. This turns an "A" frame tongue into a composite tongue (at least I think that is what it is called). That extra 30-40 # of steel just makes me feel better.

dave
*******
Dave and Regina - Enjoying old age, a LOT!

Build Journal - http://www.tnttt.com/viewtopic.php?f=50&t=62386
User avatar
daveesl77
Donating Member
 
Posts: 871
Images: 273
Joined: Tue Jan 27, 2015 4:33 pm
Location: Pocahontas County, West Virginia
Top

Re: Alto(Pop-Up) Inspired Foamie - Build Progress

Postby KCStudly » Mon Jun 01, 2015 6:49 pm

The foam will crush and deteriorate over time, and might actually hold water. It's probably not a big deal in the grand scheme of things, but if it were me, I'd want something solid in there. Wood, plastic, aluminum, anything that will hold up. $0.02.
KC
My Build: The Poet Creek Express Hybrid Foamie

Poet Creek Or Bust
Engineering the TLAR way - "That Looks About Right"
TnTTT ORIGINAL 200A LANTERN CLUB = "The 200A Gang"
Green Lantern Corpsmen
User avatar
KCStudly
Donating Member
 
Posts: 9640
Images: 8169
Joined: Mon Feb 06, 2012 10:18 pm
Location: Southeastern CT, USA
Top

Re: Alto(Pop-Up) Inspired Foamie - Build Progress

Postby thelastlokean » Wed Jun 03, 2015 12:18 am

^ Based on your concerns, I've done some weatherproofing of the foam strips, soaked it in gorilla glue before I screwed down the plywood. Then I painted the foam edges with more gorilla glue from the outside. The foam seems to be fully encased in a nice layer of foamed up gorilla glue, I don't see how water will get into it, but I'll still be spray painting a layer of Rustoleum for a final waterproofing layer. The plywood flooring is very sturdy with no detectable bends and completely silent, no creaks or squeaks! A few years time will tell how this holds up.

Also I plan on fitting the frame with foam sheets, and covering the bottom. By the time all of this is done the foam strips will most likely never see a drop of water, or even air.

Also, I got a dowel jigging set so I could merge the pieces of plywood with dowels, used a 5/16" every 4" along the 4' plywood seams... Sure was a pain to drill all those holes, but wow is it stronger than anything else I could have rigged up! I am pretty certain I am going to involve dowels in supporting foam my side walls and inside furniture...

I intend on clear coating the top side with clear epoxy, specifically 'Envirotex Lite Pour-On High Gloss Finish' for counter-tops, it'll take 2 gallons to get a solid 1/8"-1/4" coat, but it should turn out nice and add even more strength.

Also, I gave the bottom side a coat of acetone diluted bondo followed with a normal bondo coat. The idea is that the acetone diluted bondo will be thin enough to soak into the birch and harden, it did seem to greatly stiffen the boards. Holding up an 4'x6' section from one end no longer curves or flops around...

Its too dark to take any photos tonight, if all goes well I will have some photos of the floor fully clear coated and the underside pre-insulation tomorrow.
“The real truth of the matter is, as you and I know, that a financial element in the larger centers has owned the Government ever since the days of Andrew Jackson.” – FDR letter to Colonel Edward House, Nov. 21 1933
User avatar
thelastlokean
Teardrop Inspector
 
Posts: 10
Joined: Thu Apr 16, 2015 3:55 pm
Top

Re: Alto(Pop-Up) Inspired Foamie - Build Progress

Postby KCStudly » Wed Jun 03, 2015 6:41 am

As ever, you are the one who is 'up close and personal' with the situation, so are in a better position to judge for yourself. :thumbsup:

I put a nice stained finish with poly top coat on my floor; mostly because I hadn't done much wood finishing before and I wanted to practice in a spot that wouldn't really be seen later. It came out nice, and I don't regret doing it, but it will never show. Some sealer at the joints, primer and paint would have worked just as well for under the mattress. So I am curious about your reasoning for the bar top treatment. (Honestly, my first reaction was "hot tub"... what are you going to do, fill it with water and have a bath? :lol: :lol: :lol:) Compared to other sealing options, it sounds like extra cost and weight to me. Your money, your choice, just saying.
KC
My Build: The Poet Creek Express Hybrid Foamie

Poet Creek Or Bust
Engineering the TLAR way - "That Looks About Right"
TnTTT ORIGINAL 200A LANTERN CLUB = "The 200A Gang"
Green Lantern Corpsmen
User avatar
KCStudly
Donating Member
 
Posts: 9640
Images: 8169
Joined: Mon Feb 06, 2012 10:18 pm
Location: Southeastern CT, USA
Top

Re: Alto(Pop-Up) Inspired Foamie - Build Progress

Postby thelastlokean » Wed Jun 03, 2015 12:26 pm

I really want the inside to be a thing of beauty, I don't want to lay down any other type of flooring (carpeting vinyl or anything else that is garbage after 1-2 years. I'm building 6' wide so that I can sleep horizontally, in the front 4 feet of length. The bed will also be one of those 3-booths with a raise/lower table to make the bed complete. So unlike a classic teardrop most of my floor will be visible when inside, not completely covered by bedding. The first 6'x6' section of flooring will be mostly visible, and the back flooring will still be somewhat visible when the table is raised. Also my teardrop is going to be my only trailer, so I imagine it will be occasionally used to transport stuff around, like firewood/lumber, bricks, etc. So I want a good solid scratch resistant floor.

Also I was starting with raw 11-ply birch, the best peace of mind for myself it to last is to fully encase it in resin.

I spent multiple hours last night sanding and wood-filling all the screw holes and cracks/seams, etc. By the way, a great DIY wood filler - 1 part sawdust, 1 part titebond 2, 3-4 parts light drywall spackle. It turns into a nice clay that picks up stain/sealants, easily sand-able and turns out the perfect color if you use sawdust from the original wood. I only use sawdust from the fine catch on my sander.

Regarding the epoxy weight, around 9 pounds a gallon, full thick covering won't add more than 20 lbs of weight, but certainly increases the plywood strength dramatically. I will also most likely put some fiberglass sheeting over the plywood edging and seems just to really protect it.
“The real truth of the matter is, as you and I know, that a financial element in the larger centers has owned the Government ever since the days of Andrew Jackson.” – FDR letter to Colonel Edward House, Nov. 21 1933
User avatar
thelastlokean
Teardrop Inspector
 
Posts: 10
Joined: Thu Apr 16, 2015 3:55 pm
Top

Re: Alto(Pop-Up) Inspired Foamie - Build Progress

Postby KCStudly » Wed Jun 03, 2015 1:45 pm

Makes sense, I guess. I should have looked back further to refresh my memory on your plan before posting.

Still, an extra 20 lbs on top of thick 3/4 ply with a 1000 lb target in a six wide... those extra extras add up fast from the start, and don't get any lighter.

Uh oh, I'm having a Deja Vu moment. Have harped on the weight band wagon before? :frightened: :FNP
KC
My Build: The Poet Creek Express Hybrid Foamie

Poet Creek Or Bust
Engineering the TLAR way - "That Looks About Right"
TnTTT ORIGINAL 200A LANTERN CLUB = "The 200A Gang"
Green Lantern Corpsmen
User avatar
KCStudly
Donating Member
 
Posts: 9640
Images: 8169
Joined: Mon Feb 06, 2012 10:18 pm
Location: Southeastern CT, USA
Top

Next

Return to Build Journals

Who is online

Users browsing this forum: Bing [Bot] and 4 guests